Table of Contents
1Overview
........................................................................................................................................................................................................................................................................................................................
2Getting Started
..........................................................................................................................................................................................................................................................................................................
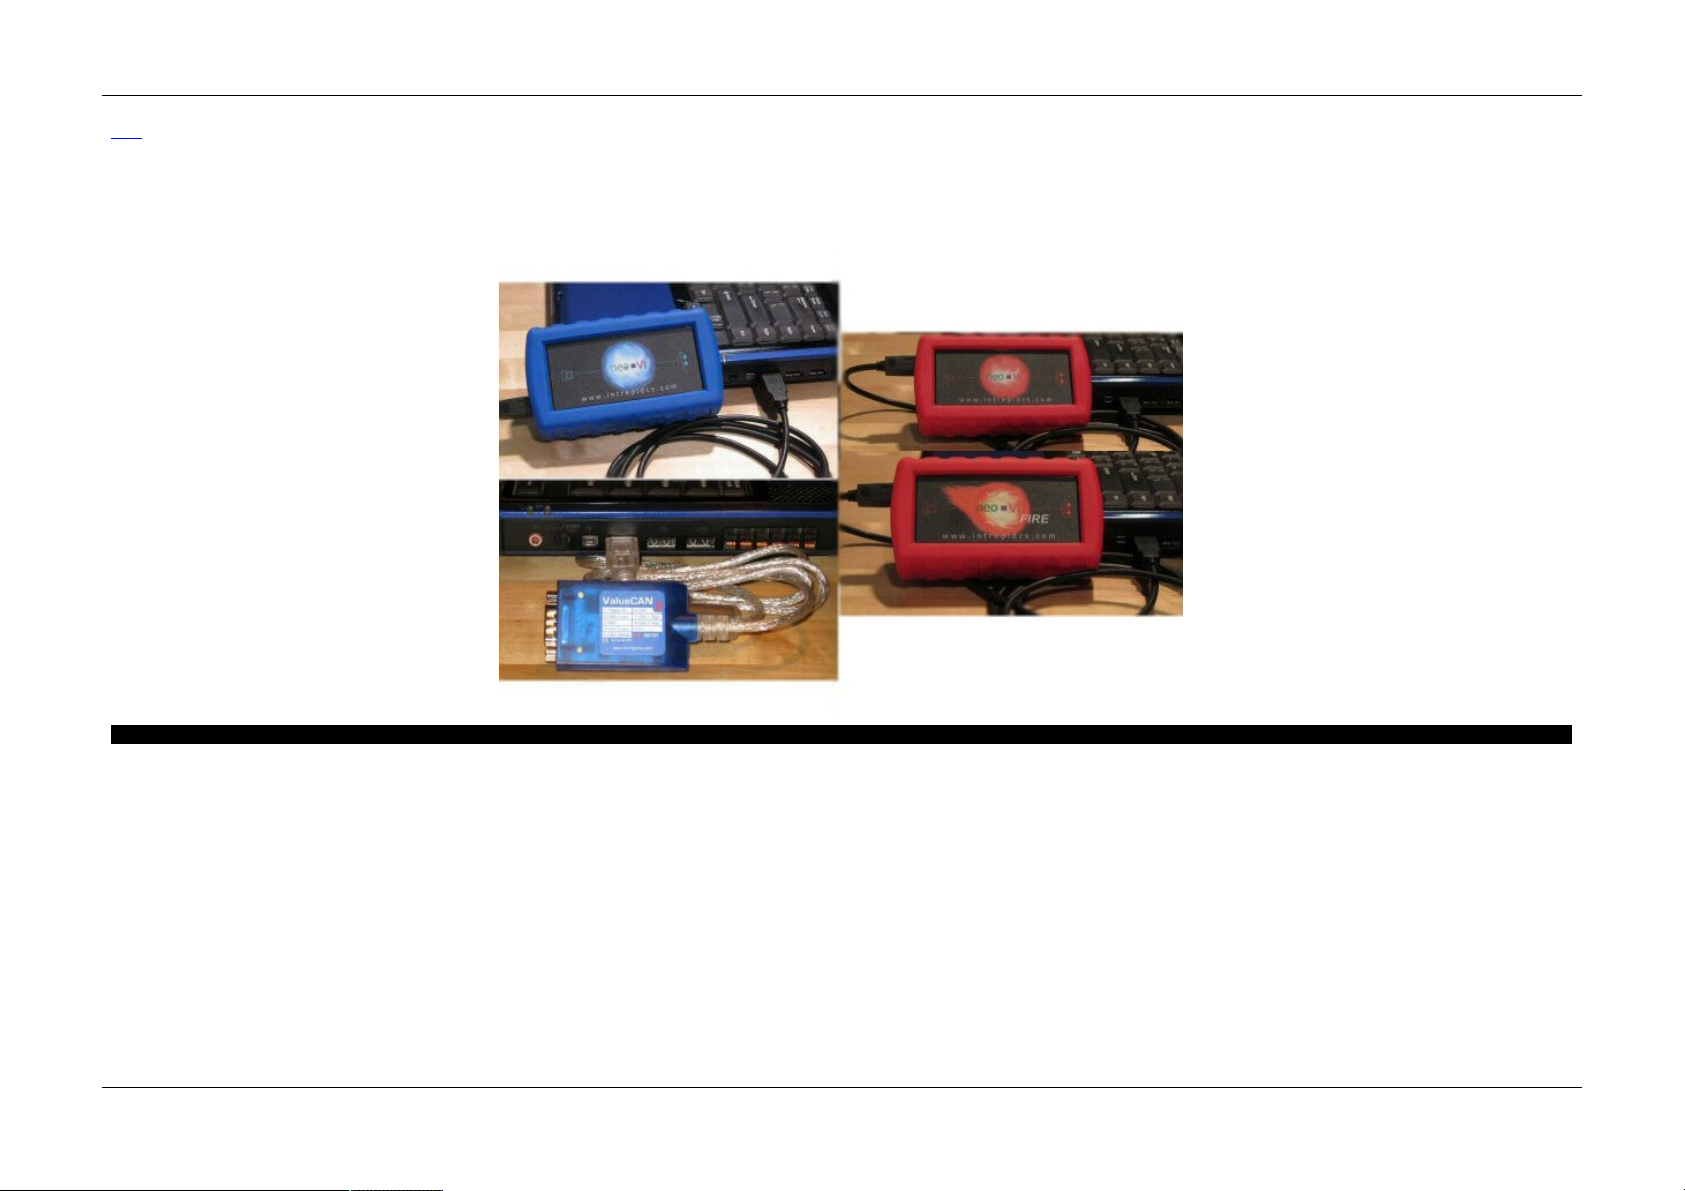
3Hardware Basics
.....................................................................................................................................................................................................................................................................................................
4
Connecting to Your PC
...................................................................................................................................................................................................................................................................................
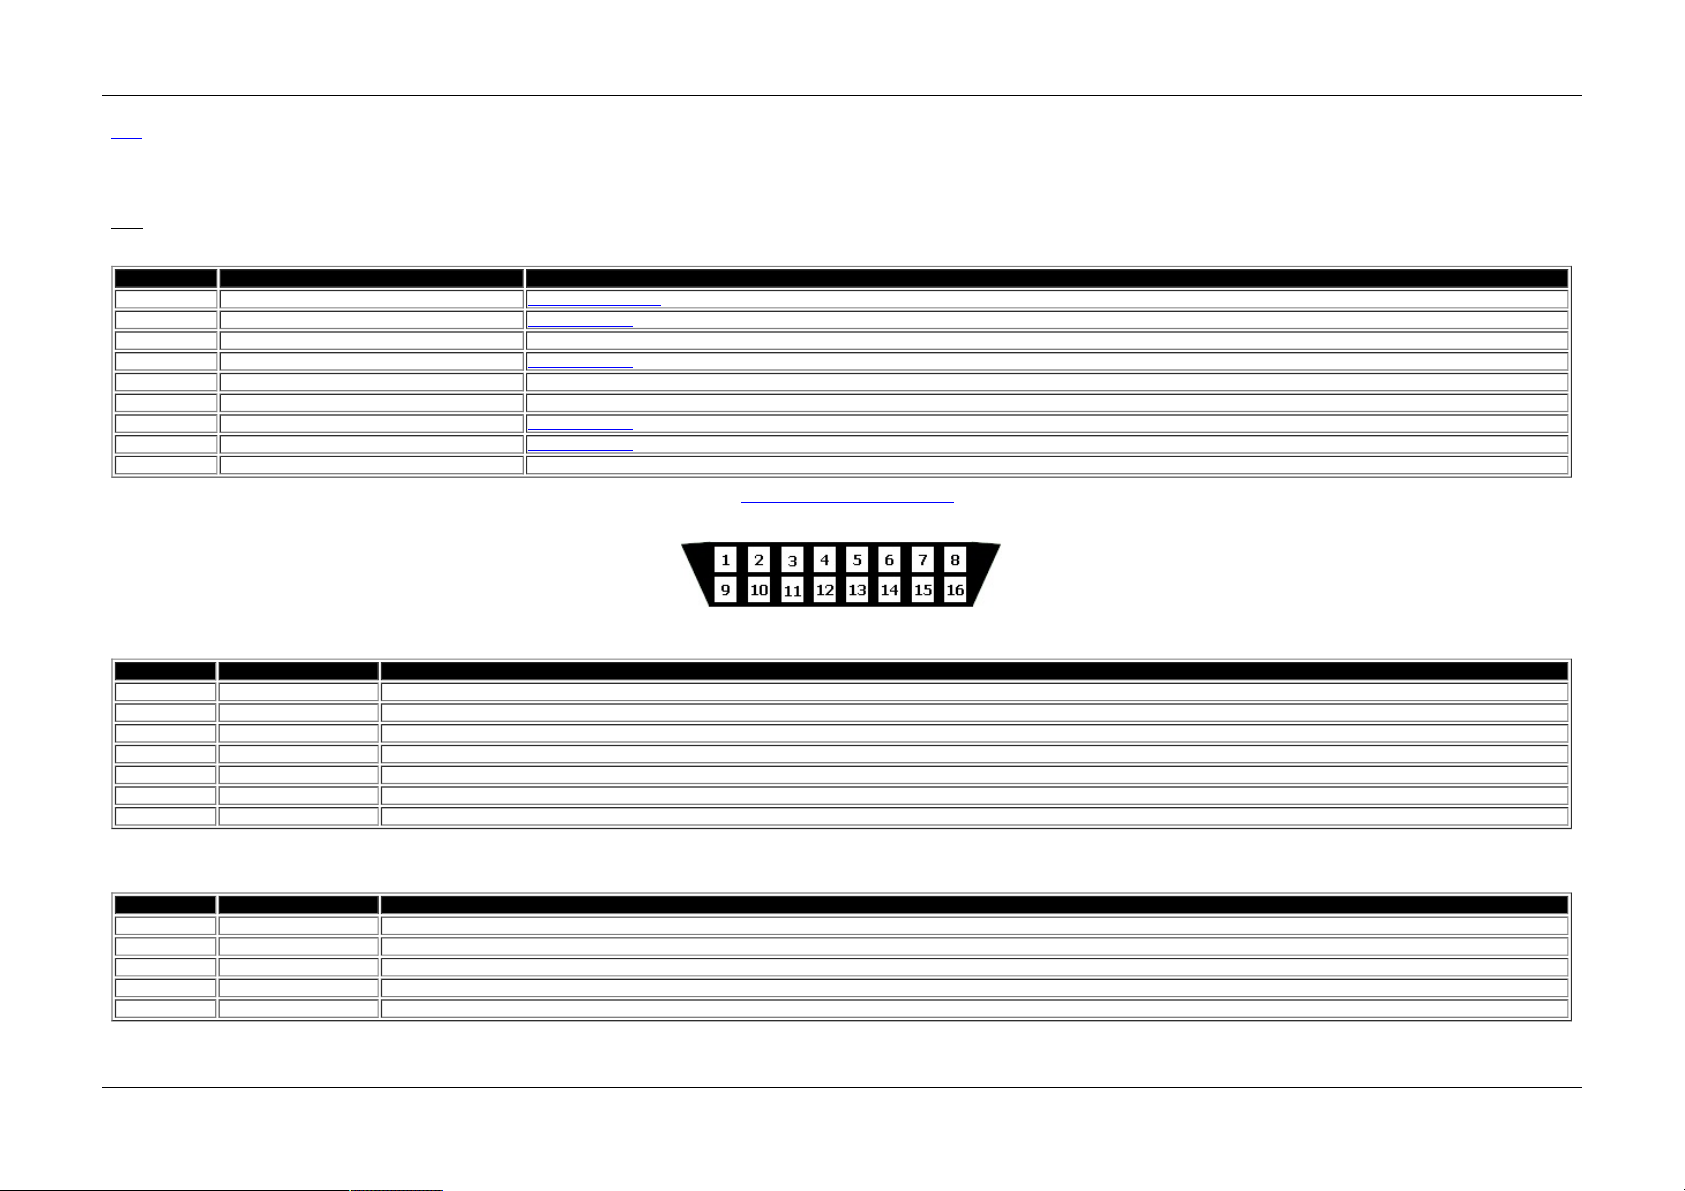
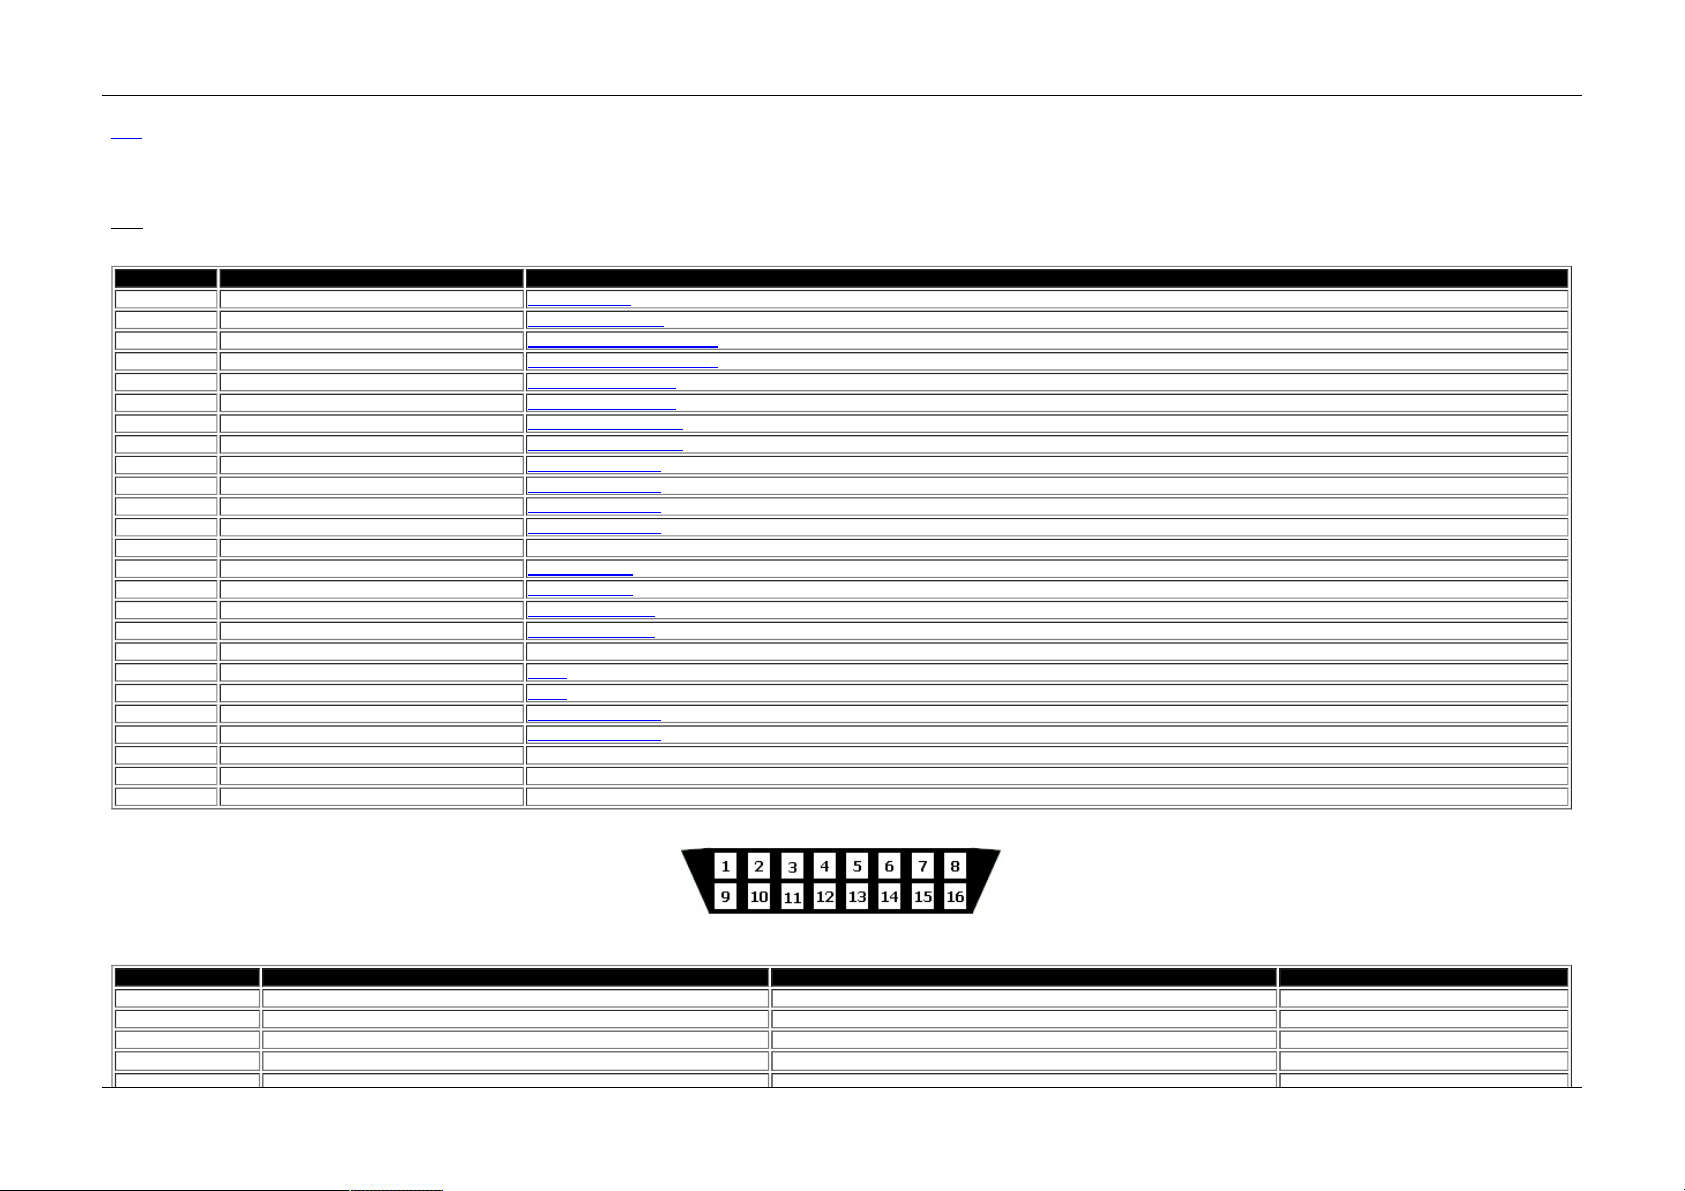
5
Connecting to Your Vehicle
..........................................................................................................................................................................................................................................................................
6
ValueCAN Connection
...........................................................................................................................................................................................................................................................................
8
neoVI Blue Connection
.........................................................................................................................................................................................................................................................................
10
neoVI FIRE / RED Connection
.........................................................................................................................................................................................................................................................
12
neoVI Yellow
.........................................................................................................................................................................................................................................................................................
14
Application Software
....................................................................................................................................................................................................................................................................................
15
Hardware Configuration
..............................................................................................................................................................................................................................................................................
17
Firmware Updates
...............................................................................................................................................................................................................................................................................
18In-vehicle Networks
...........................................................................................................................................................................................................................................................................................
19
CAN networks
.................................................................................................................................................................................................................................................................................................
20
High Speed CAN
.................................................................................................................................................................................................................................................................................
21
Medium Speed CAN
...........................................................................................................................................................................................................................................................................
22
Single Wire CAN
.................................................................................................................................................................................................................................................................................
23
Low Speed Fault Tolerant CAN
........................................................................................................................................................................................................................................................
24
CAN Baud Rates and Bit Timing
.....................................................................................................................................................................................................................................................
25
Bit Timing Calculator ...................................................................................................................................................................................................................................................................
26
Terminating a Dual Wire CAN Network
.........................................................................................................................................................................................................................................
27
Terminating a Low Speed Fault Tolerant CAN Network
............................................................................................................................................................................................................
28
J1850 VPW (Class 2)
..................................................................................................................................................................................................................................................................................
29
J1850 PWM (Ford PWM)
..........................................................................................................................................................................................................................................................................
31
J1708
..................................................................................................................................................................................................................................................................................................................
32
UART/ISO9141/KW2K/LIN
.......................................................................................................................................................................................................................................................................
34
UART Timing
........................................................................................................................................................................................................................................................................................
35
Initialization Waveforms
....................................................................................................................................................................................................................................................................
36
Error Checking
.....................................................................................................................................................................................................................................................................................
37
Local Interconnect Network (LIN)
...................................................................................................................................................................................................................................................
38
LIN Slave Table ...........................................................................................................................................................................................................................................................................
39Hardware Features
............................................................................................................................................................................................................................................................................................