15
2
13
4
1 Safety 3
1.1 General information 3
1.2 Signs and symbols 3
1.3 Safety notes 4
1.4 Intended use 5
1.5 Applicabable standards and
classifications 5
1.6 Identification data of the light unit 5
2 Product description 5
3 First time start-up 8
3.1 TwinLux and m3 8
3.2 Charging the battery 9
4 Operation 10
4.1 Carrying out light-curing cycles 10
4.2 Extending the duration of curing
cycles during operation 11
Date information prepared:
10/2007
Manufacturer
Invicon chemical solutions GmbH
Schweizer Strasse 96
A 6830 Rankweil
Austria
Phone: +43 (5522) 45 3 01-0
Fax: +43 (5522) 45 3 01-10
www.invicon.at
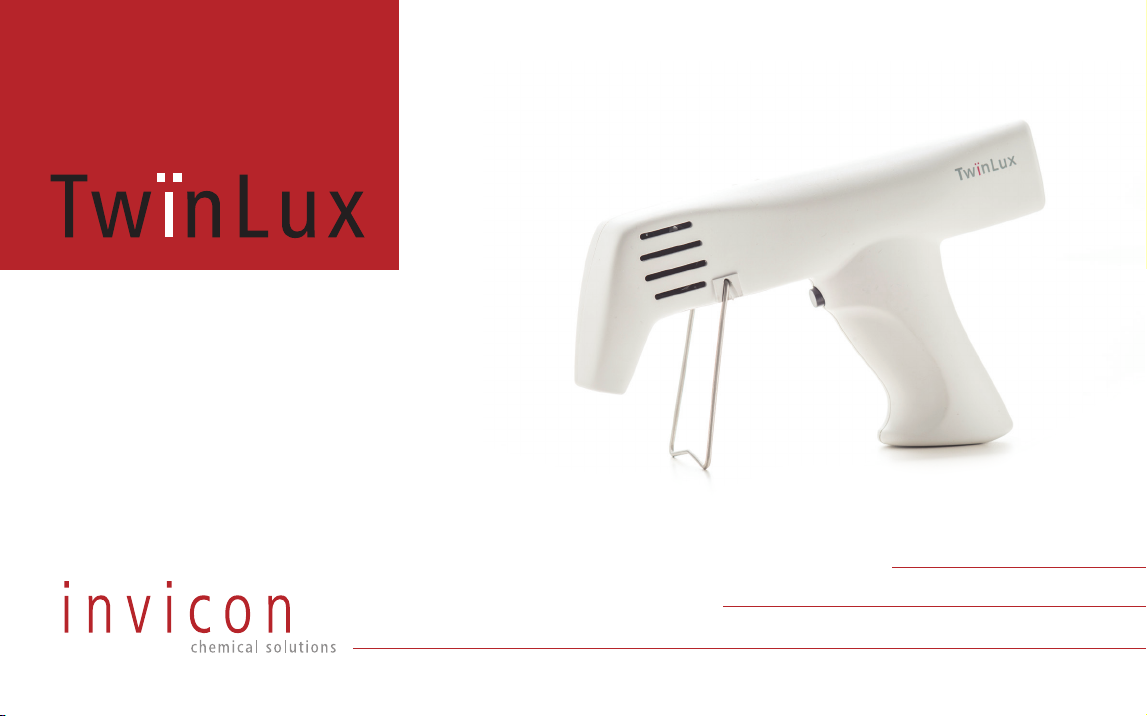
TwïnLux /
m
3
Table of Contents 5 Maintenance andcleaning 11
6 Troubleshooting 11
7 Technical data 12
7.1 Light unit 12
7.2 Battery 12
7.3 Power supply 12
7.4 Ambient conditions 12
7.5 Storage conditions 12
7.6 Weight 12
8 Delivery range andspare parts 12
9 Warranty 13
9.1 Warranty terms and conditions 13
9.2 What is not covered by the warranty 13
9.3 Procedure in caseof a claim
under warranty 13
EC Declaration of Conformity
Invicon chemical solutions GmbH
Schweizer Strasse 96
6830 Rankweil
Austria
We, the undersigned, declare under our sole responsibility that the devices
specified below
TwinLux
m3
have been developed, built and manufactured in compliance with the following
EC Directives (as well as in compliance with the provisions of domestic law adopted
in the field governed by these Directives):
•EN 61010-1
• EN 50081-2
• EN 50082-2
• 73/23 EWG
• 89/336/EWG
Lustenau, 1 October 2007 Gerhard Zanghellini, General Manager
9 Warranty
9.1 Warranty terms and conditions
Invicon chemical solutions gives a warranty of 2 (two) years on all TwinLux or m3 light
units as of the date of purchase. This also applies to light units purchased from an Invi-
con retailer or importer. The warranty is limited to defects related to the manufacture
and material of the product.
Invicon, in its sole discretion, may repair or replace the defective parts of the product
free of charge within the warranty period.
In general, the „General Terms and Conditions of Sale and Delivery” shall apply.
This warranty does not provide for the replacement of entire TwinLux or m3 light units.
9.2 What is not covered by the warranty
The following will void this warranty:
• The apparatus and its components were not used in compliance with the safety
instructions and directions provided in these Operating Instructions.
• The apparatus and its components were not used for the intended purpose.
• The apparatus or its components were altered by the user or other third parties.
• Assembly, settings, alterations, additions and repairs were not carried out by
specialized Invicon personnel or authorized specialist.
• The electrical facilities of the room in which the apparatus was used did not comply
with the current local laws and regulations.
• The conditions in the premises where the apparatus was used, kept or stored did
not comply with the conditions listed in the Technical Data section of these
Operating Instructions.
• Damage arising from catastrophic events, such as impact, accident, vandalism and
events beyond the control of the manufacturer.
The following items are not covered by this warranty:
•LED light source
•LED indicators
•Switch
•Accompanying components/accessories
The following damage is not covered by the warranty:
•Damage caused during transportation
•Damage arising from improper use or negligence
•Damage arising from wrong usage of electrical supply and voltage
9.3 Procedure in case of a claim under warranty
The warranty is only valid if the warranty form supplied with the apparatus is fully filled
in and returned together with the receipt (including the date of purchase) to Invicon
chemical solutions or to an authorized Invicon dealer within fifteen (15) days as of the
date of purchase.
In case of a claim under warranty, the customer shall put the light unit at the disposal
of Invicon or the company’s distribution partner and provide the following information:
•Name, address, telephone number, email of the owner
•Name and address of the Invicon distribution partner from whom the light unit was
purchased
•Serial number of the light unit
•Receipt (delivery note)
•Detailed description of the malfunction
The data and descriptions contained in these Operating Instructions are not binding
and may be varied by the manufacturer at any time without previous notice.
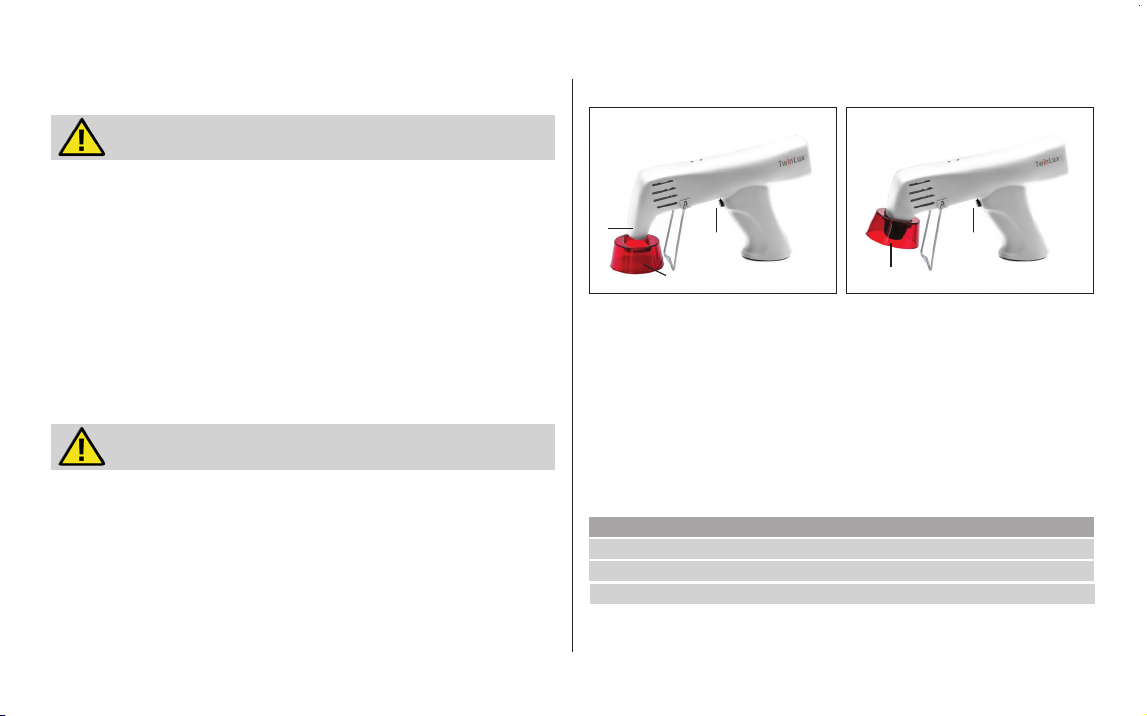
1.3 Safety notes
Light emission of LED source
Danger of explosion in rooms with explosive atmosphere
> Do not operate the light unit in rooms with explosive mixtures of ignitable
substances and air.
Electromagnetic interference
Electromagnetic radiation may interfere with pacemakers or other implanted electronic
medical devices.
> Do not use the light unit if you or somebody in your vicinity is fitted with a
pacemaker or other implanted electronic medical device.
Light emission of LED source
Direct exposure to the light of the LED light source may cause damage to the eyes.
> Do not look directly into the LED light source.
> Use the light unit only with a properly mounted and fully functioning light
protection shield.
> Always check if the light protection shield is correctly mounted on the light unit.
> Do not point the light beam of the LED light source directly into the eyes.
> Always direct the light beam of the LED light source directly towards the surface
to be polymerized.
DANGER!
DANGER!
WARNING!
Defective device
Malfunctioning devices or components may cause injury.
> Before each use, check the device for the following:
– The light unit and its accompanying components are in proper working condition.
– The light protection shield is mounted properly.
– The air vents are free of obstruction.
Exposure to water
Exposure to water may cause damage to the device.
> Do not hold the light unit under running water. Do not dip the light unit into water.
> Store the apparatus out of the reach of children.
> Use only original accessories and spare parts.
> In case of malfunction, immediately ask for support from an authorized
customer support centre or directly from Invicon chemical solutions.
WARNING!
CAUTION!