Involve Audio Y4 User manual

Involve Audio Y4
Hi-Fi Surround Sound
System User Manual
Involve Audio Pty. Ltd. © 2022

pg. 1 | Involve Audio Pty Ltd
involve audio
intelligent sound
AUSTRALIAN DESIGNED
AND MANUFACTURED
This manual describes how to setup and use your Involve
Audio™ Y4 Hi-Fi Surround Sound System. The Setup guide
describes how to set up the speakers and sub-woofer(s) and
attached other devices such as your TV, DVD, set top box,
Bluetooth device etc. so you can enjoy the full rich surround
sound experience only an Involve powered system can provide.
Welcome to the wonderful world of Involve Audio!
Involve Audio Pty Ltd
2 Shearson Cres, Mentone, Australia
www.involveaudio.com

Involve Audio Y4 User Manual V2.0 | pg. 2
Please read this guide
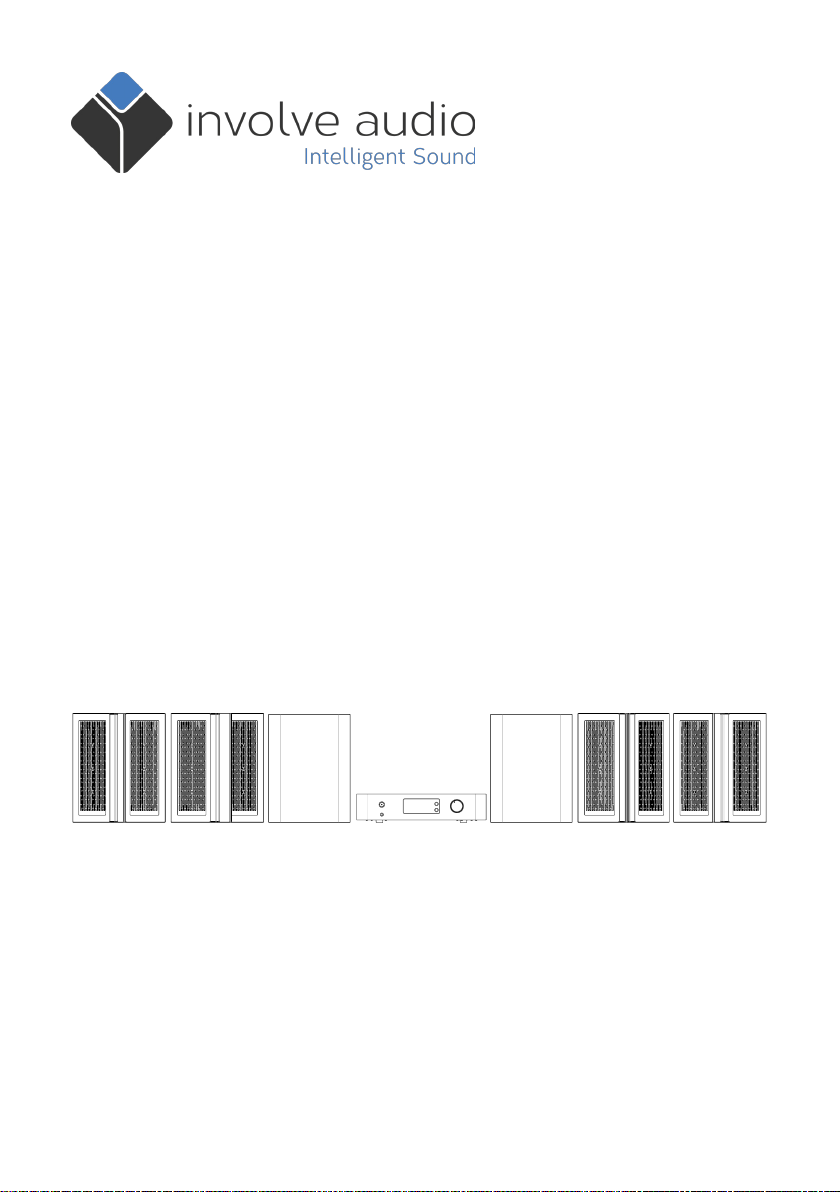
Please take the time to follow the instructions in this guide carefully. It will help you
set up and operate your Y4 Hi-Fi Surround Sound System properly and enjoy all of
its advanced features. Please save this guide for future reference.
WARNING: To reduce the risk of re or electrical shock, do not expose the product
to rain or moisture.
WARNING: The apparatus shall not be exposed to dripping or splashing, and objects
lled with liquids, such as vases, shall not be placed on the apparatus. As with any
electronic products, use care not to spill liquids into any part of the system. Liquids
can cause a failure and/or a re hazard.
WARNING: No naked ame sources, such as lighted candles, should be placed on
any part of the system.
These CAUTION marks are located on your Y4 Amplier enclosure:
The lightning ash with arrowhead symbol within an
equilateral triangle alerts the user to the presence
of uninsulated, dangerous voltage within the system
enclosure that may be of sucient magnitude to
constitute a risk of electrical shock.
PLEASE NOTE : THERE ARE NO USER SERVICEABLE COMPONENTS CONTAINED
WITHIN THE Y4 SYSTEM.
The exclamation point within an equilateral triangle, as
marked on the system, is intended to alert the user to
the presence of important operating and maintenance
instructions in this owner’s guide.
CAUTION: TO REDUCE THE RISK OF ELECTRIC SHOCK,
DO NOT REMOVE THE COVER
NO USER SERVICEABLE PARTS INSIDE
REFER SERVICING TO QUALIFIED SERVICE PERSONNEL
RISK OF ELECTRIC SHOCK
DO NOT OPEN
CAUTION: TO REDUCE THE RISK OF ELECTRIC SHOCK,
DO NOT REMOVE THE COVER
NO USER SERVICEABLE PARTS INSIDE
REFER SERVICING TO QUALIFIED SERVICE PERSONNEL
RISK OF ELECTRIC SHOCK
DO NOT OPEN

pg. 3 | Involve Audio Pty Ltd
About Involve Audio
Involve Audio is a leading research organisation specialising in sound reproduction.
Based in Melbourne, Australia, Involve Audio has concentrated its research eorts
in the eld of human hearing and how to reproduce sound in the best possible way.
After years of research and development Involve Audio has achieved a number
of technical breakthroughs that are set to change the world of Audio. These
technologies are incorporated for the rst time in your Y4 Hi-Fi System and all at
Involve Audio hope you enjoy the experience as much as we do.
The key technologies incorporated in your Y4 Hi-Fi System are:
Involve™
Our patented process called Involve™ creates a full surround sound experience
from any stereo source including Television, Internet, mobile devices, iPods, vinyl,
etc. without adding to or subtracting from the original source. It provides the most
accurate representation of the original audio recording available today. Additionally,
any recording marked with the Involve logo will have enhanced surround content
deliberately mastered for your system.
Sweet Spot Technology™ (SST™)
We have created a patented technology called Sweet Spot Technology™ that enables
your Involve™ Y4 Hi-Fi Surround Sound System to be enjoyed by everyone in the
room no matter where they are seated, eliminating the need to nd the best seat in
the house. All seats in the room now experience the same accurate surround sound
image and provide the same audio experience.

Involve Audio Y4 User Manual V2.0 | pg. 4

pg. 5 | Involve Audio Pty Ltd
Contents
1. What’s included
2. General System Layout
3. Rear Panel
4. Operation
Main Screen Layout
Settings Menu Layout
5. System Setup
Setup guide
Assembling Y Speakers
Y Speaker Positioning
Connecting the Y Speakers
Position Sub-woofers
Connecting Sub-woofers
Connecting Wired Devices
Setting Up Sweet Spot
6. Additional Information
Standby
Mode
Volume Control
Sub-woofer Level
Rear Speaker Level
Headphones
Bluetooth
7. Cleaning Your System
8. System Specications
6
7
8
9
10
12
13
15
17
18
19
20
21
23
24
25
26
27

Involve Audio Y4 User Manual V2.0 | pg. 6
1: What’s Included
• Y4 Amplier
• Four (4) Y Speakers
• One (1) or Two (2) Sub-Woofer(s)
• IEC Power Cable
• Four (4) Y Speaker Cables
• Remote Control with CR2032 battery
• HDMI Converter with ARC

pg. 7 | Involve Audio Pty Ltd
B
D
C
F
G
E
A
Front Left Y Speaker
Front Right Y Speaker
Rear Left Y Speaker
Rear Right Y Speaker
Sub-Woofer (Front)
Sub-Woofer (Rear)
Y4 Amplier
A
B
C
D
E
F
G
(Front/Rear Sub-Woofer Mode shown)
(Y Speakers shown wall mounted)
2: General System Layout
Here is a simple reference of the components and setup of a Y4 Hi-Fi system.

Involve Audio Y4 User Manual V2.0 | pg. 8
SUB B
REAR
LINE OUT
R
L
PRE SUB
SUB A FRONT
MONO/LEFT/FRONT
1
R
L
2
AUX IN OPTICAL IN RCA IN POWER
REARFRONT
RIGHT SPEAKERS
MONO/RIGHT/REAR
USB POWER
MODEL:
SERIAL:
Y43-01W
IAY43-01-1910-001
MAX 2.0A
involve audio
Intelligent Sound
Involve Audio Pty Ltd
U.S.Patent #: US9111528B2
Int. Patent #: W02011/069205A1
CAUTION: TO REDUCE THE RISK OF ELECTRIC SHOCK,
DO NOT REMOVE THE COVER
NO USER SERVICEABLE PARTS INSIDE
REFER SERVICING TO QUALIFIED SERVICE PERSONNEL
AUSTRALIAN DESIGNED
AND MANUFACTURED
“involve” and the involve logo are trademarks of Involve Audio Pty Ltd
Computer programs embodied in this equipmet Copyright Involve Audio 2014
RISK OF ELECTRIC SHOCK
DO NOT OPEN
CAUTION
LEFT SPEAKERS
2
14 5
6 7 8 12 13 14
13.5mm Aux IN
2OPTICAL IN x2
3RCA IN x2
4POWER SWITCH
5RCA Line OUT
6Y Speaker - REAR LEFT
7Y Speaker - FRONT LEFT 14 Y Speaker - REAR RIGHT
13 Y Speaker - FRONT RIGHT
12 SUB A (Mono/Left/Front)
11 30V POWER IN
9USB 5V Power Out x2
10 Air Flow vents, don’t cover
Pg. 15
Pg. 15
Pg. 15
Pg. 15
Pg. 15
Pg. 11
Pg. 10
Pg. 10
Pg. 10
Pg. 10
Pg. 12
Pg. 12
Pg. 13
8SUB B (Mono/Right/Rear) Pg. 18
10
3: Rear Panel
11
3
9

pg. 9 | Involve Audio Pty Ltd
4: Operation
6.35mm
Headphone Socket
(with mute switch)
Volume/Control Knob
- press & hold to enter
or exit Settings
- turn to change Volume
and settings Values
Standby ON/OFF
(red = standby) Display Top
Function Button
Bottom
Function Button
Standby
ON/OFF
INPUT
Volume UP
(Settings UP)
SETTINGS
(press to enter or exit
Settings)
Settings NEXT
Volume DOWN
(Settings DOWN)
Settings
PREVIOUS
MUTE
Rear Speaker
Volume UP
Rear Speaker
Volume DOWN
SUB
Volume UP
SUB
Volume DOWN
MODE

Involve Audio Y4 User Manual V2.0 | pg. 10
Current Input
INPUT change
MODE change
Bluetooth
Instructions
Volume Level
Current Mode
RCA
2
OPTICAL
1
3.5mm
AUX Bluetooth
RCA
1
OPTICAL
2
Front
SST
Rear
SST
SUB
Select
SUB
Level
Rear
Level
Screen
Timeout
Input Order
Settings Order
Main Screen Layout
Settings Menu Layout
Next Settings
Previous Settings
Current Setting
Setting
values
To access the Settings Menu, press and hold the Volume/Control Knob or press the
MENU button on the Remote Control.
Settings values can be changed by turning the Volume/Control Knob or pressing
the Volume UP or Volume DOWN buttons on the Remote Control.

pg. 11 | Involve Audio Pty Ltd

Involve Audio Y4 User Manual V2.0 | pg. 12
Setup guide
These are quick setup instructions and should help you quickly get your Y4 system
setup and going, for more detail please read the full instruction manual.
1. Assemble Y Speakers
2. Position & Orient Y speakers, then connect them to the Y4 Amp
3. Position Sub-woofers and connect them to Y4 Amp
4. Connect Devices to the Y4 Amplier
5. Connect Power to the Y4 Amplier & turn it On
6. Set Sub-Woofer Mode according to your setup
7. Calculate and set SweetSpot Delay Distance to suit your room
8. Set listening mode to SST Involve for optimum sound experience
9. Play some music and adjust Rear Speaker and Sub-Woofer levels to your
preference
5: System Setup
When setting up your system please follow the guidelines below to avoid any
needless damage or wear to your system.
• Turn OFF the system when connecting or disconnecting your Y Speakers,
Sub-Woofer or wired devices.
• Do NOT place the Y4 Amplier on any soft surface such as cloth or carpet.
Placing the Y4 Amplier on a soft surface while the system is on will void your
warranty.
• Do NOT place the Y4 Amplier or Y Speakers in Direct Sunlight, this could
damage the speakers or cause visual fading to the surfaces your system.
• The Y4 Amplier uses active cooling; keep the rear of the unit unobstructed to
allow adequate airow
• To reduce the chance of noise use high quality cables when connecting HDMI
devices and ensure HDMI cables plugged into the Y4 do not cross over or under
the Y Speaker Cables.

pg. 13 | Involve Audio Pty Ltd
Step 1: Assemble Y Speakers
x2
x2
involve audio
intelligent sound
Y Speaker B - FR/RL
(Front Right / Rear Left)
12
involve audio
intelligent sound
Y Speaker A - FL/RR
(Front Left / Rear Right)
12

Involve Audio Y4 User Manual V2.0 | pg. 14
x2 x2
involve audio
intelligent sound
Y Speaker B - FR/RL
(Front Right / Rear Left)
12
involve audio
intelligent sound
Y Speaker A - FL/RR
(Front Left / Rear Right)
12

pg. 15 | Involve Audio Pty Ltd
Step 2: Y Speaker Positioning
The speakers are marked as FR/RL or FL/RR. Face the front of the room where your
front speakers are to be placed. Left and Right are taken from this perspective
including the rear speakers. The diagram to the left illustrates the positioning of
each speaker. Place the speakers on the installed wall mounts, speaker stands or
other raised unit.
Your speakers should be placed as closely to the same height as your ears as
practical when sitting down. If they are higher than this they are best angled down
to send the sound to the centre listening position.
Y Speaker Distance & Orientation
Speakers can be placed around the room in front and behind the centre listening
position. Ideally the centre listening position will be in the middle of a room however
this is often not possible and so place your rear speakers as far to the rear of the
centre listening position as practical.
For an ideal listening experience position each speaker the same distance from the
centre listening position. With speakers equidistant a perfect circular sound eld
will be created.
The Y Speaker should have it’s connectors closest to the ground for correct
orientation. When orienting your Y Speakers turn the speaker so the outside
electrostatic panel is facing the front and back directly, ie. it is facing straight
down the room. The distance between the speakers should be set so that the inside
panels face the opposite side of the listen area. This should mean the panels of
each opposing front and back speaker line up and the inside panels are facing the
opposite side of the central listening position.

Involve Audio Y4 User Manual V2.0 | pg. 16
Front Left
(FL/RR Y Speaker)
Rear Left
(FR/RL Y Speaker)
Front Right
(FR/RL Y Speaker)
Rear Right
(FL/RR Y Speaker)
Diagram: Speaker Orientation for SST™

pg. 17 | Involve Audio Pty Ltd
Step 3: Connect the Y Speakers
Before connecting/disconnecting your Y-Speakers ensure the
system is turned OFF
Plug the four Y Speaker Cables into the Y Speakers and then into the corresponding
outputs on the Y4 Amplier, ensuring their positions match the outputs on the Y4
Amplier (FL, FR, RL, RR). Plug the 10-Pin and 6-Pin connectors of the speaker cable
into the corresponding speaker connector of the Y Speaker.
Speaker cables are supplied with your Y4 Hi-Fi Surround Sound System. Additional
cables are available either from your accredited dealer or from the Involve Audio
web site (www.involveaudio.com). The performance of your system will NOT be
eected by long length extension cables which run through the roof, oor or walls
of your home.
SUB B
REAR
LINE OUT
R
L
PRE SUB
SUB A FRONT
MONO/LEFT/FRONT
1
R
L
2
AUX IN OPTICAL IN RCA IN POWER
REARFRONT
RIGHT SPEAKERS
MONO/RIGHT/REAR
USB POWER
MODEL:
SERIAL:
Y43-01W
IAY43-01-1910-001
MAX 2.0A
involve audio
Intelligent Sound
Involve Audio Pty Ltd
U.S.Patent #: US9111528B2
Int. Patent #: W02011/069205A1
CAUTION: TO REDUCE THE RISK OF ELECTRIC SHOCK,
DO NOT REMOVE THE COVER
NO USER SERVICEABLE PARTS INSIDE
REFER SERVICING TO QUALIFIED SERVICE PERSONNEL
AUSTRALIAN DESIGNED
AND MANUFACTURED
“involve” and the involve logo are trademarks of Involve Audio Pty Ltd
Computer programs embodied in this equipmet Copyright Involve Audio 2014
RISK OF ELECTRIC SHOCK
DO NOT OPEN
CAUTION
LEFT SPEAKERS
Rear Left Y
Speaker B
Front Left Y
Speaker A
Front Right Y
Speaker B
Rear Right Y
Speaker A
Y Speakers in upright positionY Speaker connectors
10-Pin 6-Pin
(FR/RL Y Speaker model shown
FL/RR connectors are mirrored)
FR/RL
Speaker B
FL/RR
Speaker A

Involve Audio Y4 User Manual V2.0 | pg. 18
Step 4: Position Sub-Woofers
When placing a Sub-Woofer in position, keep at least 3cm of space between the rear
of the Sub-Woofer and the wall. Any wall or hard object should not cover the sound
outlet.
Positions below are recommendations, woofer location is often a matter of
convenience and personal taste. We encourage you to experiment with dierent
locations and modes. There are three sub-woofer modes, Mono, Stereo L/R and
Front/Rear F/R. After you’ve nished setting up the rest of your system the mode
can be selected through the settings menu. As a good starting place we suggest you
try the Stereo mode and place your sub-woofers accordingly.
Mono Sub-Woofer
If your system has a single Sub-Woofer it can
be placed at the front of the room just to the
left or right of centre. The Sub Mode should
be set to MONO / MONO.
Stereo Sub-Woofer
For a Stereo conguration place both Sub-
Woofers at the front of the room with one on
the left and one on the right as close to the
Front left and right Y Speakers as possible.
The Sub Mode should be set to LEFT / RIGHT.
Front/Rear Sub-Woofer
For a Front/Rear Sub-Woofer conguration
place one Sub-Woofer at the front of the
room just to the left or right of centre. The
second Sub-Woofer should be placed at the
back of the room just to the left or right of
centre (ideally diagonally opposite to front
Sub-Woofer) The Sub Mode should be set to
FRONT / REAR.
Stereo Sub-Woofer
Front/Rear Sub-Woofer

pg. 19 | Involve Audio Pty Ltd
Step 5: Connect Sub-Woofers
Attach the Sub-Woofer cable to the rear of the Y4 Amplier and Sub-woofer as
shown in the diagram below. Unscrew the terminals insert the cable into the
revealed hole and screw back in the connector (below, right), matching the positive
and negative terminals on the Y4 Amplier and Sub-Woofer. Once connected set
your sub-woofer setting as shown in the Operating Instructions section.
SUB B
REAR
LINE OUT
R
L
PRE SUB
SUB A FRONT
MONO/LEFT/FRONT
1
R
L
2
AUX IN OPTICAL IN RCA IN POWER
REARFRONT
RIGHT SPEAKERS
MONO/RIGHT/REAR
USB POWER
MODEL:
SERIAL:
Y43-01W
IAY43-01-1910-001
MAX 2.0A
involve audio
Intelligent Sound
Involve Audio Pty Ltd
U.S.Patent #: US9111528B2
Int. Patent #: W02011/069205A1
CAUTION: TO REDUCE THE RISK OF ELECTRIC SHOCK,
DO NOT REMOVE THE COVER
NO USER SERVICEABLE PARTS INSIDE
REFER SERVICING TO QUALIFIED SERVICE PERSONNEL
AUSTRALIAN DESIGNED
AND MANUFACTURED
“involve” and the involve logo are trademarks of Involve Audio Pty Ltd
Computer programs embodied in this equipmet Copyright Involve Audio 2014
RISK OF ELECTRIC SHOCK
DO NOT OPEN
CAUTION
LEFT SPEAKERS
Mono/Right/Rear Sub-Woofer Mono/Left/Front Sub-Woofer
Woofer Connections
Other manuals for Y4
1
Table of contents
Other Involve Audio Speakers System manuals
Popular Speakers System manuals by other brands

LG
LG LAS550H Simple manual

LG
LG SoundPlate LAP250H Simple manual

Hoppe
Hoppe AUDIO MINI Installation instructions & owner's manual

Diamond
Diamond HEX Product owners manual

Electro-Voice
Electro-Voice X-LINE ADVANCE Series installation manual

S.E.M. Audio Laboratories
S.E.M. Audio Laboratories INSIGHT: iP-85 quick start guide