Check system requirements.
• Pentium or higher IBM-compatible computer (recommended)
• Empty 31⁄2or 51⁄4inch drive bay with front panel access
• Embedded IDE interface or IDE card
• Windows NT, Windows 95, Windows 3.1, or
DOS version 5.0 or higher
• Iomega Tools software (included with the Zip ATAPI drive)
MBIOS Support: It is recommended that BIOS support for the
Zip ATAPI drive be disabled in the CMOS setup. On some systems
with autodetection, it will be necessary to specifically turn off
autodetection for the Zip ATAPI drive. Refer to the Owner’s
Manual for your computer if you need more information.
The Zip ATAPI drive meets the latest ATAPI specifications; however
some computers with early ATAPI support do not meet these
specifications and so may not work correctly with removable ATAPI
drives like the Zip ATAPI drive. Refer to the Zip ATAPI Errata sheet
for additional information. M
Unpack the Zip ATAPI drive.
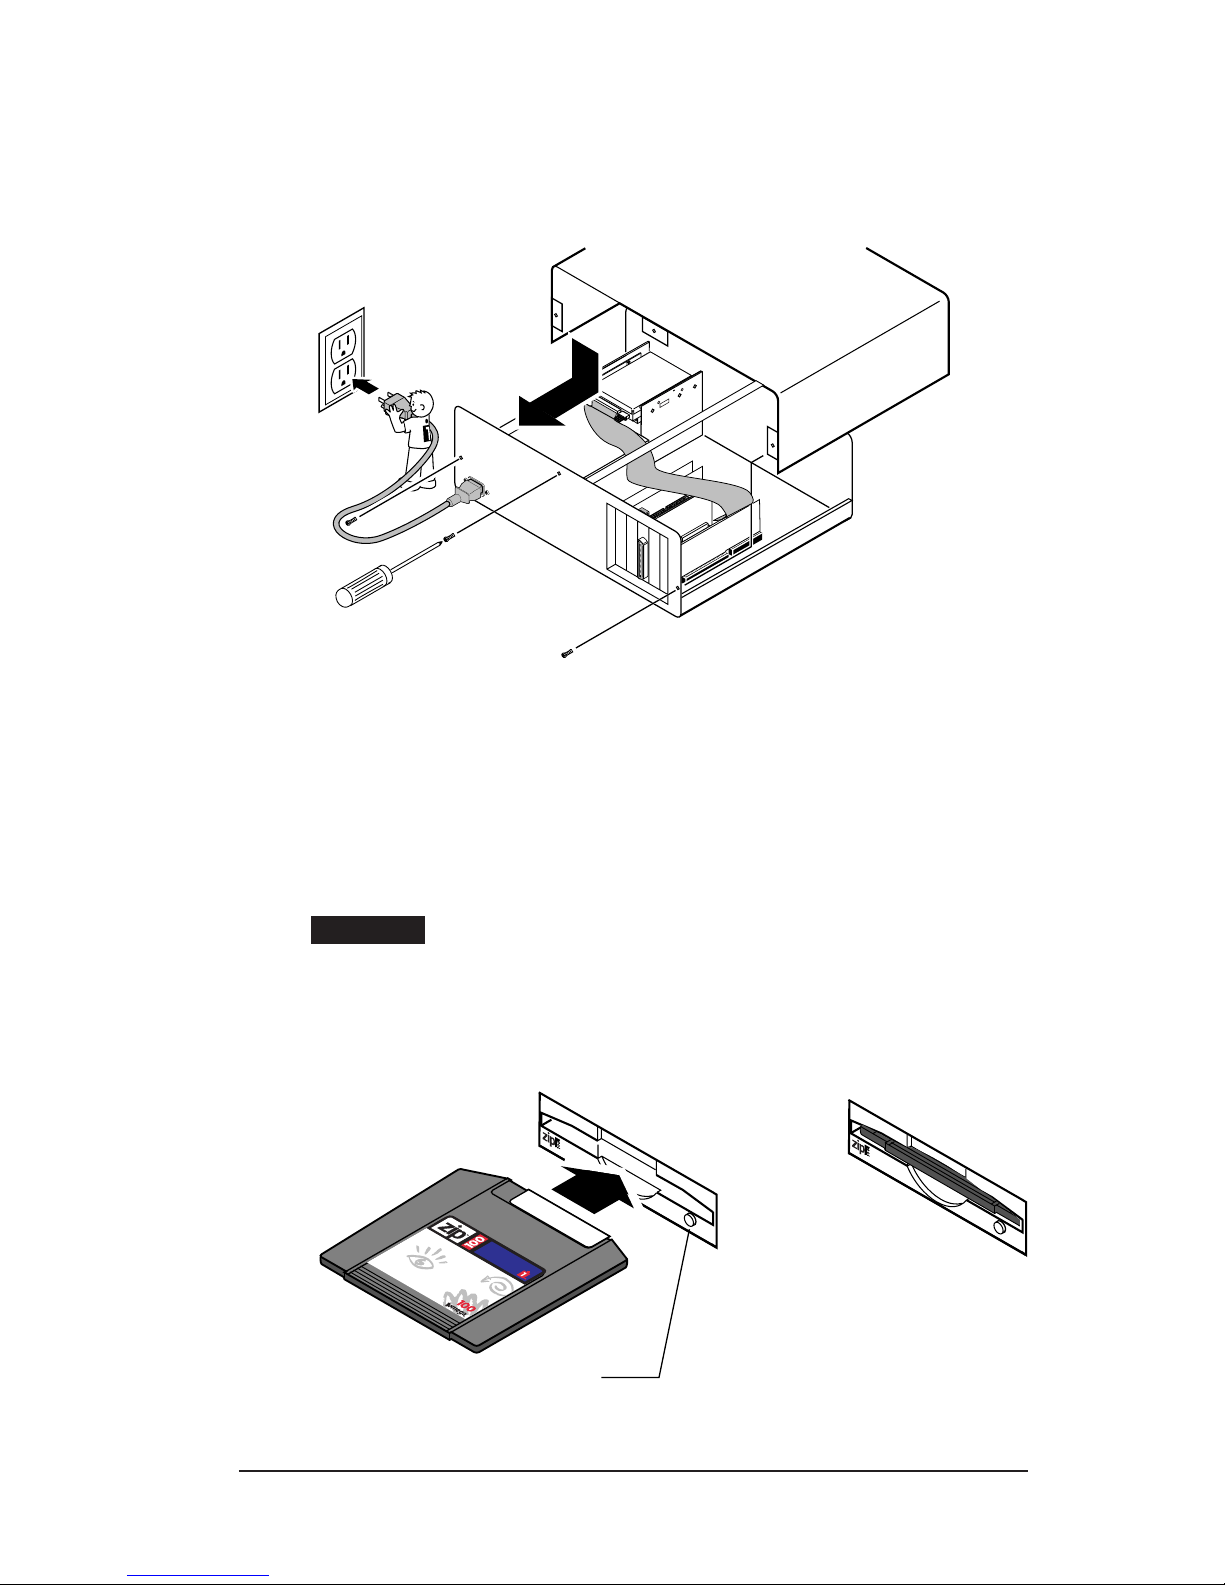
CAUTION Before handling the Zip ATAPI drive, touch a grounded
metal object (like an unpainted metal screw on the back of your
computer) to discharge any buildup of personal static electricity. M
Tools
100MB Zip Tools Disk
(contains Tools software)
Install Diskettes
and User’s Guide
3.5" Universal
Installation Kit
(includes mounting screws)
1–
2–
3–
4–
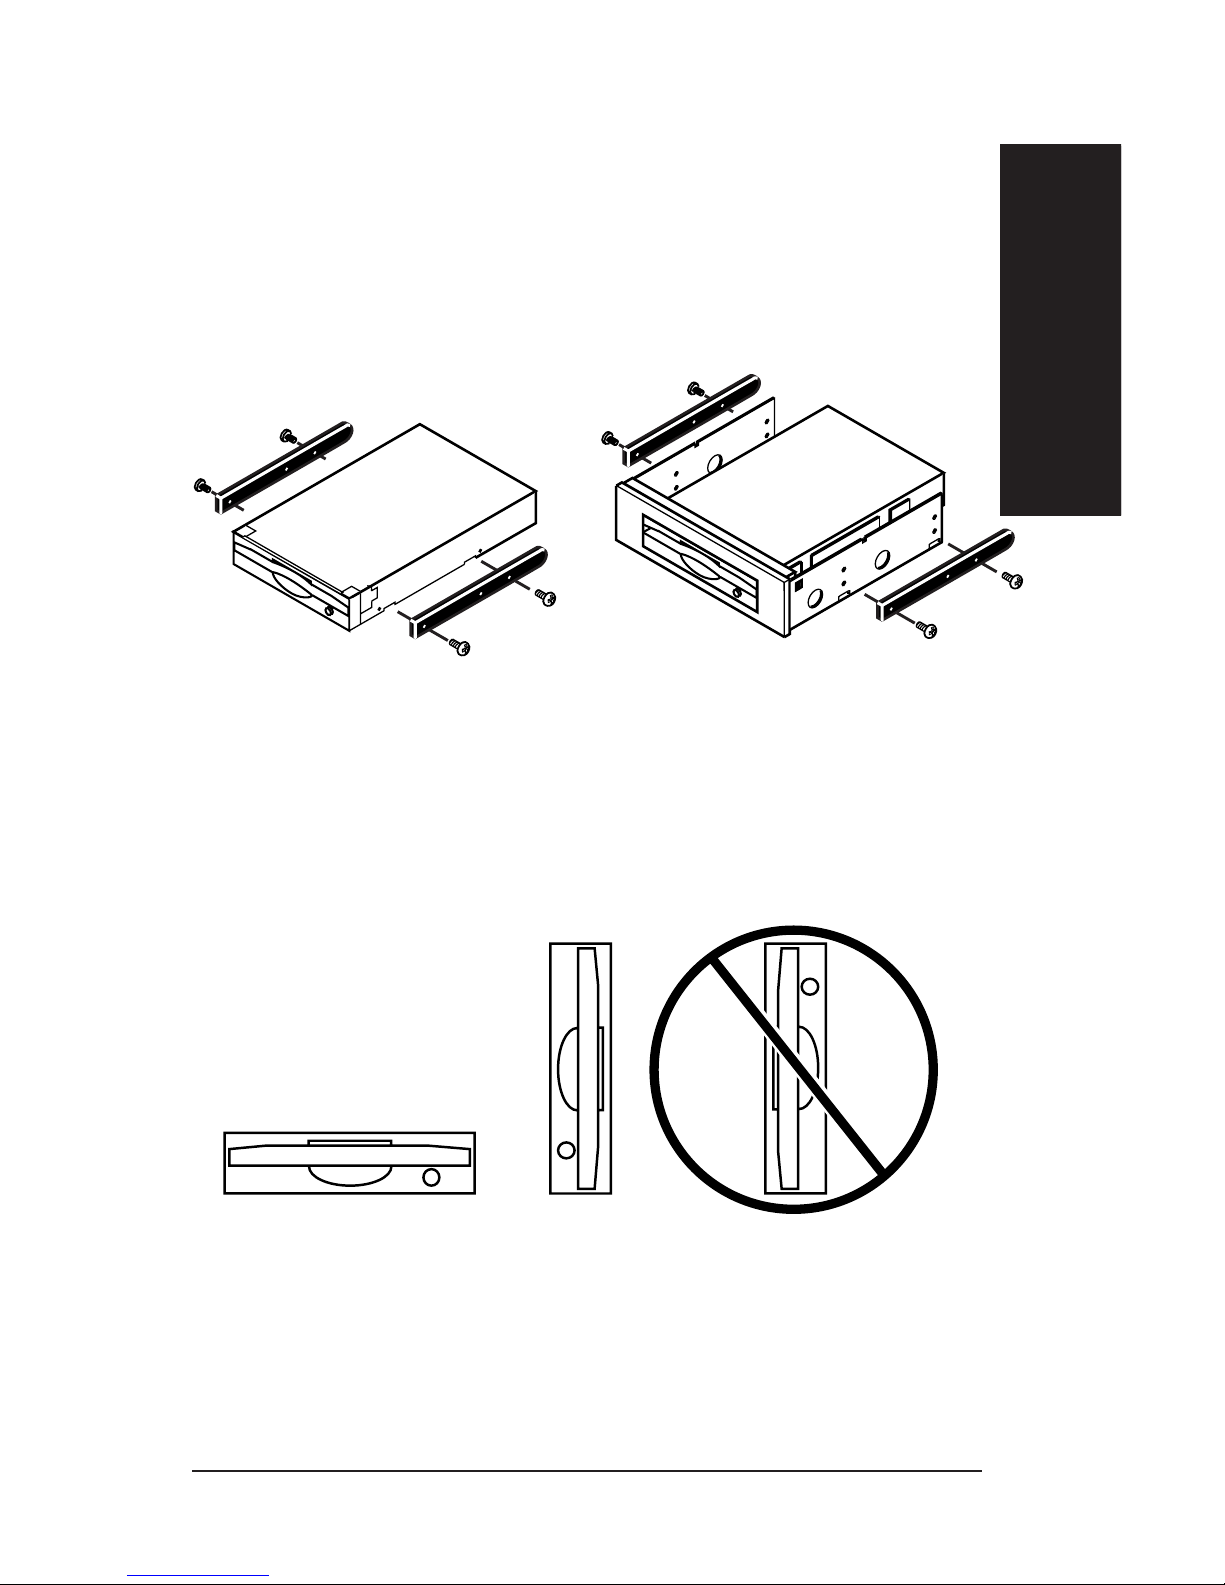
Attachthe left rail 1 to the faceplate 3 insert bottom
tabfirst, then repeat process for the right rail
Attachthe DC cable 4onto the connector of the disk drive.
Slidethe disk drive into position, aligning the
bottomholes of the disk drive with posts of the bracket
assembly. Verifythat no gaps are present on the faceplate.
Alignthe disk drive retaining clip 5 over the center of the disk
driveas pictured. Slightlyflex the drive clip and push down until
bothclip tabs engage the slots on the bottom of each rail.
NOTE:6 Screws were provided in this kit to further secure
thebrackets to the disk drive if desired,
howeverTHIS IS NOT A NECESSARY STEP!
Zip ATAPI Drive
2
1
1
Installation Guide