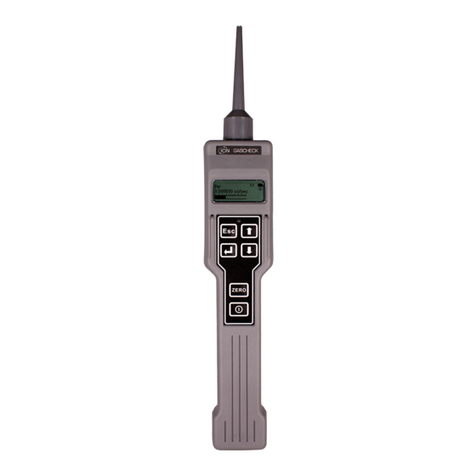
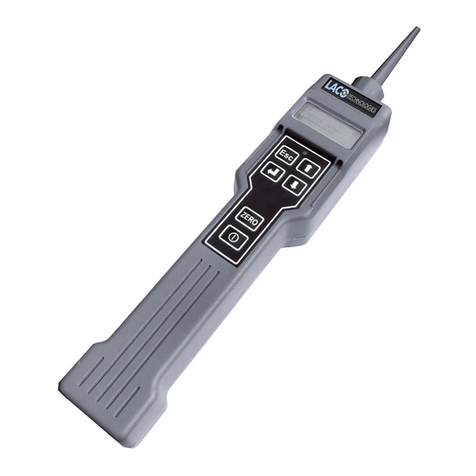
ion science PhoCheck TIGER User manual

Part Number: 861265
PhoCheck TIGER
Instrument User Manual V1.9
Register your instrument online
to receive your Extended 5 year
Warranty. See page 41 for
details.

PhoCheck TIGER
Ion Science Ltd
Page 2 of 43

PhoCheck TIGER
Ion Science Ltd
Page 3 of 43
WARNINGS
USER MANUAL: Read and understand this user manual completely before operating the
PhoCheck Tiger instrument.
STATIC HAZARDS: Do not use abrasive or chemical detergents to clean the PhoCheck Tiger
instrument as this may reduce the antistatic properties of the materials
used, clean it using a damp cloth only.
MATERIAL EXPOSURE The PhoCheck Tiger must not be exposed to atmospheres known to have an
adverse effect on Thermoplastic polyolefin or Anti-static PC/ABS
SERVICING: No part of the PhoCheck Tiger may be opened in a hazardous area except for
replacement of the battery pack. The PhoCheck Tiger must be serviced in a
Non Hazardous environment and by Ion Science authorised service centres
only.
BATTERY CHARGING: Charge PhoCheck Tiger and its Lithium ion battery packs in a Non Hazardous
environment only.
BATTERY REPLACEMENT: Never replace primary Alkaline battery cells while in a potentially explosive or
hazardous location. Use only Duracell Procell Alkaline batteries MN1500.
BATTERY CONNECTION: The PhoCheck Tigers Lithium ion and Alkaline battery packs have been
specially designed to allow connection to the PhoCheck Tiger Instrument
while in potentially hazardous atmospheres.
The PhoCheck Tiger instruments ingress protection rating is reduced to IP
20 when its battery pack is removed so avoid changing batteries in dusty or
wet environments.
FUNCTIONAL TEST The PhoCheck Tiger must be functionally checked prior to entering a
hazardous area after every occasion when a connection has been made to
the USB port. The instrument must complete its start up routine and display
legible readings. If the LCD display fails to show an intelligible and
uncorrupted display the instrument must not enter a hazardous area.”
USB CONNECTION The USB port can only be used in a Non Hazardous environment.

PhoCheck TIGER
Ion Science Ltd
Page 4 of 43
Declaration of conformity
Manufacturer: Ion Science Ltd, The Way, Fowlmere, Cambridge, UK. SG8 7UJ
Product: PhoCheck TIGER
Product description: Intrinsically safe photo-ionisation gas
detector for detecting volatile organic
compounds
Directive 94/9/EC Required Coding- II 2 G Ex ib IIC T4
Cert Number- IECEx ITS 10.0036X
Tamb.= -15ºC to +45 ºC (with Lithium ion Battery pack)
Tamb.= -15 ºC to +40 ºC (with Alkaline Battery pack)
Notified body Intertek –Report number: 08036757A1
Standards
EN 60079-0: 2006 Electrical apparatus for explosive gas
atmospheres. General requirements
EN 60079-11: 2007 Explosive atmospheres . Equipment
protection by intrinsic safety "i"
EN61326-1:2006 Electrical equipment for measurement,
control and laboratory use - EMC
requirements. Group 1, Class B equipment -
(emissions section only)
EN61326-1:2006 Electrical equipment for measurement, control and laboratory use - EMC requirements.
Industrial location immunity - (immunity section only)
EN50270:2006 Electromagnetic compatibility - Electrical apparatus for the detection and measurement
of combustible gases, toxic gases or oxygen. Immunity Type 2 - industrial
environments.
CFR 47:2008 Class A
Code of Federal Regulations: 15 Subpart B- Radio Frequency Devices -
Unintentional Radiators.
Other Standards
EN ISO 9001: 2008 Quality Management System - Requirements
EN 13980: 2002 Potentially Explosive Atmospheres - Application of Quality Systems
On behalf of Ion Science Ltd, I declare that, on the date this product accompanied by this declaration is
placed on the market, the product conforms to all technical and regulatory requirements of the above
listed directives.
Name: Mark Stockdale Position: Technical Director
Signature: Date: 20th January 2010

PhoCheck TIGER
Ion Science Ltd
Page 5 of 43
Contents Page
Warnings 3
Declaration of Conformity 4
Contents 5-6
Statements 7
Responsibility for use 7
Caution 7
Quality Assurance 7
Disposal 7
Calibration Facility 7
Ion Science Contact Details 7
Introduction to PhoCheck TIGER 8
Getting Started 9
Understanding the Keypad 10
Understanding the Display Screen 11-13
Status Icons 11-12
Main Screen area 12
Soft Key areas 13
Using your TIGER 14-16
On 14
Off 14
Sleep 14
Zeroing 14
Zones 14
Data-logging 14
Multiple data-logging 14
Health and Safety readings 15
Gas selection 15
Peak hold 15
Average 15
Options 15
Backlight 15
Sound 15
Calibration 15
Alarms 16
Information 16

PhoCheck TIGER
Ion Science Ltd
Page 6 of 43
Contents (continued) Page
TIGER PC Software 17-28
PC Requirements 17
Installation of TIGER PC Software 19
Connecting TIGER to a PC 20
The Features Screen 20
The Configuration Screen 21-23
The Gas Table Screen 24
The Firmware Screen 25
Downloading data-logged readings 26
Health and Safety screen 27
Snapshots 27
Software disclaimers 28
Batteries 29-31
Replacement of rechargeable battery pack 30
Replacement of non-rechargeable batteries 31
Diagnostics 32
Maintenance 33-36
Calibration 33-34
Probes 34
Filter 34
PID Sensor/Lamp replacement & cleaning 35-36
TIGER Parts 37
Accessories 38-40
Instrument Warranty and Service 41
Technical Specification 42
Manual History 43

PhoCheck TIGER
Ion Science Ltd
Page 8 of 43
Introduction to PhoCheck TIGER
PhoCheck TIGER is a portable gas detector that uses Photo-ionization technology to detect a
large range of Volatile Organic Compounds (VOC's) which can be dangerous from both a
poisoning and explosive perspective.
The TIGER uses a Photo-Ionization Detector (PID) to measure gas concentrations. The
patented fence electrode technology minimises the effects of moisture and contamination,
avoiding the need for compensation.
Survey is the default mode of operation. This mode is often used in applications such as Head
Space Sampling and Leak Detection where several areas (or Zones) are to be monitored and
readings data logged. All sensor readings are real time measurements and alarm levels are set
manually.
Health & Safety mode is used to check for conformity of short-term exposure levels (STEL) or
time-weighted averages (TWA) that are specific for particular hazardous environments (for
example EH40 in the UK and OSHA in the USA). In this mode of operation STEL's and TWA's
are continually calculated and compared to levels set in the instrument‟s gas table.
The TIGER can be upgraded from the users own desk top. Additional features can be added
without the need to return the instrument to a service centre.
Like it's predecessor, PhoCheck+, the TIGER also has an intuitive graphical interface allowing
easy access to instrument settings. Two soft keys can be configured to suit the user‟s
application, so many functions can be selected without entering the main menu structure. This
improves efficiency of use, particularly with repeatable tasks.
TIGER PC (the TIGER's PC Software) maintains the intuitive look and feel by adopting the
same graphical symbols. TIGER PC also helps manage logged data files and multiple
instrument settings in a clear and concise way.
The TIGER uses a Lithium-ion battery that not only boasts an impressive running time and short
charge time, but also allows battery packs to be replaced in potentially hazardous environments.
Field replaceable alkaline battery packs are also available for when power to charge is
unavailable.
The TIGER has true USB capability so the instrument can be connected directly to a PC via a
standard USB cable. It also offers fast data download.
A loud audio output, vibration and bright LED's indicate alarm conditions. Orange and Red
LED's indicate High and Low conditions respectively. This colour scheme is used within TIGER
PC to offer clear indication of alarm levels within logged data.

PhoCheck TIGER
Ion Science Ltd
Page 9 of 43
Getting started
Thank you for choosing TIGER from Ion Science Limited. We hope that your TIGER will give
you many years of active and trouble-free service.
The Manual
Ion Science Ltd recommend that you familiarise yourself with this manual before using your
TIGER. Pages 7 & 8 contain important information, which should be read before you turn your
TIGER on for the first time.
Probes
Ensure that the probe supplied is fitted to your TIGER. Details on how to fit and change probes
is detailed in the Maintenance section on page 33. If the supplied probe is unsuitable for your
application, details of alternative probes can be found on page 34.
Turn On.
Press the ON/OFF / ENTER key once to turn TIGER on.
Turn Off
Press and hold the ON/OFF / ENTER key for three seconds to turn TIGER off.
(NOTE If the TIGER fails to shut down, press the ESCAPE key once or twice to
return to the main screen, then press and hold the ON/OFF / ENTER key again.)
Batteries
Check that your TIGER has sufficient charge for use. The battery icon (see Understanding the
display screen, page 11) should show at least two full segments.
Rechargeable Batteries
TIGER instruments leave the factory with the rechargeable battery fully charged. However
prolonged periods of storage may result in the battery pack discharging. We recommend
charging the instrument for seven hours before use. See the battery section of this manual,
page 29.
Alkaline Batteries
An alkaline battery pack is also supplied with the PhoCheck TIGER. For more information
please see the battery section of this manual, page 29.
Select the gas
TIGER instruments leave Ion Science pre-set for gas type TVOC (total volatile organic
compounds). Instruments are factory calibrated against isobutylene and all response factors
are equivalent to this. By changing the gas from the internal gas table all readings will be given
using that gas‟s response factor.
Turn the TIGER on by pressing the On/Off / Enter key once.
Press the information icon (see page 16) and check the correct gas, alarm
levels and flow rate are selected.
Change the gas (if necessary) as instructed under Gas Selection on page 15.
Set alarm levels
We recommend that alarm levels are set to user specifications as soon as possible before the
TIGER is used for the first time. Please see page 16 for details of how to set alarm levels.
TIGER PC
The full functionality of your TIGER can only be realised through the TIGER PC software.
Ion Science Ltd recommend that you load the software supplied with your instrument and set up
your TIGER according to the instructions on page 17 of this manual.

PhoCheck TIGER
Ion Science Ltd
Page 10 of 43
Understanding the Keypad
General description
The keypad comprises two soft keys: A and B, „up‟ and „down‟ arrow keys, an escape key, and
an „on/off‟ button, which also serves also as an enter key. In general, setup and application
settings are selected and adjusted via the soft keys, options are selected by the arrow keys and
confirmed by the enter key. A single press is used as a switching operation. A continuous
press is used to adjust numbers or change gas selections by automatically rolling.
Keypad function descriptions
Soft keys A & B rely on graphical prompts on the
display to indicate their functionality.
NOTE: Pressing both soft keys together switches
the torch on and off.
Up & Down keys are used to adjust
settings and navigate through the menu
structure.
Enter / On/Off key is used to accept
adjustments and select functions; also to
turn the TIGER on and off.
Escape (Esc) key is used to abort an
adjustment or exit from a menu.

PhoCheck TIGER
Ion Science Ltd
Page 11 of 43
Understanding the display screen
Screen display
The display is divided into four sections.
Fixed LCD Status icons fill the top of the screen offering instrument status at a glance. The
Icons display only when a function is selected. The main central viewing screen will display
readings in large numbers only, 4 digits and decimal place will display 0.001 ppm to 19,999
ppm. Two soft key areas have been set aside as soft key indicators. The area between the soft
key indicators displays the measurement units.
Status icons
Health & Safety: The icon consists of a single part and will flash in an alarm
condition and when health and safety readings are being collected.
. Peak Hold: When peak hold is switched on, the icon appears.
Memory status: This icon only appears if the instrument has the data logging
functionality. Four sections within the border fill as the data log memory is filled.
Empty border = 100% memory available through to full, where all segments are
present.
USB: The icon will appear when connected to a host device.
Battery status: This icon consists of a border and four segments. The
segments fill or empty to indicate 0-25, 26-50, 51-75 & 76-100% full. When
discharging, the border will flash for 1 minute before the instrument shuts down.
When charging, the segments will successively fill until 100% charge is reached.
Left is the default
display with no
functions active.
Right is the display
with all functions
active.

PhoCheck TIGER
Ion Science Ltd
Page 12 of 43
Understanding the display screen (continued)
Back light: Light beam lines appear when the backlight is on.
Sound: The main body of the icon is present at all times.
The disable lines appear if all 3 alarm sounders are disabled and the volume is
at 0%. Three sound projection lines indicate the volume level.
However there are four sound levels and the quietest level has no line.
Alarm bell: The icon consists of 2 parts, the Bell and the sound bars. When the
instrument reaches a 'Low alarm' the Bell and one sound bar will flash; when a
'High alarm' is reached the Bell and both sound bars flash.
Flash light / Torch: When the flashlight is illuminated the light beams appear.
Lock: The Lock icon will appear when the configuration of the TIGER has been
locked in Tiger PC.
Main Screen Area
During normal operation this area displays the readings in four large numbers, with the units of
measurement below.
During setup and adjustment, a function bar overlays the main screen.

PhoCheck TIGER
Ion Science Ltd
Page 13 of 43
Understanding the display screen (continued)
Soft key areas
The following icons will appear in the soft
key areas as soft key options. They are
selected using the UP and DOWN keys.
Those labelled „optional‟ will only appear if
your TIGER has that functionality.
These icons can be reorganised using the
TIGER PC software.
Button A Button B
Information Sleep
Zone(s) Zeroing
Gas selection Peak hold
Options Average
Health & safety (optional) Data log (optional)
Multiple data logging (optional)

PhoCheck TIGER
Ion Science Ltd
Page 14 of 43
Using your TIGER
Instrument functionality is broken into two parts; Application and Setup. Application settings are
initially selected via the soft keys. Setup functions like backlight, sound, calibration and alarm
setting are adjusted within the Adjust soft key setting. Many of the screens have a 2 second
time out which returns to the main screen if no other keys are pressed.
ON To switch the TIGER on press the On/Off and Enter key once. Start up screen 1
appears showing the TIGER logo. Start up screen 2 contains variable text sent from the TIGER
PC configuration screen. The lower half of the screen contains the instrument IRN (Internal
Reference Number) and firmware version. The third screen shows TIGER checking that the
lamp has „struck‟. When „OK‟ appears, the working screen will follow. If the lamp fails to strike,
turn TIGER off, wait for 30 seconds and try again. If the problem persists, change the lamp or
contact Ion Science Ltd or your distributor.
OFF To switch the TIGER off press and hold the On/Off / Enter key. A three-second count
down takes place before the instrument shuts down. During this count down the instrument
activates the upper alarm. viz. RED LED's flash and audible alarm sounds. This is done to
alert the user to avoid accidental switch off.
SLEEP Press and hold the Zzz soft key to send the TIGER to sleep. A three-second
count down takes place before entering sleep mode. This function is not available when the
instrument is locked. All peripherals switch off. Only 'Zzz' remains on screen. Press ESC key
to awaken the instrument. (The instrument can also enter 'Sleep mode' during data logging
when the duration between logs exceeds 2 minutes. This is a power saving function which only
occurs when a tick box is set in TIGER PC.)
ZEROING Pressing the Zero soft key presents two zero options
selected with the UP or DOWN keys. The upper symbol represents an absolute zero. The
lower symbol represents a relative zero which follows the drift of the PID detector. Having made
your selection, press Esc. If the relative zero has been selected TIGER will zero itself before
returning to the main screen.
ZONES Press the Zone soft key to display the currently selected Zone:
The TIGER‟s default is 'Zone 1' Zones are set up in TIGER PC only and the
name given to the zone(s) will appear on the screen.. Use Up and Down keys to select
alternative zones.
DATA-LOGGING Press the Single Data log soft key to take a single data log
reading. The single data log symbol appears with a tick: Press Esc to return
to the main screen. Press the Single Data log soft key again to take another reading.. The
fixed LCD memory icon flashes off when a single log is taken.
MULTIPLE DATA-LOGGING Pressing the Multiple Data log soft key results in the
multiple log symbol appearing with a question mark: Press the ENTER key to
start the data logging process based on TIGER PC set-up. A tick appears beside the question
mark, confirming that data logging has started. The fixed LCD memory icon flashes at 1 Hz
while continuous data logging is in progress. Press Esc to return to the main screen. To stop
data logging, press the soft key again. A crossed out data log symbol is presented with a
question mark. Press the ENTER key to confirm the action. A tick appears beside the question
mark, confirming that data logging has stopped and the LCD memory icon ceases to flash.
Press Esc to return to the main screen.

PhoCheck TIGER
Ion Science Ltd
Page 15 of 43
Using your TIGER (continued)
HEALTH & SAFETY readings Press the Health & Safety (H&S) soft key to
display the H&S symbol with a question mark to ask if the user wishes to proceed:
Press ENTER to start the calculation. The STEL (Short Term Exposure
Level) and TWA (Time Weighted Average) values are shown. The fixed LCD H&S icon will
continually flash while calculating. Pressing the ENTER key while the values are displayed
presents the user with a screen asking if the calculation should stop. Press ENTER again to
stop the calculation. Press Esc to return to the main screen.
GAS SELECTION Press the Gas soft key to display an alphabetical letter which
can be changed using the Up and Down keys: Press the ENTER key to
present the gases beginning with that letter. Using the Up and Down keys scroll through the
gases starting with that letter to find the subject gas. Press enter to select the chosen gas. If a
tick appears, press Enter again and TIGER will use the relevant data for the chosen gas from
the gas table for alarms and response factor etc. Should the selected gas have no numeric
response factor then a warning screen will appear. The message can be
cleared by pressing the ENTER key and the gas will still be selected. An alternative lamp type
may then be selected to match the chosen gas. Should an incompatible gas/lamp combination
be selected the instrument will show the warning screen again.
PEAK HOLD Press the Peak Hold soft key to present the screen
When 'Peak hold' is selected the sub display will appear and this will continue to display the
peak reading until peak hold is no longer required. To deselect the peak hold function press
Esc.
AVERAGE Press the Average soft key to display a rolling average over 10
seconds. A tick appears when time is up. Pressing the 'Average soft key' again resets the
calculation even if there is an average already running. Press ESCAPE to return to the main
screen.
OPTIONS Press the Options soft key to give access to various
adjustable features, selected with the UP and DOWN keys. Press ENTER to
confirm selection.
BACKLIGHT Four options are presented: „Permanently Off‟, „Permanently On‟, „On in
low ambient light‟and „Timed‟. (Set the time in TIGER PC - see page 21). Select the preferred
option with the UP and DOWN keys and confirm with ENTER.
SOUND The sound options are presented as set up in Tiger PC. Use the
DOWN arrow to select either keypad beep, alarm sound, crescendo or percentage volume.
Press ENTER to turn selection on or off. For percentage volume, press ENTER again to
confirm selection. The frame will flash. Use UP and DOWN arrows to change the percentage
volume and press ENTER to confirm the chosen value. Press Esc twice to return to the main
screen.
CALIBRATION Only two options are presented: Factory calibration and Custom
calibration. Select the preferred option with the UP and DOWN keys and confirm with ENTER.
Whichever calibration standard is selected, the TIGER will operate against that calibration.
Readings taken against unsatisfactory calibrations may be unreliable.

PhoCheck TIGER
Ion Science Ltd
Page 16 of 43
Using your TIGER (continued)
Factory Calibration Not for operator use.
Return to Ion Science Ltd or your distributor for calibration. (see also page 33)
Custom Calibration see under Maintenance on page 33.
ALARMS Upper and Lower alarm settings are displayed. Select the
subject alarm using the UP and DOWN keys and press ENTER. The arrow(s) on the chosen
alarm will flash. Adjust the level using the UP and DOWN keys and press ENTER. Repeat,
if necessary for the other alarm. Press Esc twice to return to the main screen.
NOTE: The Lower alarm setting must never be greater than the Higher alarm.
INFORMATION Pressing the Information soft key allows access to a number of
other information screens. Use the DOWN key to scroll through the screens. Press ESCAPE to
return to the main screen:
First Screen Gas selected
Upper alarm
Lower alarm
Pump flow
Second screen Lamp selected
Date of Factory calibration
Date of Custom calibration
Date and time
Third Screen SPAN 1 (gas concentration set in TIGER PC)
SPAN 2 (gas concentration set in TIGER PC)
PID detector
A/D reading
Fourth Screen Temperature (optional upgrade module)
Barometric pressure (optional upgrade module)
Relative humidity (optional upgrade module)
Battery type and status
Fifth Screen STEL
TWA
IRN number (Internal Reference Number)
Firmware version
Bootloader version

PhoCheck TIGER
Ion Science Ltd
Page 17 of 43
TIGER PC Software
PC Requirements
TIGER PC Software must be used in conjunction with a PC or laptop using Windows XP,
Windows Vista or Windows 7. The software is supplied on a USB memory stick.
Installation of TIGER PC Software
When the memory stick is plugged into a USB socket the flowing screen (Below left) should
appear. If it doesn‟t, view the content of the memory stick and double click the file named:
„ion_cd_Tiger.exe „.
On the TigerPC screen (below),
select „Install TigerPC‟and click OK.
On the Ion Science screen (below), select „Install
Tiger Software‟
On the Welcome screen (below), click
„Next‟ to proceed.
On the select destination location screen (below),
click „Next‟ to create an „Ion Science‟ folder on
your C drive.

PhoCheck TIGER
Ion Science Ltd
Page 18 of 43
TIGER PC Software (continued)
On the set up screen (below) click „Next‟ to
create an „Ion Science‟ start up folder.
On the additional tasks screen (below) tick the
box and click „Next‟ to create a desktop icon.
On the ready to install screen (below),
click „Install‟.
On the install screen (below) Click „OK‟.
Click „Next‟ on the Device Driver screen,
„Finish‟ on the installation wizard
and „Finish‟ on the Setup wizard.
Finally Exit the Ion Science screen.
The Tiger icon should appear on your desktop.

PhoCheck TIGER
Ion Science Ltd
Page 19 of 43
TIGER PC Software (continued)
Connecting TIGER to a PC
1. Double click the TIGER icon on your desktop and open TIGER PC.
The Home page should appear.
2. Click on „Instrument(s)‟. If your TIGER has previously been connected to your PC your
instruments IRN (Internal Reference Number) will appear.
Note: If, while using this software your TIGER should inadvertently be turned off or
disconnected from your computer, click on ‘Instrument(s) again and proceed as below.

PhoCheck TIGER
Ion Science Ltd
Page 20 of 43
TIGER PC Software (continued)
3. Switch TIGER on and when fully booted up connect to a USB socket on your PC using the
USB cable supplied. If the „Found New Hardware‟ screen appears, follow the prompts to
install your instrument on your PC.
4. Click on „Read‟. Your instrument number will appear under „instrument(s)‟ (if it was not
there already) and the Instrument Summary page will appear. This page gives the current
status of your TIGER. If the „snapshot‟ screen appears click „Yes‟. You can delete the
snapshot later if you wish (see page 27).
The Features Screen
The „Features‟ screen indicates which of the available updates has been added to your TIGER.
Once the transaction is
complete and confirmed,
click on Update to add the
relevant features to your
TIGER.

PhoCheck TIGER
Ion Science Ltd
Page 21 of 43
TIGER PC Software (continued)
The Configuration Screen
Use this screen to configure your TIGER.
Backlight
Choose from „Permanently Off‟, „Permanently On‟, „On in low ambient Light‟, or „On For Limited
Time‟. The Backlight Timeout can be set from 1 to 99 seconds.
Sound
The three icons represent: key press; alarm; and crescendo. Crescendo increases the sound
as the upper alarm is approached. Sound on each of these may be enabled or disabled by
ticking or un-ticking the box. Sound volume is adjusted with the slider.
Units
The units of measurement may be chosen as parts per million (ppm), parts per billion (ppb) or
milligrammes per cubic metre (mg/m3).
Soft Menu
The various functions may be allocated to the soft buttons in any order of preference by
dragging and dropping the icons.
Other manuals for PhoCheck TIGER
1
Table of contents
Other ion science Gas Detector manuals
Popular Gas Detector manuals by other brands

Centech
Centech 93005 Assembly and operating instructions

Tecnocontrol
Tecnocontrol SE137PM user manual

Medem
Medem AGDS-4 installation instructions

Adicos
Adicos GSME-X20/X2 Supplementary instructions manual

Prosense
Prosense PQ Series Installation and user manual

BMB Technology
BMB Technology COD18 user guide