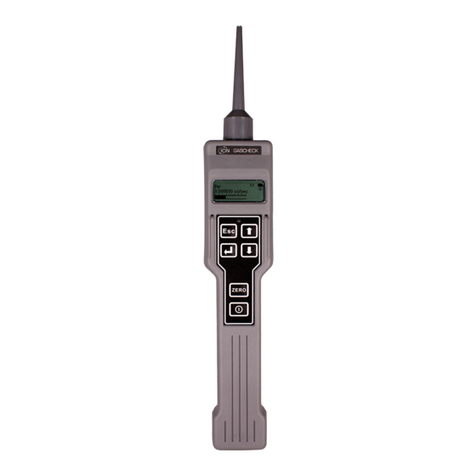
ion science GasCheck Tesla User manual

Unrivaled Detection. ionscience.com/usa
Register
your instrument
online to receive your
extended Warranty.
GasCheck Tesla
Instrument User Manual V1.2R

Unrivaled Detection. ionscience.com/usa
Register your instrument online for extended warranty
Thank you for purchasing your ION Science instrument.
The standard warranty of your instrument can be extended up to two years.
To receive your extended warranty, you must register your instrument online within
one month of purchase (terms and conditions apply.)
Visit www.ionscience.com/usa

Unrivaled Detection. ionscience.com/usa
GasCheck Tesla Instrument User Manual V1.2R
Page 3 of 26
Declaration of conformity
The EU Authorised Representative of the manufacturer Ion Science limited has sole responsibility, on the date this product
accompanied by this declaration is placed on the market, the product conforms to all technical and regulatory requirements of the
listed directives
Authorised Representative: ISM Deutschland GmbH · Laubach 30 · D-40822 Mettmann, Germany
Product: GasCheck G 1, 2 and 3 (Graphical)
Product description: Handheld micro thermal conductivity sensor used to detect gas leaks. This instrument
has been designed specifically for search and location of non-flammable gases such as
helium and CFC’s.
Directive: EMC Directive (2014/30/EU)
LVD Directive (2014/35/EU)
Standards:
EN IEC 61010-1:2010 Safety requirements for electrical equipment for measurement, Control, and laboratory use
–Part 1: General requirements
EN ISO/IEC ISO 9001:2015 Quality management systems –Requirements
EN I 61326-1:2013 Electrical Equipment for measurement, control and laboratory use
EMC Requirements (Class B and General Immunity)
Name: Clemens A. Verley Position: Chief Executive Officer
Signature: Date: 31st December 2020

Unrivaled Detection. ionscience.com/usa
GasCheck Tesla Instrument User Manual V1.2R
Page 4 of 26
Contents
Declaration of conformity..................................................................................................................................... 3
Statements........................................................................................................................................................... 5
Safety................................................................................................................................................................................5
Quality Assurance.............................................................................................................................................................5
Responsibility of use.........................................................................................................................................................5
Disposal ............................................................................................................................................................................5
Calibration Facility............................................................................................................................................................5
Legal Notice......................................................................................................................................................................5
Instrument Description......................................................................................................................................... 6
Packing list ........................................................................................................................................................... 7
How GasCheck Tesla works ................................................................................................................................... 8
Thermal Conductivity .......................................................................................................................................................8
Instrument main menu ......................................................................................................................................... 9
Running screen....................................................................................................................................................10
Gas selection ..................................................................................................................................................................10
Sensitivity .......................................................................................................................................................................10
Battery status .................................................................................................................................................................10
Backlight .........................................................................................................................................................................10
Gas measurement ..........................................................................................................................................................10
Sound indication.............................................................................................................................................................10
Bar graph ........................................................................................................................................................................10
Peak hold........................................................................................................................................................................10
Functions ............................................................................................................................................................11
Contrast..........................................................................................................................................................................11
Backlight .........................................................................................................................................................................11
Sound..............................................................................................................................................................................11
Peak hold........................................................................................................................................................................11
Calibration ......................................................................................................................................................................11
Battery selection ............................................................................................................................................................12
View Data .......................................................................................................................................................................12
Units ...............................................................................................................................................................................12
Display ............................................................................................................................................................................12
Gas selection ..................................................................................................................................................................13
Getting started ....................................................................................................................................................14
The Keypad.....................................................................................................................................................................14
Using GasCheck Tesla...........................................................................................................................................15
The GasCheck Tesla instrument.....................................................................................................................................15
GasCheck Tesla fan current monitor .....................................................................................................................16
Probe options......................................................................................................................................................17
Detecting leaks....................................................................................................................................................18
Overview ........................................................................................................................................................................18
Calibration ..........................................................................................................................................................19
Over view........................................................................................................................................................................19
Selecting Factory or Custom Calibration........................................................................................................................19
Calibration procedure using 'ppm' units........................................................................................................................19
Calibration procedure using 'cc/sec' units .....................................................................................................................20
Replacing batteries..............................................................................................................................................21
Instrument specification ......................................................................................................................................22
Replacement parts ..............................................................................................................................................23
Instrument warranty and service..........................................................................................................................24
Warranty ........................................................................................................................................................................24
Service ............................................................................................................................................................................24
Contact details................................................................................................................................................................24
Manual log..........................................................................................................................................................25

Unrivaled Detection. ionscience.com/usa
GasCheck Tesla Instrument User Manual V1.2R
Page 5 of 26
Statements
Safety
Please read this manual in full before using the GasCheck Tesla instrument. ION Science Inc takes no
responsibility for damage, injury or death resulting from misuse, misunderstanding or negligence while using this
gas detector. Please contact ION Science Inc via the address below for clarification on any aspect of this manual
that is not understood or for additional information required.
This instrument should only be used by qualified or competent persons with suitable knowledge of the hazards
relating to the gases contained within equipment or in the local environment.
Quality Assurance
GasCheck Tesla instruments are manufactured by ION Science Inc within an ISO 9001:2015 compliant quality
system, which ensures that the equipment supplied to our customers has been designed and assembled
reproducibly, and from traceable components.
Responsibility of use
Many gases are hazardous and can cause explosions, poisoning and corrosion resulting in damage to property
and life. It is the responsibility of the person using this instrument to ensure it is being used in accordance with
this manual and that the instrument is functioning correctly before use.
The GasCheck Tesla can detect a large range of gases but some gases are more difficult to detect.
It is the responsibility of the user to ensure the GasCheck Tesla instrument has the sensitivity to detect the
required gas before reaching potentially dangerous levels.
Inadequate performance of the gas detection equipment described in this manual may not necessarily be self-evident
and consequently equipment must be regularly inspected and maintained. ION Science recommends that personnel
responsible for equipment use implement a regime of regular checks to ensure it performs within calibration limits,
and that a record be maintained which logs calibration check data. The equipment should be used in accordance with
this manual, and in compliance with local safety standards.
Disposal
Disposal of GasCheck Telsa, its components and any used batteries shall be in accordance with local and national
safety and environmental requirements. This includes the European WEEE (Waste Electrical and Electronic
Equipment) directive. ION Science Inc offers a 'take-back' service. Please contact Ion Science Ltd for more
information.
Calibration Facility
Ion Science Ltd offers a calibration service including the issue of a traceable certificate valid for 12 months. A
GasCheck Tesla Calibration Kit offers a means of checking and calibrating the instruments against a known
reference, however ION Science Inc strongly recommend the instrument is returned to an approved service
centre on an annual basis for general maintenance and calibration.
Legal Notice
While every attempt is made to ensure the accuracy of the information contained in this manual, Ion Science accepts
no liability for errors or omissions, or any consequences deriving from the use of information contained herein. It is
provided "as is" and without any representation, term, condition or warranty of any kind, either express or implied. To
the extent permitted by law, Ion Science shall not be liable to any person or entity for any loss or damage which may
arise from the use of this manual. We reserve the right at any time and without any notice to remove, amend or vary
any of the content which appears herein.

Unrivaled Detection. ionscience.com/usa
GasCheck Tesla Instrument User Manual V1.2R
Page 6 of 26
Instrument Description
The GasCheck Tesla is a portable, handheld gas leak detector capable of detecting helium leaks within a high magnetic
field, typically surrounding Magnetic Resonance Imaging (MRI) scanners and can be effectively used while the
machinery is still in operation. GasCheck Tesla is part of a range of gas leak detectors used for detecting gas leaks, and
can detect almost all gases to varying degrees.
It is powered by standard AA size batteries and will accept both Alkaline and Nickel Metal Hydride (rechargeable)
types. The GasCheck Tesla uses thermal conductivity to detect gas which offers a robust sensor technology that
requires practically no maintenance beyond annual servicing.
All GasCheck models have an easy to use graphical interface with an intuitive keypad allowing simple function
selection and adjustment. The instrument has an LCD display, LED indicator and audible sounder that indicate the
detected signal.
Applications where GasCheck instruments are typically used include:
•Medical - used by service technicians during maintenance of Magnetic Resonance Imaging (MRI) scanners and
testing of membrane materials and sealing of glove boxes.
•Laboratory applications - detection of leaks from mass spectrometers and chromatograph equipment.
•Quality assurance - testing seal integrity after product manufacture.
•Industrial - leaks from gas cylinders, pipe work and process equipment.
•Pneumatic - valve seal testing.
The GasCheck Tesla is calibrated against a 5 E-4 cc/s Helium leak to allow volumetric readings and also a 5000ppm
helium to allow measurement of concentrations.
Selectable units:
cc/sec Cubic Centimeters per second offers a reading that indicates the volume of gas escaping into
atmosphere from a single point i.e. leakage from a hole in a gas filled vessel or pipe.
ppm Parts Per Million is a concentration reading. GasCheck Tesla will display the concentration being
detected however it is more difficult to gauge the quantity of leakage.
mg/m3Milligrams per meter cubed is also a unit that measures concentration. (See ppm above)
g/yr Grams per Year is an alternative measure of leak rate.
NOTES:
GasCheck Tesla is NOT intrinsically safe so should not be using in a potentially explosive environment. Please contact
ION Science Inc for more information or visit www.ionscience.com/usa
Ambient air pressure, heat and humidity can affect readings.
The GasCheck Tesla range is NOT 'Gas Specific' i.e. it can NOT differentiate between gases. Selecting a specific gas on
the GasCheck Tesla allows the instrument to calculate concentrations and leak rates of that gas only if that gas is being
detected.

Unrivaled Detection. ionscience.com/usa
GasCheck Tesla Instrument User Manual V1.2R
Page 7 of 26
Packing list
Please remove all packing material and then check the content of the carry case against the list below before use. Should
the instrument or any accessory appear damaged or missing then contact the instrument supplier for advise before use.
Item
Qty
Description
Check
1
1
GasCheck Tesla instrument with short probe and nozzle fitted
2
1
Long probe
3
1
Box spanner used to change probes
4
1
Spare battery clip
5
1
Quick start guide
6
1
Calibration certificate

Unrivaled Detection. ionscience.com/usa
GasCheck Tesla Instrument User Manual V1.2R
Page 8 of 26
How GasCheck Tesla works
Thermal Conductivity
All gases conduct heat but by varying amounts, if an object is heated and then the source of heat is removed, the
object will eventually cool down to match ambient air temperature. This action occurs because the ambient air
surrounding the object carries the access heat into the surrounding atmosphere.
This principal is also the same for objects that are cooler than the surrounding ambient air.
Dissipation of heat into an air atmosphere is known and is a predictable rate however, if the ambient air is replaced
with an alternative gas like Helium the rate at which an object cools down changes.
If the object mentioned above had its environment replaced with pure Helium it would cool down to the environment
temperature about 6 times faster.
The GasCheck Tesla contains a heated thermistor bead that transmits heat to a block of material that remains at a
constant temperature. As air passes through the detector chamber a constant amount of heat passes from the bead
to the block. Gases that are different to air will affect the rate at which heat transmits from the bead to the block,
these rates of change are measured and displayed as leak rates.
The diagram below shows the basic functionality of the GasCheck Tesla 's Thermal Conductivity sensor.
A fan draws a small flow of gas through the probe and into the sensing chamber. The thermistor bead heats up when
electrical power is applied. As air passes through the cell a constant level of heat is transmitted to a Temperature
Stable block through the air, this rate of heat transmission is used to 'Zero' the instrument.
When gases with different thermal qualities pass through the chamber the amount of heat being transmitted to the
Temperature Stable block changes. These changes are measured, calculated and displayed on GasCheck Tesla as leak
rates or gas concentrations.
NOTES:
- Some gases have similar thermal properties to that of air, therefore the GasCheck Tesla can only detect larger
concentrations of these gases.
- Some gases have positive and other gases negative signals. To simplify the instruments function GasCheck Tesla only
displays changes as positive readings.
- The GasCheck Tesla can NOT differentiate between gases! Selecting a specific gas on the GasCheck Tesla allows the
instrument to calculate concentrations of that gas only if that gas is being detected.
Probe
Temperature
Stable
Fan
Air flow
Display

Unrivaled Detection. ionscience.com/usa
GasCheck Tesla Instrument User Manual V1.2R
Page 9 of 26
Instrument main menu
Once the GasCheck Tesla has run through its 'Start up' routine it will display its normal 'Running screen' used when
locating gas leaks. Before using the instrument the various settings should be set and adjusted to suit the application.
Pressing the 'Esc' key while viewing this
'Running screen' will access the
instruments Main Menu. Repeated
pressing of the 'Esc' returns back to the
'Running screen'.
Running screen
Main Menu
Contrast
Backlight
Sound
Peak Hold
Calibration
Battery
View Data
Units
Gas

Unrivaled Detection. ionscience.com/usa
GasCheck Tesla Instrument User Manual V1.2R
Page 10 of 26
Running screen
GasCheck Tesla displays the 'Running screen' whenever the instrument is being used to detect leaking gas, the
illustration below outlines the various information and icons.
Gas selection
The GasCheck Tesla displays the gas being measured in the top left of the running screen. The GasCheck Tesla will display
the gas as selected at the factory, however the Tesla has a range of gases that can be selected via an internal gas table.
Sensitivity
GasCheck Tesla has three (3) sensitivity levels, X100 (times one hundred) is most sensitive, X10 (times ten) is mid-range
and X1 (times one) is least sensitive. See the sensitivity of various gases on the table under ‘Functions (continues), Gas
Selection’.
Battery status
When the battery symbol is filled in the battery is full, when just an outline is displayed the battery is exhausted.
Backlight
The backlight symbol shows the status of the backlight even in bright daylight.
Gas measurement
The GasCheck Tesla measures the leak rate of gas leakage in which ever units are selected.
Sound indication
This symbol shows if the sounder is on or off, if the semi-circle (on the right) of the symbol is present then the sound is
switched on, if not the sounder is switched off. The beep that occurs with each key press cannot be switched off.
Bar graph
The bar graph increases as gas is detected. This graph is not scaled and should be used for indication only.
When gas is detected and the bar graph has reached its maximum level, a different sensitivity level can be selected to
give a wider detection range.
Peak hold
When selected, peak hold displays the maximum measurement on the display. Pressing the ENTER key resets the
reading but also logs the peak reading in memory.
Gas selection
Sensitivity levels
Gas measurement
Bar graph
Battery status
Backlight indicator
Sound indicator
Peak hold indicator
Data logs

Unrivaled Detection. ionscience.com/usa
GasCheck Tesla Instrument User Manual V1.2R
Page 11 of 26
Functions
Contrast
Use this function to adjust the contrast of the GasCheck Tesla's LCD (Liquid Crystal Display).
Significant variations in ambient light conditions can cause the display to appear too dark or
faint. When this function is selected a number will appear to the right of the Contrast
symbol as a percentage. Use the Up and Down keys to adjust the display contrast to the
desired level. When satisfied with the desired level selected, press the Esc key to exit to the
main menu.
Backlight
The user can select either Backlight On or Backlight Off.
In daylight the user may not be able to determine if the
backlight is On or Off therefore a symbol on the main
running screen shows the status.
When the backlight is 'ON' it significantly reduces battery life.
Backlight OFF = 40hrs of use, Backlight ON = 20hrs of use.
Sound
The GasCheck Tesla has an audible sounder that increases
frequency as detected gas levels increase. This sounder can be
switched On and Off. Use the Up or Down key to move the 'tick'
to the desired position and then press the 'Esc' key to return to
the Main Menu.
An audible 'beep' can also be heard whenever the key pad is pressed. This beep can be
switched off.
Peak hold
When selected, this function holds the highest detected reading on the display until the
'ENTER' key is pressed.
Select Peak On or Off using the 'Up or Down' key and then
press 'Esc' key to exit to the 'Main menu'.
When using the GasCheck Tesla, press the ENTER key to clear
the held reading.
The reading held on screen will be logged when the 'ENTER' key is pressed.
WARNING: ZEROing the instrument in a contaminated environment will result in false readings.
Calibration
There are two Calibration settings that can be selected;
Factory and Custom. Factory calibration is carried out shortly
after manufacture and cannot be adjusted, however Custom
calibration offers the ability to calibrate the instrument
between annual Factory calibrations. The GasCheck Tesla
Zero's its reading at switch on, therefore the Custom
calibration routine only has one stage. Also see the
‘Calibration’ section of this manual.

Unrivaled Detection. ionscience.com/usa
GasCheck Tesla Instrument User Manual V1.2R
Page 12 of 26
Functions
Battery selection
The GasCheck Tesla will operate using AA size
batteries in either Alkaline (non-rechargeable) or
Nickel Metal Hydride (Rechargeable).
Select the battery type using the 'Up or Down' key and
then press the 'Esc' key to exit to the Main menu.
Failing to select the correct battery type will not damage the instrument or affect its ability
to detect gas, however it will cause the battery indicator to read incorrectly.
View Data
The GasCheck Tesla instrument has the ability to data log 10 readings
within its internal memory. To store a reading press the 'ENTER' key
while on the main Running screen. When readings are stored in memory
a symbol will appear on the Main viewing screen.
When the memory is full the 'Data' symbol will flash. The stored data can be viewed by
scrolling through the logged readings using the 'Up and Down' keys. To delete the stored data
press and hold the 'ENTER' key, the 'Trash can' symbol will flash, continue holding the 'ENTER'
key until the data is deleted. Press the 'Esc' key to exit to the Main menu.
Units
GasCheck Tesla instruments have the capability of displaying detected readings in a
variation of units; ppm, cc/s, mg/m3and g/yr.
Use the 'Up and Down' keys to select the desired unit and then press the 'Esc' key to exit to
the main menu.
Please note: the Custom Calibration routine automatically selects the type a calibration
depending on this setting. See the ‘Calibration’ section of this manual.
cc/sec = Cubic Centimeters per second offers a volumetric leak rate that directly
measures the volume of a gas escaping from a given point, it is also known as ml/sec
(milliliters per second). The GasCheck Tesla can typically detect Helium leaks down to
0.0005 of a cubic centimeter per second.
ppm = Parts per million, this unit indicates a concentration but can't be used to quantify
a volume of gas leakage.
mg/m3= Milligrams per meter cubed, like ppm this unit is also concentration so can't be
used to quantify a volume of gas leakage.
g/yr = Grams per year offers an alternative volumetric leak rate that directly measures
the volume of a gas escaping from a given point.
Display
GasCheck Tesla instruments have the capability of displaying cc/sec and g/yr readings in
either decimal or exponent form. (Readings in ppm and mg/m3can only be displayed in
decimal form.)
Use the 'Up and Down' keys to select the desired unit. Press the 'Enter' key to display the
next screen. Use the 'Up and Down' keys to select the desired display and then press the
'Esc' key twice to exit to the main menu.

Unrivaled Detection. ionscience.com/usa
GasCheck Tesla Instrument User Manual V1.2R
Page 13 of 26
Functions
Gas selection
GasCheck Tesla is calibrated using Helium gas at manufacture, however other gases can be detected and measured
using a gas table within the instrument.
Although GasCheck Tesla can't differentiate between gases it can quantify other gases using response factors stored in
its internal gas table. Gas groups 1 2, 3, 4 and 5 offer a generic sensitivity.
The following list indicates minimum sensitivity for specific gases. For advice on gases not listed please contact ION
Science Inc.
Name
Abbreviation
Minimum sensitivity
cc/sec (ml/sec)
Minimum sensitivity
cc/sec (ml/sec)
Hydrogen
H2
7.7 E-6 cc/sec
0.0000077 cc/sec
Helium
He
1.0 E-5 cc/sec
0.000010 cc/sec
Refrigerant R12
R12
2.7 E-5 cc/sec
0.000027 cc/sec
Refrigerant R1301
R1301
2.4 E-5 cc/sec
0.000024 cc/sec
Refrigerant R134a
R134a
5.8 E-5 cc/sec
0.000058 cc/sec
Refrigerant R22
R22
2.6 E-5 cc/sec
0.000026 cc/sec
Refrigerant R11
R11
3.2 E-5 cc/sec
0.000032 cc/sec
Sulphur Hexaflouride
SF6
2.2 E-5 cc/sec
0.000022 cc/sec
Carbon dioxide
CO2
4.0 E-5 cc/sec
0.000040 cc/sec
Methane
CH4
2.9 E-5 cc/sec
0.000029 cc/sec
Argon
Ar
3.5 E-5 cc/sec
0.000035 cc/sec
Oxygen
O2
2.9 E-4 cc/sec
0.000290 cc/sec
Refrigerant R502
R502
3.0 E-5 cc/sec
0.000030 cc/sec
Refrigerant R404a
R404a
3.2 E-5 cc/sec
0.000032 cc/sec
Refrigerant R407c
R407c
3.3 E-5 cc/sec
0.000033 cc/sec
Refrigerant R410a
R410a
3.2 E-5 cc/sec
0.000032 cc/sec
Refrigerant R507
R507
3.8 E-5 cc/sec
0.000038 cc/sec
To select an alternative gas, use the 'Up and Down' keys to select the desired gas and then press the 'ENTER' key to
confirm the selection, at which point a tick will appear. Press the 'ENTER or Esc' key to exit into the 'Main menu'.
If the gas to be detected does not appear in the instrument’s internal gas table then one of the five 'Gas Groups' can
be selected. 'Gas Groups' have a variation of sensitivities. (Group 1 being high sensitivity through to Group 5 being low
sensitivity) Contact ION Science Inc for advice. Gas groups allow the instrument to calculate leak rates with reasonable
accuracy.

Unrivaled Detection. ionscience.com/usa
GasCheck Tesla Instrument User Manual V1.2R
Page 14 of 26
Getting started
The Keypad
All GasCheck Tesla models have the same keypads, the following section explains the general functionality of each
key:-
When the GasCheck Tesla first switches on it will display its model number
and the Gas that it has been calibrated with.
A second screen then displays the instrument’s serial number, the
instrument’s firmware version and ION Science web address.
A third screen appears to indicate the GasCheck Tesla is Zeroing its signal.
Once the Zero routine is complete the instrument displays its running screen and is ready for use.
ENTER
This key is used to select functions and
accept settings after a parameter has
been adjusted.
ZERO
Pressing the Zero key Zeros-out
background readings.
On/Off.
Press this key once to switch the
instrument 'ON'. To switch the instrument
off press and hold this key until the bar
graph reaches the right side of the screen.
This procedure has been designed to avoid
accidental switch OFF.
ESCAPE
This key is used to return the display to
the previous screen and to abort an
adjustment. Repeated pressing of this key
will return the display to the 'Display
screen'.
UP
Use the UP key to scroll through
the function menu and to adjust
settings.
DOWN
Use to scroll down or change
selection

Unrivaled Detection. ionscience.com/usa
GasCheck Tesla Instrument User Manual V1.2R
Page 15 of 26
Using GasCheck Tesla
The GasCheck Tesla instrument
WARNING: Before switching the GasCheck Tesla on, ensure the ambient air is clean as the instrument automatically
Zero's the sensor at switch on. After the instrument has run through its start-up routine, adjust the instrument
settings to the desired levels. Check the instruments sensitivity using a CalCheck or calibration kit.
Switch the GasCheck Tesla on by pressing the ON/OFF key. After the
instrument has completed its Zero routine it will enter its normal running
screen. (see right)
Ensure the instrument is on the X100 (times one hundred) range, while on the main running screen use the UP and
DOWN key to adjust between sensitivity ranges. X100 is most sensitive, X1 is the least sensitive.
Gas leaks tend to occur at pneumatic joints or welded seams, hold the GasCheck Tesla at a 45oangle to the object
being tested and drag the probe along the seam or joint at a rate of approximately 25mm per second.
When a leak is detected the bar graph will start to fill and the frequency of the audio output will increase but will
reduce as the probe moves away from the leak. Return the probe to the suspected leaking area and move slowly
along the same area until the leak is located, once located the probe should be held at the leak until the numeric
reading stabilizes.
The bar graph offers a graphical indication only and should not be used to measure a leak, you may find that the graph
completely fills however the numeric reading will continue to increase.
Variation in temperature, humidity and background gas may result in a constant level being detected on the
instrument. To reset to Zero, hold the instrument away from the source of contamination and then press the ZERO
key. The instruments display will return to a near zero reading.
The following things will affect the instruments reading:-
* Breath of the instrument user contains both CO2 and moisture;
* Barometric air pressure and background temperature;
* Sources of cold and heat.

Unrivaled Detection. ionscience.com/usa
GasCheck Tesla Instrument User Manual V1.2R
Page 16 of 26
GasCheck Tesla fan current monitor
Even with magnetic shielding in place, in the presence of strong magnetic fields, the fan inside the GasCheck Tesla will
degrade. This degradation is permanent and results in the current drawn by the fan increasing.
There are also temporary effects where the local magnetic field will cause the current drawn by the fan to increase.
These effects disappear when the instrument is removed from the magnetic field.
The software inside the GasCheck Tesla prevents leak detection measurements from being taken when the fan is
permanently damaged, or if the local field is too high.
The GasCheck Tesla can monitor the current consumed by the fan as it draws air through the detector chamber. This
allows the end user to see how much damage has occurred to the fan inside the unit due to the magnetic field. If the
current is too high, the unit displays an error message preventing the operator from making measurements of the leak
rate.
Refer to Figure 6. The fan current indicator can be found in the bottom left hand corner of the 'Zeroing' screen. The
number can range from around 200 units or below on a new unit and can rise to 600 units before the unit displays the
error message shown in Figure 7. The 'Zeroing' screen can be accessed at any time by holding down the and
zeroing the GasCheck Tesla.
Once the error message is displayed, it will remain on the screen until the. is pressed and the fan current has
returned to an acceptable level. In the event of the fan current constantly exceeding 600 units, for example if the
GasCheck Tesla fan has reached the end of its working life, the unit will not display the leak rate and the GasCheck
Tesla should be returned to ION Science for servicing.
Figure 7 –Fan current limit exceeded indicator
Figure 6 –Fan current indicator
ZERO
ZERO

Unrivaled Detection. ionscience.com/usa
GasCheck Tesla Instrument User Manual V1.2R
Page 17 of 26
Probe options
In some applications the grey probe cover may restrict access to
the area under test, the grey probe cover can be removed by
pulling it off way from the instrument . When the grey cover
is removed great care should be taken when using the instrument
and the following precautions noted:-
* Do not remove the semi-transparent probe sleeve, this
sleeve ensures the metal inner probe remains 1 mm
from the surface of the test area avoiding accidental dirt
and moisture ingress.
* Do not touch the probe and especially the brass sensor
housing. Heat from fingers can result in significant
changes in signal causing false readings.
* Avoid placing the probe on wet or dirty surfaces,
blockage of the probe will result in instrument failure.
Some applications may require a longer probe to gain access to
pneumatic joints and seems to be tested, the GasCheck Tesla is
also supplied with a 300mm probe that can be changed by the
user. To change probes carefully follow the following steps:-
* Switch the instrument OFF
* Remove the outer grey probe cover
* Place the box spanner (supplied with the instrument) over the existing probe so the spanner fits over the
brass nut , unscrew the probe counter-clockwise direction.
* Withdraw the spanner and probe assembly
To refit the short or the long probe follow the steps above but in reverse order.
CAUTION: When using the box spanner to tighten the probe nut, ensure the nut is firmly tightened however do
not use additional tools as the tread may become damaged.
Should a probe become blocked, first remove the probe from the instrument. Then, use dry, clean compressed air to
blow out the blockage from the instrument end of the probe.
CAUTION: The instrument has been factory calibrated using the standard short capillary which sets a certain flow
rate into the detector. The long capillary by nature of its construction has a different flow to improve the time
response in detection. This will change the calibration of the instrument when the long probe is used instead of
the short capillary. Thus the long probe is only to be used in finding leaks in difficult places where the standard
short probe cannot reach. The readings given by the long probe are only qualitative and the reading given by
the display is only to be taken as being relative to another value given by another leak site while using the long
probe.
WARNING: Ensure safety guidelines are adhered to when using compressed air.
(ION Science Inc takes no responsibility for injury or damage caused by misuse of compressed air equipment)

Unrivaled Detection. ionscience.com/usa
GasCheck Tesla Instrument User Manual V1.2R
Page 18 of 26
Detecting leaks
Overview
The GasCheck Tesla is suitable for detecting leaks
around the outside of the MRI scanner. It is not suited to
detection of leaks within the center of the MRI scanner.
Hold the GasCheck Tesla in one hand and draw the
instrument probe along the area to be checked at
approximately 25mm per second. When a leak is
detected retrace the route of the probe at a slower rate
until the leak is located.
Once located hold the instrument over the leak until the
measurement stabilizes. The reading can be logged by
pressing the ENTER key.
Some readings may be larger than the instrument can
detect and the measurement units will be replaced by
'99999' on the display, in which case used the UP or
DOWN keys to adjust the instruments sensitivity.
When detecting very small leaks or when detecting
gasses less sensitive then a rate of 10mm per second
may be required.
The outer grey probe cover can be removed to allow better access to restricted areas, if the outer probe is removed the
following points should be noted:-
- Avoid bending the inner probe as this will affect the GasCheck Tesla 's accuracy.
- Avoid placing the probe in liquid or dirt as the probe can become blocked.
- Care should also be taken to ensure the brass sensor housing component remains at a constant temperature. Avoid
touching the brass sensor block with fingers.
- GasCheck Tesla can detect changes in Humidity and Carbon dioxide, therefore avoid breathing on the probe.
- The thin white tube that covers the inner probe should not be removed, this tube ensures a 1mm gap is maintained
between the probe and the surface being tested.

Unrivaled Detection. ionscience.com/usa
GasCheck Tesla Instrument User Manual V1.2R
Page 19 of 26
Calibration
Over view
The GasCheck Tesla has two selectable calibration settings;
Factory and Custom. 'Factory Calibration' is carried out at ION
Science Inc / Authorized Service Centers during the instruments
manufacture, it can be selected and used but can not be changed.
The GasCheck Tesla is calibrated against a 5000 ppm Helium
concentration and a 0.0005cc/sec (5 E-4) Helium leak rate.
'Custom Calibration' gives the user the ability to calibrate the
instrument, this facility may offer improved accuracy over the
'Factory Calibration' if the Barometric air pressure differs from
that stated on the instruments Calibration certificate.
Selecting Factory or Custom Calibration
To select either Factory or Custom Calibration select the Calibration
screen and user the UP and DOWN keys to move the 'tick / check'
under the desired symbol, then Press the 'Esc' key to exit into the main
menu.
'Custom Calibration' can only be selected and used after the instrument has been calibrated by the user, to do this move
the 'tick / check' under the 'Custom Cal' symbol and press the ENTER key.
The GasCheck Tesla requires either 5000 ppm Helium concentration or a 0.0005cc/sec (5 E-4 cc/sec) leak rate as a
reference. The GasCheck Tesla automatically selects the type of Calibration media based on which units the instrument
already has selected.
If the GasCheck Tesla is used to detect leaks measured using 'ppm or mg/m3' units then the instrument must be
calibrated using a 5000 ppm Helium concentration.
If the GasCheck Tesla is used to detect leaks measured using 'cc/sec' units then the instrument must be calibrated using
a 0.0005 cc/sec (5 E-4) Helium leak.
Calibration procedure using 'ppm' units
Please read this entire procedure before proceeding with this calibration routine.
* Fill an empty (uncontaminated) sample bag with 5000 ppm Helium gas before starting the
calibration procedure. Also remove the outer grey probe from the GasCheck Tesla.
* Select the 'Custom Cal' symbol from the instruments menu. An option appears allowing the
adjustment of the 'ppm' value to ensure the instrument matches the gas concentration being
used. Use the UP and DOWN keys to adjust between 4900 and 5100 ppm.
* Ensure the instrument is in clean air and then press the ENTER key, the instrument will Zero,
this will take a few seconds but once complete a 'Ready' message will appear.
* Insert the instruments probe fully into the sample bag containing the gas and press the
ENTER key. The instrument will automatically sequence through the cold and hot stages of
calibration but when finished gives a summary of values.
* Press the ENTER key to return back to the calibration option screen. Press the ESC key to
start using the instrument or press the ENTER key to calibrate again.
NOTE: To avoid errors in calibration the following points should be noted:-
- Avoid bending the inner probe as this will affect the GasCheck Tesla 's accuracy.
- GasCheck Tesla can detect changes in Humidity and Carbon dioxide, therefore avoid
breathing on the probe.
- Avoid pressurizing the sample bag as this will cause significant errors in reading

Unrivaled Detection. ionscience.com/usa
GasCheck Tesla Instrument User Manual V1.2R
Page 20 of 26
Calibration
Calibration procedure using 'cc/sec' units
Please read this entire procedure before proceeding with this calibration routine.
- Follow the instructions of the CalCheck unit, the pointer of the pressure gauge must rest
over the green segment.
- Select the 'Custom Cal' symbol from the instrument’s menu.
- Ensure the instrument is in clean air and then press the ENTER key, the instrument will Zero,
this will take a few seconds but once complete a 'Ready' message will appear.
- Insert the instruments probe into the CalCheck’s outlet and press the ENTER key. The
instrument will automatically sequence through the cold and hot stages of calibration but
when finished gives a summary of values.
- Pressing the ENTER key will return back to the calibration option screen. Press the ESC key
to start using the instrument or press the ENTER key to recalibrate again.
NOTE:
-GasCheck Tesla can detect changes in Humidity and Carbon dioxide, therefore avoid breathing on the
probe.
Part No.
Description
Used
A-21500
0.0005 cc/sec Helium Calibration kit
For when GasCheck Tesla is used with cc/s units
WARNING: Great care should be taken to ensure the calibration gas is neither pressurized or restricts flow to the
instruments probe. Changes in flow of gas to the sensor will result in significant errors in readings.
Other manuals for GasCheck Tesla
1
Table of contents
Other ion science Gas Detector manuals
Popular Gas Detector manuals by other brands

Visonic
Visonic MCT-442 installation instructions

UE
UE VANGUARD WirelessHART TCD50H1A Installation and maintenance instructions

Sensitron
Sensitron PATROL manual

FORENSICS DETECTORS
FORENSICS DETECTORS FD-90E-RED Operation manual

SISCO
SISCO SKY3000 Series user manual

RKI Instruments
RKI Instruments RI-600 Operator's manual