7
Operation
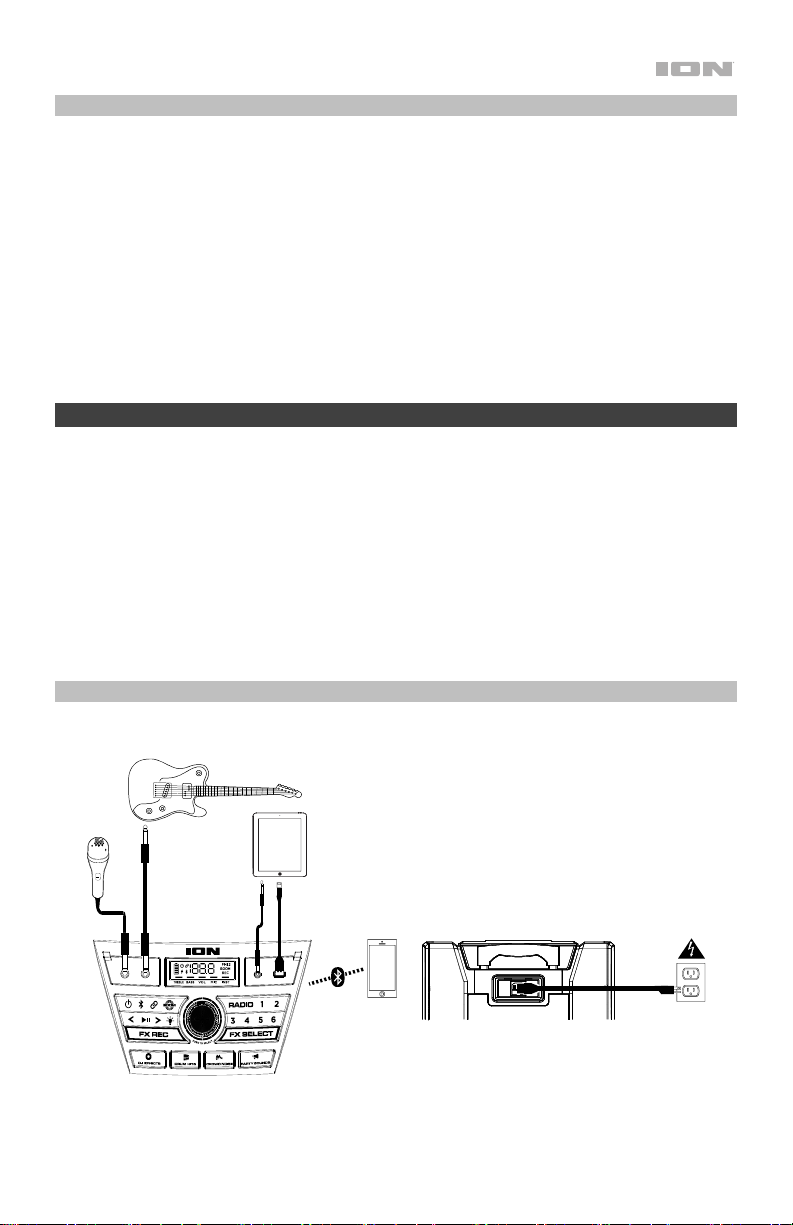
Pairing with a Bluetooth Device
1. Make sure the speaker is within range of your Bluetooth device (no more than 100 ft. /
30.5 m away).
2. Press the Bluetooth button on the speaker.
3. Navigate to your Bluetooth device’s setup screen. Then find and select Explorer XL. If
your Bluetooth device prompts for a pairing code, enter 0000.
Note: Do not connect to Explorer XL_BLE; this is reserved exclusively for connecting to the
ION Sound XP app. If you experience trouble in connecting, select “Forget this Device” on
your Bluetooth device and try to connect again.
Note: If you have previously connected to your Bluetooth device, Explorer XL will reconnect
automatically.
Tip: Press and hold the Bluetooth button to enable or disable the Bluetooth pairing voice
prompts.
To disconnect a paired Bluetooth device, press the Bluetooth button, or turn off Bluetooth
from your device’s Bluetooth settings. This will also enter Aux mode. Double-press the
Bluetooth button to disconnect a paired Bluetooth device and search for a different device.
App Control
IMPORTANT: To ensure the best possible experience with the app, use the most current
Android OS or iOS on your device.
Follow these steps to download the free app on your device:
1. Open the Apple App Store or Google Play on your device. Then, search for the ION
Sound XPTM app.
2. Follow the on-screen instructions to download and install the app. Once downloaded,
the ION Sound XPTM app will appear on your device's home screen.
3. Connect your device to Explorer XL via Bluetooth. See Pairing with a Bluetooth
Device to learn how to do this.
4. Open the ION Sound XPTM app. If prompted, allow the app to access your device's
Bluetooth and Location Services.
5. Tap to select Add A Product on the screen. The app will scan and find Explorer XL.
If you are having issues connecting, tap Help with setting up? for additional tips.
6. Select the Explorer XL icon to gotothe next screen, where you can usethe app to
control various functions ofthe speaker such as:
•Radio: Play the radio, change stations, and edit presets.
•EQ: Adjust the speaker's equalization, and enable ordisable Bass Boost.
•Volume: Adjust the speaker volume and microphone volume.
•Voice Prompts: Enable or disable the voice prompts.
•Link: View instructions for linking Explorer XL to another compatible speaker.
•Support: Visit ionaudio.com,contact Technical Support, and view Warranty
information and Frequently Asked Questions.