Caution
This device is intended for indoor, home use.
* This device is not intended for public use.
* This device is portable, but it is not intended for use during patient trans-
port.
* This device is not suitable for continuous monitoring during medical emer-
gencies or operations.
* This device is intended for non-invasive measuring and monitoring of arte-
rial blood pressure. It is not intended for use on extremities other than the
arm, or for any purpose other than obtaining a blood pressure measurement.
* This device is for adults. Do not use this device on babies or infants. Do not
use it on children unless otherwise instructed by a medical professional.
* Do not use on pregnant women, including pre-eclamptic, patients.
* The device is not suitable for use on patients with implanted, electrical
devices, such as cardiac pacemakers, defibrillators.
* The effectiveness of this device has not been established for use:
-on users with common arrhythmias such as atrial or ventricular premature
beats or atrial fibrillation,
-on users with peripheral arterial disease,
-on users undergoing intravascular therapy, or with arteriovenous (AV) shunt.
Consult a medical professional before use.
* Do not use this device for diagnosis or treatment of any health problem or
disease. Contact your physician if you have or suspect any medical problem.
Do not change your medications without the advice of your physician or
health care professional.
* If you are taking medication, consult your physician to determine the proper
time to measure your blood pressure.
* This device may be used only for the intended use described in this manual,
the manufacturer shall have no liability for any incidental, consequential, or
special damages caused by misuse or abuse.
* Report any unexpected operation or events to the manufacturer.
* Do not apply the cuff on an arm that has an intravenous drip or a blood
transfusion attached.
*Do not kink, fold, stretch, compress, or otherwise deform the tube during
measuring, as the cuff pressure might continuously increase, which could
prevent blood flow and result injury.
*Taking blood pressure measurements too frequently could disrupt blood
circulation and cause injuries.
* Do not apply cuff to areas on patient where skin is delicate or damaged.
Check cuff site frequently for irritation.
* Warning: Do not place the cuff on the arm of a person whose arteries
or veins are undergoing medical treatment, i.e. intra-vascular access or
intra-vascular therapy or an arteriovenous (A-V)
shunt, which could disrupt blood circulation and cause injuries.
* Do not place the cuff on the arm on the same side of a mastectomy (es-
pecially when lymph nodes have been removed). it is recommended to take
measurements on the unaffected side.
* Do not wrap the cuff on the same arm to which another monitoring device
is applied. One or both devices could temporarily stop functioning if you try
to use them at the same time.
* Please check that the operation of the device does result in prolonged
impairment of patient blood circulation.
* Warning: On the rare occasion of a fault causing the cuff to remain fully
inflated during measurement, loosen and remove the cuff immediately.
Prolonged high pressure applied to the arm (cuff pressure >300 mmHg or
constant pressure >15 mmHg for more than 3 minutes) might lead to bruising
and discolored skin.
* Warning: Do not use this device with high-frequency (HF) surgical equip-
ment at the same time.The unit should not be used for prolonged monitoring
during medical emergencies or operations.
The cuff being inflated for a prolonged time will lead to numbness of the
wrist and fingers, causing pain and ecchymosis.
Use the device according to the instructions of this manual to guarantee
efficient performance and durability of the device.
The cuff complies with the requirements of ISO 10993- 5:2009 and ISO
10993-10:2010.
The cuff does not cause any potential allergic reaction or contact injury, but
those allergic to polyester, nylon, or plastic may take caution.
There is no need for calibration during the two years of guaranteed service.
Maintenance
Make sure to place the device away from the sun. Store it in a dry place.
When you want to clean the device, you should use a dry cloth. Do not place
it in water or clean it with wet cloths.
Also, be careful not to shake or throw the device.
For better performance, keep it in a room with a stable temperature and
away from dust.
The cuff should not be cleaned as it may affect the accuracy of the reading.
EMC guidance
The ME EQUIPMENT or ME SYSTEM is suitable for home healthcare environ-
ments.
Warning: Don’t be near the active HF surgical equipment and the RF shielded
room of an ME system for magnetic resonance imaging, where the intensity
of EM disturbances is high.
Warning: Use of this equipment adjacent to or stacked with other equipment
should be avoided because it could result in improper operation. If such use
is necessary, this equipment and the other equipment should be observed
to verify that they are operating normally. Warning: Use of accessories, trans-
ducers, and cables other than those specified or provided by the manufac-
turer of this equipment could result in increased electromagnetic emissions
or decreased electromagnetic immunity of this equipment and result in
improper operation.
Warning: Portable RF communications equipment (including peripherals such
as antenna cables and external antennas) should be used no closer than 30
cm (12 inches) to any part of the equipment TMB-2088-C including cables
specified by the manufacturer. Otherwise, degradation of the performance of
this equipment could result.
Technical description
1. All necessary instructions for maintaining BASIC SAFETY and ESSENTIAL
PERFORMANCE with regard to electromagnetic disturbances for the excep-
ted service life.
2. Guidance and manufacturer’s declaration - electro-magnetic emissions and
Immunity
Safety information
The signs below might be in the user manual, labeling, or other components.
They are the requirement of standard and using.
Symbol for “THE OPERATION
GUIDE MUST BE READ”
Symbol for “MANUFACTURER”
Symbol for “SERIAL NUMBER”
Symbol for “TYPE BF APPLIED
PARTS”
Symbol for “DIRECT CURRENT”
Symbol for “ENVIRONMENT
PROTECTION - Electrical waste
products should not be disposed of
with household waste. Please recycle
where facilities exist. Check with your
local authority or retailer for recycling
advice”
For indoor use only
Symbol for “Class II Equipment”
SN
Symbol for “Recycle”
Guidance and manufacturer’s declaration - electromagnetic emissions
RF emissions
CISPR 11
RF emissions
CISPR 11
Group 1
Class [ B ]
Class A
Comply
Compliance
Harmonic emissions
IEC 61000-3-2
Voltage fluctuations /
flicker emissions
IEC 61000-3-3
Emissions test
FCC statement
This device complies with Part 15 of the FCC Rules. Operation is subject
to the following two conditions: (1) this device may not cause harmful
interference, and (2) this device must accept any interference received,
including interference that may cause undesired operation.
If for any reason you are unsatisfied with our product,
feel free to reach out to iProven directly. We offer a
refund or will replace the product for free within 100
days from your purchase.
Contact us: support@iproven.com
DISTRIBUTED BY
NETDIRECT DISTRIBUTION, LLC 9360 Federal Blvd
Federal Heights, CO 80260, USA
Phone: 1-503-974-0913
NOTE: If the product still does not work, contact our Customer Service.
Under no circumstance should you disassemble or attempt to repair the
unit by yourself.
PROBLEM SYMPTOM CHECK THIS REMEDY
No power
High Battery
Low Battery
Error
message
Display can
not light up.
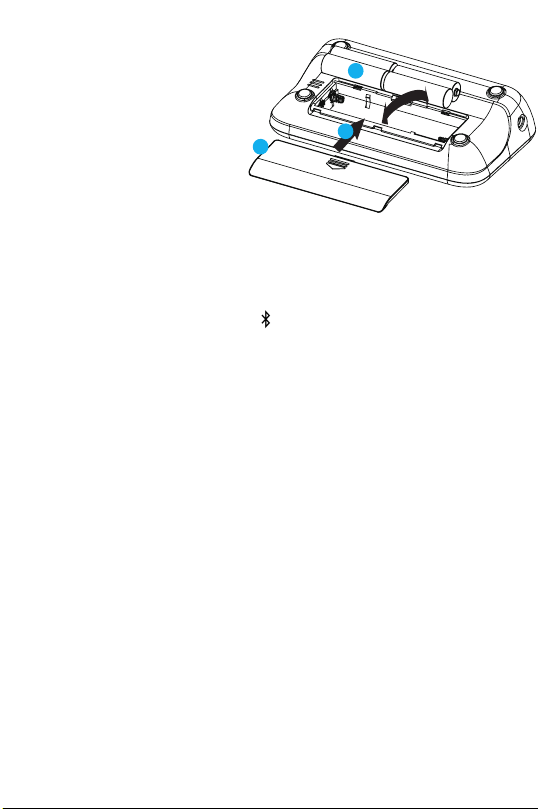
Batteries are depleted. Replace with new batteries.
Insert the batteries
correctly.
Replace with new batteries.
Batteries are inserted
incorrectly.
bAt Lo shows The battery is too low.
E 1 shows
E 3 shows
E 4 shows The measurement
failed.
Adapter is inserted
incorrectly.
Insert the AC adapter
correctly.
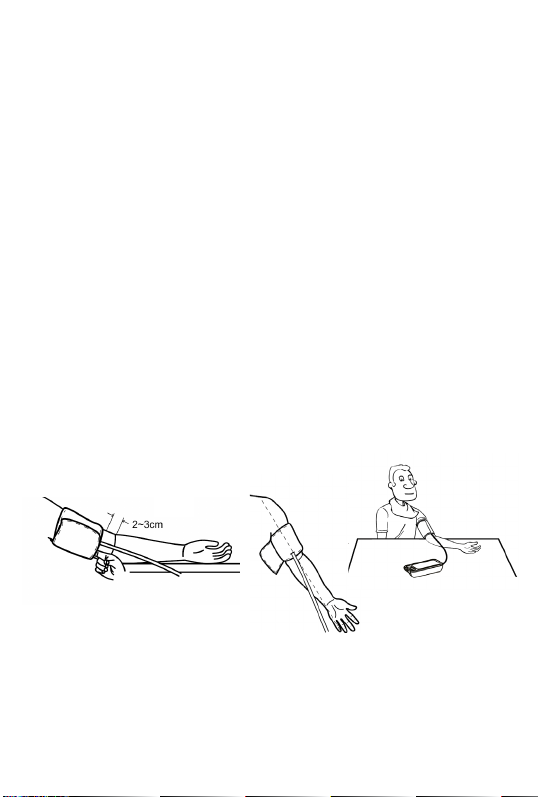
The cuff is not wrapped
or wrapped incorrectly,
or the cuff air plug is
loose.
Refasten the cuff and insert
air tube plug correctly then
measure again.
Relax for 5 minutes. and
then keep still, measure
again.
Relax for 5 minutes and
measure again.
Pulse is not detected
during measuring.
Loosen the clothing on the
arm and measure again.
Warning
message
Relax for a moment and
then measure again. If the
problem persists, contact
your physician.
out shows Out of measurement
range
EEx shows Hardware error
(X can be some digital
symbol, such as 1, 2, 3,
etc.)
Turn off monitor and
measure again. If EEx still
appears on the display,
please contact the retailer
or our customer service.
Err & Usb
shows
Adapter error
bAt H shows The battery is too high. Replace with new batteries.
Replace with the authorized
adapter.
Excessive body motion
(such as shaking of the
arm with the cuff on)
or weak Pulse is
detected.
E 2 shows
Approx.325g (Excluding the batteries and cuff)
A01
5V 1A
Battery powered mode:
AC adaptor powered mode:
(Please only use the recommended AC
adaptor model).
Type BF applied part
WARNING: No modification of this equipment is allowed.
Power supply
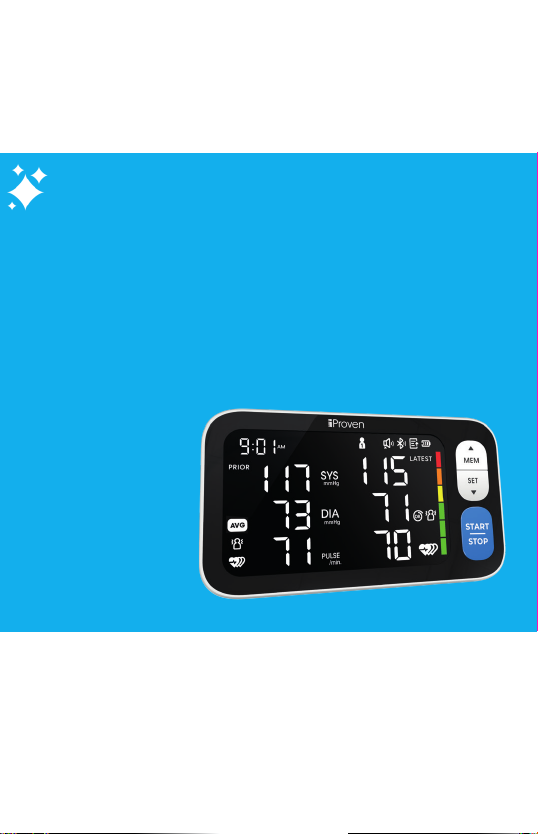
Display mode
Measurement mode Oscillographic testing mode
Measurement range
Measurement perimeter
of the upper arm
Weight
External dimensions
Attachment
Mode of operation Continuous operation
Degree of protection
Protection against
ingress of water
Accuracy
Normal working condition
Storage & transportation
condition
Software Version
Pressure:
5℃-40℃within±3 mmHg
Pulse value:±5%
Rated cuff pressure:
0mmHg~299mmHg
Measurement pressure:
SYS: 60mmHg~230mmHg
DIA: 40mmHg~130mmHg
Pulse value: (40-199)beat/minute
Device Classification Battery Powered Mode:
Internally Powered ME Equipment
AC Adaptor Powered Mode: Class II ME Equipment
A temperature range of :+5°C to +40°C
A relative humidity range of 15% to 90%,
non-condensing, but not requiring a water vapour
partial pressure greater than 50 hPa
An atmospheric pressure range of :
700 hPa to 1060 hPa
Temperature:-20°C to +60°C
A relative humidity range of ≤ 93%, non-condensing,
at a water vapour pressure up to 50 hPa
About 22 cm ~ 32 cm, 22 cm ~ 42 cm
IP21 It means the device could protected against
solid foreign objects of 12.5mm and greater, and
protect against vertically falling water drops.
Out
Copyright
iProven owns and reserves the rights comprised in the copyright of
this document. No part of this document may be changed, copied,
reproduced, or imitated in any form or by any means without the
prior written consent of iProven. All statements, information, and
recommendations in this document are provided “AS IS” without
warranties, guarantees or representations of any kind, either
express or implied. The information in this document is subject to
change without notice. iProven reserves the right of final interpreta-
tion of this document.
Warranty
This Limited Warranty covers any defects in materials or work-
manship under normal use during the Warranty Period. iProven will
either replace the product or repair the product at no charge, using
new or refurbished replacement parts. The Warranty Period of this
iProven product is 5 years from the date of purchase. A replace-
ment product or product part assumes the remaining warranty
of the original product purchase. This Limited Warranty does not
cover batteries and packaging, nor any problem that is caused by
conditions, malfunctions, or damage not resulting from defects in
material or workmanship.
Date and Country
of manufacture
Caution: These notes must be
observed to prevent any
damage to the device.
Guidance and manufacturer’s declaration – electromagnetic Immunity
Immunity Test
±8 kV contact
±2 kV, ±4 kV, ±8 kV, ±15 kV air
±8 kV contact
±2 kV, ±4 kV, ±8 kV, ±15 kV air
±2 kV for power supply lines
±1 kV signal input/output
100 kHz repetition frequency
±2 kV for power supply lines
Not Applicable
100 kHz repetition frequency
±0.5 kV, ±1 kV differential mode
±0.5 kV, ±1 kV, ±2 kV common mode
±0.5 kV, ±1 kV differential mode
Not Applicable
30 A/m
50 Hz / 60 Hz
30 A/m
50 Hz / 60 Hz
NOTE U
T
is the a.c. mains voltage prior to application of the test level.
Compliance level
Electrostatic
discharge (ESD)
IEC 61000-4-2
Power frequency
magnetic field
IEC 61000-4-8
Voltage dips, short
interruptions and
voltage variations
on power supply
input lines
IEC 61000-4-11
Electrical fast
transient/burst
IEC 61000-4-4
Surge
IEC61000-4-5
IEC 60601-1-2
Test level
0% U
T
; 0,5 cycle. At 0°, 45°, 90°, 135°,
180°, 225°, 270° and 315°.
0% U
T
; 1 cycle and 70% U
T
;
25/30 cycles; Single phase: at 0°.
0% U
T
; 250 / 300 cycle
0% U
T
; 0,5 cycle. At 0°, 45°, 90°, 135°,
180°, 225°, 270° and 315°.
0% U
T
; 1 cycle and 70% U
T
;
25/30 cycles; Single phase: at 0°.
0% U
T
; 250 / 300 cycle
Conduced RF
IEC61000-4-6
3 V
0,15 MHz – 80 MHz
6 V in ISM and amateur radio bands
between 0,15 MHz and 80 MHz
80% AM at 1 kHz
3 V
0,15 MHz – 80 MHz
6 V in ISM and amateur radio bands
between 0,15 MHz and 80 MHz
80% AM at 1 kHz
10 V/m
80 MHz – 2,7 GHz
80% AM at 1 kHz
10 V/m
80 MHz – 2,7 GHz
80% AM at 1 kHz
Radiated RF
IEC61000-4-3