iQube V3 User manual

User Manual

Important Product Information
Please read this manual and all instructions carefully before use, to avoid any possibility of
injury.
Limited warranty
Qables warranty is limited. Qables warrants the original purchaser that under normal conditions
and use this product is free of material and/or production faults for the period of 1 (one) year
after the date of purchase. The receipt or original purchasing invoice is the proof and should
always be shown to be able to claim any rights to this warranty.
To claim warranty please refer with the original, dated proof of purchase to the sales channel or
shop were you have bought this product or for direct on-line sales please refer to the iQube
website www.i-qube.nl and follow the instructions mentioned under the chapter ‘warranty’.
Mis- or abuse do not in any way fall under any warranty rights. This is to the sole discretion of
Qables.
If you have any questions or if you need any instructions please contact your dealer where you
have bought the product or for direct on-line sales go to www.i-qube.nl.
Disposal of waste electrical equipment
Disposal of waste electrical equipment may be regulated in your country. It is your responsibility
to comply with the applicable law and restrictions of household waste.
iQube and headphones
The iQube is a portable amplifier to be used with all kind of music sources such as an mp3 player
CD player or music servers and to be used with headphones. The iQube can play loud enough to
permanently damage your hearing. To protect your hearing when using the iQube and/or head-
phones always abide the following general rules:
Even low volumes can damage your hearing when you are listening for many hours.
Also replacement- or other headphones may play louder than those originally delivered with your
on turning the volume slowly up to an acceptable volume.
iQube V3 user instructions
The iQube V3 is designed to work with chargeable batteries only. The batteries are non-user
replaceable. Opening the unit by non-qualified persons will void the manufacturer’s warranty.
DO NOT install non-chargeable batteries and connect the unit either to USB or a charger/wall
adapter. This will cause injury. Non-chargeable batteries may explode when charged.
The iQube will not work properly when there are no batteries installed. Batteries must always be
installed for a proper functioning!
Controls
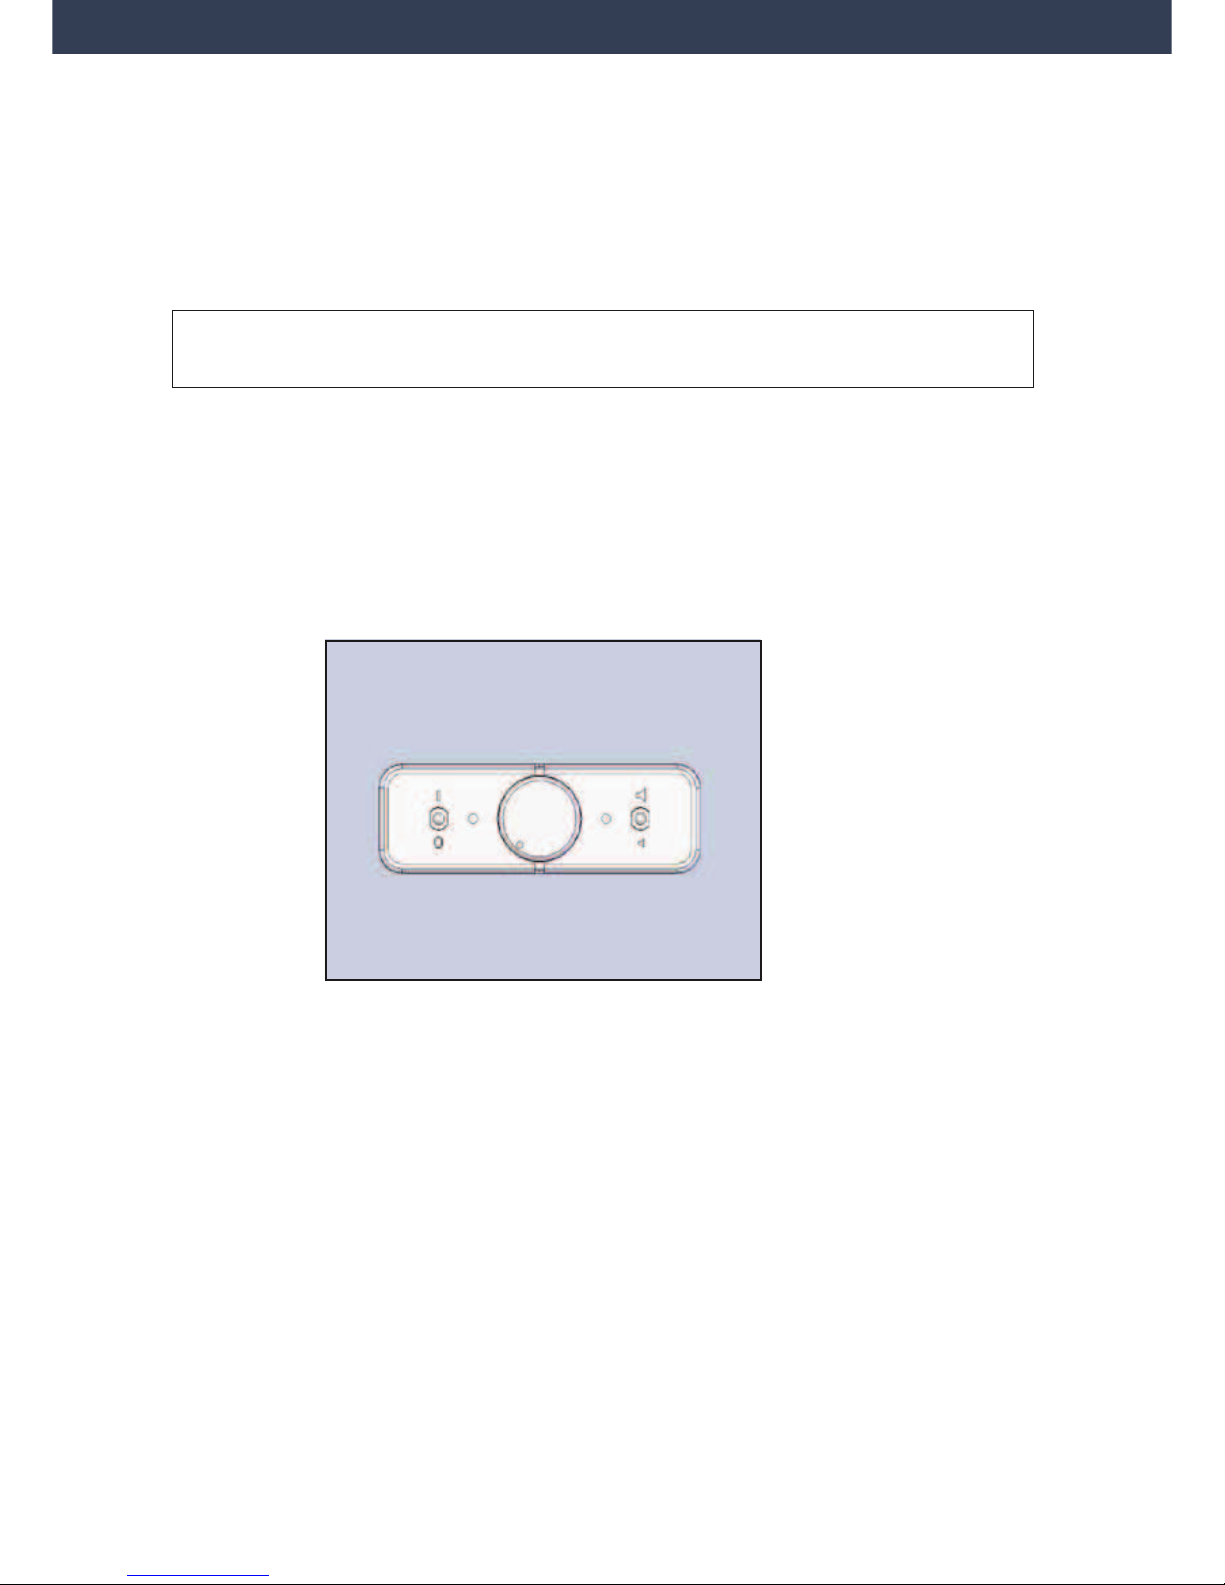
FIG 1
Front view
Controls from the left to the right:
ON/Off Switch:
Power LED I:
This LED indicates power on.
This LED is also used to indicate a lock with a digital signal.
Once a link has been established it will blink for about 20 second. It will then start to burn
continuously again.
Volume:
This controls the volume output of the iQube. Turn fully counter clockwise for reducing the volume
to zero. Turn clockwise to increase the volume.

Charge LED II:
The green LED next to the gain switch indicates the status of the charging.
The status will ONLY show if the unit is switched ON.
If the unit is switched OFF this LED will NOT show a status but charging will take place.
Fully lit and blinking: The batteries are nearly empty and must be charged;
Gradually dimming: The charge in the batteries is increasing as the LED dims;
Very dimly lit: The main charging has finished and the iQube is dripple charging the batteries;
Out (while switched ON): There is no charger connected to the iQube or charging has been
completed. The unit cannot operate properly when connected to a charger
without batteries installed!
Gain switch:
The iQube’s gain can be adjusted between High- and Low gain to accommodate the use of differ-
ent impedance headphones.
Low gain is typical for low impedance headphones and High gain is typical for high impedance
headphones.
FIG 2
Rear view
Connection terminals from the left to the right:
Input:
This is to connect an analogue input source, for example a mp3 player or a CD player.
3.5mm jack input:
This is a 4-pole input jack.
A 3-pole analogue jack will connect an analogue input source, for example a mp3 player or a CD
player. An accessory cable 4-pole mini jack to female cinch is provided with the iQube V3 to
connect a digital coaxial SPDIF input signal to the iQube V3. The iQube will automatically detect
a digital signal and switch from analogue to digital input. To indicate a lock with the digital
signal the ON/OFF LED on the front will blink for about 10 seconds.

Micro switch 3-position, input selection switch:
This switch serves to select between the three inputs 3.5mm input, USB input or Optical SPDIF
input.
Top position: 3.5mm jack input selected
Mid position: mini USB input selected
Bottom position: Optical SPDIF input selected
Mini USB digital- and charge input:
This is to connect your unit to the USB output of a computer or laptop.
To indicate a lock with the digital signal the ON/OFF LED on the front will blink for about
10 seconds.
The unit can be charged continuously while any input is selected.
Charging will also continue while the unit is switched OFF although the charging LED will
be out when the unit is switched OFF.
Please allow for overnight charging to reach maximum charged batteries.
You can also use this input to only charge the unit by using the same cable and connect it to a
wall adapter having a USB charger output.
Do not connect the unit to any other source then an USB output or a USB wall charger
as this may cause harm to the unit.
Optical SPDIF input:
This is to connect a digital SPDIF input by means of an optical cable, JEITA Standard CP−1212n
(Toslink fiber optic cables)
To indicate a lock with the digital signal the ON/OFF LED on the front will blink for about 10
seconds.
Output:
A 3.5mm 3-pole jack to connect your headphones.
Table of contents


