9
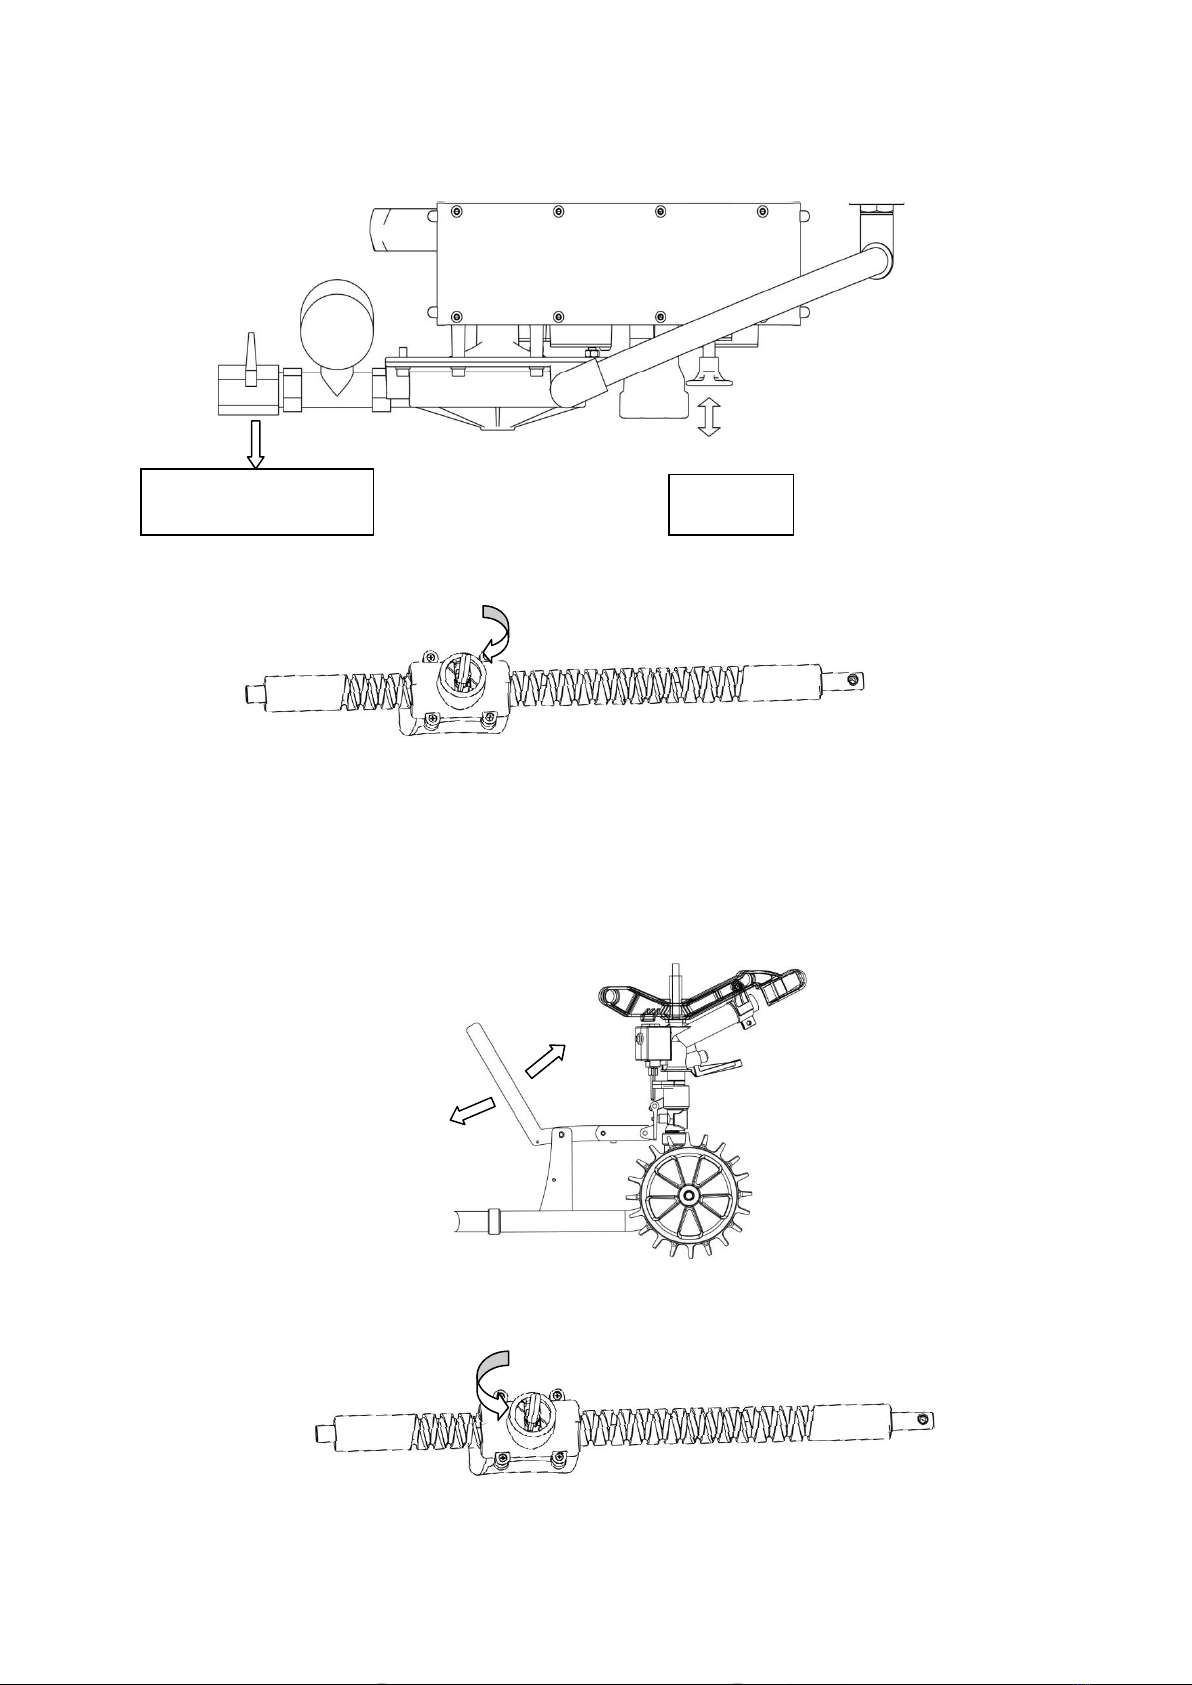
Step 6: Push in the clutch handle and engage the clutch handle. Shift: inside is slow, outside
is fast. (1-13)
1-13
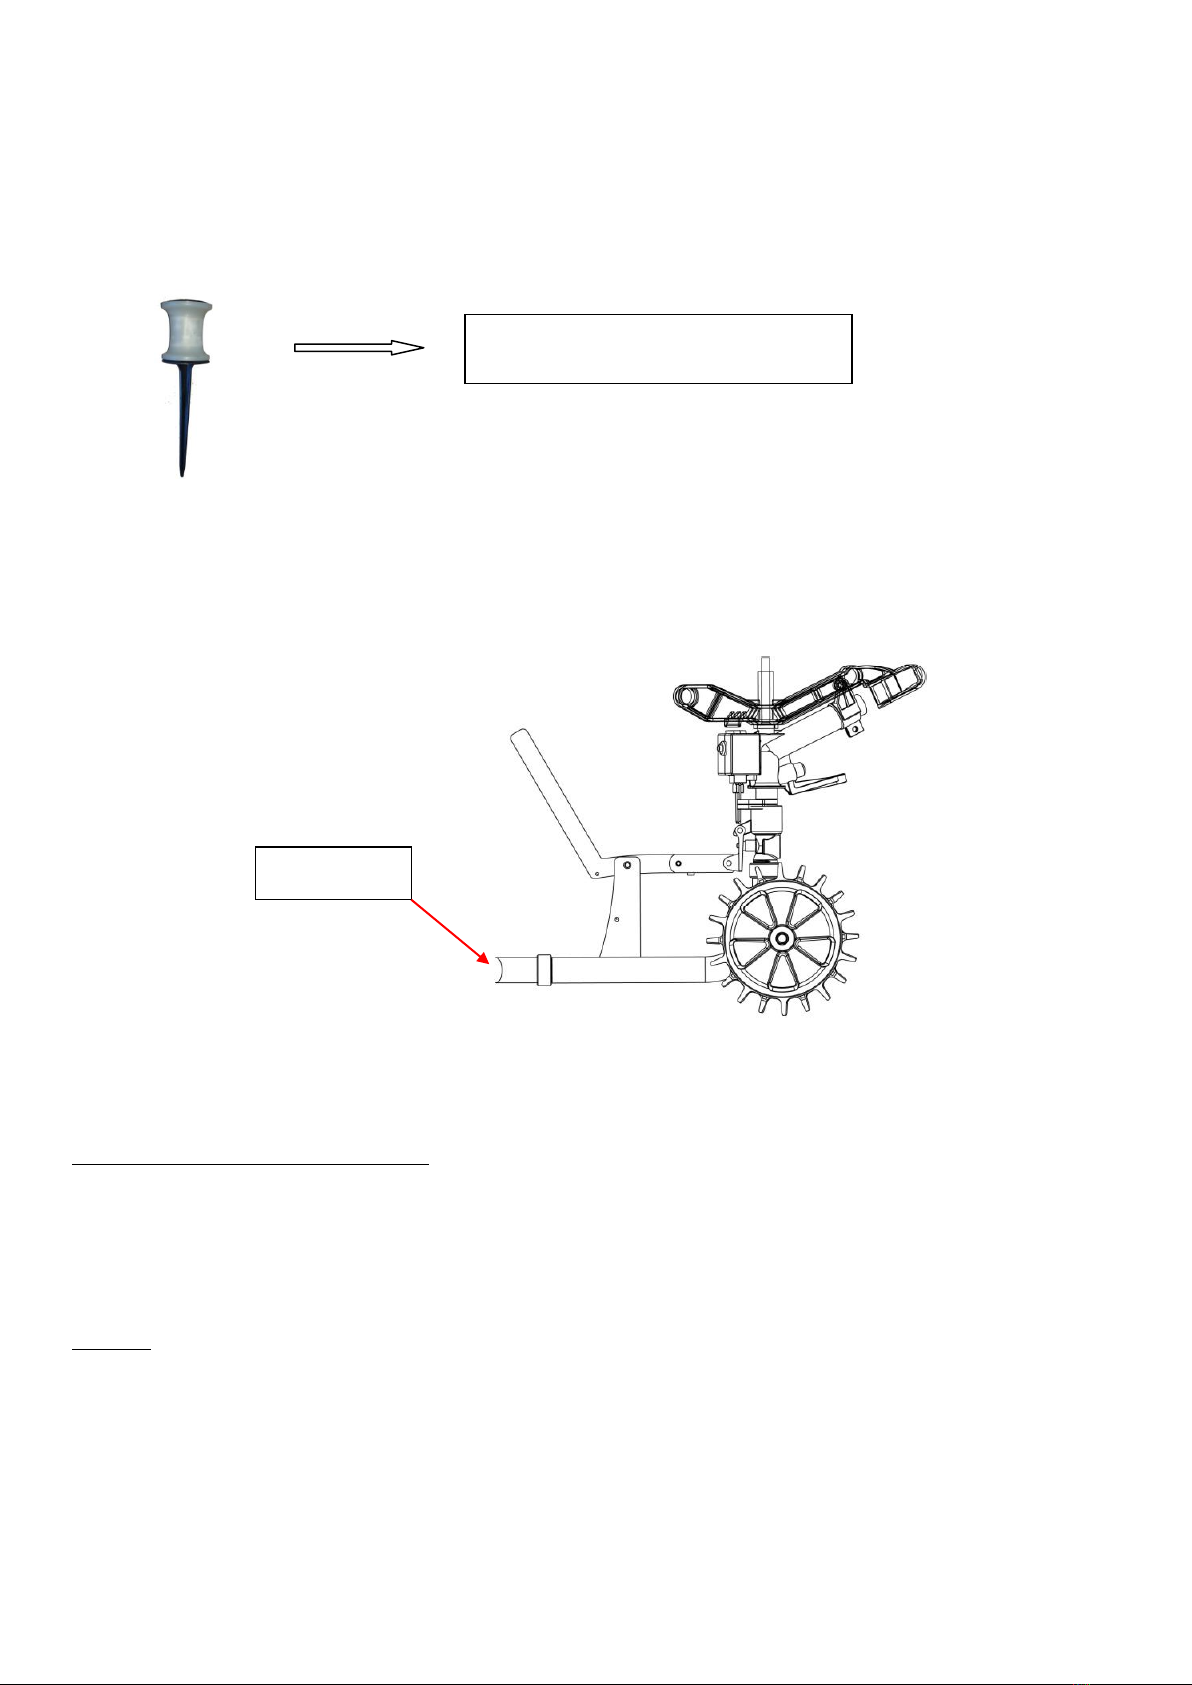
Step 7: Open the main water valve and adjust the water pressure. The sprinkler sprays, and
the water flow will drive the travelling water sprinkler to recovery the hose. The higher the
water pressure, the faster the recovery speed. When the hose fully retracted, it is
automatically shut off.
Remarks: the retractable speed will be adjusted during the watering by Hose-recovery
Speed rotator.
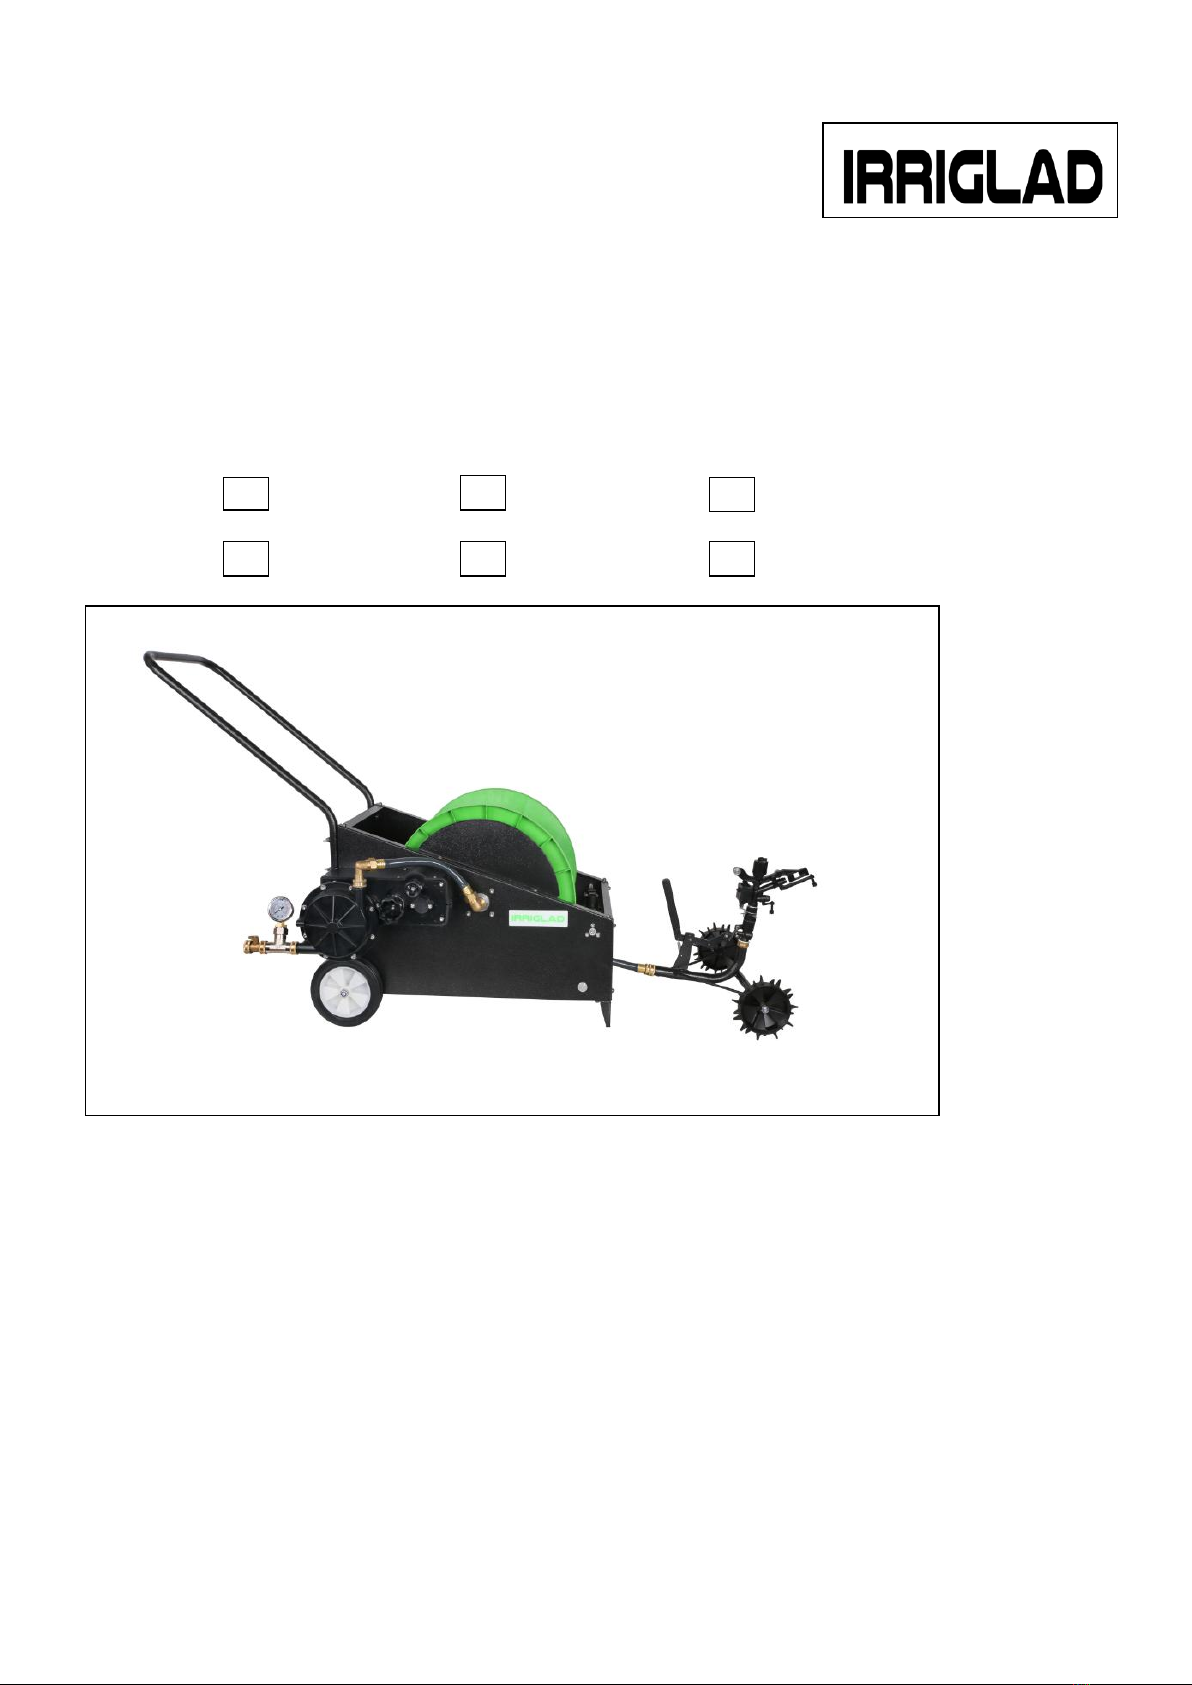
Part B:
Step 1: The fully Assembled Unit is pulled onto the lawn, and the legs are pushed into the
ground to prevent the Stationary Base Unit from moving. Connect the Stationary unit to the