Quick guide Maintenance Blood Gas Analyzer
For further detail, please refer to the operator’s manual of i-Smart 300 VET Blood Gas Analyzer.
i-SENS, Inc. www.i-sens.com 7979 Rev. 0, 2016-06
1) Before turning on the power switch, please remove the USB
memory or the network cable from the analyzer.
2) Connect the power adapter to the power port and turn on the
power switch in the back of the analyzer.
3) Once the booting is complete, the main screen will appear.
1) Open Printer cover by pressing the PUSH button located in
the top of the analyzer’s back side and place the paper roll as
shown in the picture below.
(Paper roll direction )
2) Make sure that the edge of paper is not out of the printer
output area. Close the printer cover.
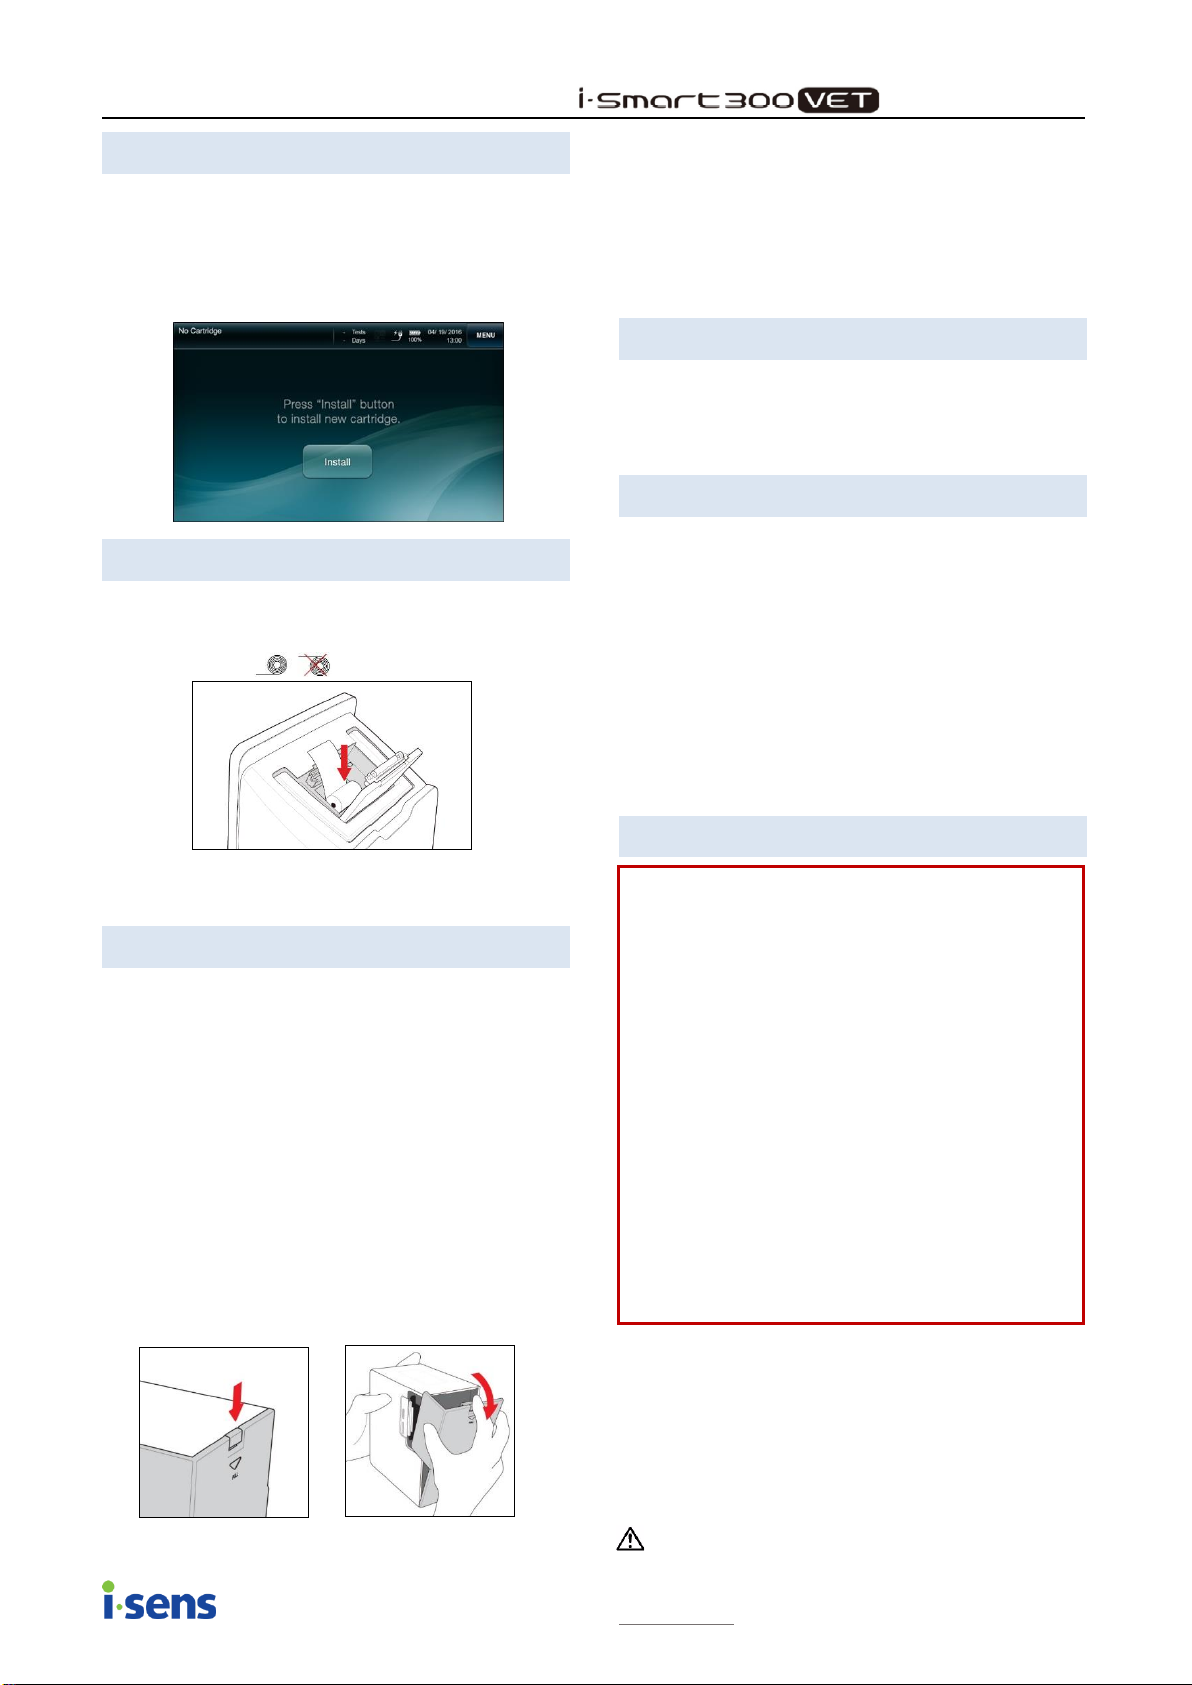
When a cartridge is expired for any of the below reasons,
Cartridge Expired screen will appear automatically.
The useful life of the cartridge has expired
Cartridge’s remaining test is 0
Analyzer has been turned off for longer than the allowed time
to restart cartridge
To remove a cartridge currently in use before expiration date,
select Menu > Remove Cartridge. Install Cartridge screen will
appear.
1) Open the cartridge door, following the instruction on the
screen. Remove the used cartridge from the analyzer.
Open the cartridge door by pressing the lever down located on
the cartridge door when you will hear ‘click’ locking sound.
2) Remove the cover of new cartridge.
3) Following the instruction on the screen, insert a new cartridge
into the analyzer.
4) Close the door and pull up the lever on the door all the way
up. You will hear ‘click’ locking sound if the door has been
closed normally
5) Once the analyzer recognizes the cartridge’s RFID information
automatically and the RFID information is valid, cartridge
Warm-Up will begin. It takes about 25 minutes to warm up the
new cartridge
If the sensor condition has a problem or there is an error in
sample result, proceed with calibration manually, following menu
operation below.
Menu → Run Cal 1 or Run Cal 2
1) Select Menu → Status → Cartridge Data to copy the cartridge
data to USB memory.
2) Cartridge Data list will display in descending order (the most
recent result on top). Check the cartridge data you want to copy
and press Copy button.
3) Insert USB memory into the USB port of analyzer.
4) Once the data copy is complete, remove the USB memory.
5) You can see copied data, connecting USB memory to PC.
Removable Disk → “Analyzer S/N_Cartridge S/N.zip”file
(ex. G10001_150430-1-1.zip)
1) Select Menu > Shutdown Analyzer. The Shutdown message
will appear.
2) Press Yes button. The auto restart will proceed.
3) Wait until restart is completed.
4) When “Turn off the analyzer” message appears, turn off the
power by pushing the power button at the rear of analyzer.
Failure to follow the shutdown instruction may result in
data loss or damage in components.
5. Download Cartridge Data
To turn off analyzer is used only for maintenance purpose
or only when the analyzer is not used for long time.
The cartridge cannot be removed while the power is turned
off or during the shutdown process.
Although the power is turned off while using a cartridge,
cartridge can be restarted if the analyzer is rebooted on
following cases:
The analyzer was in Ready state or in process of calibration
when the power was interrupted and the power returns
within 1 hour.
The analyzer was analyzing a sample when the power was
interrupted and the power returns within 20 minutes.
Less than 1 hour from the power turned off during the
QC measurement.
Cartridge Restart normally takes about 10 minutes.


