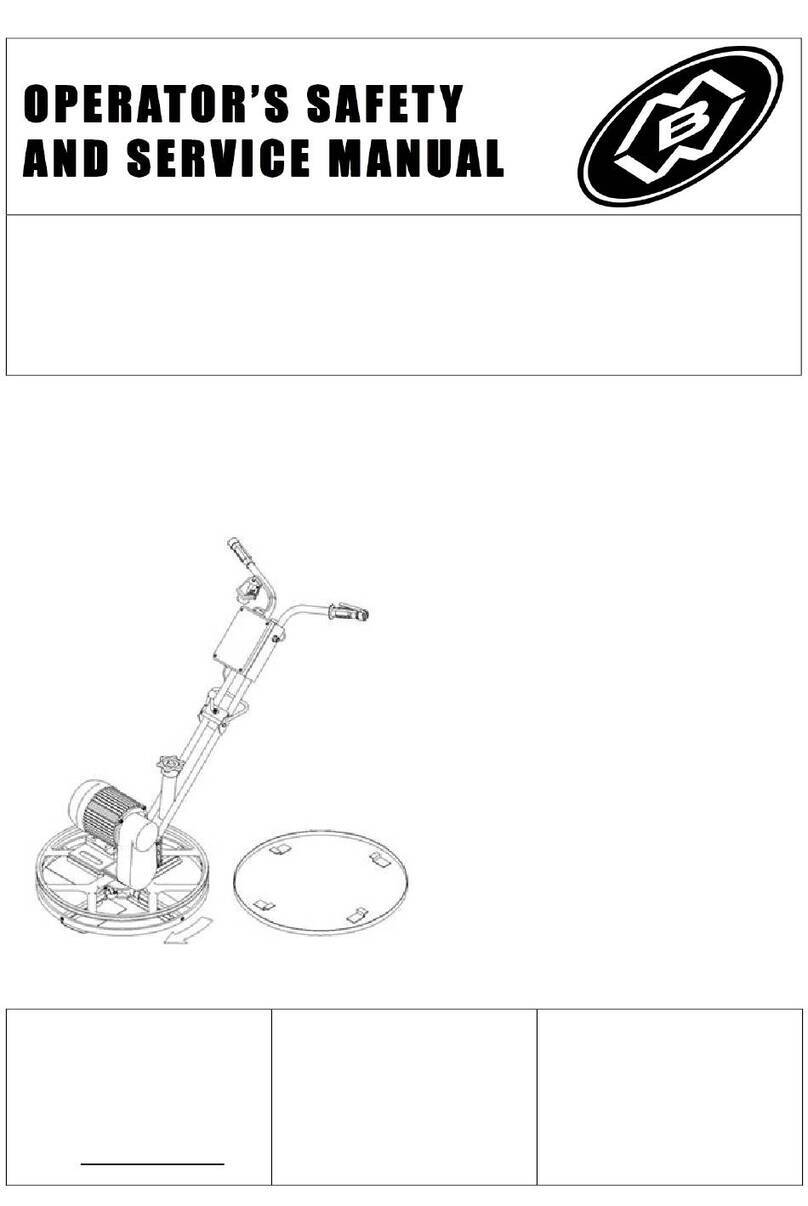
Isoplam L030002 User manual

1
CONCRETE POWER TROWEL L030002
USER MANUAL AND SPARE PARTS LIST

2
Business Man Manual –Parts book
Isoplam s.r.l.
Building and road equipments
Address:
Via E.Mattei, 4
31010 Maser (TV) Italy
Phone 039 0423 925023
Fax number 039 0423 926119
E-mail: [email protected]
Web: www.isoplam.it
CONCRETE POWER
TROWEL L030002
SERIAL NUMBER …………….

3
1. General precaution’s
2. Machine’s presentation
3. Machine’s identification
4. Instructions for the unpack of the machine
5. Instructions for the machine installation
6.Mounting and dismounting of the blades and
smoothing plate
7. Security working instructions
8.Working
9.Controls before starting
10. Starter
11. Instructions for use
12. Stopping
13. Maintenance
14. Guide to the search of anomalies and remedies
15. Transport
16. Technical data
17. Spare parts list
18. CE European Conformity Declaration

4
Introduction
Isoplam thanks to have purchased the L030002 Power Trowel. This manual must be considered
an integral part of the machine and it must follow every stage of sale until the last user.
Every machine is perfectly checked before it leaves the factory.
Warning!
THIS SYMBOL WILL BE USED EVERY TIME THERE IS A PARTICULAR
DANGER FOR THE USER.
Warning!
TO READ CAREFULLY THIS USER MANUAL
This manual has been written in order to help the user for the correct use of the
machine, to explain the safety norms in force in the European Community and to
eliminate the possible risks for a wrong use.
This machine must be utilised only at the use for which has been designed and that is
for the levelling and finishing of the concrete floors.
Every other use is considered
improper and dangerous.
Consequently the manufacturer not is responsible for possible damages at persons or at
things coming from improper and wrong uses made on the same machine.
In addition, at these norms, please observe the safety instructions into force in the
building sites and in the workshops.
The ISOPLAM S.r.l. can make any modifications or improvements to its products
manufactured, without to inform the users in advance.
Warning! IT IS FORBIDDEN TO REPRODUCE ANY PART OF THIS USER MANUAL.
To contact our Zone Dealer more near to You or our Assistance Service
Department for any questions or problems you need.
ISOPLAM S.R.L.
Via E.Mattei, 4 –31010 Maser (TV) ITALY
tel. : 039 0423 925023 Fax : 039 0423 926119
Email : info@isoplam.it
WEB: www.isoplam.it

5
Instructions for use the L030002 Power Trowel
1. General precaution’s
·Warning! To move away the children from the job area. When the job is
completed please to put the machine in a safe place.
·The Isoplam Trowels are started with gasoline, diesel and electric motors and they
give the most safety if they are used according to the instructions. To read
carefully this user manual before starting the machine. A misuse can cause
damages to persons and the equipment.
·The buyer must entrust the use of this machine only to adults, who are both
physically and mentally suitable. He must make sure that these persons are able
to use correctly the machine.
·The Trowels can be started only if all performances and safety norms into force
are observed.
·The persons who work with these machines must know all safety norms for the
use.
·The use of this machine can expose the operator to a level of the superior noise to
the 85 dB (A). In fact, the resonant power of this machine is equal to the 101 dB
(A); whereas the emission level of sound pressure in the operator position is equal
to the 101 dB (A). Consequently, the users who use this machine must use all
protection accessory, as for example the crash helmet and stoppers for hearing
(D.L. 9 April 2008 n°81).

6
2. Machine’s presentation
·The ISOPLAM TROWEL is used to smooth the concrete backgrounds, prefabricated
panels and for small and large industrial flooring.
·To use 4 floating blades to level the floor or the smoothing plate (only in the LS60 and
L030002 versions).
·The finishing work can be started immediately after at job of levelling. In the winter,
when the climate is damp or cold, it is necessary to increase waiting time for the finish
smoothing.
·The essential controls have been put on the guide rudder for the user, so that the
ISOPLAM TROWEL is very easy to manipulate. The excellent balancing allows
without to strive the correct working.
·The rudder is adjustable to height, so that the operator can work in a more
comfortable position or to facilitate the transport, reducing the encumbrance.
·The handle is part of the safety device, which when realest will turn of the motor.
·The inclination of the four blades with the flooring surface is adjusted by a wheel that
is situated at the centre of rudder.
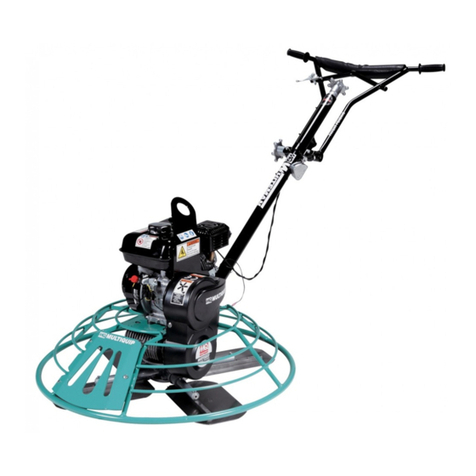
·THE MACHINE IS EQUIPPED OF THE FOLLOWING PARTS: (see the picture 01)
1. Security lever;
2. Wheel or lever for blades adjustment;
3. Handle;
4. Guide rudder;
5. Motor guard;
6. Belts guard;
7. Finishing or combination blades;
8. Cruise;
9. Pivots for blades;
10. Floating blades;
11. Circle of protection;
12. Motor plate;
13. Recoil starter of the motor;
14. Wheel to regulate the guide rudder;
Picture 01

7
3.Machine`s Identification
All the necessary data to identify the machine are on the nameplate “A”(see the picture 02)
situated on belts guard “B”.
4.Instructions for the unpack of the machine
The accessories supplied to the buyer with the machine are the following:
N. 01 USER MANUAL, SPARE PARTS LIST AND EUROPEAN CONFORMITY DECLARATIONS.
N. 01 TESTS AND WARRANTY CERTIFICATES
N. 01 PLASTIC ENVELOPE WITH N.17 KEY FOR THE MOUNTING AND DISMOUNTING OF THE BLADES
To execute with caution the outside packing elimination, so to avoid any damage to the
machine, above all at the rubber pipes and at the electrical connections.
5.Instructions for the machine installation
·The machine arrives completely mounted; it is ready for the use.
·The ISOPLAM TROWEL is delivered to the buyer full of fuel in the motor and in
the reduction gear, ready for the use.
·To loosen the joint wheel “C”(see the picture 03). To regulate the handle height
and to tighten the wheel “C”.
Picture 02 Picture 03

8
6. Mounting and dismantling blades
and smoothing plate
·Warning! To manipulate carefully the blades to avoid damages and lesions.
It is obligatory to use the protection gloves against cuts.
·To switch off the motor (to disconnect the socket from the electric system).
·Warning! To verify the springs connection "A" in the mounting of floating
blades and of smoothing plate, to avoid damages to the user (see the picture 04).
·To loosen the tightening screws “B”with the proper key in the mounting of the
finishing and of the combination blades (see the picture 05).
·To clean the blades pivots and the blades.
7. Security working instructions
·The work place must be perfectly in order without risks and well-lit.
·Warning! To remove the foreign persons from the neighbourhoods, before to
begin the levelling work.
·To wear always all proper protections, which spectacles, leather gloves, close-
fitting clothes, helmet and proper footwear to protect oneself against the sparks
and splinters of materials during the work.
·In case of job in the places closed: like rooms, galleries, etc…To make sure that
there is sufficient air for the health, because the exhaust gas contain the carbon
monoxide (they can cause a consciousness leak and be mortal).
·It is forbidden the use of machine in the places exposed to the explosions or with
dangerous products in the neighbourhoods.
Picture 04 Picture 05

9
8. Working
·To move backwards and forwards the machine at circular arches in the
longitudinal direction of the floor.
·It recommend itself to keep away from the surface just worked, moving itself at
small footprints.
·THE LEVELLING CAN BE MADE GENERALLY IN TWO PHASES:
ØThe FLOATING JOB: it is the hand finishing with a wooden tool. It becomes
a flat surface, without due irregularity to the concrete flowing.
ØThe FINISHING WORK: it is the hand finishing with a metal tool. It becomes
a perfect flat and uniform surface.
·With the machine complete of floating blades executes itself the FLOATING JOB.
You can start when the concrete hardened, so that it is possible to walk over
without leaving the too evident footprints. It is possible to make this operation with
a good yield, using also smoothing plate.
·If it forms itself a concrete roll around at the diameter of the blades rotation, this
means the working has been started too soon.
·To not stay long in the same place to not cause potholes of the machine.
·The FINISHING JOB follows the FLOATING JOB using only the finishing or the
combination blades, it is possible to start the FINISHING JOB when from the
concrete floor every humidity trace are disappearance. To obtain a good result in
the cold or damp environments, it is necessary to increase the waiting time before
to start the FINISHING JOB. To ascertain oneself the correct moment to begin
the FINISHING JOB, it is sufficient to press the hand palm on the surface and start
when it not sticks more to the skin. To have a good finishing it is necessary to
make at least two passes. During the first passage, the blades must have a few
degrees of inclination, to not make a too strong pressure on the surface. While the
second passage must start at the latest possible, but before the concrete is
hardened, naturally increasing also the blades inclination.
·The excellent results of the levelling operations much depend on the quality of the
equipments and the ability of the user.


10
9. Controls before starting
SECTION FOR DIESEL AND GASOLINE MOTORS
·To read with attention the starting and motors maintenance instructions.
·To consider the environment of work place.
·To control the full of fuel.
·Warning! To make the refuelling with switched motor off and in a good windy
environment.
·Warning! To not fill too much the fuel tank. To avoid dropping of the fuel, in
particular the gasoline, during the refuelling on the motor hot parts and on the
parts that can damage oneself.
·Warning! The gasoline is much inflammable and explosive in some
conditions. To not smoke or to not leave the free flames or the sparks in the same
place where the machine is refuelled. The vapours of the gasoline can to catch
fire. If the gasoline is fallen, to make sure that the job place is perfectly dry, before
to start the motor.
SECTION FOR ELECTRICAL MOTORS
·Warning! To verify that the feed voltage of machine is in accordance with
voltage of net (see the identity nameplate on section 3.0 of this user manual).
·Warning! It is obligatory to provide to the machine grounding.
·Warning! On all machines supplied with 400V electric motor, it is necessary
to make sure the rotation direction is that indicated by arrow on the belts guard. In
the contrary case it is absolutely forbidden the use of the machine; therefore to
contact your trust dealer or our Assistance Service Department (tel. 039 0722
59290).
·The safety device doesn’t allow the start of machine if this has stopped for sudden
want of current.
·Join forces to the mains by a feed cable of suitable section 4x4mm2or 5x4mm2
with maximum depth to 100m.
·The motor protection is insured to the magneto-thermal switch.
·To fill the water tank, but before to remember to close the faucet.

11
10. Starting
·Warning! To read with attention the instructions before starting.
·Warning! IT RECOMMEND ITSELF THE MAXIMUM ATTENTION. To remove the
keys and the possible adjustment tools. To put always the guards. To jam the
advancing wheel with the proper hook.
·To read and to follow the instructions on the user manual for the diesel and
gasoline motors starting. Therefore to continue as follows:
1. –To turn on the fuel faucet;
2. –To adjust the STARTER in the ignition position;
3. –To keep the pulled lever that is at left side of the rudder (stop device for the motor
when it leaves itself the handle that will never permit the motor starting in lowered
position (this system is usually called “
dead man
”);
4. –To slowly pull the rope starting until to find the compression resistance, to continue
to slowly pull until to just pass it (see the picture 06);
5.
–
To release the rope wrapping it up again (see the picture 06);
6. –Therefore to pull with force (see the picture 07);
IF THE MOTOR FAILS TO START, TO REPEAT ALL OPERATIONS FROM 4 POINT
·The Starter with the electric motor happens pressing the handle lever. To stop the
machine is sufficient to leave the lever. All machines equipped with electric motor
have the low voltage system.
·To use the maximum warning on the blades and plate rotation during the motor
starting or pauses and during the job of floor smoothing.
Picture 06 Picture 07

12
11. Directions
·To keep pressing the lever of safety device.
·To hold strong the handle and to keep a correct position during the smoothing
working (see the picture 08).
·The TROWEL is equipped with centrifugal clutch to transmit gradually the power
to the blades; with the motor at minimum, the four blades stay stationary,
accelerating gradually those put themselves in rotation until to reach the desired
working speed.
·To work advance happens very simply. It is sufficient to raise or to lower just the
handle to drive the machine in the desired direction.
·Warning! The user not must leave the machine and its controls during the
working.
·The user must switch off the motor in case it must leave the machine; moreover, it
must to put it in a safe place to avoid due damages at the sudden movements or
possible overturning of the machine.
Picture 08

13
12. Stopping
·To reduce the motor idling before to stop it, letting after the lever of safety device.
·To stop the motor, as indicated on the instructions of its user manual.
13. Maintenance
·Warning! It is obligatory to switch off the motor (in the electric system to turn
off also the socket).
·To lubricate on base of the use frequency, both the blades pivots and the blades
adjusting screw.
·To clean and to keep in perfect conditions the used tools.
·When the machine is not used, it recommend itself to clean the same machine
and the blades from concrete residuals and to position it in a safe place out
accessible of the children.
·To verify periodically the tightening bolts.
·The possible repairs exclusively must be made by technical skilled staff.
·An use not corrected, not original spare parts and modifications not authorised
exclude the manufacturer from every responsibility and guarantees.
·Warranty! It is obligatory to do of tests on the machine at least one time
every years by your trust dealer or by our Assistance Service Department for to
keep stable the same security level and working of the machine in the time.
·Every days before to start a job, the user must verify the efficacy of the safety
devices and controls.
·Every days, before to begin the cut must control the belts voltage. If it is
necessary, must stretch again the belts with moderation (to loosen 4 tightening
nuts of motor, to act on the belts, making attention to keep the ranged motor, until
to get a correct voltage; so to stop again).
·Every day to verify the motor oil; to replace oil like recommended from
manufacturer (see the user manual on this subject).

14
14. Guide to the search of anomalies and remedies
·Warranty! Before to make any type of operation, to switch the motor off
(diesel and gasoline system), or to disconnect the removing the socket (electric
system).
·In case of the sudden stop of the machine during the working, to verify :
-The belts voltage (they could be slack)
-The fuel’s level (diesel or gasoline)
-Presence of voltage of net (electric)
- Speed too much elevated of advance
·If the motor not starts (diesel or gasoline), to verify the fuel on its fuel tank.
·To verify and to clean the air filter, possibly to change it.
·To verify and to clean the fuel filter, possibly to change it.
·To verify the oil level, possibly to fill.
·To clean the sparking plug in the gasoline system, to verify the distance between
the electrodes (0.7mm).
·In the electric system if the motor doesn’t start, to control the feed cable. If the
thermical of the switch jumps, to verify if the feed cable is of the adequate section
and if the proper power is sufficient for the electric motor installed on the machine.

15
15. Transport
·Warranty! Before to make any type of movement, to switch off the motor
(gasoline or diesel) or disconnect the machine removing the socket (electric
system).
·Warranty! In case of lifting, to use only the point "A" of hooking (see the
picture 09).
·Warranty! The machine is moved manually of weight by two persons for the
movements in the building site, using the handle and the proper pipe “B”to
facilitate the same movements (see the picture 10).
·To put the machine correctly on the means of transport, to avoid that it can tip
over or sliding.
Picture 09 Picture 10

16
16. Technical data
·SPECIFICATIONS:
Type
Motor
Power KW
Weight Kg.
L030002
PETROL KOHLER CH270 5.2 81
L030002
PETROL HONDA GX160 4.0 78
L030002
PETROL ROBIN SUBARU EX17 4.4 80
L030002
DIESEL LOMBARDINI 15LD225 3.5 100
L030002
ELECTRIC 1PHASE 230V-50Hz 2.2 88
L030002
ELECTRIC 3PHASE 400V-50Hz 2 speed 1.85 / 2.4 96
·OUTSIDE CIRCLE DIAMETER Ø 920mm
·BLADES ROTATION DIAMETER Ø 900mm
·BLADES ROTATION SPEED 50÷110 rpm
·STANDARD ACCESSORY: 4 FINISHING OR COMBINATION BLADES ( at choice)
·MEASURES: (see the picture 11)
A B C D
L030002 1.800 x 920 x 800 x
1.020
17. Spare parts list
For every request of spare parts is necessary to write the serial number of machine and
the reference code of the spare part desired. The reference code of the spare parts is
reported on the list attached; every number indicated on the picture table corresponds at
a part of the machine. It is necessary to report the same denomination written on this list,
to avoid some possible mistakes.
Picture 11

17

18
Mechanical Rudder Page from 1 to 2
ITEM
CODE
N°
DESCRIPTION
1
2
3
4
5
6
7
8
9
10
11
12
13
14
15
16
17
18
19
20
21
22
23
24
25
26
27
28
29
DEPENDS TYPE OF
MOTOR
3002A018
3015A007
1338A008
3001A009
6001A007
2701A007
3019A010
3015A007
1601A021
1302A020
1205A076-81
3015A008
3001A082
3015A002
3019A008
3015A008
1324A002
3015A008
3019A003
3001A002
1305A074
3001A045
3019A003
1308A010
3003A001
0923A001
3001A002
2017A001
1
2
2
1
4
1
1
1
1
1
1
2
8
4
4
4
4
1
2
2
2
1
4
4
1
2
1
2
1
PETROL OR ELECTRIC MOTOR
ZINC PLATED SCREWW T.C.E.I. M6X50
LOCK-NUT M 6
MOTOR PROTECTION
ZINC PLATED SCREW T.E. M 8X35
CENTRIFUGAL PULLEY
BELT A 29
ZINC PLATED WASHER M 6X30X4
ZINC PLATED NUT M 6
MECHANICAL RUDDER
CIRCLE’S PROTECTION
FIXING BRACKET FOR CIRCLE
ZINC PLATED AND LOW NUT M 8
BURNISHED SCREW T.E. M 12X35
LOCK-WASHER D.12
ZINC PLATED AND LEVEL WASHER D. 8X17X1.6
ZINC PLATED AND LOW NUT M 8
FORK
ZINC PLATED AND LOW NUT M 8
ZINC PLATED LEVEL WASHER D.8
BURNISHED SCREW T.E. M8X20
FIXING BRACKET FOR PROTECTION
ZINC PLATED SCREW T.E. M8X16
ZINC PLATED AND LEVEL WASHER D.8
CARTER TO COVER BELTS
RIVET IN ALLUMINIUM METAL
IDENTIFICATION NAMEPLATE
BURNISHED SCREW T.E. M8X20
CLAMP

19
Mechanical Rudder Page from 2 to 2
ITEM
CODE
N°
DESCRIPTION
30
31
32
33
34
35
36
37
38
39
40
41
42
43
44
45
46
47
48
49
50
51
3023A008
0722A019
2022A001
2020A002
2022A001
2023A004
2023A001
2020A001
2024A007
3023A009
2002A020
2901A001
0814A001
2024A004
2023A007
2023A007
2023A007
2023A007
2801A001
3019A010
2002A020
3001A106
1
1
1
1
1
1
1
1
1
1
1
1
1
1
1
1
1
1
1
1
1
1
ELASTIC PLUG D.6X30
PULLEY
ENDS-SHEATH D. 8
SHEATH’S PROTECTION
ENDS-SHEATH D. 8
CLOSED HANDLE D.25
ACCELERATOR HANDLE
SHEATH’S PROTECTION
ACCELERATOR PIPE
ELASTIC PLUG
HAND-WHEEL D.90 M16 (LOOPING HOLE)
BEARING 51103
SCREW TO ADJUSTING BLADES
STEEL CABLE TO ADJUSTING BLADES
HANDLE
OPENED HANDLE D.25 (WITH DOSSIER)
COMPLETE SAFETY DEVICE FOR PETROL MOTOR
ELECTRIC WIRE L=2700+SHORT RUBBER WASHER
SPRING
ZINC PLATED WASHER D.16
HAND-WHEEL D.90 M16
BURNISHED SCREW T.E. M16X110

20
Table of contents
Other Isoplam Trowel manuals