Stone CF24E User manual

OPERATOR MANUAL
MODELS: CF24E, CF364, CF464, CF484
4 Blades
POWER TROWEL
A 100% employee-owned American manufacturer
REVISION: E 2/2003 P/N 56353


- 3 -
TABLE OF CONTENTS ............................................................................................ 3
FOREWORD .............................................................................................................. 4
LIMITED WARRANTY ............................................................................................. 5
TECHNICAL DATA .................................................................................................. 6-10
Specific tions .............................................................................................................. 6
Torque Ch rt - Imperi l ............................................................................................... 7
Torque Ch rt - Metric..................................................................................................8
H rdw re Identific tion .............................................................................................. 10
HEALTH & SAFETY .................................................................................................11-13
S fety Tr ining ............................................................................................................11
S fety Prec utions ....................................................................................................... 12-13
INTRODUCTION ....................................................................................................... 14-17
Intro ............................................................................................................................. 14
Oper ting Principle .....................................................................................................14
Delivery Checks ..........................................................................................................14
Before St rting ............................................................................................................ 14
Determining the Right M chine .................................................................................. 14
St nd rd Fe tures ........................................................................................................ 15
Prep r tion for Service ................................................................................................ 15
Loc tion nd Use of Controls .....................................................................................16
Adjust Tilt Lock Nut ................................................................................................... 17
OPERATIONS............................................................................................................. 18
To St rt ........................................................................................................................18
To Shut Off .................................................................................................................. 18
Initi l Oper tion .......................................................................................................... 18
Flo ting Oper tion ...................................................................................................... 18
Finishing Oper tion .....................................................................................................18
MAINTENANCE ........................................................................................................ 19
M inten nce, Lubric tion nd Adjustment .................................................................19
Lubric tion .................................................................................................................. 19
Trowel Ge rc se ..........................................................................................................19
Arm Be ring ................................................................................................................ 19
CALIFORNIA PROPOSITION 65 ............................................................................. IBC
MANUFACTURED UNDER ONE OR MORE OF THE FOLLOWING PATENTS AND OTHERS
PENDING, 4046483, 4232980, CAN.-1131361
DYNA-CLUTCH is tr dem rk of the M nuf cturer.
Table of Contents CF Power Trowel

- 4 -
Foreword
User Information
These instructions include:
Safety regulations
Operating instructions
Maintenance instructions
These instructions have been prepared for operation
on the construction site and for the maintenance
engineer.
These instructions are intended to simplify operation of
the machine and to avoid malfunctions through im-
proper operation.
Observing the maintenance instructions will increase
the reliability and service life of the machine when used
on the construction site and reduce repair costs and
downtimes.
Always keep these instructions at the place of use of
the machine.
Only operate the machine as instructed and follow
these instructions.
Observe the safety regulations as well as the guide-
lines of the civil engineering trade association.
Observe safety rules for the operation of equipment
and the pertinent regulations for the prevention of
accidents.
Stone Construction E uipment, Inc. is not liable for the
function of the machine when used in an improper
manner and for other than the intended purpose.
Operating errors, improper maintenance and the use of
incorrect operating materials are not covered by the
warranty.
The above information does not extend the warranty
and liability conditions of business of Stone Construc-
tion E uipment, Inc.
Stone Construction quipment, Inc.
P.O. Box 150, Honeoye, New York 14471
Phone: (800) 888-9926
Fax: (585) 229-2363
Please enter the following data. This will help
expedite any service or warranty work.
1. Machine Type:__________________________
Machine S/N: __________________________
2. Engine Type: ___________________________
Engine S/N: ____________________________
3. VIN: _________________________________
4. Purchase Date:__________________________
5. Dealer/Distributor Information:
Name: ________________________________
Address:_______________________________
______________________________________
Phone #:_______________________________
Fax #: _________________________________
6. Battery
Manufacturer:___________________________
Battery Type: ___________________________
Battery S/N: ____________________________
Location of above information:
1. Information on S/N tag.
2. Information on engine tag.
3. Information on S/N tag - if applicable.
4. Date you purchased machine.
5. Dealer machine was purchased from.
6. Information on battery and battery warranty card.

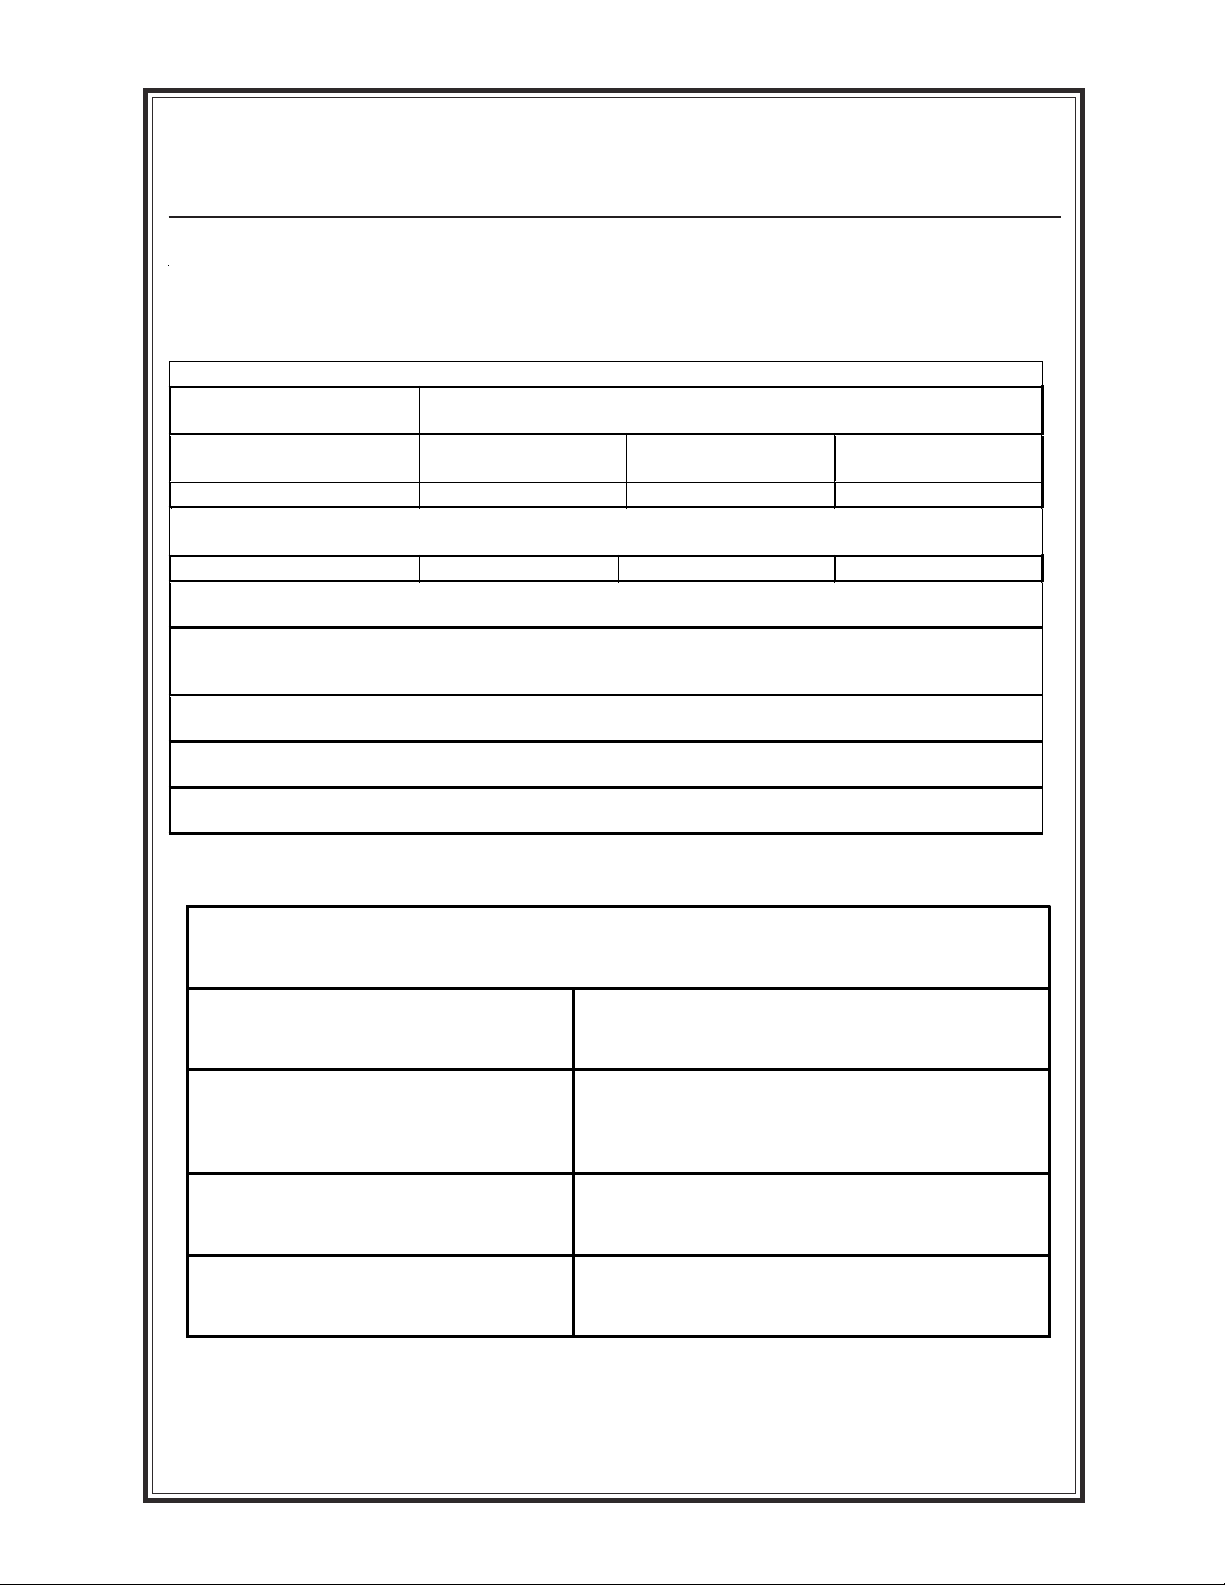
L i m i t e d W a r r a n t y
The Manufacturer warrants that products manufactured shall be free from defects in material and
workmanship that develop under normal use for a period of 90 days for concrete vibrators and electric
pumps, one year for Rhino®, Bulldog®, WolfPac Rollers, trowels, Stompers®, saws, forward plates,
engine powered pumps, Lift Jockey, Mortar Buggyand 6 months for all other products from the
date of shipment. The foregoing shall be the exclusive remedy of the buyer and the exclusive liability of the
Manufacturer. Our warranty excludes normal replaceable wear items, i.e. gaskets, wear plates, seals, O-
rings, V-belts, drive chains, clutches, etc. Any equipment, part or product which is furnished by the
Manufacturer but manufactured by another, bears only the warranty given by such other manufacturer.
(The Manufacturer extends the warranty period to “Lifetime” for the drum bearings and seals for the mortar
mixers, and agrees to furnish, free of charge, the bearings and seals only upon receipt of the defective
parts. The warranty is two years for eccentric bearings on the forward plate compactors, mortar and plaster
mixer drums, trowel gearboxes and five years on the Bulldog trench roller eccentric bearings.) A Warranty
Evaluation Form must accompany all defective parts. Warranty is voided by product abuse, alterations,
and use of equipment in applications for which it was not intended, use of non-manufacturer parts, or
failure to follow documented service instructions. The foregoing warranty is exclusive of all other warranties
whether written or oral, expressed or implied. No warranty of merchantability or fitness for a particular
purpose shall apply. The agents, dealer and employees of Manufacturer are not authorized to make
modification to this warranty, or additional warranties binding on Manufacturer. Therefore, additional
statements, whether oral or written, do not constitute warranty and should not be relied upon.
The Manufacturer’s sole responsibility for any breach of the foregoing provision of this contract, with respect
to any product or part not conforming to the Warranty or the description herein contained, is at its option (a)
to repair, replace or refund such product or parts upon the prepaid return thereof to location designated
specifically by the Manufacturer. Product returns not shipped prepaid or on an economical transportation
basis will be refused (b) as an alternative to the foregoing modes of settlement - the Manufacturer’s dealer
to repair defective units with reimbursement for expenses, except labor, and be reviewed with the
Manufacturer prior to repair. A Warranty Evaluation Form must accompany all warranty claims.
Except as set forth hereinabove and without limitation of the above, there are no warranties or other
affirmations which extends beyond the description of the products and the fact hereof, or as to operational
efficiency, product reliability or maintainability or compatibility with products furnished by others. In no
event whether as a result of breach of contract or warranty or alleged negligence, shall the Manufacturer
be liable for special or consequential damages including but not limited to: Loss of profits or revenues, loss
of use of the product or any associated product, cost of capital, cost of substitute products, facilities or
services or claims of customers.
No claim will be allowed for products lost or damaged in transit. Such claims should be filed with the carrier
within fifteen days.
Effective July 2002.
P/N 51018 F-7080 7/2002
Stone Construction Equipment, Inc. • 8662 Main Street, P. O. Box 150 • Honeoye, NY 14471-0150
Phone: 1-800-888-9926 • 1-585-229-5141 Fax: 1-585-229-2363

- 6 -
Technical Data Trowels – Specifications
MODEL
Dimensions
Operating Wt. (kg)
Diameter (cm)
Blades:
Number
Finish (cm)
Combination (cm)
Float (cm)
Blade Positioning /
Blade Leveler
Operating System
Engine
hp/(kw)
RPM'S (Hertz)
Gear Box
Standard Features:
Safety Shutoff
Handle
Throttle
Spider
Stabilizing Ring
Lifting Eye
Gauges
Shipped
Other Features:
Warranty
STONE
CF464
180 - 225 lbs.
(82 - 102.3)
46" (116)
4
6" x 18" (15.2 x 45.7)
8" x 18" (20.3 x 45.7)
10" x 18" (25.2 x 45.7)
Self-aligning aircraft
bearings - positive
blade positioning,
inf. var. blade leveler
8 hp B&S I/P, (5.9)
8 hp Honda, (5.9)
9hp Robin (6.71)
50 - 130 (.8 - 2.1)
Hardened steel worm
and bronze gear, cast
aluminum gear box,
tapered roller
bearings
Patented
Dyna-Clutch
Reinforced, triple-
tube,
contoured,
adjustable
T-handle Throttle
(turns)
w/1/4-turn locking
cast iron
rotating
standard
oil sight gauge
assembled
cushioned handgrips,
shock-mounted
stationary guard
2-year gear case
STONE
CF24E
130lbs.
(59)
24" (61)
4
-
5"x9" (12.7 x 22.9)
-
Self-aligning aircraft
bearings - positive
blade positioning,
inf. var. blade leveler
4 hp Honda (2.98)
4.5hp Robin (3.36)
50 - 130 (.8 - 2.1)
Hardened steel worm
and bronze gear, cast
aluminum gear box,
tapered roller bearings
Patented
Dyna-Clutch
Reinforced,
contoured,
T-handle Throttle
(turns)
w/1/4-turn locking
cast iron
rotating
hand lift
oil sight gauge
assembled
cushioned handgrips,
rotating guard
2-year gear case
STONE
CF364
160 - 185 lbs.
(72.7 - 84)
36" (91.5)
4
6" x 14" (15.2 x 35.6)
8" x 14" (20.3 x 35.6)
10" x 14" (25.4 x 35.6)
Self-aligning aircraft
bearings - positive
blade positioning,
inf. var. blade leveler
5 hp B&S, (3.7)
5 hp B&S I/P, (3.7)
8hp B&S I/P, (5.9)
5.5 hp Honda, (4.1)
8 hp Honda, 5.9)
6hp Robin (4.47)
9hp Robin (6.71)
50 - 130 (.8 - 2.1)
Hardened steel worm
and bronze gear,
cast aluminum gear
box, tapered roller
bearings
Patented
Dyna-Clutch
Reinforced, triple-
tube,
contoured,
adjustable
T-handle Throttle
(turns)
w/1/4-turn locking
cast iron
rotating
standard
oil sight gauge
assembled
cushioned handgrips,
shock-mounted
stationary guard
2-year gear case
STONE
CF484
275 lbs.
(124.7)
48" (122)
4
6" x 18" (15.2 x 45.7)
8" x 18" (20.3 x 45.7)
10" x 18" (25.2 x 45.7)
Self-aligning aircraft
bearings - positive
blade positioning,
inf. var. blade leveler
11 hp Honda (8.2)
11.5 hp Robin (8.5)
13 hp Honda (9.7)
70 - 180 (1.1 - 2.9)
Hardened steel worm
and bronze gear, cast
aluminum gear box,
tapered roller
bearings
Patented
Dyna-Clutch
Reinforced, triple-
tube,
contoured,
adjustable
T-handle Throttle
(turns)
w/1/4-turn locking
cast iron
rotating
standard
oil sight gauge
assembled
cushioned handgrips,
shock-mounted
stationary guard
2-year gear case

- 7 -
Technical Data Machine Sound & Vibration Mea-
surements/Lubrication Specs
Lubrication Specifications
Re comme nded Fuel Gasoline 86 Octane minimum
Engine Oil
Mobil Delvac 1200 10W30, approximately
1.3 quarts/1.2 liters
(check engine manual)
Gear Case Mobilube HD80W-90 API GL-5
40 ounces/1.2 liters
Grease Fittings Mobilegrease XHP222
(NLGI 2EP Lithium Complex)
Sound and Vibration Measurements
Sound Pressure Values as measured are per the following:
Noise 1 Model/Configuration
Sound Pressure CF364
5.5 Honda
CF464
8 Honda
CF484
11 Honda
at operator’s ear 92dBA 93dBA 93dBA
RMS acceleration on the handle were measured per the following:
meter/sec2 RMS 8.27 1.5
Sound and vibration values have been taken in accordance to the EEC machine regulation
(edition 93/68/EEC)
Sound Pressure measurements were taken with Simpson model 886-2 type 2 meter, calibrated
1/31/98
1/17/2003
Acceleration measurements were taken with Quest Tech model VI-100 meter, calibrated 4/17/96
1/17/2003
Sound and vibration measurements were obtained with machine operating at maximum engine
speed of 3600 RPM.
Unit measurements were taken on steel test plate.

- 8 -
Technical Data Torque Chart - Imperial
SAE GRADE 8
Coarse Thread
SIZE PLATED
1/4 – 20 (.250) 9 ft. lbs. 12 Nm
5/16 – 18 (.3125) 18 ft. lbs. 24 Nm
3/8 – 16 (.375) 33 ft. lbs. 45 Nm
7/16 – 14 (.4375) 52 ft. lbs. 70 Nm
1/2 – 13 (.500) 80 ft. lbs. 108 Nm
9/16 – 12 (.5625) 115 ft. lbs. 156 Nm
5/8 – 11 (.625) 159 ft. lbs. 215 Nm
3/4 – 10 (.750) 282 ft. lbs. 382 Nm
7/8 – 9 (.875) 454 ft. lbs. 615 Nm
1 – 8 (1.000) 682 ft. lbs. 925 Nm
SAE GRADE 8
Fine Thread
SIZE PLATED
1/4 – 28 (.250) 10 ft. lbs. 14Nm
5/16 – 24 (.3125) 20 ft. lbs. 27 Nm
3/8 – 24 (.375) 37 ft. lbs. 50 Nm
7/16 – 20 (.4375) 58 ft. lbs. 79 Nm
1/2 – 20 (.500) 90 ft. lbs. 122 Nm
9/16 – 18 (.5625) 129 ft. lbs. 175 Nm
5/8 – 18 (.625) 180 ft. lbs. 244 Nm
3/4 – 16 (.750) 315 ft. lbs. 427 Nm
7/8 – 9 (.875) 501 ft. lbs. 679 Nm
1 – 12 (1.000) 746 ft. lbs. 1011 Nm
1 – 14 (1.000) 764 ft. lbs. 1036 Nm
SAE GRADE 5
Coarse Thread
SIZE PLATED
1/4 – 20 (.250) 6 ft. lbs. 8 Nm
5/16 – 18 (.3125) 13 ft. lbs. 18 Nm
3/8 – 16 (.375) 23 ft. lbs. 31 Nm
7/16 – 14 (.4375) 37 ft. lbs. 50 Nm
1/2 – 13 (.500) 57 ft. lbs. 77 Nm
9/16 – 12 (.5625) 82 ft. lbs. 111 Nm
5/8 – 11 (.625) 112 ft. lbs. 152 Nm
3/4 – 10 (.750) 200 ft. lbs. 271 Nm
7/8 – 9 (.875) 322 ft. lbs. 436.5 Nm
1 – 8 (1.000) 483 ft. lbs. 655 Nm
SAE GRADE 5
Fine Thread
SIZE PLATED
1/4 – 28 (.250) 7 ft. lbs. 10Nm
5/16 – 24 (.3125) 14 ft. lbs. 19 Nm
3/8 – 24 (.375) 26 ft. lbs. 35 Nm
7/16 – 20 (.4375) 41 ft. lbs. 56 Nm
1/2 – 20 (.500) 64 ft. lbs. 87 Nm
9/16 – 18 (.5625) 91 ft. lbs. 123 Nm
5/8 – 18 (.625) 128 ft. lbs. 173 Nm
3/4 – 16 (.750) 223 ft. lbs. 302 Nm
7/8 – 14 (.875) 355 ft. lbs. 481 Nm
1 – 12 (1.000) 529 ft. lbs. 717 Nm
1 – 14 (1.000) 541 ft. lbs. 733 Nm

- 9 -
Technical Data
Property Class 8.8
ZINC-PLATED Coarse Thread Fine Thread
SIZE Nm ft. lbs. Nm ft. lbs.
M6 9.9 7 10 7
M8 24 18 25 18
M10 48 35 49 36
M12 83 61 88 65
M14 132 97 140 103
M16 200 148 210 155
M20 390 288 425 313
M24 675 498 720 531
Property Class 10.9
ZINC-PLATED Coarse Thread Fine Thread
SIZE Nm ft. lbs. Nm ft. lbs.
M6 14 10 14 10
M8 34 25 35 26
M10 67 49 68 50
M12 117 86 125 92
M14 185 136 192 142
M16 285 210 295 218
M20 550 406 600 443
M24 950 701 1000 738
Property Class 12.9
ZINC-PLATED Coarse Thread Fine Thread
SIZE Nm ft. lbs. Nm ft. lbs.
M6 16.5 12 16.5 12
M8 40 30 42 31
M10 81 60 82 60
M12 140 103 150 111
M14 220 162 235 173
M16 340 251 350 258
M20 660 487 720 531
M24 1140 841 1200 885
Conversion Factor: 1 ft. lb. = 1.3558 Nm
Torque Chart - Metric

- 10 -
Technical Data Hardware Key

- 11 -
Health & Safety
SAFETY
These machines are designed to carry out the function of
finishing concrete surfaces.
If used correctly, they will provide an effective and safe
means of finishing and meet the appropriate performance
standards.
It is essential that the operator of the machine is ad-
equately trained in its safe operation, be authorized to
operate it, and have sufficient knowledge of the machine
to ensure that it is in full working order, before being put
to use.
Safety Training

- 12 -
Health & Safety
Before using this equipment, study the entire owner's m nu l
to become f mili r with its oper tion. Do not llow un-
tr ined or un uthorized personnel, especi lly children, to
oper te this equipment. Use only f ctory uthorized p rts
for service.
When w rning dec ls re destroyed or missing, cont ct the
M nuf cturer immedi tely t 1-800-888-9926 for repl ce-
ment. For the s fety of yourself nd others, it is imper tive
th t the following rules re observed. F ilure to do so m y
result in serious injury or de th.
USE COMMON SENSE WHEN HANDLING FUELS
Tr nsport nd h ndle fuel only when cont ined in pproved
s fety cont iners.
Do not smoke when refueling the engine or during ny other
fuel h ndling oper tion.
Do not refuel the unit with the engine running or while hot.
If fuel is spilled during refueling, wipe it off from the en-
gine immedi tely nd disc rd the r g in s fe pl ce. Do
not oper te the unit if fuel or oil le ks exist-rep ir immedi-
tely.
Never oper te this equipment in n explosive tmosphere.
Never perform ny work on the unit while it is running.
Before working on it, stop the engine nd disconnect the
sp rk plug wire to prevent ccident l st rting.
Do not oper te this unit without ll gu rds in pl ce. Keep
h nds, feet, clothing nd jewelry w y from the unit bl des
nd ll moving p rts. Rot ting nd moving p rts will c use
serious injury if cont cted during oper tion.
Do not llow nyone to st nd or le n on the unit during
oper tion.
WARNING
Safety Precautions

- 13 -
Health & Safety
Keep the p tented Dyn -Clutch s fety system in djustment
nd good oper ting condition t ll times. Do not oper te
the trowel if it does not work properly. Out of control Trow-
els c n c use serious person l injury nd d m ge to fresh
concrete surf ces. The Dyn -Clutch system will utom ti-
c lly stop the unit if the oper tor loses control of it during
oper tion.
M ke sure the Dyn -Clutch is diseng ged (lever in the down
position) before st rting the unit. Keep one h nd firmly on
the h ndle while st rting nd do not let go of the h ndle
during oper tion.
Avoid cont ct with hot exh ust systems nd engine p rts.
Allow engine to cool before performing ny rep irs or
service.
E r protection required when oper ting this equipment.
Never oper te ny g s powered equipment in poorly
ventil ted or enclosed re .
Avoid prolonged bre thing of exh ust g ses.
Safety Precautions

- 14 -
Introduction
Intro/Operating Principle/Deliv-
ery Checks/Before Starting/
Determining the Right Machine
Congr tul tions on your purch se of Stone
Smooth Oper tor Power Trowels! You've
m de n excellent choice! The Power Trowels
h ve been specific lly designed s the ide l
m chine for the contr ctor who is eng ged in
profession l concrete finishing.
Upon receipt of your Smooth Oper tor Power
Trowel, CAREFULLY CHECK FOR ANY
FREIGHT DAMAGE. Any d m ge should be
immedi tely reported to the c rrier nd cl im
registered.
The Smooth Oper tor Power Trowel is m nu-
f ctured to the strictest specific tions nd inspec-
tion procedures. If ny m teri l or m nuf cturing
defects re found, return the t g on the m chine
with ssembler's sign ture nd your findings to
the m nuf cturer. We w nt to know when prod-
uct is less th n perfect. We lso welcome ny nd
ll input on how the product m y serve you better.
OPERATING PRINCIPLE
The following instructions were compiled to
provide you inform tion on how to obt in long
nd trouble free use of the unit. Periodic
m inten nce of this unit is essenti l. Re d the
m nu l in its entirety nd follow the instructions
c refully. F ilure to do so m y injure yourself
or byst nder.
DELIVERY CHECKS--Immedi tely on
t king delivery of your new equipment nd
before putting it into service:
Re d the h ndbook completely--it could
s ve gre t de l of unnecess ry expense.
Re d the engine m nu l supplied.
Check the gener l condition of the
equipment--h s it been d m ged during
delivery?
Check engine oil level.
Check fuel levels.
Recommended lubric nts re det iled in the
C re nd M inten nce section.
BEFORE STARTING--These st rting
instructions re gener l guidelines only.
Consult the engine m nu l included with this
unit for specific instructions.
DETERMINING THE RIGHT
MACHINE
CF24E--Ide l comp ctness for sm ll jobs.
CF364--Ide l ll purpose size.
CF464 & CF484--Utilized for jobs requiring
m ximum productivity.
The Stone Smooth Oper torTM line provides the
most popul r sizes nd configur tions v il ble.
Engine options nd trowel sizes c n ccommod te
ny job. Engines v il ble re Hond , Briggs or
Robin with four finish or combo bl de
configur tions in 24", 36", 46" nd 48" di meters.

- 15 -
Introduction
STANDARD FEATURES
Your new CF Power Trowel comes st nd rd
with m ny fe tures to enh nce productivity,
perform nce nd s fety. Listed below re just
few of these fe tures.
DYNA-CLUTCH--Patented safety device
automatically stops blade rotation without
shutting down the engine, if the trowel gets
away from the operator. Prevents injury to
personnel and damage to the trowel and
fresh concrete surfaces.
ADJUSTABLE THROTTLE--Loc ted in
convenient loc tion, this push-pull throttle
control c n be set to provide ny desired bl de
speed nd loc ted in pl ce t the desired
oper ting speed.
BENT ARM ADJUSTMENT--Allows
bl des to be djusted to compens te for bent
rms c used by dropping or mish ndling the
trowel. C n be e sily djusted on-site for
consistent finishing.
HEAVY DUTY RING GUARD--Protects
operator and unit while providing lower
center of gravity which contributes to unit
stability and performance.
CAST IRON SPIDER--Extr strong, houses
double set of repl ce ble nylon be rings for
e ch bl de rm to insure lignment nd elimi-
n te seizing. Also contributes to lower center
of gr vity for incre sed trowel perform nce.
ADJUSTABLE HANDLE--C n be posi-
tioned to provide comfort nd control for ny
oper tor's height. Equipped with fl nged nd
cushioned motorcycle style h nd grips to
bsorb vibr tion nd minimize oper tor f tigue.
Standard Features/Preparation
for Service
PREPARATION FOR SERVICE
BEFORE STARTING--Your new CF Power
Trowel h s been ssembled nd tested t the
f ctory. However, before pl cing the unit into
service the following items should be checked:
ASSEMBLY AND HARDWARE--The unit
is shipped completely ssembled, except for
inst ll tion of the djust ble h ndle. Consult
the HANDLE ASSEMBLY exploded di gr m
nd ssemble the djust ble to the m in h ndle
with h ndle djustment knob s shown.
Next check ll h rdw re on the unit nd engine.
Consult the HARDWARE AND TORQUE
CHART section of this m nu l for gener l
guidelines nd recommend tions nd tighten ny
suspicious h rdw re.
OIL LEVEL AND LUBRICATION--
Check the oil level in the engine nd ge rbox.
Engine nd trowel w rr nties re VOID if this
unit is run without oil. Also, check the bl de
rms nd thrust be ring to m ke sure they h ve
been gre sed. Consult the LUBRICATION
SPECIFICATION SECTION of this m nu l for
lubric tion requirements nd instruction, if
required.
FUEL--Fill the fuel t nk on g soline engines
with cle n g soline from s fety c n. DO NOT
mix oil with the g soline.
FOLLOW SAFETY PRECAUTIONS
WARNING

- 16 -
Introduction
WHENEVER HANDLING GASOLINE.
LOCATION AND USE OF CON-
TROLS
Before oper ting this trowel, it is import nt to
f mili rize yourself, nd ny other personnel
who will be using it, with the loc tion nd
proper use of the controls to insure s fe nd
efficient oper tion:
A - HANDLE ADJUSTMENT KNOB - to
djust the h ndle for m ximum oper tor
comfort nd control, simply turn the knob
counterclockwise one-qu rter turn m xi-
mum to loosen, move h ndle to desired
position nd tighten knob to lock h ndle in
pl ce.
B - THROTTLE CONTROL - this is push-
pull type throttle control which c n be
locked t ny desired bl de speed to meet
v rying job conditions. To use, simply push
or pull the throttle control to obt in the
desired bl de speed. To lock the throttle t
the speed, turn the control clockwise. To
unlock the throttle for further djustments,
turn the control counter clockwise pproxi-
m tely 1/4 turn.
C - DYNA-CLUTCH LEVER - this is
p tented fe ture which cts s s fety
device to stop the trowel from spinning out
of control if the oper tor lets go of the
h ndle. It lso llows the oper tor to control
the eng gement nd diseng gement of the
trowel bl des independent of engine speed.
To use, simply move the lever ll the w y up
to the RUN position to eng ge the trowel
bl des. To stop the bl des from turning,
push the lever ll the w y down to STOP
position. In the event th t the oper tor lets
go of the h ndle while the bl des re
turning, the centrifug l force from the swing
of the h ndle will throw the Dyn -Clutch
lever to the STOP position. This prevents
the unit from spinning out of control nd
c using injury to personnel or d m ge to the
trowel nd fresh concrete. Since the Dyn -
Clutch system diseng ges the bl des from
the engine, r ther th n shutting down the
engine to stop the bl des, time is s ved in
getting the unit oper ting g in. The
oper tor simply moves the Dyn -Clutch
lever to RUN position inste d of h ving to
rest rt the engine nd re djust engine speed.
D - TILT ADJUSTMENT KNOB - djusts the
ngle of the bl des for different curing
st ges nd conditions of the concrete.
Turning the knob clockwise incre ses the
ngle of the bl des to the concrete. Turning
the knob counterclockwise fl ttens or
decre ses the ngle of the bl des.
E - ProPitc Handle Option - djusts the
gnle of the bl des for different curing st ge
nd conditions of the concrete. Lift h ndle
upw rds to incre se ngle of the bl des to
the concrete. Depress trip button to rele se
lock nd decre se the ngle of the bl des.
Location and Use of Controls

- 17 -
Introduction
TO ADJUST TILT LOCK NUT--The tilt
lock nut is loc ted on the tilt rod ssembly.
Using the lifteye, r ise the trowel with n
overhe d cr ne. B ck off tilt knob until there is
enough c ble sl ck to ccess the tilt lock nut.
For more tilt, loosen lock nut set screw nd turn
lock nut tow rds tilt knob, 1 turn, nd lock set
screw. Cr nk knob to full tilt position nd
check cle r nce between the tilt lever nd
ge rc se for 1/64" (p per thickness). Repe t
djustment if required.
NOTE: Cables may stretc over time and
may need to be replaced if full tilt is no
longer obtainable.
SWIVEL
LINKAGE ROD
NUT
YOKE END
Adjust Tilt Knob Lock
Nut/Linkage Rod
TO ADJUST ProPitch LINKAGE
Rod--The link ge rod is f stened to yoke end
nd swivel by two nuts. To djust follow the
steps listed below.
1. Using the lifteye, raise the trowel using an overhead
crane.
2. The lower end of the linkage rod is connected to a
yoke and held in place with two (2) nuts. Loosen the
nut on the upper end of the linkage rod to allow
slack in the tilt cable when the ProPitch handle is in
full tilt position.
4. With handle in full tilt position, adjust the nut on the
backside of swivel at the upper end of linkage rod
until the proper gap is achieved between the tilt
lever and the gearcase--approximately 1/64 inch.
5. Tighten nut on the outside of swivel to lock linkage
rod into position.
6. Repeat adjustment if re uired.
NOTE: Cables may stretc over time and
may need to be replaced if full tilt is no
longer obtainable. Refer to Service and Parts
Manual for full diagram and parts break-
down.
NUT
NUT

- 18 -
Operations
TO START--M ke sure the Dyn -Clutch lever
is in the STOP position. If it is not, push the
lever down to the STOP position before t-
tempting to st rt the engine. Open fuel v lve
under fuel t nk (if so equipped), open throttle
pproxim tely h lf w y down nd pply choke.
Holding unit h ndle firmly with one h nd, pull
the st rter rope sh rply with the other bout (3)
times. When engine st rts, open choke nd
djust throttle s necess ry to keep it running. If
engine doesn't st rt fter (3) pulls, open choke
slightly.
NOTE: These st rting instructions re gener l
guidelines only. Since m ny engine options re
v il ble on CF Power Trowels, consult the
ENGINE MANUAL included with the unit for
specific instructions.
TO SHUT OFF
5.5 HP & 8 HP B&S ENGINES - close throttle
ll the w y, flip grounding t b g inst sp rk plug
nd hold there until the engine comes to
complete stop.
4, 5.5, 8, 11 and 13 HP HONDA ENGINES -
close throttle ll the w y nd flip oil minder kill
switch to the OFF position.
4.5, 6, 9 & 11.5 HP ROBIN ENGINES - close
throttle ll the w y, depress kill switch button
nd hold down until engine stops completely.
NOTE: These stopping instructions re gener l
guidelines only, consult the ENGINE MANUAL
included with the unit for specific instructions.
INITIAL OPERATION--With engine st rted
s instructed previously nd t oper ting tem-
per ture, djust speed to bout h lf throttle.
Hold the h ndle firmly with one h nd nd move
the Dyn -Clutch lever to RUN position to
eng ge the trowel bl des.
FLOATING OPERATION
Att ch flo t or combin tion bl des to the trowel
rms, nd when the concrete h s set sufficiently
to support the weight of the trowel, pl ce the
unit on the concrete. St rt the unit nd eng ge
the bl des s previously instructed. Using the
tilt djustment knob or ProPitch h ndle,
djust the bl des to the flo t position--bl des
should be s fl t to the concrete s possible with
enough tension kept on the tilt djustment c ble
to prevent the unit from d ncing or ch ttering.
Guide the trowel over the concrete in circul r
b ck nd forth motion. Under norm l condi-
tions, you should be ble to flo t 30 x 30 foot
re in pproxim tely 15 minutes.
This oper tion will bring the w ter nd fines to
the surf ce, llowing for smoother finish when
finishing the concrete.
FINISHING OPERATION
After flo ting, llow the concrete to set until it
will support the weight of the trowel. Set the
pitch to pproxim tely 1/4" to 3/8" on the
bl des. If the bl des st rt to dig into the con-
crete, decre se the mount of pitch.
To Start/To Shut Off/Inital Op-
eration/Floating Operation/
Finishing Operation

- 19 -
Maintenance
MAINTENANCE, LUBRICATION
AND ADJUSTMENT
To get long nd trouble free service from your new
CF Power Trowel, it is essenti l to perform peri-
odic m inten nce on engine nd m chine mech -
nisms. Follow the guidelines listed below:
LUBRICATION
A. ENGINE CRANKCASE
Daily--check oil level in engine. Engine w rr nty
is VOID if it is run without oil. Add oil s re-
quired to keep cr nkc se full. Engine oil should
be ch nged every 250 hours of oper tion, or once
ye r, whichever comes first. See Lubric tion
Specific tion section for engine.
Maintenance, Lubrication, Ad-
justment/Lubrication/Trowel
Gearcase/Arm Bearing
These oil requirements re gener l guidelines only,
for specific requirements consult the ENGINE
MANUAL included with the unit.
B. TROWEL GEARCASE
Daily--check oil level in ge rc se. Trowel w r-
r nty is VOID if run without oil. Oil level should
fill the sight plug, loc ted on the right side of the
ge rc se, when the unit is t rest on level sur-
f ce. Add oil s required to keep oil level t cor-
rect height. Ge rc se oil should be ch nged ev-
ery 250 hours of oper tion, or once ye r, which-
ever comes first. See Lubric tion Specific tion
section when dding or repl cing ge rc se oil.
C. ARM BEARING
Mont ly--gre se rm be ring through the gre se
fittings in the spider. There re (3) fittings on (3)
rm trowels nd (4) fittings on (4) rm trowels.
Pump gre se into e ch fitting until cle n gre se
comes out of spider t either end, thoroughly cle n
excess gre se off from spider when ll rms h ve
been gre sed. See Lubric tion Specific tion sec-
tion for gre se requirements.
D. THRUST BEARING
Weekly--gre se with ny gr de 1 Lithium b sed
gre se to purge out ny dirt or w ter. Wipe off
excess gre se. See Lubric tion Specific tion
section for gre se requirements.
Yearly--for be ring lubric tion remove thrust
be ring nd cle n thoroughly. Inspect for
d m ge nd repl ce if necess ry or rep ck with
gre se nd reinst ll. Refer to Spider Assembly
Remov l section in your P rts/Service Trowel
M nu l, P/N 56354 for spider remov l.

This manual suits for next models
3
Table of contents