IST MRO001 User manual

Instruction Manual
Please read and save these instructions.
Reverse Osmosis System
MRO001

This device complies with part 15 of the FCC Rules. Operation is subject to the following two conditions: (1) This device
may not cause harmful interference, and (2) this device must accept any interference received, including interference
that may cause undesired operation. Any changes or modications not expressly approved by the party responsible for
compliance could void the user's authority to operate the equipment.

Contents
Installation Instructions
Before Installation............................................................................................................................................................................................................................1
Parts List ................................................................................................................................................................................................................................................2
Product Introduction ....................................................................................................................................................................................................................2
Installation Sample.........................................................................................................................................................................................................................3
Installation Tips .................................................................................................................................................................................................................................3
Installation Steps..............................................................................................................................................................................................................................4
Step 1: Connect to the Cold Water Supply......................................................................................................................................................................4
Step 2: Install the Drain Saddle ...............................................................................................................................................................................................4
Step 3: Install the RO Faucet.....................................................................................................................................................................................................5
Step 4: Connect Tubing...............................................................................................................................................................................................................5
Step 5: Start up the system .......................................................................................................................................................................................................6
Filter Replacement Schedule...................................................................................................................................................................................................6
Filter Life Reminder.........................................................................................................................................................................................................................6
Filter Replacement Guide...........................................................................................................................................................................................................7
Malfunction Display.......................................................................................................................................................................................................................7
System Maintenance.....................................................................................................................................................................................................................8
Troubleshooting...............................................................................................................................................................................................................................9
Limited Product Warranty..........................................................................................................................................................................................................10

Required Tools
• Variable speed drill • Screwdriver
• Utility knife or scissors • Flashlight
• Drill bit: 1/4" (for drainpipe), 1" (for faucet hole) • Towel
• Adjustable wrench, pliers
1
Installation Instructions
Specifications
To achieve optimal performance, it is highly recommended that the system be used only within these operational
parameters.
NOTE: If you are using well water as the source, please ensure that the feed water has passed through a
pre-ltration system.
MRO001
17.1" *5.5" *14.8"
14.5-87 psi/0.1-0.6 MPa
41-100 °F / 5-38 °C
Municipal Tap Water
Input 110-240 V
Output 24 V
50/60 HZ
400 G
Model
Size (L*W*H)
Feed Water Pressure
Feed Water Temperature
Feed Water Requirement
Rated Frequency
Max Daily Production Rate
Power Specication
Before Installation

Preinstalled
MRF2
2
Parts List
Product Introduction
a
b
c
d
e
g
f
h
i
j
k
l
RO ltration unit
Front cover
Feed water adapter (3/8”and 1/2” x1)
Inlet water tubing(white tubing)
a
b
c
d
MCF1 lter
MRF2 lter
e
DescriptionPart
RO faucet x1 set
Pure water tubing(white tubing)
Drain water tubing(red tubing)
Teon tape x1
Drain saddle x1
Lock clips x4
l
f
g
h
i
k
j
DescriptionPart
Filtering indicator
• When the system is ushing, the ltering indicator light ashes.
• When the system is making water, the ltering indicator turns steady blue.
Filter life indicator
• Indicator displays blue when the filter life is normal.
• When the remaining life of the filter is less than 15 days or 40 gallons, the indicator light turns purple and the
system beeps two times whenever the faucet is turned on.
• When the life of the filter has expired, the indicator light turns red and the system will keep beeping every time
the faucet is turned on. Please replace the filter as soon as possible.
Filter life indicator
PURE DRAIN INLET
Filtering
indicator
Power
indicator

How to Drill a Hole in Your Sink or Countertop (Optional)
NOTE: Conrm if there is an existing hole available to install the RO faucet. If not, drill a hole according to the
following steps.
There is also a reference sticker included to help you drill the faucet hole. Remember to wear safety glasses to
protect your eyes while drilling.
“PURE”water port
Connects with polyethylene (PE) tubing
“DRAIN”water port
Connects with polyethylene (PE) tubing
“INLET”water port
Connects with polyethylene (PE) tubing
3
a. Choose a diamond core bit for granite or a carbide drill bit for stainless steel. Do not use a hammer drill on natural
stone, glass or ceramic.
b. Press the sticker onto your sink or countertop where you want the hole to be located, and drill the hole the same
diameter (1”) as the sticker.
c. To help guide the bit make an indent with a center punch on a stainless-steel sink before drilling.
d. Be careful when drilling on a porcelain sink, as it can be easily chipped. Apply downward pressure rmly on the bit
until you break through the surface.
e. Starting at the lowest speed, hold the drill straight with rm pressure to prevent the bit from walking on the
counter.
f. Once you break through the surface, swirl the drill a little to apply pressure in a circle evenly.
Installation Sample
f
g
h
Power indicator
The indicator light is always on when the system is powered on.
Installation Tips
Cold
Power
RO FaucetKitchen Faucet
Hot
Inlet Water Tubing
Feed Water Adapter
Pure Water Tubing
Drain Water
Tubing

Step 2: Install the Drain Saddle
a. Stick the foam seal on the inside of the front plate of the drain saddle. Ensure that the hole in the foam seal is
aligned with the hole of the front plate.
NOTE: It is recommended that the drain saddle be installed on the vertical portion of the drainpipe.
b. Choose a spot on the drainpipe that is convenient for installing the drain saddle and drill a 1/4” hole in the
drainpipe. Be sure not to penetrate the opposite side of the pipe.
c. Position both halves of the drain saddle on the drain pipe with the saddle’s opening aligned over the drilled
hole, and insert your drill bit through the saddle and the drilled hole to ensure proper alignment. Tighten the
screws of the drain saddle in place as shown.
d. Insert a quick connect tting into the hole in the drain saddle, then insert the drain water tubing [circle h] rmly
into the quick connect tting and use a lock clip to hold the tubing in place.
Step 1: Connect to the Cold Water Supply
CAUTION: DO NOT CONNECT THIS WATER LINE TO A HOT WATER SUPPLY LINE. The water supply to the unit MUST
be from the COLD WATER LINE. Using HOT WATER will severely damage your lters.
a. Turn o and then disconnect the current cold water supply line.
b. Connect the feed water adapter to the cold water supply line.
c. Twist the cold water supply line clockwise onto the feed water adapter until it is securely connected.
NOTE: An extra adapter nut is included on the feed water adapter (B) allowing it to attach to either a 3/8 in. or 1/2
in. feed plumbing line.
4
Installation Steps
3/8" Cold Water Pipe 3/8” INPUT
Water Tubing
3/8” INPUT
Water Tubing
Washer
Feed Water Adapter
Cold Water Supply Valve
Unscrew
Unscrew
1/2" Cold Water Pipe
Front plate
Foam seal
Lock clip
e
e
k
j
j
If the System Cannot Be Powered on After You Insert the Power Plug
a. Check the ow of electricity to the power outlet under the sink as this problem most often occurs when there is no
ow of electricity to the outlet. Also, check to ensure that the system has been plugged correctly into the outlet
To test if there is a problem with the system itself, just pick up the system and try another power outlet. Please contact
us if the system can't be powered on, and we will help determine the source of the problem
No Output Water from RO Faucet
a. Filter has expired: Check the lter life indicators to conrm which lter needs to be replaced, and replace it immedi-
ately.
b. Low water pressure: Check and conrm that the water pressure is between 14.5 psi and 87 psi.
c. Water supply is o: Turn on the feed water adapter or water supply valve.
d. Incorrect lter installation: Reinstall the two lters, making sure they are inserted properly.
e. A tubing is crimped: Check all tubings and remove any crimps.
Low Water Flow at RO Faucet
a. A tubing is crimped or there's a leak at the tubing connection: Check to ensure all tubing is installed correctly and
completely.
b. Filter has expired: Check the lter life indicators to conrm which lter needs to be replaced, and replace it immedi-
ately.
c. Low water temperature: Be sure to use the system only with a water temperature of 41-100 °F.
d. If you use well water as the source and the feed water has not been through a preltration system, the lter may
have become clogged. If you are using well water as the source, please ensure that the feed water passes through a
pre-ltration system. Otherwise, large particles in the well water can easily clog the lter and shorten the lter life.
High TDS in Filtered Water
The system will provide a 90%+ TDS (Total Dissolved Solids) rejection rate (tested under standard laboratory
conditions) after full ushing when working properly. If the TDS reading is high, the following are possible causes:
a. The system hasn't been used for a long time; Turn on the RO faucet, and allow water to run for a while. The TDS
reading should return to normal.
b. The RO membrane lter has expired: Replace the RO membrane lter immediately
c. The waste water tubing may be crimped or clogged: Check and remove crimps. Realign the drain saddle and
drainpipe.
d. The source water may have a high TDS: Test both the source water and ltered water. The ltered water's TDS should
be about 5%-10% of your source water's TDS. This is a normal range. A high TDS in the source water may reduce the
service life of the system. When the ltered water's TDS creeps up to 15%-20% of the source water's TDS, perform
routine lter replacement.
Water Leakage
a. Check all joints, ttings and tubing connections to locate the leakage. Make sure the lters are properly installed.
Filtered Water from the RO Faucet Tastes Like Tap Water
a. Incorrect tubing installation: Make sure the waste water tubing is not connected to the RO faucet.
Booster Pump Overworked Reminder
Buzzer keeps beeping for 3 minutes, and then the lter life indicators on the front panel ash red.
a. Continuously dispensing water for more than 30 minutes: Power on the system again to reset it.
b. There is a leak at the tubing connection between the system and RO faucet: Turn o the power. Check the tubing
connection, make sure the tubing is inserted into the quick-connect tting properly and rmly, and power on the
system again.
Booster Pump Starting and Stopping Frequently
a. Reminder Buzzer beeps 5 times, and then the lter life indicators on the front panel ash purple.
b. There is an internal pressure imbalance: Disconnect the power. Turn o the RO faucet completely, removing any
tubing crimps. Make sure the ow of water to the faucet is not blocked, and power on the system again.
Loud Sound from the RO System
Normally, the operating sound of the RO System will not exceed 55 dB, which is largely unnoticeable in everyday life
(55 dB is as tested under standard laboratory conditions, when the feed water pressure is between 14.5 psi and 87 psi).
A louder sound may be caused by the following:
a. The system is not positioned on a at surface. Make sure the system is placed evenly without shaking.
b. The system is placed against the cabinet. Do not place the system in contact with the cabinet. The system may
vibrate when it is operating.
c. The water pressure is unstable. Check and conrm that the water pressure is between 14.5 psi and 87 psi. The sound
will decrease when the water pressure becomes stable.

5
Step 3: Install the RO Faucet
a. Insert the faucet spout into the faucet body.
b. Insert the faucet stem through the hole on the counter top.
c. Under the sink, slip on the other parts in the order shown in the
diagram.
d. Slip the quick-connect tting fully and rmly over the bottom of
the faucet stem, using the clip to lock it in place (see Step 4 below).
e. Insert the pure water tubing into the quick-connect tting
fully and rmly, using the clip to lock it into place.
Step 4. Connect tubing
1. How to Use the Quick-Connect Fittings?
To connect:
There is an existing mark at the end of the tubing for you to
conrm if the tubing is fully inserted into the tting. Please push
the tubing into the tting until it reaches the mark on the tubing
(about 0.8“). Put the blue lock clip on the tting to lock the tubing
in place and prevent it from falling o.
NOTE:
• If the tubing is not fully inserted, no seal will be created and
leakage will occur.
• If the tubing is too long, cut it to a suitable length with a sharp
utility knife or scissors. Cut the tubing squarely and cleanly.
Mounting Washer
Countertop
Nut
Faucet Spout
Quick-Connect
Fitting
Faucet Body
Faucet Stem
Clip
Clip
Mark for
full insert
Cut cleanly and squarely
To disconnect:
• Remove the blue lock clip from the tting.
• Use your thumb and index nger to press down the lock
sleeve. Use your other hand to pull out the tubing from the
tting.
NOTE: Please do not pull out the tubing directly without rst
pressing down on the lock sleeve, as otherwise the tting
will be damaged and leakage will occur.
b. Connect the three tubes ( , , and ) to the back of the RO ltration unit as shown.
c. Use locking clips to secure the tubes.
Lock clip
a
g
fgh
k
If the System Cannot Be Powered on After You Insert the Power Plug
a. Check the ow of electricity to the power outlet under the sink as this problem most often occurs when there is no
ow of electricity to the outlet. Also, check to ensure that the system has been plugged correctly into the outlet
To test if there is a problem with the system itself, just pick up the system and try another power outlet. Please contact
us if the system can't be powered on, and we will help determine the source of the problem
No Output Water from RO Faucet
a. Filter has expired: Check the lter life indicators to conrm which lter needs to be replaced, and replace it immedi-
ately.
b. Low water pressure: Check and conrm that the water pressure is between 14.5 psi and 87 psi.
c. Water supply is o: Turn on the feed water adapter or water supply valve.
d. Incorrect lter installation: Reinstall the two lters, making sure they are inserted properly.
e. A tubing is crimped: Check all tubings and remove any crimps.
Low Water Flow at RO Faucet
a. A tubing is crimped or there's a leak at the tubing connection: Check to ensure all tubing is installed correctly and
completely.
b. Filter has expired: Check the lter life indicators to conrm which lter needs to be replaced, and replace it immedi-
ately.
c. Low water temperature: Be sure to use the system only with a water temperature of 41-100 °F.
d. If you use well water as the source and the feed water has not been through a preltration system, the lter may
have become clogged. If you are using well water as the source, please ensure that the feed water passes through a
pre-ltration system. Otherwise, large particles in the well water can easily clog the lter and shorten the lter life.
High TDS in Filtered Water
The system will provide a 90%+ TDS (Total Dissolved Solids) rejection rate (tested under standard laboratory
conditions) after full ushing when working properly. If the TDS reading is high, the following are possible causes:
a. The system hasn't been used for a long time; Turn on the RO faucet, and allow water to run for a while. The TDS
reading should return to normal.
b. The RO membrane lter has expired: Replace the RO membrane lter immediately
c. The waste water tubing may be crimped or clogged: Check and remove crimps. Realign the drain saddle and
drainpipe.
d. The source water may have a high TDS: Test both the source water and ltered water. The ltered water's TDS should
be about 5%-10% of your source water's TDS. This is a normal range. A high TDS in the source water may reduce the
service life of the system. When the ltered water's TDS creeps up to 15%-20% of the source water's TDS, perform
routine lter replacement.
Water Leakage
a. Check all joints, ttings and tubing connections to locate the leakage. Make sure the lters are properly installed.
Filtered Water from the RO Faucet Tastes Like Tap Water
a. Incorrect tubing installation: Make sure the waste water tubing is not connected to the RO faucet.
Booster Pump Overworked Reminder
Buzzer keeps beeping for 3 minutes, and then the lter life indicators on the front panel ash red.
a. Continuously dispensing water for more than 30 minutes: Power on the system again to reset it.
b. There is a leak at the tubing connection between the system and RO faucet: Turn o the power. Check the tubing
connection, make sure the tubing is inserted into the quick-connect tting properly and rmly, and power on the
system again.
Booster Pump Starting and Stopping Frequently
a. Reminder Buzzer beeps 5 times, and then the lter life indicators on the front panel ash purple.
b. There is an internal pressure imbalance: Disconnect the power. Turn o the RO faucet completely, removing any
tubing crimps. Make sure the ow of water to the faucet is not blocked, and power on the system again.
Loud Sound from the RO System
Normally, the operating sound of the RO System will not exceed 55 dB, which is largely unnoticeable in everyday life
(55 dB is as tested under standard laboratory conditions, when the feed water pressure is between 14.5 psi and 87 psi).
A louder sound may be caused by the following:
a. The system is not positioned on a at surface. Make sure the system is placed evenly without shaking.
b. The system is placed against the cabinet. Do not place the system in contact with the cabinet. The system may
vibrate when it is operating.
c. The water pressure is unstable. Check and conrm that the water pressure is between 14.5 psi and 87 psi. The sound
will decrease when the water pressure becomes stable.
f
g
h

Step 5. Start up the system
a. Turn on the cold water supply. Check for any leaks in the system.
b. Insert the power plug into the socket.
NOTE: If the system can’t be powered on after you insert the power plug, check whether there is power owing
to the socket under the sink, as this mostly occurs when the power under the sink is powered o. Also, check to
ensure that the power plug is plugged fully and correctly into the socket. To test if there is a problem with the system
itself, just pick up the system and try another power outlet.
Please contact us if the system can’t be powered on and we will help determine the source of the problem.
c. After the rst power-up, the system will beep and then start an automatic ve-minute ush; after ve minutes, turn
on the tap and let the system continue ushing for an additional 30 minutes until the Filtering indicator change from
ashing to a constant light.
NOTE: Do not drink the water when the system is ushing.
Be sure to carefully check the tightness of each part of the system while ushing. Check and ensure all tubing is
installed correctly and completely. Make sure there are no leaks at the joints, ttings, valves and tubing connections.
6
Filter Replacement Schedule
Filter Type Replacement Schedule Function
MCF1 lter 1100G/12 months Removes mud, sand, rust, suspended materials, residual chlorine,
and abnormal avor from water, improving the taste.
MRF2 lter 2200G/24 months Can eectively reduce the presence of substances including arsenic,
lead, uoride, heavy metals, etc.
Filter Life Reminder
Status Remaining
Life (Day)
Remaining
Capacity (G)
Indication
Light Buzzer
Beeps 2 times when
dispensing water
N/A
Normal
Pre-warning
>15 >40 Blue
≤15 ≤40 Purple
Keeps beeping when
dispensing water
Warning ≤0 ≤0Red
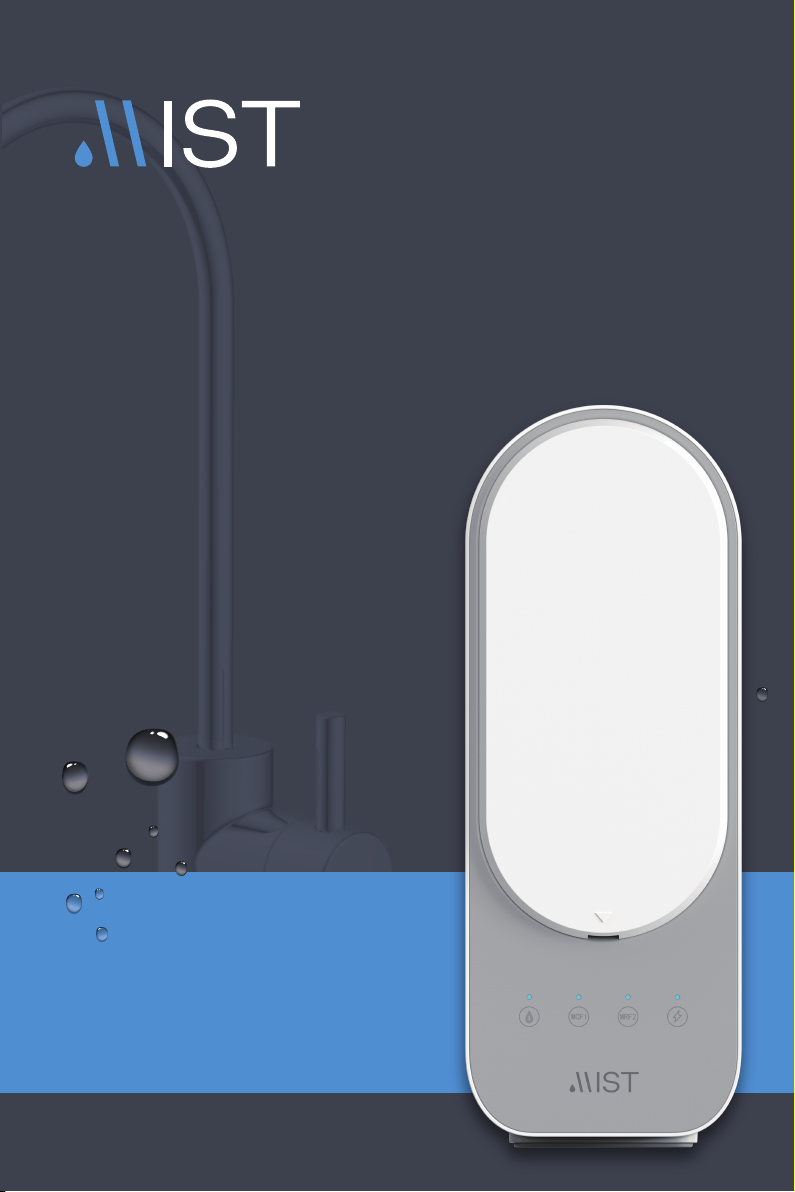
There are convenient electronic lter indicators on the front panel that will notify you by change of color when it is
time to perform routine lter replacement. Be sure to reset the lter life indicator every time you replace a lter.
(see next page for instructions).
If the System Cannot Be Powered on After You Insert the Power Plug
a. Check the ow of electricity to the power outlet under the sink as this problem most often occurs when there is no
ow of electricity to the outlet. Also, check to ensure that the system has been plugged correctly into the outlet
To test if there is a problem with the system itself, just pick up the system and try another power outlet. Please contact
us if the system can't be powered on, and we will help determine the source of the problem
No Output Water from RO Faucet
a. Filter has expired: Check the lter life indicators to conrm which lter needs to be replaced, and replace it immedi-
ately.
b. Low water pressure: Check and conrm that the water pressure is between 14.5 psi and 87 psi.
c. Water supply is o: Turn on the feed water adapter or water supply valve.
d. Incorrect lter installation: Reinstall the two lters, making sure they are inserted properly.
e. A tubing is crimped: Check all tubings and remove any crimps.
Low Water Flow at RO Faucet
a. A tubing is crimped or there's a leak at the tubing connection: Check to ensure all tubing is installed correctly and
completely.
b. Filter has expired: Check the lter life indicators to conrm which lter needs to be replaced, and replace it immedi-
ately.
c. Low water temperature: Be sure to use the system only with a water temperature of 41-100 °F.
d. If you use well water as the source and the feed water has not been through a preltration system, the lter may
have become clogged. If you are using well water as the source, please ensure that the feed water passes through a
pre-ltration system. Otherwise, large particles in the well water can easily clog the lter and shorten the lter life.
High TDS in Filtered Water
The system will provide a 90%+ TDS (Total Dissolved Solids) rejection rate (tested under standard laboratory
conditions) after full ushing when working properly. If the TDS reading is high, the following are possible causes:
a. The system hasn't been used for a long time; Turn on the RO faucet, and allow water to run for a while. The TDS
reading should return to normal.
b. The RO membrane lter has expired: Replace the RO membrane lter immediately
c. The waste water tubing may be crimped or clogged: Check and remove crimps. Realign the drain saddle and
drainpipe.
d. The source water may have a high TDS: Test both the source water and ltered water. The ltered water's TDS should
be about 5%-10% of your source water's TDS. This is a normal range. A high TDS in the source water may reduce the
service life of the system. When the ltered water's TDS creeps up to 15%-20% of the source water's TDS, perform
routine lter replacement.
Water Leakage
a. Check all joints, ttings and tubing connections to locate the leakage. Make sure the lters are properly installed.
Filtered Water from the RO Faucet Tastes Like Tap Water
a. Incorrect tubing installation: Make sure the waste water tubing is not connected to the RO faucet.
Booster Pump Overworked Reminder
Buzzer keeps beeping for 3 minutes, and then the lter life indicators on the front panel ash red.
a. Continuously dispensing water for more than 30 minutes: Power on the system again to reset it.
b. There is a leak at the tubing connection between the system and RO faucet: Turn o the power. Check the tubing
connection, make sure the tubing is inserted into the quick-connect tting properly and rmly, and power on the
system again.
Booster Pump Starting and Stopping Frequently
a. Reminder Buzzer beeps 5 times, and then the lter life indicators on the front panel ash purple.
b. There is an internal pressure imbalance: Disconnect the power. Turn o the RO faucet completely, removing any
tubing crimps. Make sure the ow of water to the faucet is not blocked, and power on the system again.
Loud Sound from the RO System
Normally, the operating sound of the RO System will not exceed 55 dB, which is largely unnoticeable in everyday life
(55 dB is as tested under standard laboratory conditions, when the feed water pressure is between 14.5 psi and 87 psi).
A louder sound may be caused by the following:
a. The system is not positioned on a at surface. Make sure the system is placed evenly without shaking.
b. The system is placed against the cabinet. Do not place the system in contact with the cabinet. The system may
vibrate when it is operating.
c. The water pressure is unstable. Check and conrm that the water pressure is between 14.5 psi and 87 psi. The sound
will decrease when the water pressure becomes stable.

7
Turn o faucet and wait for 30 seconds to fully release the pressure on the system. The lter can be replaced without
turning o the water source or power supply.
a. Twist the lter that needs to be replaced counterclockwise;
b. Remove wrappings and protective cap from the new lter;
c. Insert the new lter into the corresponding lter hole, align the lter handle horizontally with the“lock”mark on the
housing and then rotate 90° clockwise until the lter handle is aligned vertically with the “lock” mark on the housing.
You may hear a click when the lter is in place.
d. After the lter is in place, press and hold the corresponding lter reset button for 5 seconds until you hear the
system beeps. The lter is now successfully reset.
How to Flush the Filter After Replacement:
For CF lter: The system starts ushing automatically for ve minutes, with the ltering indicator ashing blue.
For RO lter: The system starts ushing automatically for ve minutes and then the faucet must be opened to run for
30 additional minutes. The ltering indicator will ash blue during the ushing process.
Malfunction Display
Overworked Reminder: When the system continuously makes water for more than 30 minutes, the overworked
reminder will be executed and the buzzer will beep for 3 minutes. The system stops making water when working for
over 33 minutes, and the ltering indicator and power indicator will turn o. Meanwhile, the lter life indicators will
ash red. The system needs to be powered on again to reset itself.
Starting and Stopping Frequently Reminder: The RO system will perform a starting and stopping frequently
reminder when the booster pump is frequently started and stopped over the course of 20 minutes. The system will
stop making water, while the ltering indicator and power indicator will turn o and the lter life indicators will ash
purple. The system needs to be powered on again to reset itself.
If the System Cannot Be Powered on After You Insert the Power Plug
a. Check the ow of electricity to the power outlet under the sink as this problem most often occurs when there is no
ow of electricity to the outlet. Also, check to ensure that the system has been plugged correctly into the outlet
To test if there is a problem with the system itself, just pick up the system and try another power outlet. Please contact
us if the system can't be powered on, and we will help determine the source of the problem
No Output Water from RO Faucet
a. Filter has expired: Check the lter life indicators to conrm which lter needs to be replaced, and replace it immedi-
ately.
b. Low water pressure: Check and conrm that the water pressure is between 14.5 psi and 87 psi.
c. Water supply is o: Turn on the feed water adapter or water supply valve.
d. Incorrect lter installation: Reinstall the two lters, making sure they are inserted properly.
e. A tubing is crimped: Check all tubings and remove any crimps.
Low Water Flow at RO Faucet
a. A tubing is crimped or there's a leak at the tubing connection: Check to ensure all tubing is installed correctly and
completely.
b. Filter has expired: Check the lter life indicators to conrm which lter needs to be replaced, and replace it immedi-
ately.
c. Low water temperature: Be sure to use the system only with a water temperature of 41-100 °F.
d. If you use well water as the source and the feed water has not been through a preltration system, the lter may
have become clogged. If you are using well water as the source, please ensure that the feed water passes through a
pre-ltration system. Otherwise, large particles in the well water can easily clog the lter and shorten the lter life.
High TDS in Filtered Water
The system will provide a 90%+ TDS (Total Dissolved Solids) rejection rate (tested under standard laboratory
conditions) after full ushing when working properly. If the TDS reading is high, the following are possible causes:
a. The system hasn't been used for a long time; Turn on the RO faucet, and allow water to run for a while. The TDS
reading should return to normal.
b. The RO membrane lter has expired: Replace the RO membrane lter immediately
c. The waste water tubing may be crimped or clogged: Check and remove crimps. Realign the drain saddle and
drainpipe.
d. The source water may have a high TDS: Test both the source water and ltered water. The ltered water's TDS should
be about 5%-10% of your source water's TDS. This is a normal range. A high TDS in the source water may reduce the
service life of the system. When the ltered water's TDS creeps up to 15%-20% of the source water's TDS, perform
routine lter replacement.
Water Leakage
a. Check all joints, ttings and tubing connections to locate the leakage. Make sure the lters are properly installed.
Filtered Water from the RO Faucet Tastes Like Tap Water
a. Incorrect tubing installation: Make sure the waste water tubing is not connected to the RO faucet.
Booster Pump Overworked Reminder
Buzzer keeps beeping for 3 minutes, and then the lter life indicators on the front panel ash red.
a. Continuously dispensing water for more than 30 minutes: Power on the system again to reset it.
b. There is a leak at the tubing connection between the system and RO faucet: Turn o the power. Check the tubing
connection, make sure the tubing is inserted into the quick-connect tting properly and rmly, and power on the
system again.
Booster Pump Starting and Stopping Frequently
a. Reminder Buzzer beeps 5 times, and then the lter life indicators on the front panel ash purple.
b. There is an internal pressure imbalance: Disconnect the power. Turn o the RO faucet completely, removing any
tubing crimps. Make sure the ow of water to the faucet is not blocked, and power on the system again.
Loud Sound from the RO System
Normally, the operating sound of the RO System will not exceed 55 dB, which is largely unnoticeable in everyday life
(55 dB is as tested under standard laboratory conditions, when the feed water pressure is between 14.5 psi and 87 psi).
A louder sound may be caused by the following:
a. The system is not positioned on a at surface. Make sure the system is placed evenly without shaking.
b. The system is placed against the cabinet. Do not place the system in contact with the cabinet. The system may
vibrate when it is operating.
c. The water pressure is unstable. Check and conrm that the water pressure is between 14.5 psi and 87 psi. The sound
will decrease when the water pressure becomes stable.
Filter Replacement Guide

8
System Maintenance
If you do not use the machine for a long time (more than 1 week), it is recommended that the faucet be opened to
ush for a while before the water is used again.
Please replace the lter regularly according to the lter life indicator.
NOTE: While testing was performed under standard laboratory conditions, actual performance may vary depend-
ing on the source water quality and water usage.
To prevent premature blockage and failure of the lters, it is recommended that the lters be replaced in accordance
with actual usage.
Clean the system with clear water. Do not spray the water directly onto the lter. Do not use steel wool, abrasive
cleaners or corrosive liquids such as gasoline or acetone.
When cleaning, do not pour other liquids into the lter so as not to risk damaging the lter system.
Keep the waste water pipe unobstructed to avoid damage to the lter or internal components.
When the drainpipe is blocked, do not use the system (please turn o the power) to avoid waste water from ooding.
Check the system and water pipe ttings regularly for water leakage to avoid any property damage.
Regularly check whether the power supply and wires are damaged or loose to avoid major accidents caused by
electrical malfunction.
If you are using well water as the source, please ensure that the feed water has passed through a pre-ltration system.
Otherwise, large particles in the well water will easily clog the lter and shorten the lter life.
If the System Cannot Be Powered on After You Insert the Power Plug
a. Check the ow of electricity to the power outlet under the sink as this problem most often occurs when there is no
ow of electricity to the outlet. Also, check to ensure that the system has been plugged correctly into the outlet
To test if there is a problem with the system itself, just pick up the system and try another power outlet. Please contact
us if the system can't be powered on, and we will help determine the source of the problem
No Output Water from RO Faucet
a. Filter has expired: Check the lter life indicators to conrm which lter needs to be replaced, and replace it immedi-
ately.
b. Low water pressure: Check and conrm that the water pressure is between 14.5 psi and 87 psi.
c. Water supply is o: Turn on the feed water adapter or water supply valve.
d. Incorrect lter installation: Reinstall the two lters, making sure they are inserted properly.
e. A tubing is crimped: Check all tubings and remove any crimps.
Low Water Flow at RO Faucet
a. A tubing is crimped or there's a leak at the tubing connection: Check to ensure all tubing is installed correctly and
completely.
b. Filter has expired: Check the lter life indicators to conrm which lter needs to be replaced, and replace it immedi-
ately.
c. Low water temperature: Be sure to use the system only with a water temperature of 41-100 °F.
d. If you use well water as the source and the feed water has not been through a preltration system, the lter may
have become clogged. If you are using well water as the source, please ensure that the feed water passes through a
pre-ltration system. Otherwise, large particles in the well water can easily clog the lter and shorten the lter life.
High TDS in Filtered Water
The system will provide a 90%+ TDS (Total Dissolved Solids) rejection rate (tested under standard laboratory
conditions) after full ushing when working properly. If the TDS reading is high, the following are possible causes:
a. The system hasn't been used for a long time; Turn on the RO faucet, and allow water to run for a while. The TDS
reading should return to normal.
b. The RO membrane lter has expired: Replace the RO membrane lter immediately
c. The waste water tubing may be crimped or clogged: Check and remove crimps. Realign the drain saddle and
drainpipe.
d. The source water may have a high TDS: Test both the source water and ltered water. The ltered water's TDS should
be about 5%-10% of your source water's TDS. This is a normal range. A high TDS in the source water may reduce the
service life of the system. When the ltered water's TDS creeps up to 15%-20% of the source water's TDS, perform
routine lter replacement.
Water Leakage
a. Check all joints, ttings and tubing connections to locate the leakage. Make sure the lters are properly installed.
Filtered Water from the RO Faucet Tastes Like Tap Water
a. Incorrect tubing installation: Make sure the waste water tubing is not connected to the RO faucet.
Booster Pump Overworked Reminder
Buzzer keeps beeping for 3 minutes, and then the lter life indicators on the front panel ash red.
a. Continuously dispensing water for more than 30 minutes: Power on the system again to reset it.
b. There is a leak at the tubing connection between the system and RO faucet: Turn o the power. Check the tubing
connection, make sure the tubing is inserted into the quick-connect tting properly and rmly, and power on the
system again.
Booster Pump Starting and Stopping Frequently
a. Reminder Buzzer beeps 5 times, and then the lter life indicators on the front panel ash purple.
b. There is an internal pressure imbalance: Disconnect the power. Turn o the RO faucet completely, removing any
tubing crimps. Make sure the ow of water to the faucet is not blocked, and power on the system again.
Loud Sound from the RO System
Normally, the operating sound of the RO System will not exceed 55 dB, which is largely unnoticeable in everyday life
(55 dB is as tested under standard laboratory conditions, when the feed water pressure is between 14.5 psi and 87 psi).
A louder sound may be caused by the following:
a. The system is not positioned on a at surface. Make sure the system is placed evenly without shaking.
b. The system is placed against the cabinet. Do not place the system in contact with the cabinet. The system may
vibrate when it is operating.
c. The water pressure is unstable. Check and conrm that the water pressure is between 14.5 psi and 87 psi. The sound
will decrease when the water pressure becomes stable.

9
Troubleshooting
If the System Cannot Be Powered on After You Insert the Power Plug
a. Check the ow of electricity to the power outlet under the sink as this problem most often occurs when there is no
ow of electricity to the outlet. Also, check to ensure that the system has been plugged correctly into the outlet
To test if there is a problem with the system itself, just pick up the system and try another power outlet. Please contact
us if the system can't be powered on, and we will help determine the source of the problem
No Output Water from RO Faucet
a. Filter has expired: Check the lter life indicators to conrm which lter needs to be replaced, and replace it immedi-
ately.
b. Low water pressure: Check and conrm that the water pressure is between 14.5 psi and 87 psi.
c. Water supply is o: Turn on the feed water adapter or water supply valve.
d. Incorrect lter installation: Reinstall the two lters, making sure they are inserted properly.
e. A tubing is crimped: Check all tubings and remove any crimps.
Low Water Flow at RO Faucet
a. A tubing is crimped or there's a leak at the tubing connection: Check to ensure all tubing is installed correctly and
completely.
b. Filter has expired: Check the lter life indicators to conrm which lter needs to be replaced, and replace it immedi-
ately.
c. Low water temperature: Be sure to use the system only with a water temperature of 41-100 °F.
d. If you use well water as the source and the feed water has not been through a preltration system, the lter may
have become clogged. If you are using well water as the source, please ensure that the feed water passes through a
pre-ltration system. Otherwise, large particles in the well water can easily clog the lter and shorten the lter life.
High TDS in Filtered Water
The system will provide a 90%+ TDS (Total Dissolved Solids) rejection rate (tested under standard laboratory
conditions) after full ushing when working properly. If the TDS reading is high, the following are possible causes:
a. The system hasn't been used for a long time; Turn on the RO faucet, and allow water to run for a while. The TDS
reading should return to normal.
b. The RO membrane lter has expired: Replace the RO membrane lter immediately
c. The waste water tubing may be crimped or clogged: Check and remove crimps. Realign the drain saddle and
drainpipe.
d. The source water may have a high TDS: Test both the source water and ltered water. The ltered water's TDS should
be about 5%-10% of your source water's TDS. This is a normal range. A high TDS in the source water may reduce the
service life of the system. When the ltered water's TDS creeps up to 15%-20% of the source water's TDS, perform
routine lter replacement.
Water Leakage
a. Check all joints, ttings and tubing connections to locate the leakage. Make sure the lters are properly installed.
Filtered Water from the RO Faucet Tastes Like Tap Water
a. Incorrect tubing installation: Make sure the waste water tubing is not connected to the RO faucet.
Booster Pump Overworked Reminder
Buzzer keeps beeping for 3 minutes, and then the lter life indicators on the front panel ash red.
a. Continuously dispensing water for more than 30 minutes: Power on the system again to reset it.
b. There is a leak at the tubing connection between the system and RO faucet: Turn o the power. Check the tubing
connection, make sure the tubing is inserted into the quick-connect tting properly and rmly, and power on the
system again.
Booster Pump Starting and Stopping Frequently
a. Reminder Buzzer beeps 5 times, and then the lter life indicators on the front panel ash purple.
b. There is an internal pressure imbalance: Disconnect the power. Turn o the RO faucet completely, removing any
tubing crimps. Make sure the ow of water to the faucet is not blocked, and power on the system again.
Loud Sound from the RO System
Normally, the operating sound of the RO System will not exceed 55 dB, which is largely unnoticeable in everyday life
(55 dB is as tested under standard laboratory conditions, when the feed water pressure is between 14.5 psi and 87 psi).
A louder sound may be caused by the following:
a. The system is not positioned on a at surface. Make sure the system is placed evenly without shaking.
b. The system is placed against the cabinet. Do not place the system in contact with the cabinet. The system may
vibrate when it is operating.
c. The water pressure is unstable. Check and conrm that the water pressure is between 14.5 psi and 87 psi. The sound
will decrease when the water pressure becomes stable.

10
If the System Cannot Be Powered on After You Insert the Power Plug
a. Check the ow of electricity to the power outlet under the sink as this problem most often occurs when there is no
ow of electricity to the outlet. Also, check to ensure that the system has been plugged correctly into the outlet
To test if there is a problem with the system itself, just pick up the system and try another power outlet. Please contact
us if the system can't be powered on, and we will help determine the source of the problem
No Output Water from RO Faucet
a. Filter has expired: Check the lter life indicators to conrm which lter needs to be replaced, and replace it immedi-
ately.
b. Low water pressure: Check and conrm that the water pressure is between 14.5 psi and 87 psi.
c. Water supply is o: Turn on the feed water adapter or water supply valve.
d. Incorrect lter installation: Reinstall the two lters, making sure they are inserted properly.
e. A tubing is crimped: Check all tubings and remove any crimps.
Low Water Flow at RO Faucet
a. A tubing is crimped or there's a leak at the tubing connection: Check to ensure all tubing is installed correctly and
completely.
b. Filter has expired: Check the lter life indicators to conrm which lter needs to be replaced, and replace it immedi-
ately.
c. Low water temperature: Be sure to use the system only with a water temperature of 41-100 °F.
d. If you use well water as the source and the feed water has not been through a preltration system, the lter may
have become clogged. If you are using well water as the source, please ensure that the feed water passes through a
pre-ltration system. Otherwise, large particles in the well water can easily clog the lter and shorten the lter life.
High TDS in Filtered Water
The system will provide a 90%+ TDS (Total Dissolved Solids) rejection rate (tested under standard laboratory
conditions) after full ushing when working properly. If the TDS reading is high, the following are possible causes:
a. The system hasn't been used for a long time; Turn on the RO faucet, and allow water to run for a while. The TDS
reading should return to normal.
b. The RO membrane lter has expired: Replace the RO membrane lter immediately
c. The waste water tubing may be crimped or clogged: Check and remove crimps. Realign the drain saddle and
drainpipe.
d. The source water may have a high TDS: Test both the source water and ltered water. The ltered water's TDS should
be about 5%-10% of your source water's TDS. This is a normal range. A high TDS in the source water may reduce the
service life of the system. When the ltered water's TDS creeps up to 15%-20% of the source water's TDS, perform
routine lter replacement.
Water Leakage
a. Check all joints, ttings and tubing connections to locate the leakage. Make sure the lters are properly installed.
Filtered Water from the RO Faucet Tastes Like Tap Water
a. Incorrect tubing installation: Make sure the waste water tubing is not connected to the RO faucet.
Booster Pump Overworked Reminder
Buzzer keeps beeping for 3 minutes, and then the lter life indicators on the front panel ash red.
a. Continuously dispensing water for more than 30 minutes: Power on the system again to reset it.
b. There is a leak at the tubing connection between the system and RO faucet: Turn o the power. Check the tubing
connection, make sure the tubing is inserted into the quick-connect tting properly and rmly, and power on the
system again.
Booster Pump Starting and Stopping Frequently
a. Reminder Buzzer beeps 5 times, and then the lter life indicators on the front panel ash purple.
b. There is an internal pressure imbalance: Disconnect the power. Turn o the RO faucet completely, removing any
tubing crimps. Make sure the ow of water to the faucet is not blocked, and power on the system again.
Loud Sound from the RO System
Normally, the operating sound of the RO System will not exceed 55 dB, which is largely unnoticeable in everyday life
(55 dB is as tested under standard laboratory conditions, when the feed water pressure is between 14.5 psi and 87 psi).
A louder sound may be caused by the following:
a. The system is not positioned on a at surface. Make sure the system is placed evenly without shaking.
b. The system is placed against the cabinet. Do not place the system in contact with the cabinet. The system may
vibrate when it is operating.
c. The water pressure is unstable. Check and conrm that the water pressure is between 14.5 psi and 87 psi. The sound
will decrease when the water pressure becomes stable.
Limited Product Warranty
The warranty of this product covers defects in materials and workmanship from the original date of purchase. During
the warranty period, we will replace or repair any part deemed defective, as long as the product has not been subject-
ed to tampering, alteration, lack of regular maintenance or improper use after delivery. The cost of repair or replace-
ment under these excluded circumstances shall be borne by the consumer. This limited warranty does not cover the
following items: lters and all other parts or components that require regular replacement as a result of ordinary
usage. This limited warranty only applies if the system is installed, used, and maintained in compliance with all
instructions and requirements enclosed with the system.
This limited warranty shall be valid only if:
1. The feed water pressure is no less than 14.5 psi and no higher than 87 psi;
2. The feed water temperature must be no less than 41°F and no more than 100°F;
3. The feed water must have a pH between 6.5 and 8.5;
4. Turbidity must be less than 1.0 NTU.
Any information or suggestion with respect to our product concerning applications, specications or standards is
provided solely for your convenience of reference. The quality of water supplies may vary seasonably or over a period
of time. Your water usage may vary as well. The manufacturer assumes no liability for the determination of the proper
equipment necessary to meet your requirements, and we do not authorize others to assume such obligation on our
behalf.You must verify and test the suitability of any information with respect to the product for your specic applica-
tion.
This limited warranty shall be void if:
1. The cartridge lters are not replaced according to the recommended maintenance schedule.
2. The product is purchased from someone other than our ocial website or our authorized dealers, as in such cases
we cannot verify or guarantee the integrity or authenticity of the product in such cases.
Our sole obligation under this warranty shall be repair or replacement of a non-conforming product or parts of this
product, or at our option, return of the product and a refund of the purchase price. Our obligation does not include
the cost of transportation. We are not responsible for damage in transit, and claims for such damage should be
presented to the carrier by the customer.
The warranties set forth herein are the only warranties made by us with respect to the product. We make no
warranties, expressed or implied, including, but not limited to, any warranties of tness or merchantability, except as
expressly set forth above.
NOTE: In case some states do not allow limitations on how long an implied warranty lasts, you may choose to
return the system. If you choose to keep it, you agree that the above limitations still apply to you.

REVERSE OSMOSIS SYSTEM
If the System Cannot Be Powered on After You Insert the Power Plug
a. Check the ow of electricity to the power outlet under the sink as this problem most often occurs when there is no
ow of electricity to the outlet. Also, check to ensure that the system has been plugged correctly into the outlet
To test if there is a problem with the system itself, just pick up the system and try another power outlet. Please contact
us if the system can't be powered on, and we will help determine the source of the problem
No Output Water from RO Faucet
a. Filter has expired: Check the lter life indicators to conrm which lter needs to be replaced, and replace it immedi-
ately.
b. Low water pressure: Check and conrm that the water pressure is between 14.5 psi and 87 psi.
c. Water supply is o: Turn on the feed water adapter or water supply valve.
d. Incorrect lter installation: Reinstall the two lters, making sure they are inserted properly.
e. A tubing is crimped: Check all tubings and remove any crimps.
Low Water Flow at RO Faucet
a. A tubing is crimped or there's a leak at the tubing connection: Check to ensure all tubing is installed correctly and
completely.
b. Filter has expired: Check the lter life indicators to conrm which lter needs to be replaced, and replace it immedi-
ately.
c. Low water temperature: Be sure to use the system only with a water temperature of 41-100 °F.
d. If you use well water as the source and the feed water has not been through a preltration system, the lter may
have become clogged. If you are using well water as the source, please ensure that the feed water passes through a
pre-ltration system. Otherwise, large particles in the well water can easily clog the lter and shorten the lter life.
High TDS in Filtered Water
The system will provide a 90%+ TDS (Total Dissolved Solids) rejection rate (tested under standard laboratory
conditions) after full ushing when working properly. If the TDS reading is high, the following are possible causes:
a. The system hasn't been used for a long time; Turn on the RO faucet, and allow water to run for a while. The TDS
reading should return to normal.
b. The RO membrane lter has expired: Replace the RO membrane lter immediately
c. The waste water tubing may be crimped or clogged: Check and remove crimps. Realign the drain saddle and
drainpipe.
d. The source water may have a high TDS: Test both the source water and ltered water. The ltered water's TDS should
be about 5%-10% of your source water's TDS. This is a normal range. A high TDS in the source water may reduce the
service life of the system. When the ltered water's TDS creeps up to 15%-20% of the source water's TDS, perform
routine lter replacement.
Water Leakage
a. Check all joints, ttings and tubing connections to locate the leakage. Make sure the lters are properly installed.
Filtered Water from the RO Faucet Tastes Like Tap Water
a. Incorrect tubing installation: Make sure the waste water tubing is not connected to the RO faucet.
Booster Pump Overworked Reminder
Buzzer keeps beeping for 3 minutes, and then the lter life indicators on the front panel ash red.
a. Continuously dispensing water for more than 30 minutes: Power on the system again to reset it.
b. There is a leak at the tubing connection between the system and RO faucet: Turn o the power. Check the tubing
connection, make sure the tubing is inserted into the quick-connect tting properly and rmly, and power on the
system again.
Booster Pump Starting and Stopping Frequently
a. Reminder Buzzer beeps 5 times, and then the lter life indicators on the front panel ash purple.
b. There is an internal pressure imbalance: Disconnect the power. Turn o the RO faucet completely, removing any
tubing crimps. Make sure the ow of water to the faucet is not blocked, and power on the system again.
Loud Sound from the RO System
Normally, the operating sound of the RO System will not exceed 55 dB, which is largely unnoticeable in everyday life
(55 dB is as tested under standard laboratory conditions, when the feed water pressure is between 14.5 psi and 87 psi).
A louder sound may be caused by the following:
a. The system is not positioned on a at surface. Make sure the system is placed evenly without shaking.
b. The system is placed against the cabinet. Do not place the system in contact with the cabinet. The system may
vibrate when it is operating.
c. The water pressure is unstable. Check and conrm that the water pressure is between 14.5 psi and 87 psi. The sound
will decrease when the water pressure becomes stable.
Made in China
Manufacturer Technical Support
Tel: 888-612-2513
E-mail: info@mistlters.com
E
A
S
Y
&
F
A
S
T
R
E
O
R
D
E
R
FOR EASY REORDER
Use the camera app
on your smartphone to
scan this QR code.
Use code REORDER for
10% off your next order.
E
A
S
Y
&
F
A
S
T
R
E
O
R
D
E
R
FOR EASY REORDER
Use the camera app
on your smartphone to
scan this QR code.
Use code REORDER for
10% off your next order.
MCF1 FILTER
MRF2 FILTER

主机说明书
印刷品技术要求 IMPORTANT PRINTING CAUTION
1. 印刷要求
2. 材质要求
3. 颜色要求
覆光膜 覆亚膜 UV油 吸塑油 过油 丝印
封面封底200g铜版纸覆亚膜,内页105g铜版纸
四色印刷
图像颜色请依据数码稿印刷
请不要擅自变更来稿件,如须修改,请联系伊可普做有关决定
此页不印刷
If the System Cannot Be Powered on After You Insert the Power Plug
a. Check the ow of electricity to the power outlet under the sink as this problem most often occurs when there is no
ow of electricity to the outlet. Also, check to ensure that the system has been plugged correctly into the outlet
To test if there is a problem with the system itself, just pick up the system and try another power outlet. Please contact
us if the system can't be powered on, and we will help determine the source of the problem
No Output Water from RO Faucet
a. Filter has expired: Check the lter life indicators to conrm which lter needs to be replaced, and replace it immedi-
ately.
b. Low water pressure: Check and conrm that the water pressure is between 14.5 psi and 87 psi.
c. Water supply is o: Turn on the feed water adapter or water supply valve.
d. Incorrect lter installation: Reinstall the two lters, making sure they are inserted properly.
e. A tubing is crimped: Check all tubings and remove any crimps.
Low Water Flow at RO Faucet
a. A tubing is crimped or there's a leak at the tubing connection: Check to ensure all tubing is installed correctly and
completely.
b. Filter has expired: Check the lter life indicators to conrm which lter needs to be replaced, and replace it immedi-
ately.
c. Low water temperature: Be sure to use the system only with a water temperature of 41-100 °F.
d. If you use well water as the source and the feed water has not been through a preltration system, the lter may
have become clogged. If you are using well water as the source, please ensure that the feed water passes through a
pre-ltration system. Otherwise, large particles in the well water can easily clog the lter and shorten the lter life.
High TDS in Filtered Water
The system will provide a 90%+ TDS (Total Dissolved Solids) rejection rate (tested under standard laboratory
conditions) after full ushing when working properly. If the TDS reading is high, the following are possible causes:
a. The system hasn't been used for a long time; Turn on the RO faucet, and allow water to run for a while. The TDS
reading should return to normal.
b. The RO membrane lter has expired: Replace the RO membrane lter immediately
c. The waste water tubing may be crimped or clogged: Check and remove crimps. Realign the drain saddle and
drainpipe.
d. The source water may have a high TDS: Test both the source water and ltered water. The ltered water's TDS should
be about 5%-10% of your source water's TDS. This is a normal range. A high TDS in the source water may reduce the
service life of the system. When the ltered water's TDS creeps up to 15%-20% of the source water's TDS, perform
routine lter replacement.
Water Leakage
a. Check all joints, ttings and tubing connections to locate the leakage. Make sure the lters are properly installed.
Filtered Water from the RO Faucet Tastes Like Tap Water
a. Incorrect tubing installation: Make sure the waste water tubing is not connected to the RO faucet.
Booster Pump Overworked Reminder
Buzzer keeps beeping for 3 minutes, and then the lter life indicators on the front panel ash red.
a. Continuously dispensing water for more than 30 minutes: Power on the system again to reset it.
b. There is a leak at the tubing connection between the system and RO faucet: Turn o the power. Check the tubing
connection, make sure the tubing is inserted into the quick-connect tting properly and rmly, and power on the
system again.
Booster Pump Starting and Stopping Frequently
a. Reminder Buzzer beeps 5 times, and then the lter life indicators on the front panel ash purple.
b. There is an internal pressure imbalance: Disconnect the power. Turn o the RO faucet completely, removing any
tubing crimps. Make sure the ow of water to the faucet is not blocked, and power on the system again.
Loud Sound from the RO System
Normally, the operating sound of the RO System will not exceed 55 dB, which is largely unnoticeable in everyday life
(55 dB is as tested under standard laboratory conditions, when the feed water pressure is between 14.5 psi and 87 psi).
A louder sound may be caused by the following:
a. The system is not positioned on a at surface. Make sure the system is placed evenly without shaking.
b. The system is placed against the cabinet. Do not place the system in contact with the cabinet. The system may
vibrate when it is operating.
c. The water pressure is unstable. Check and conrm that the water pressure is between 14.5 psi and 87 psi. The sound
will decrease when the water pressure becomes stable.
Table of contents
Popular Water Filtration System manuals by other brands

Hoshizaki
Hoshizaki WOX-40WA-EW installation manual

Panasonic
Panasonic TK-AS40 instruction manual

Vestergaard
Vestergaard LifeStraw user manual

Ultraviolet Sysrtems Inc.
Ultraviolet Sysrtems Inc. Ultra UV2 Installation & operation manual

WellerFT
WellerFT MG100S Translation of the original instructions

WaterGroup
WaterGroup Aqua Flo Installation, operation and instruction manual

Everpure
Everpure EV9607-41 Specification sheet

ewo
ewo GOURMET BASIC installation manual

Mutable Instruments
Mutable Instruments Ripples manual

Ultimaker
Ultimaker S5 Air Manager quick start guide

Philips
Philips AWP9820 user manual

FCI Watermakers
FCI Watermakers DOCKSIDE TREATMENT SYSTEM PLUS Series User manual & installation guide