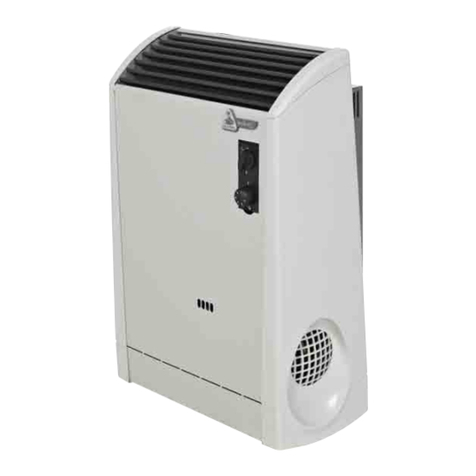
Italkero faro Service manual


2GENERAL
COMPLIANCE
Our appliance are compliance at:
Gas directive 90/396/CEE
Electromagnetic directive compatible 89/336/CEE
Low-tension directive 73/23/CEE 0694
RANGE
Faro
MODEL CODE
FR70R2 M0000

Kind Technical
We thank you for choosing the appliance. We can assure you its performance will be long lasting,
reliable when it is installed and used properly (manufacturerʼs guidelines are followed).
Good work and thanks
The Manufacturer.
3
GENERAL
WARRANTY
Provided that it is fitted in accordance with the Manufacturer's instructions, this
appliance benefits from the statutory warranty.

GENERAL
General informations pag.5
Safety rules pag.5
Appliance description pag.6
Identification pag.6
Structure pag.7
Technical data pag.8
Accessories pag.8
Electrical scheme pag.9
Control panel pag.10
INSTALLATION
Receiving the product pag.11
Installation types pag.12
Weight and dimension pag.12
Installation pag.13
- Apparatus choice location pag.13
- Intake and exhaust tube fumes assemblage pag.14
- Fastening the appliance pag.15
- Fitting and removing the front and rear panel pag.17
- Ø 54 mm parallel pipes with single end piece pag.18
- Fitting Special pipe KIT from inside the premises to be heated pag.19
- Ø 54 mm pipes with single end piece pag.19
- Diaphragms assemblage pag.23
- Fitting the remote digital control pag.24
Electrical collegaments pag.25
Gas connection pag.26
CUSTOMER SERVICE
Preliminary operations pag.25
First service start pag.25
Processor control box malfunction pag.26
Controls during the first & after starting service pag.26
Gas transformation pag.27
Regolation pag.28
Ordinary maintenance pag.29
Appliance clean out pag.29
Components replacement pag.30
Disassembly & reassembly of the skirt pag.34
Eventual anomalies & remedies pag.34
Useful information pag.36
4GENERAL
In same parts of the book there are used these symbols:
Attention: it used to underline particular caution or actions.
Prohibited: it used to underline the actions that don’t half to
be executed.
INDEX

We like to remember that, products that use combustion
or electrical energy there is security rule to observe
before operating.
Do not allow children to be near the appliance.
It is prohibited to turn on an electrical device if there
is a gas smell.
In this case:
- Open windows and door.
- Close the gas tap.
- Call a Technical Service Assistance.
It is prohibited to touch the appliance with wet hand
or other parts of your body.
-Electrical Hazard: Do not touch the appliance with
wet feet or other part of your body.
It is prohibited to clean the appliance when it is run-
ning.
It is prohibited to pull, remove and wring electric
wires outside the appliance also if the electrical
supply is turned off.
It is prohibited place over the appliance, towels, tea
clothes and other could be cause of inefficiency or
also source of hazard.
It is prohibited to leave paper, plastic, or other things
of the appliance box outside within a childʼs reach.
After removing the packaging, check the integrity of
the contents. In case of discrepancies, contact the
Agency that sold the appliance.
The appliance must be installed by an authorised
company pursuant to Law no. 46 dated 5 March
1990. After installation, such company should issue
the owner with a declaration of conformity of proper
installation, according to current national regulations
and any local regulations pursuant to Art. 17 of law
no. 46/90 and the instructions provided by the
Manufacturer in the installer's booklet that accompa-
nies the product.
The appliance must be used as intended by the
Manufacturer and for the purpose for which it was
expressly built.
The Manufacturer disclaims any contractual and
non-contractual liability for injury to persons and ani-
mals and damage to things caused by installation,
adjustment and maintenance errors or improper
appliance use.
If the appliance is not used for a long period of time,
the following operations will have to be performed:
- position the master switch of the appliance on
"OFF"
- position the master switch of the system, if fitted, on
"OFF" or disconnect the plug from the power socket.
- close the gas tap
The appliance should be serviced at least once a
year.
This booklet is an integral part of the appliance and
must therefore be carefully looked after and
ALWAYS accompany the appliance, including when
this is sold to another user or transferred to another
system.
In case of damage or loss, ask the Area After Sales
service of the Manufacturer for another copy.
Always make sure that curtains or other objects do
not obstruct the suction filter and the room air outlet
vent.
Only connect the appliance to properly earthed
power sockets.
Only install the appliance in dry environments (pro-
tection IP 20)
The appliance must not be operated wherever there
are hazardous materials, vapours or liquids.
Install the appliance on a flat surface to prevent any
malfunction.
5
GENERAL
GENERAL INFORMATIONS
SAFETY RULES

The appliance is identified through:
- Packed label:
A label that indicates the code and the combustion it
uses to identifies the appliance.
- Technical label:
The technical label reports the matrices numbers,
the gas prearrangement, and technical observation.
-Gas prearrangement label:
It reports the kind of gas the appliance has to use,
and if there is a transformation from one kind of gas
to another you have to change the old label.
Spare parts, or technical operation require, a
precise identification of the type of model.
If there is going to be any tampering of the technical
label, this will not consent the right identification of
the apparatus.
The appliance is a gas radiator that heat up the
atmosphere.
It has an intake of air that goes in the combustion
chamber type C.
The appliance is made with an aluminium body that
allows a high efficiency of heat; it also has a fan that
allows the dispersal of air faster in the rooms.
The appliance are arranged in factory for the function
at gas methane and they can be transformed to
GPL(G30/G31) using the furnished nozzle kit.
Note: At request the appliance can be furnished
already arranged at GPL.
It also has an electrical device that allows you to do
a series of things.
There also is a Processor Control Box (P.C.B
assy) that controls all the principalsʼfunction of
the apparatus.
After there is the Control Panel that has other
options.
6GENERAL
APPLIANCE DESCRIPTION
IDENTIFICATION
Metano
Methane
G.P.L.
L.P.G.

7
GENERAL
STRUCTURE
19
21
1 Fume exhaust
2 Air intake pipe
3 Convection fan
Condenser
5 Safety thermostat
6 Structure
7 Heat exchanger
8 Glass pipe
9 Ignition electrode
10 Detection electrode
11 Pressure switch
12 Combustion chamber
13 Combustion fan
1 Garter spring
15 Power plug
16 Technical data plate
17 Gas valve
18 Gas tap
19 Manual control
20 Control unit
21 On/Off switch
22 Thermostat knob
23 On/Off Wireless key
2 Wireless Control
25 Room heat probe
26 Data setting keys
27 Display screen
1 2
3
5
6
7
8
12
13
1
17
18
11
15
16
10
9
19 20
22 23
@
25
27
26
2

The following options are available upon request:
8GENERAL
MODEL
kW
kW
%
mbar
m3/h
kg/h
n∞
Ø
m3
m3/h
V~Hz
W
kg
kW
kW
kW
kW
mbar
faro
6,5
90,7
C13 - C33 - C53 - C63
II
2H 3+
1
3
230~50
135
IP20
5,9
,8
,3
LPG
28,5/36,3
0,511/0,276
0,7
1 3 ∏ 86
228
17/21
Methane
12,0
0,587/0,3 5
1,30
1 3 ∏ 86
228
58
7,5
Methane
G30
G31 kg/h
0,50 /0,273
mbar
29/3720
Terminal capacity nomination (Qn)
Right efficiency
Nozzle pressure
Gas consumption (15∞C) (nom./red.)
Type of apparatus
Combustion category
Efficiency class
Nozzle
Max/min value Atmospheric
heated by a convector
Quantity of air heated
Electrical alimentation
Power absorbed when in function
Protection degree
Weight with the convector in box
Terminal capacity reduction (Qn)
Terminal power convector nomination (Pn)
Terminal power convector reduction (Pn)
Reduce nozzle pressure
Main pressure (nomination)
DESCRIPTION CODE
90∞ curve _Ø 5 mm pipe union
Extension Ø 5 mm L = 500mm
Extension Ø 5 mm L = 1000mm
90∞ curve Ø 5 mm cast
Outer protection grille "GP" for separate end piece Ø 5 mm
Recessed screen "SDP" for separate end piece Ø 5 mm
Stack for pipe Ø 5 mm
INSULATION for pipe Ø 5 mm L = 1000mm (pack of pcs.)
Inlet/Outlet end piece Ø 5 mm L = 6 cm
135∞ curves Ø 5 mm
Outer protection grille "GPu" for combined end piece Ø 5 mm
70000370 00
70000390 00
70000380 00
70000755 00
70000350 00
70000365 00
700007 0 00
70000850 00
70000 65 00
70000375 00
70000610 00
Base + Side support foot 70000 95 00
TECHNICAL DATA
ACCESSORIES

9
GENERAL
ELECTRICAL SCHEME
CN1
3 2 1
CN2
1 2
CN6
3 2 1
VC
CN8
1 2 3 4 5 6
CN7
1 2
CN5
1
2
EV2
4
3
SAS
PS
F 1AT 250V
TL
LN
CL
230V~
EV1
EP
T1
ER
TA
3 2 1
EA
CN
MIN
MAX
C
SC II I O
V.T.C.
CVT
SAS
VC
VT
CN...
T1
VT
TA
BL
WH
R
SC
EA
ER
EV1
F
CL
EV2
L
N
PS
TL
EP
CVT
SPLIT ROOM PROBE
COMBUSTION FAN
TANGENTIAL FAN
CONNECTOR
POWER TERMINAL
TANGENTIAL FAN
IGNITION TRANSFORMER
BLUE WIRE
WHITE WIRE
RED WIRE
CONTROL BOARD
IGNITION ELECTRODE
DETECTION ELECTRODE
ELECTRIC GAS VALVE
FUSE
LINE CONNECTOR
POWER MODULATOR
PHASE LINE
NEUTRAL LINE
PRESSURE SWITCH
High LIMIT THERMOSTAT
EASY PANEL
TANG. FAN CONDENSER

10 GENERAL
CONTROL PANEL
1 - GREEN Led On = heater On
1b - GREEN Led Off = heater Off
2 - RED Led On = burner flame block
2b - RED Led Off = heater released
2c - RED Led SLOW flashing = pressure switch donʼt switch ON
2d - RED Led FAST flashing = locked pressure switch
3 - Thermostat knob regulation (approximate value): from MIN 5°C to MAX 35°C
A = from 5°C to 10°C
B = from 11°C to 16°C
C = from 17°C to 22°C
D = from 23°C to 28°C
E = from 29°C to 35°C
4 - GREEN Led On = Wireless control panel activated
4b - GREEN Led Off = Wireless control panel disabled
4c - GREEN Led flashing = waiting to recognize the Wireless
4d - GREEN Led flashing = Wireless default transmission (about. 2,5 minutes)
4e - GREEN Led flashing = Wireless data transmission by the change of any parameter
5 - Wireless On button switch = press and hold 2 seconds, LED 4 starts to blink to recognize the Wireless
(waiting at MAX 60 seconds) after which it automatically reactivates the manual control
5b - Wireless Off button switch = press and hold 2 seconds, LED 4 turns off automatically activating the
manual controls
6 - YELLOW Led FAST flashing = flame ignition cycle: start
6b - YELLOW Led SLOW flashing = burner ON turned to MIN heating
6c - YELLOW Led On = burner ON turned to MAX heating
6d - YELLOW Led Off = burner off, temperature reached
7 - Heater On/Off button switch
7b - RESET button switch = when switch On again, the Heater restart automatically
1 2 3 4
567
A
B
C
D
E

The appliance is supplied protected by cardboard
packaging containing:
n. 1 Appliance
n. 1 Manual control
n. 1 Digital Wireless control
n. 1 STANDARD pipe kit
n. 1 Side support foot
n. 1 Documents envelope:
n. 1 User instruction booklet
n. 1 Installer booklet
n. 1 Gas transformation KIT
n. 1 Spare parts catalogue
n. 1 Warranty certificate
n. 1 Warranty labels
n. 1 Power socket
- PARALLEL PIPE KIT WITH SINGLE END PIECE
(STANDARD)
- STANDARD Ø 54 pipe KIT with single end piece
The Kit consists of:
Q.ty Description
1 90° curve in cast aluminium
1 90° curve in aluminium
1 Gas tap with connections
2 Pipes Ø 54 mm L = 500 mm
1 Single end piece with integrated rosette
4 Ø 6 mm screw anchors for fastening
single end piece
2 Diaphragms
4 O-Ring for pipes
For installation see INSTALLER section.
If the STANDARD Pipe KIT inside the appliance
packaging fails to satisfy the desired installation cha-
racteristics, new parts can be added (pipes, curves,
etc.) from the Manufacturerʼs List.
To avoid any type of breakage or malfunc-
tion that could damage the appliance, we
suggest always using the Manufacturerʼs original
accessories and spare parts.
11
INSTALLER
RECEIPT OF PRODUCT

Below is a description of all possible types of
appliance installation:
A– fastened to a wall, as an extension of same;
B– between two perpendicular walls;
C– in the middle of a wall;
D– in the centre of an environment.
12 INSTALLER
mm
2157
mm
680
mm
312
kg
58
faro
Height ( B )
Width ( C )
Depth ( A )
Weight
DESCRI TION
INSTALLATION TYPES
WEIGHT & DIMENSION
A B
C D

GENERAL INFORMATIONS
This apparatus is tin respect to the environment; the
air is intake from the outside.
-When the appliance is being installed do not use
other pieces that are not give from the manufacturer.
-Donʼt let the electrical cable touch heated parts, like
the grill or the intake & exhaust tubes.
Is the installation duty to tell the owner the behaviour
to keep during the apparatus function.
- To avoid problems donʼt place cloth or other things
on top of the grill.
-Donʼt block with cloths or rug the apparatus intake &
exhaust tubes.
APPARATUS CHOICE LOCATION
Before youʼre going to install the appliance, check if
there is enough space for the correct function of the
appliance.
Check if around the appliance tubes there are mate-
rials that can support the heath, second check if the
wall is made of the right material and can support the
appliance weight.
Verified if around the exhaust fumes tubes, there is
no wood or plastic but there is the right material that
can support the heath.
The material where the appliance it going to be pla-
ced has to resist the exhaust tube heath (about
180°C).
In case of low resistant wall material itʼs possi-
ble to realize a cavity around the exhaust fume
tube, and insulate with strong material for the pre-
sent temperature, otherwise execute a hole with a
larger diameter at least 4 cm respect to the exhaust
fume tube.
Its prohibited settles the appliance in rooms like
bath, or showers. For this installation you need
to realize special protections that make the appara-
tus consistent to the Electrical security rules.
13
INSTALLER
INSTALLATION
centrale/central
laterale/lateral

14 INSTALLER
Installation stage
The appliance installations stages are:
- Apparatus choice location
- Tube installation
- Parallel tube kit Ø 54 mm with unique terminal
- Separated pip kit Ø 54 mm with single terminal
- Appliance installation
- Electrical collegaments
- Gas connection
TYPE OF INSTALLATION SECOND UNI CIG 7129
As we go on we are going to show you the types of
installation second by the Uni Cig 7129 rule.
INTAKE AND EXHAUST TUBE FUMES ASSEM-
BLAGE
The intake & exhaust tubes can be embedded insi-
de the wall, or in sight, they have to be protected to
avoid, risk condition. To have the apparatus in sight
it exist a spacing bar so that you can see the tubes,
we recommend that the unloaded tubes (1) have
to have a good insulation using materials that
have also a resistant of more 200° C° (ex. HT/-
Armaflex) of temperature. Realize the holes for
fastening the tubes, after establish the hangersʼ
length; insert it in the right position.
Before assembling the tubes verifying that the
Max tube length has been respected, even the
Max loaded loss provided (See table).
(*) - Sum of the pressure leak both air suction and
gas exhaust pipes.
(**) - MAX two dye-cast curve: 1 for intake and 1 for
the unloaded.
1
1
Max single terminal tube length
Min comprehensive tube length
Loaded loss tube l 500 mm
Loaded loss tube l 1000 mm
Loaded loss single terminal
Loaded max loss permissible
MODEL
Faro
80
mm
mm
m
mm
a
a
a
a
a
54
110
10
0,6
1
1
0,6
19
a5
Single terminal a1

FASTENING THE APPLIANCE
Position the appliance in the premises or along the
desired wall to check: overall dimensions, MAX
pipe length and installation feasibility (see fol-
lowing pages CASE A1, A2, B, B1 and C).
WALL installation (start, centre or end):
Install the appliance so the screens (1 and
2), used to make future maintenance/repair
easier, are not blocked.
- take the appliance out of the packaging, being
careful not to damage the front and rear panel (3);
- ricomporre il KIT fissaggio (5);
- recompose the fastening KIT (5);
- remove all the guards (1 top and 2 bottom);
- fasten the plate (11) on the top part of the applian-
ce (12) using the screws (10);
- fasten two L-shaped parts (6) on the plate (11);
- lift the appliance and stop it with the side support
foot (4, provided), to make all subsequent installation
operations easier;
- cut the vertical bars (9) to measure (h) to adapt
them to the height of the selected room;
- fasten the vertical bars (9) to the plates (6) already
fitted on the plate (11);
- fit the other two plates (6) on the vertical bars (9) to
fasten to the ceiling;
- position the appliance in its final position, mark and
drill the holes in the ceiling through the two plates (6)
just fitted;
During the drilling operations, be very careful
not to damage/drill the extraction pipe that
runs along the entire side upright of the appliance;
During the drilling operations, be very careful not
to damage/drill the gas pipes and wiring harnes-
ses passing along the side upright of the
appliance;
In view of the various types of installation offered by the
appliance, the Manufactures simply provides basic instruc-
tions regarding safety and fitting, so as not to restrict the
endless options used or conceived by the installer.
Make sure the chosen or conceived parts,
for fastening the appliance, are suitable for
supporting the weight taking into account above
all the material from which the wall is made.
- fasten the appliance in the desired position and
lock in the bottom;
Use the anchors most suitable for suppor-
ting the weight of the appliance and for the
material from which the wall on which the
appliance is being fastened is made.
- mark the centre point on the wall and then make
the holes for the extraction and exhaust pipes
(SPLIT or SINGLE end piece);
- make a Ø 110 mm hole in the wall (1 SPLIT end
piece) or a Ø 54 mm hole (2 SINGLE end pieces);
- remove the screen (1) for easier fitting of the
extraction and exhaust pipes;
ALWAYS insulate the exhaust pipe to prevent mal-
functions due to the formation of condensation;
- connect the pipes to the appliance;
- now bring the front and rear panels (3) up to the
appliance;
- fit the screen (1) back on.
15
INSTALLER
2
13
4
5
6
11
6
8
7
10
9
12
h
5
6
9
11
13

Installation at the CENTRE of the room:
Install the appliance so as not to block the
screens (1 and 2), used to make future main-
tenance/repair easier.
- take the appliance out of the packaging, being care-
ful not to damage the panels (3);
- lift the appliance, stopping it with the side support
foot (4, supplied), to make all subsequent installation
operations easier;
- remove the side screens (5) by loosening the
screws (6);
- position the appliance after deciding the pipe layout
(Extraction, Exhaust and Gas supply):
TYPE A) Extraction, Exhaust and Gas from
above;
TYPE B) Extraction in environment, Exhaust and
Gas supply from below under the floor;
In view of the various types of installation offered by the
appliance, the Manufactures simply provides basic instruc-
tions regarding safety and fitting, so as not to restrict the end-
less options used or conceived by the installer.
Make sure the chosen or conceived parts, for
fastening the appliance, are suitable for suppor-
ting the weight of the appliance taking into account
above all the material from which the wall is made.
- fasten the appliance in the desired position;
Use the anchors most suitable for suppor-
ting the weight of the appliance and for the
material from which the wall on which the
appliance is being fastened is made.
TYPE A) Use the fastening KIT (5) or fit adequate
brackets both to the ceiling (see bracket 11) and to
the floor (see bracket 13), able to secure the applian-
ce firmly and sturdily;
TYPE B) Use the fastening KIT (5) or fit adequate
brackets to any false ceiling (see bracket 11) and
floor (see bracket 13), able to secure the appliance
firmly and sturdily;
- mark the centre point on the wall and then make
the holes for the extraction and exhaust pipes
(SPLIT or SINGLE end piece);
- make a Ø 110 mm hole in the wall (1 SPLIT end
piece) or a Ø 54 mm hole (2 SINGLE end pieces);
ALWAYS insulate the exhaust pipe to pre-
vent malfunctions due to the formation of
condensation;
- connect the pipes to the appliance;
- now bring the front and rear panels (3) up to the
appliance;
- fit the screen (1 or 2) back on.
16 INSTALLER
3
1
2
type
B
type
A
5
6
11
6
8
7
10
9
12
h
5
6
9
11
13
13

FITTING AND REMOVING THE FRONT AND
REAR PANEL
Perform all the panel (5) fitting and removal
operations very carefully. These should be
done by at least 2 people in view of the consi-
stency and the weight of the parts to be moved.
Before proceeding to fit the panels on the
appliance, make sure that:
- the brackets (3 and 7) are perfectly fastened to
the panel (5);
- the brackets (1, 4 and 9) are correctly fastened
on the appliance.
The panels are fastened by slotting in to the lower
part of the Appliance, while the top part features a
fastening system that keeps the panel blocked up
against the frame.
Fitting
- check the correct fitting of the top brackets (1, 4)
and lower brackets (9) onto which the panels (5) will
be fastened.
To ensure perfect panel fastening and centring,
all the brackets are adjustable.
- insert the split (8) of the metal plate (7) on the lower
brackets (9) previously fastened on the Appliance.
- centre the panel with respect to the frame and
move it to vertical position.
- regulate the overhang of the L-shaped plate (1)
with respect to the bracket (4), then tighten the screw
(2) well so as to keep the panel up against the frame,
causing it to adhere properly on the seal (6) on the
inner edge.
Removal
- loosen the screw (2) and take out the L-shaped
metal plate (1). The top part (3) of the panel is freed.
Because of its weight, the panel which has just
been freed could fall forwards, so be very careful.
- tilt the panel outwards and lift it so as to remove the
metal plate (7) from the bottom brackets (9).
Pipe adapter connection
The adapter Connection is already installed in the top
part of the appliance, so no further fitting is required.
Cutting the pipes:
- the cut must be perpendicular to the pipe axis, and
care must be taken not to deform these.
- once the cut has been made, carefully remove the
burrs and make the fastening holes.
- fit the pipes, cut to measure, on the two adapter con-
nection curves, inserting them as far as they will go.
To make it easier to fit the pipes featuring O-Rings,
use silicone grease or soapy solution and make sure
the O-Rings do not come out of their seats.
17
INSTALLER
7
8
9
7
3
8
9
1
2
4
1
2
4
3
55 5
4
9
5
8
1
3
7
6
2
9

Outside grill assemblage (cod 7000000350)
To assemble the grill you only need the inserts, and
the steeliness steel flange.
Assemblage SDP protection (cod 7000000365)
The assembling is execute in the following way:
-After you have drilled on the outside wall put the
protection with mortar
-Assemblage the terminal tube with the equipment
screws
-Adapt the terminal to the tube length and grill pro-
tection between the walls.
The tube cuts have to be perpendicular being real
careful do not deform.
Ø 54 mm PARALLEL PIPES WITH SINGLE END
PIECE
This type uses parallel pipes which are best when
the fume exhaust (1) and the combustion air extrac-
tion (2) are close to each other and therefore come
together in a single end piece.
Fitting the single end piece from OUTSIDE
- Fit the pipes and any corner curves in the wall
without the single end piece.
- position the extraction/exhaust pipes flush with the
outer wall, being careful that the exhaust pipe (1) is
always higher than the extraction pipe (2).
- fit the single end piece on the pipes and make sure
the rosette is flush with the wall.
- mark the centres of the fastening holes using a
punch.
- remove the end piece, drill the holes for housing
the Ø 6 mm anchors using a Ø 6 mm drill bit.
- Fasten the single end piece to the wall using the Ø
6 mm anchors provided and being careful that the
fume exhaust hole (3) of the end piece is always
positioned upwards.
Ascertain that the adapter tubes connections
are correctly inserted. To fasten the tubes
assemblage, use silicone grease and verified that
the O-ring donʼt come out from there seating.
Before you wall up the tubes, provide to insula-
te the exhaust fume tube with material resistant
to the 200° C° (ex. HT/-Armaflex)
18 INSTALLER
Ø 54
SDP
GP
Ø 54
1
2
3

Fitting the SPECIAL PIPE KIT from inside the pre-
mises to be heated
After making the hole in the wall, adapt the length of
the pipes to the actual thickness of the wall, by cut-
ting off the excess part.
IMPORTANT: pipe cutting must always be done per-
pendicular to the axis of the pipe itself, being very
careful not to deform the pipes.
Before fitting in the hole made in the wall, fasten the
SPECIAL Kit on the pipes using the screws.
Fit the assembled “unit” in the hole (SPECIAL Kit +
pipes).
Ø 54 mm PIPES WITH SINGLE END PIECE
This type uses separate pipes with two single end
pieces and is used when the fume exhaust and the
combustion air extraction pipes are at a distance
from the appliance.
Types of installation can vary, but can be summed
up in the three examples described in this chapter.
Before assembling the Pipes, check complian-
ce with MAX pipe length and MAX accepta-
ble flow resistance (see Chart).
(*) - Sum of the pressure leak both air suction and
gas exhaust pipes.
(**) - MAX two dye-cast curve: 1 for intake and 1 for
the unloaded.
Chances A1/A2 tube assemblage in wall.
This solution can be adapted when the wall thick-
ness consent to execute the trace for the connection
tubes, and can be realize in two ways:
Before you wall up the tubes, provide to insulate
the exhaust fume tubes, with strong materials
resistant at a greater temperature of 200 °C (ex.
HT/-Armaflex).
19
INSTALLER
Max single terminal tube length
Min comprehensive tube length
Loaded loss tube l 500 mm
Loaded loss tube l 1000 mm
Loaded loss single terminal
Loaded max loss permissible
MODEL
Faro
80
mm
mm
m
mm
a
a
a
a
a
54
110
10
0,6
1
1
0,6
19
a5
Single terminal a1
A1
A2
MIN
200mm

-Chance A1 (with tube Ø 54 mm)
For the unloaded & intake tube installation:
-Mark the centre (A) execute the hole Bfor the (Ø 65
mm) for the tube Ø 54 mm.
- check the correctness and the length of the
path described by the pipes (extraction and
exhaust) to be recessed in the wall.
-Execute trace in the wall for the tube.
Before you wall up the tubes, provide to
insulate the exhaust fume tubes, with strong
materials resistant at a greater temperature of
200 °C (ex. HT/-Armaflex).
Group adapter connection tube
The group adapter preparation is effected by two
kinds of tubes Ø 54 mm
-- With Ø 54 mm tubes.
- Adapt the length tube; to the wall space so it
increases 25 mm, then cut it.
- the adapter connection unit is already fitted on the
top part of the appliance and does not require any
type of further assembly or adjustment.
- fit the curves/pipes on the connection as far as they
will go.
Make sure the pipes have been correctly fit-
ted in the adapter connection and that the
O-rings do not protrude from their seats, for
pipes featuring seal.
- Assemble the unique terminal (2) to tube (1).
The cut has to be perpendicular to the axe
tubes, being real careful donʼt deform.
At the cut, take away real carefully the featheredge,
after make the fastening holes.
+25mm
L
2
1
+25mm
Ø 54
20 INSTALLER
AB
Table of contents
Other Italkero Heater manuals