Basic Sequencing Ideas
The following are very basic sequencing ideas using the router, but when they are dynamically
patched or played live they can create more variation to the rhythm of your patch.
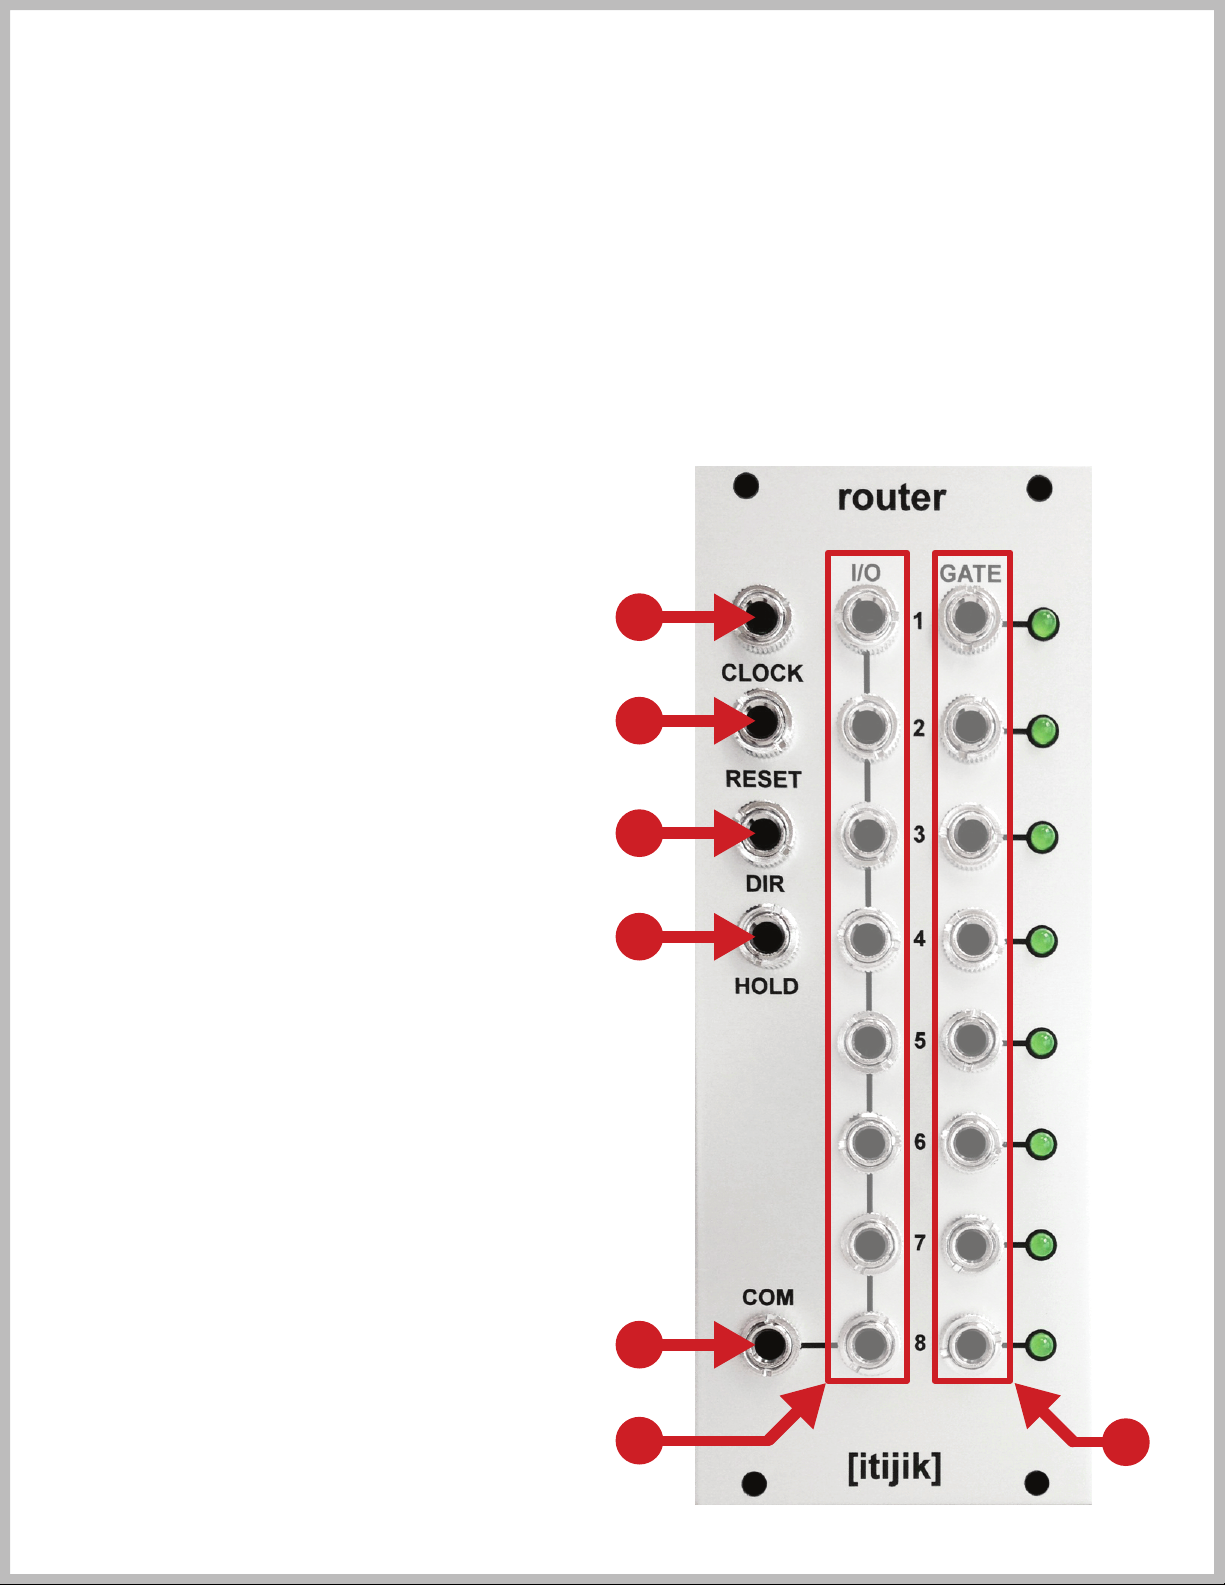
- Connect one of the GATE outputs to RESET input to limit the router to the desired number of steps.
- Connect one of the GATE outputs to the HOLD input to create a “one-shot” sequence.
- Connect one of the GATE outputs to the DIR input to bounce between that step and the next.
- Add a clock divider and drive it from the same clock used for the router. Then use the divider’s
outputs to trigger the router’s various functions. You can also use one of the router’s GATE outputs to
drive the divider instead.
- Add a flip flop and connect the “Q” output to the DIR input of the router. Then connect a GATE
output of the router to the “Set” input of the flip flop, and another GATE output of the router to the
“Reset” input of the flip flop. This will create a ping pong type sequence between the two steps
selected.
Patch Ideas
Patching with sequential switches can go anywhere your set of modules and your imagination can go!
I have included a few of my ideas here, but I know the synth community will come up with some
amazing stuff. If you have such a patch and would like it included, please contact me at itijik.com.
Quick LFO wiggle - Connect the square output of a multi-wave LFO into the CLOCK input. Connect
various waveforms from the same LFO into different I/O steps of the router. Connect the COM output
to your CV destination. This creates a quick tempo synced modulation source.
Sequencer expander - Combine multiple analog sequencer channels to make a large programmable
sequence! This is a common use for smaller sequential switches, but the router does it bigger.
Connect the COM output of the router to your CV destination. Connect the outputs of your sequenc-
ers to the I/Os of the router. If you have open I/Os, try throwing an LFO or other CV source to mix up
the fixed sequence voltages. You could also just leave them open for rests, or limit the number of
steps with the RESET input connected to one of the GATE outputs.
Envelope routing - Multiple envelopes can be routed and sequenced to one CV input! This can
produce some interesting results, since the envelopes are cut off when the next step is active.
Connect envelope outputs into the router’s I/Os and connect the corresponding GATE outputs to the
envelope trigger or gate inputs. Connect the COM output of the router to your CV destination. You
can also multi the envelope outputs to various I/Os without retriggering to get stutter or gated enve-
lope effects. Or even mix some envelopes with the output while still routing the rest of them, for mul-
tiple layers of envelope action.
Audio rate waveform sequencing - Connect a square wave from a VCO to the CLOCK input. Connect
various waveforms from the VCO into the I/O steps of the router. Connect the COM output to a mixer.
Try using VCAs or filters to adjust these waveforms dynamically to get some timbre movement!
FSU, Audio Slicer - If nessesary, amplify an incoming audio signal and multi it to each I/O of the
router. Connect the COM output to a mixer. Now clock the router at audio rates. Sound nice?...Now
remove some steps from the I/Os and you have a dirty bit reducer with the clock speed being the
“sample rate” (tested to 30kHz with a 50% duty cycle square wave). Choosing different steps will
produce different results. Try just four steps, then swap them around and wiggle that clock! At LFO
clock speeds you have an audio slicer. Keep in mind you may hear some clicking between steps, but
it can still be a lot of fun. Try running a bunch of different audio sources on different steps for a sound
collage. Try running a kick drum with a long decay in and make it stutter for a pseudo delay effect.