JackJaw 301 User manual
Assembly Instructions
Operating Instructions
JackJaw®301/302 Assembly and Operating Instructions
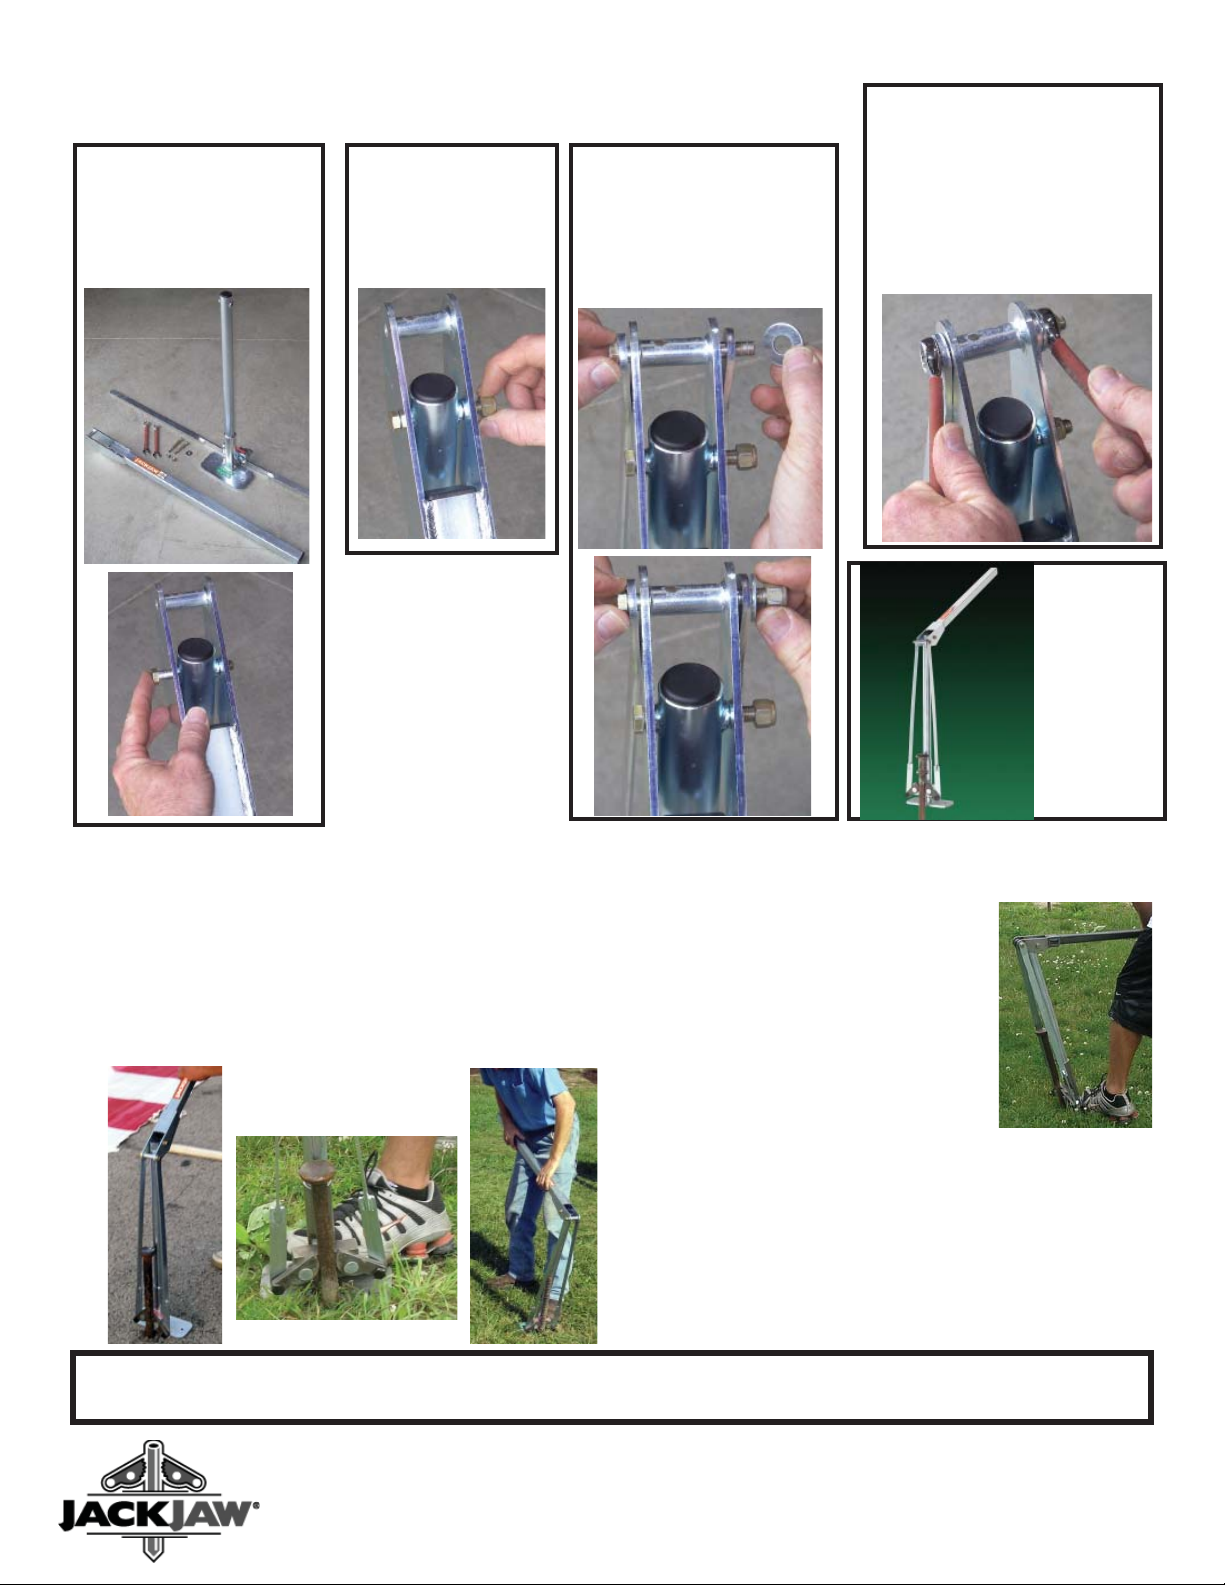
Step 1: Place contents of
box on floor or table. Place
handle over riser tube with
decal facing up and insert
short 3/8” - 24 bolt.
Step 2: Start 3/8”-24
self locking nut on to
bolt.
Step 3: Swing link arms up to
handle. Insert the long 3/8”-
24 bolt through link arms and
handle. Install flat washer on
bolt. Start 3/8”-24 locking nut
on bolt.
Step 4: Use two 9/16” wrenches
to tighten riser bolts and nuts and
link arms onto handle.
Note: Nut will stop before con-
tacting the handle.Then, back off
the nut on the link arm bolt one
half turn from the washer. Handle
should raise and lower freely.
Construction Accessories, Inc. • Phone 937-429-9089 • Fax 937-427-4653
Printed in U.S.A. • Product Made in the U.S.A.
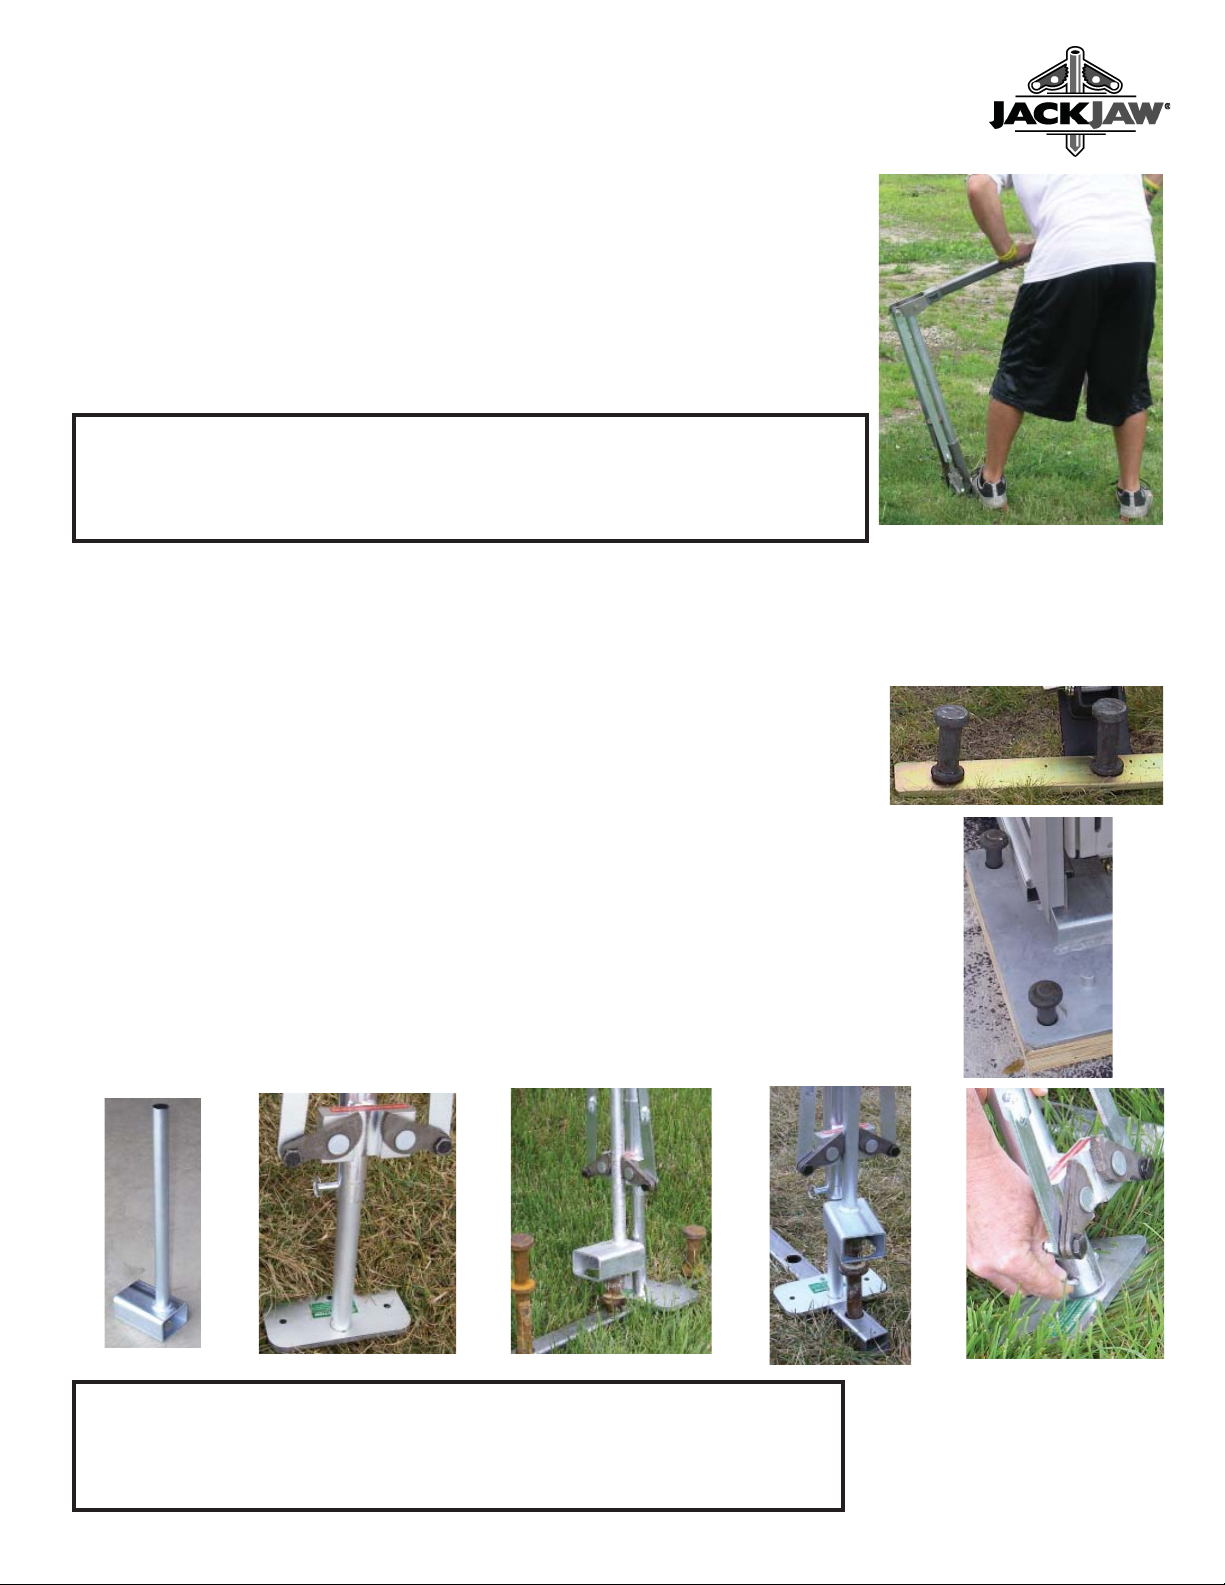
Step 1: Lift handle to up position so that jaws are fully open.
Step 2: Place unit so that jaws are on either side of the stake.
Figure 1 and 2below.
Step 3: Place foot on base. Figure 3 below. Push down
on handle, clamping on stake and lifting it out of the ground.
Step 4: Repeat motion as necessary until stake is free.
Caution: Never put your fingers or hands between the jaws, or between the jaws and the stake.
Replacement Jaw Set - 4 jaws & hardware Part # CA0003
1.
2.
March 2011
Tilted Tent Stake Removal
Step 1: When you pull a tilted or
leaning stake, simply put the unit on
the high side and lean the stake puller
over so that the shaft aligns wih the
shaft of the stake. If the ground is un-
even, use two blocks of wood to level
the base of the stake puller so that the
central shaft is parallel to the stake.
Figure 4.
Step 2-4: Same as Basic Tent Stake
4.
Pulling Stakes from Asphalt
JackJaw stake pullers excel on asphalt. When pulling from
asphalt, make sure that the stake puller is aligned with the
direction of the stake. This keeps the stake from binding with
the asphalt. The stake will usually come straight out. If you
have some difficulty, try moving the puller around the stake to
get better alignment.
Basic Tent Stake Pulling
Tip: In soft conditions or mud, place a short piece (1to 2 feet in length) of 2 x 6 lumber under the base of the unit. This will
spread the force over a larger area, allowing stake removal even in muddy conditions.
3.
Completed
Assembly
JackJaw®301/302 Operating Instructions
Construction Accessories, Inc. • 937-429-9089
www.jackjaw.com
Printed in U.S.A. • Product Made in the U.S.A.
March 2011
Pulling Flush Pounded Stakes with the JackJaw302 and AC0009 Adapter
7.
6.
8.
VERY IMPORTANT: If you are pulling a stake from a stake bar or frame plate, put
the metal base of the JackJaw unit ON TOP of the bar or plate. You must pull the stake
straight out of the bar or plate. If the unit is on the ground next to the bar or plate, a slight
misalignment can cause the stake to bind with the bar, making it difficult to pull from the bar.
If you pound your stakes so that the heads of the stakes are flush with the surface or flush to a
stake bar or frame plate (Figures 6 & 7) you will need an optional stake adapter, AC0009. The Jack-
Jaw302 was designed specifically to solve this problem.
Step 1: Slip the AC0009 stake adapter over the head of the stake. See Figure 8.
Step 2: Pull the ring pin at the bottom of the stake puller and extend the base to the high position.
Re-insert the pin in the highest hole. Figure 9.
Step 3: Place the metal base of the stake puller as close to the stake as possible. When using a
stake bar system, put the metal base of the JackJaw on top of the bar. Figure 10.
Step 4: Raise the handle of the stake puller, and put the shaft of the stake adapter between the
jaws of the stake puller. Be careful not to put your fingers in between the jaws and the adapter!
Step 5: Let the handle down to close the jaws on the shaft of the stake adapter.
Step 6: Push down on the handle, pulling up on the adapter (and the stake) until 4-5 inches of the
stake are exposed. It may take two or three pulls on the adapter. Figure 11.
Step 7: Move the stake adapter to the next stake and repeat Steps 1 - 6 for each of flush pounded
stakes that you need to pull. After all stakes have been pulled up to expose 4-5 inches of each stake
shaft, go to Step 8.
Step 8: Pull the ring pin from the high position and retract the base to the normal low position.
Re-insert the pin in the lowest hole. Figure 12.
Step 9: Pull all the stakes the rest of the way out using the steps from “Basic Stake Pulling.”
9. 10. 11. 12.
Difficult or VeryTight Stake Removal
If you encounter difficult or very tight stakes, you can optimize the pulling power of the
JackJaw by positioning the lever arm perpendicular to the vertical shaft of the stake puller.
This maximizes the leverage from the first and most important push on the handle. See
Figure 5.
To get this position, follow steps 1-2 to put the stake puller on the stake. Then, gently lift
the slide block with your hand from underneath so that the jaws slide up the stake slightly,
until the handle is perpendicular. This allows you to get your full weight, safely and comfort-
ably on top of the stake puller handle for the first push. Since the handle is perpendicular,
the leverage is maximized in this position.
5.
WARNING: Do not lengthen the handle of the JackJaw stake extractors. The JackJaw unit
must only be used for stake removal. Use extreme caution in the vicinity of moving parts such
as the fulcrum area and gripping jaws. Improper use of this tool is likely to result in serious
bodily injury or damage for which Construction Accessories shall not be responsible.
This manual suits for next models
1
Table of contents


