1
Contents
Contents
Contents
Contents
1.
1.
1.
1. IMPORTANT
IMPORTANT
IMPORTANT
IMPORTANT SAFETY
SAFETY
SAFETY
SAFETY INSTRUCTIONS
INSTRUCTIONS
INSTRUCTIONS
INSTRUCTIONS
.......................................................................................................
.......................................................................................................
.......................................................................................................
.......................................................................................................
2
2
2
2
1.1
1.1
1.1
1.1 IMPORTANT
IMPORTANT
IMPORTANT
IMPORTANT ELECTRICAL
ELECTRICAL
ELECTRICAL
ELECTRICAL INFORMATION
INFORMATION
INFORMATION
INFORMATION
..................................................................................
..................................................................................
..................................................................................
..................................................................................
4
4
4
4
1.2
1.2
1.2
1.2 IMPORTANT
IMPORTANT
IMPORTANT
IMPORTANT OPERATION
OPERATION
OPERATION
OPERATION INSTRUCTIONS
INSTRUCTIONS
INSTRUCTIONS
INSTRUCTIONS
.................................................................................
.................................................................................
.................................................................................
.................................................................................
4
4
4
4
2.BRIEF
2.BRIEF
2.BRIEF
2.BRIEF DESCRIPTION
DESCRIPTION
DESCRIPTION
DESCRIPTION
...........................................................................................................................................
...........................................................................................................................................
...........................................................................................................................................
...........................................................................................................................................
5
5
5
5
3.OPERATION
3.OPERATION
3.OPERATION
3.OPERATION INSTRUCTIONS
INSTRUCTIONS
INSTRUCTIONS
INSTRUCTIONS
...........................................................................................................................
...........................................................................................................................
...........................................................................................................................
...........................................................................................................................
6
6
6
6
3.1
3.1
3.1
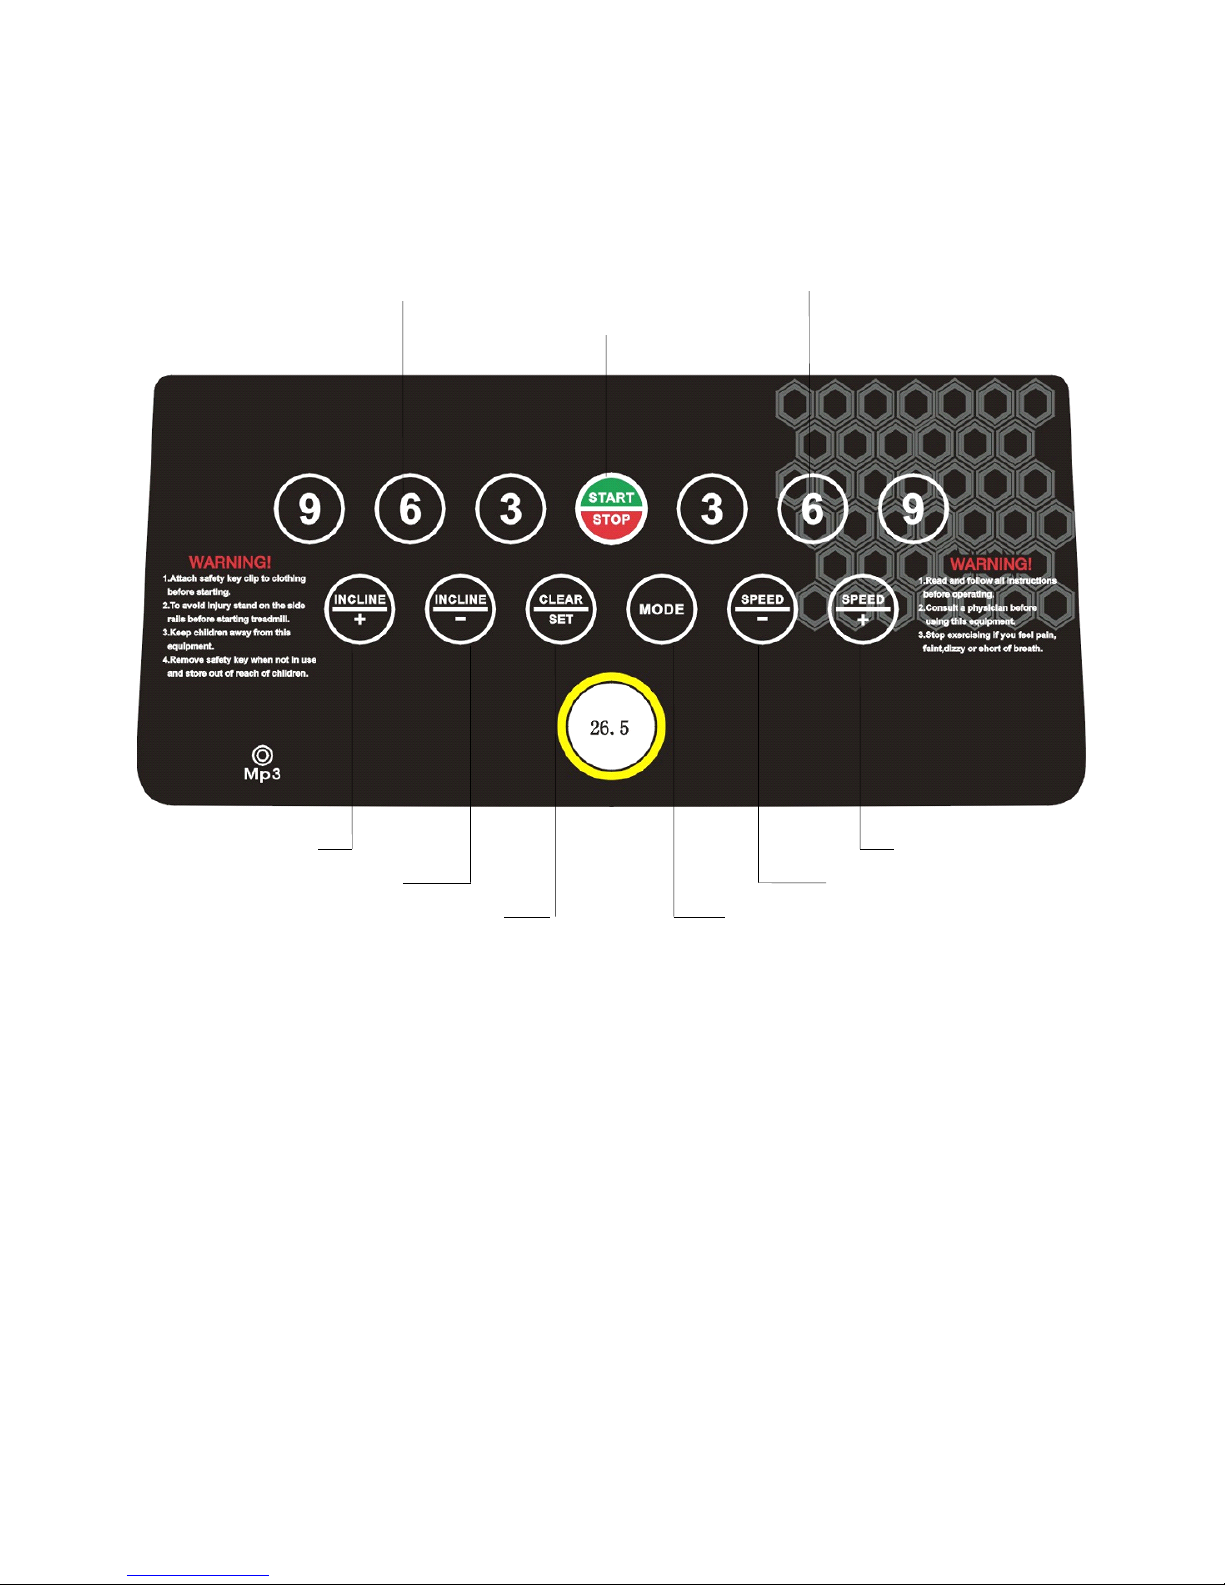
3.1 Console
Console
Console
Console keys
keys
keys
keys
...............................................................................................................................................
...............................................................................................................................................
...............................................................................................................................................
...............................................................................................................................................
6
6
6
6
3.2
3.2
3.2
3.2 Getting
Getting
Getting
Getting Started
Started
Started
Started
..........................................................................................................................................
..........................................................................................................................................
..........................................................................................................................................
..........................................................................................................................................
8
8
8
8
3.3
3.3
3.3
3.3 Self-Checking
Self-Checking
Self-Checking
Self-Checking
..............................................................................................................................................
..............................................................................................................................................
..............................................................................................................................................
..............................................................................................................................................
8
8
8
8
3.4
3.4
3.4
3.4 Quick-Start
Quick-Start
Quick-Start
Quick-Start Operation
Operation
Operation
Operation
...........................................................................................................................
...........................................................................................................................
...........................................................................................................................
...........................................................................................................................
8
8
8
8
3.5
3.5
3.5
3.5 Incline
Incline
Incline
Incline Feature
Feature
Feature
Feature
..........................................................................................................................................
..........................................................................................................................................
..........................................................................................................................................
..........................................................................................................................................
9
9
9
9
3.6
3.6
3.6
3.6 Pulse
Pulse
Pulse
Pulse Grip
Grip
Grip
Grip Feature
Feature
Feature
Feature
...................................................................................................................................
...................................................................................................................................
...................................................................................................................................
...................................................................................................................................
9
9
9
9
3.7
3.7
3.7
3.7 Calorie
Calorie
Calorie
Calorie Display
Display
Display
Display
...........................................................................................................................................
...........................................................................................................................................
...........................................................................................................................................
...........................................................................................................................................
9
9
9
9
3.8
3.8
3.8
3.8 Folding
Folding
Folding
Folding and
and
and
and Unfolding
Unfolding
Unfolding
Unfolding Treadmill
Treadmill
Treadmill
Treadmill
.....................................................................................................
.....................................................................................................
.....................................................................................................
.....................................................................................................
9
9
9
9
3.8.1
3.8.1
3.8.1
3.8.1 Folding
Folding
Folding
Folding
........................................................................................................................................................
........................................................................................................................................................
........................................................................................................................................................
........................................................................................................................................................
9
9
9
9
3.8.2
3.8.2
3.8.2
3.8.2 Unfolding
Unfolding
Unfolding
Unfolding
...................................................................................................................................................
...................................................................................................................................................
...................................................................................................................................................
...................................................................................................................................................
9
9
9
9
3.8.3
3.8.3
3.8.3
3.8.3 Transport
Transport
Transport
Transport
..................................................................................................................................................
..................................................................................................................................................
..................................................................................................................................................
..................................................................................................................................................
9
9
9
9
3.9
3.9
3.9
3.9 Programmable
Programmable
Programmable
Programmable Operations
Operations
Operations
Operations
..................................................................................................................
..................................................................................................................
..................................................................................................................
..................................................................................................................
9
9
9
9
3.10
3.10
3.10
3.10 To
To
To
To Select
Select
Select
Select a
a
a
a Program
Program
Program
Program
..........................................................................................................................
..........................................................................................................................
..........................................................................................................................
..........................................................................................................................
10
10
10
10
4.
4.
4.
4. MAINTENANCE
MAINTENANCE
MAINTENANCE
MAINTENANCE
....................................................................................................................................................
....................................................................................................................................................
....................................................................................................................................................
....................................................................................................................................................
10
10
10
10
4.1
4.1
4.1
4.1 General
General
General
General Cleaning
Cleaning
Cleaning
Cleaning
....................................................................................................................................
....................................................................................................................................
....................................................................................................................................
....................................................................................................................................
10
10
10
10
4.2
4.2
4.2
4.2 General
General
General
General Care
Care
Care
Care
.............................................................................................................................................
.............................................................................................................................................
.............................................................................................................................................
.............................................................................................................................................
11
11
11
11
4.3
4.3
4.3
4.3 Belt/Deck/Roller
Belt/Deck/Roller
Belt/Deck/Roller
Belt/Deck/Roller Lubrication
Lubrication
Lubrication
Lubrication
.........................................................................................................
.........................................................................................................
.........................................................................................................
.........................................................................................................
11
11
11
11
4.4
4.4
4.4
4.4 How
How
How
How to
to
to
to check
check
check
check the
the
the
the running
running
running
running mat
mat
mat
mat for
for
for
for proper
proper
proper
proper lubrication
lubrication
lubrication
lubrication
.....................................................
.....................................................
.....................................................
.....................................................
12
12
12
12
4.5
4.5
4.5
4.5 Belt
Belt
Belt
Belt Adjustment
Adjustment
Adjustment
Adjustment Belt
Belt
Belt
Belt Tension
Tension
Tension
Tension Adjustment
Adjustment
Adjustment
Adjustment
.............................................................................
.............................................................................
.............................................................................
.............................................................................
12
12
12
12
4.6
4.6
4.6
4.6 Belt
Belt
Belt
Belt Tracking
Tracking
Tracking
Tracking Adjustment
Adjustment
Adjustment
Adjustment
.................................................................................................................
.................................................................................................................
.................................................................................................................
.................................................................................................................
13
13
13
13
5.
5.
5.
5. TROUBLE
TROUBLE
TROUBLE
TROUBLE SHOOTING
SHOOTING
SHOOTING
SHOOTING
.......................................................................................................................................
.......................................................................................................................................
.......................................................................................................................................
.......................................................................................................................................
13
13
13
13
5.1
5.1
5.1
5.1 Alarm
Alarm
Alarm
Alarm signals
signals
signals
signals
...........................................................................................................................................
...........................................................................................................................................
...........................................................................................................................................
...........................................................................................................................................
13
13
13
13
6.
6.
6.
6. EXERCISE
EXERCISE
EXERCISE
EXERCISE GUIDE
GUIDE
GUIDE
GUIDE
...............................................................................................................................................
...............................................................................................................................................
...............................................................................................................................................
...............................................................................................................................................
14
14
14
14
7.
7.
7.
7. INSTALLATION
INSTALLATION
INSTALLATION
INSTALLATION GUIDE
GUIDE
GUIDE
GUIDE
....................................................................................................................................
....................................................................................................................................
....................................................................................................................................
....................................................................................................................................
1
1
1
1 6
6
6
6
21450