J&J Amusements Bumper Boat 2014 User manual

Service Manual
Bumper Boat 2014
Published by J&J Amusements, Inc.
A Corporation of Oregon
© 2014 J&J Amusements Inc. - All Rights Reserved
G
O
-
K
A
R
T
S
B
U
M
P
E
R
B
O
A
T
S

WARNING - Important Safety Notice
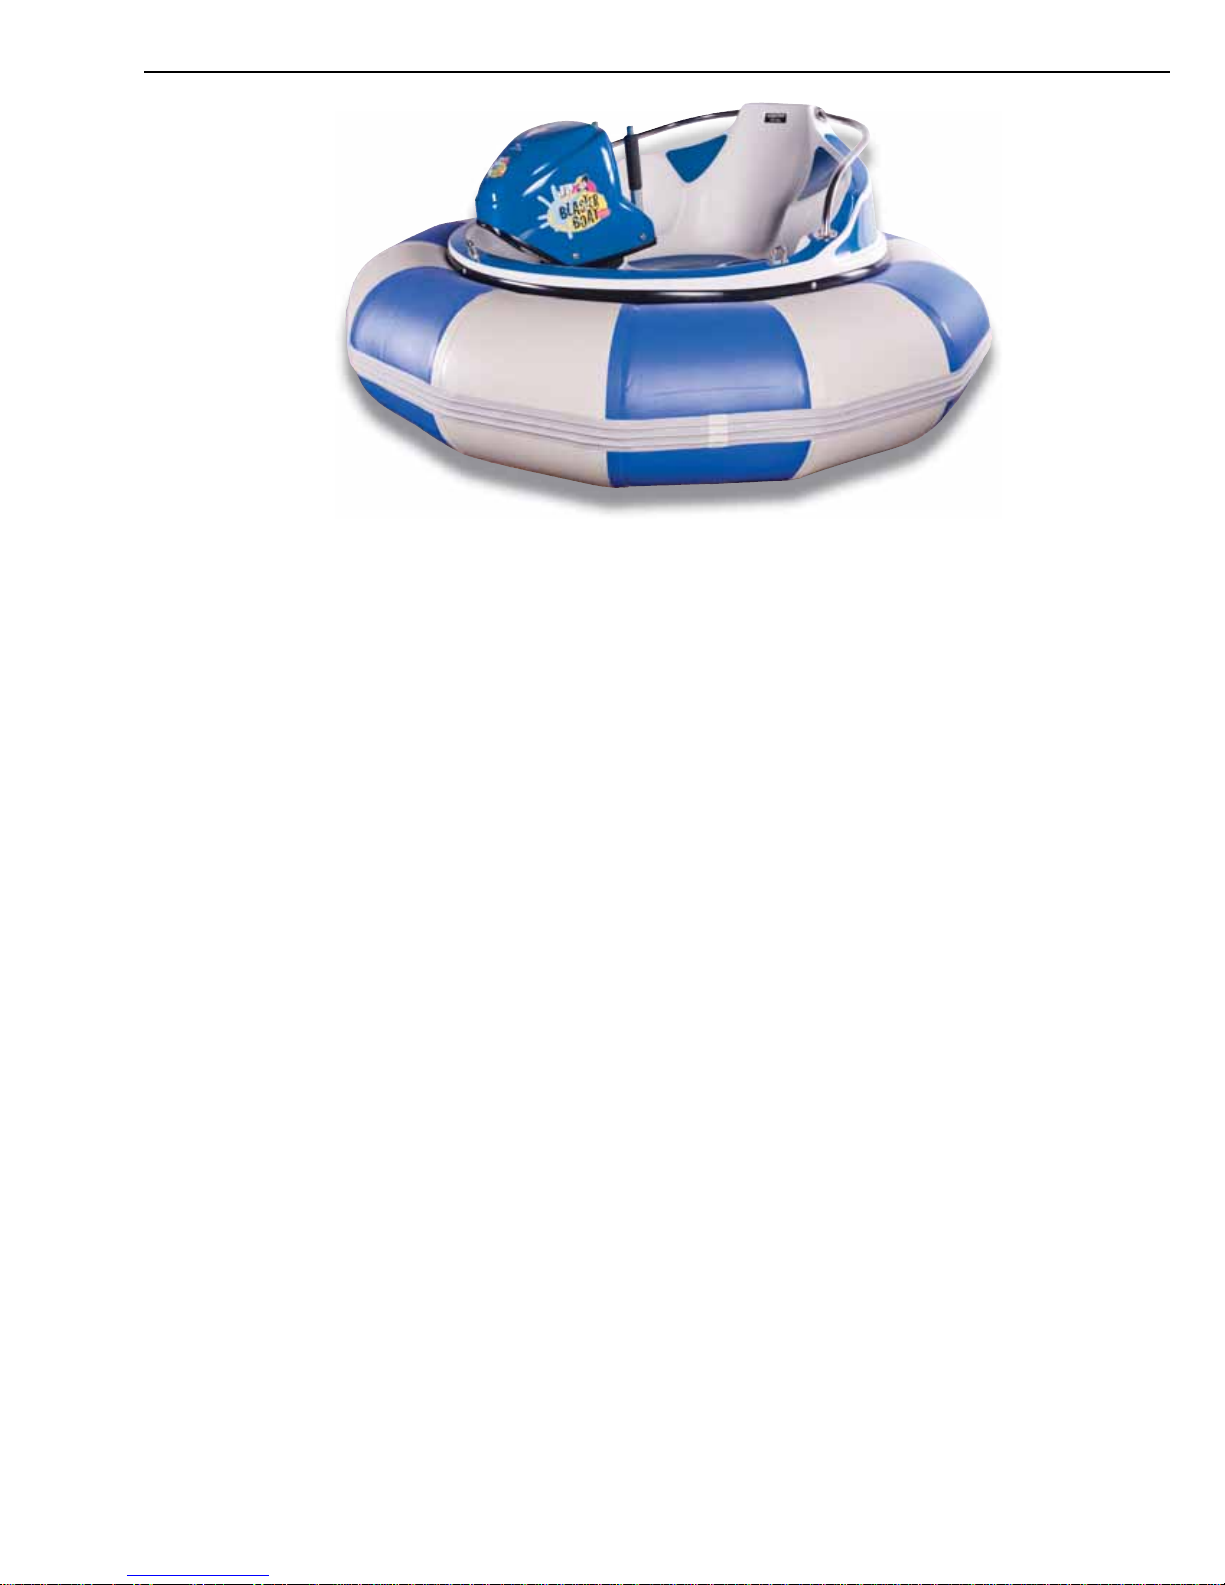
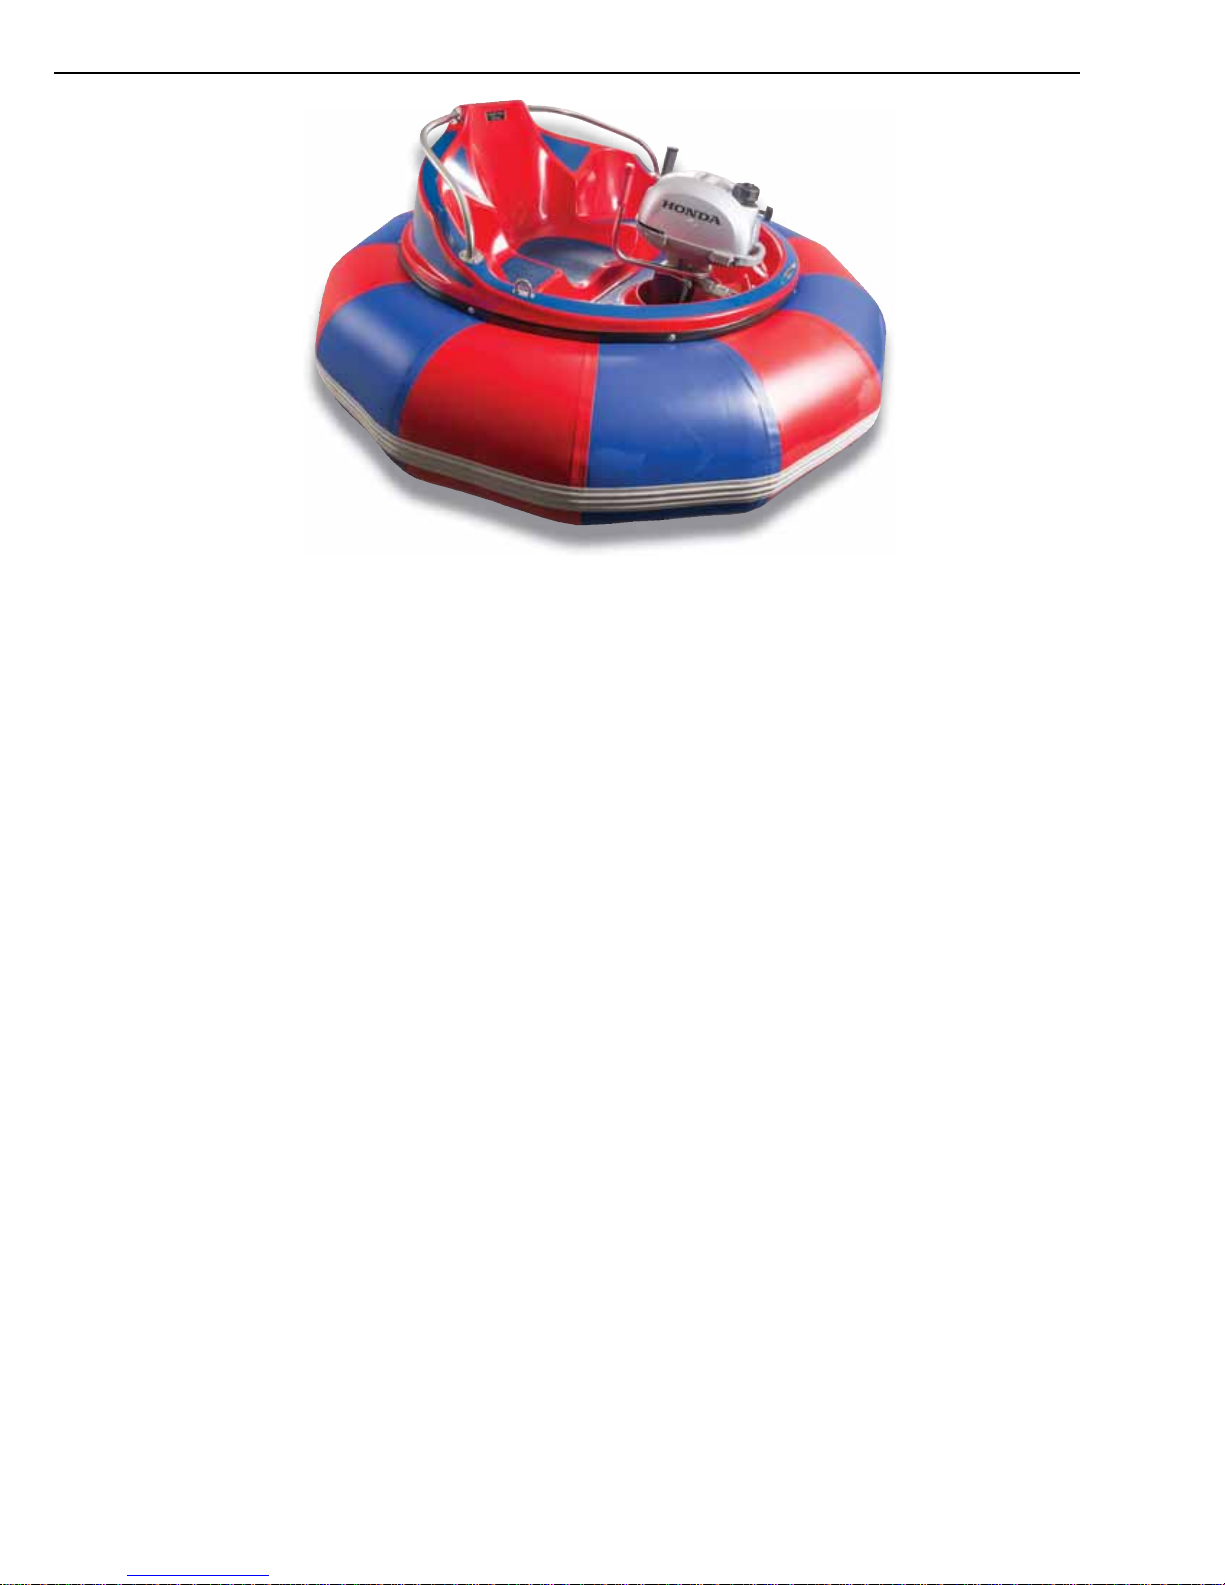
Proper service and repair procedures are vital to safe, reliable operation of J&J bumper boats, as well as to the personal
safety of those performing the repairs. This manual outlines procedures for servicing and repairing J&J bumper boats
using safe, effective methods. The procedures contain many NOTES, CAUTIONS and WARNINGS which should be
followed (along with standard safety procedures) to eliminate the possibility of personal injury or improper service,
which could damage the bumper boat or compromise its safety.
It is important to note that repair procedures, techniques, tools and parts for servicing J&J bumper boats, as well as the
skill and experience of the individual performing the work, vary widely. It is not possible to anticipate all conceivable
ways or conditions under which J&J bumper boats may be serviced, or to provide cautions to all possible hazards
that may result. Standard precautions should be used when handling toxic or flammable fluids, and safety goggles or
other protection should be used during cutting, grinding, chiseling, prying or any other process that can cause material
removal or projectiles. J&J recommends the use of safety goggles or approved glasses during all servicing of J&J bumper
boats.
All information contained in this manual is based on the latest product information available at the time of printing.
We reserve the right to make changes at any time without notice. All rights reserved. Except as expressly provided
herein, no part of the manual may be reproduced, copied, transmitted, disseminated, downloaded or stored in
any storage medium, for any purpose, without prior written consent of J&J Amusements, Inc. A Corporation of
Oregon. J&J Amusements, Inc. grants permission to download a single copy of this manual onto a hard drive or
other electronic storage medium to be viewed for personal use, provided that such electronic or printed copy of
this manual contains the complete text of this copyright notice. Any unauthorized commercial distribution of this
manual is strictly prohibited.
4897 Indian School Rd NE
Suite 150
Salem Oregon 97305-1126
www.jjamusements.com
Phone: 503-304-8899
Toll Free Phone: 800-854-3140
Fax: 503-304-1899
Toll Free Fax: 800-366-7505
JJ
&Amusements, Inc. Technical Contact Information
We value your feedback; technical comments
and suggestions are helpful to us. Please e-mail
From time to time, updates may be made
to this manual. For the latest updates,
please visit our technical website at
http://jjamusements.com/technical/index.htm.
As you read this manual, you will find information that is preceded by a NOTICE symbol. The purpose of this message is
to prevent damage to the bumper boat, other property, or the environment.
SAFETY MESSAGES
Your safety and the safety of others are very important. To help you make informed decisions, we have provided safety
messages and other information throughout this manual. Of course, it is not practical or possible to warn you about all the
hazards associated with servicing a bumper boat. You must use your own good judgement.
You will find important safety information in a variety of forms, including:
SAFETY MESSAGES - preceded by a safety alert symbol and one of four signal words:
DANGER, WARNING, CAUTION, or SAFETY ITEM.
These signal words mean:
‹ DANGER › You WILL be KILLED or SERIOUSLY INJURED if you do not follow the subsequent instructions.
‹ WARNING › You CAN be KILLED or SERIOUSLY INJURED if you do not follow the subsequent instructions.
‹ CAUTION › You WILL be INJURED if you do not follow the subsequent instructions.
‹ SAFETY ITEM › This safety device was installed at the factory and may be required by state, local, or ASTM standards.

INSTRUCTIONS
To eliminate unnecessary work, careful reading of the applicable section is recommended before starting to service a
bumper boat. Photographs, diagrams, notes, cautions, warnings, and detailed descriptions have been included wherever
necessary. Nevertheless, even a detailed account has limitations; a certain amount of basic knowledge is also required for
successful work.
ESPECIALLY NOTE THE FOLLOWING:
DIRT
Before removal and disassembly, clean the bumper boat. Any dirt entering the engine or other parts will work as an
abrasive and shorten the life of these parts. For the same reason, before installing a new part, clean off any dust or metal
filings.
TIGHTENING SEQUENCE
Generally, when installing a part with several bolts, nuts or screws, start them all in their appropriate holes and tighten
them to a snug fit. Then tighten them evenly in a cross pattern. This will avoid distortion of the part. Conversely, when
loosening the bolts, nuts or screws, loosen by a quarter turn, and then remove. Where there is a tightening sequence
indication in this Service Manual, the bolts, nuts or screws must be tightened in the order and method indicated.
TORQUE
When torque values are given in this Service Manual, use them. Either too little or too much torque may lead to serious
damage. Use a good quality, reliable torque wrench.
FORCE
Common sense should dictate how much force is necessary in assembly and disassembly. If a part seems especially
difficult to remove or install, stop and examine what may be causing the problem. Whenever tapping is necessary, tap
lightly using a wooden or plastic-faced mallet. Use an impact driver for screws (particularly for the removal of screws held
by a locking agent) in order to avoid damaging the screw heads. It may also be necessary to apply heat to some parts that
are held with locking compound.
EDGES
Watch for sharp edges, especially during major motor/engine disassembly and assembly. Protect your hands with gloves
or a piece of thick cloth when lifting the motor/engine, or when turning it over.
HIGH-FLASH-POINT SOLVENT
A high-flash-point solvent is recommended to reduce fire danger. A commercial solvent commonly available in North
America is “Standard solvent” (generic name). Always follow manufacturer and container directions regarding the use of
any solvent.
GASKET, O-RING
Do not reuse a gasket or O-ring once it has been in service. The mating surfaces around the new gasket should be free of
foreign matter and perfectly smooth.
LIQUID GASKET, NON-PERMANENT LOCKING AGENT
Followmanufacturer’s directionsforcleaningandpreparingsurfaceswherethese compoundswillbeused.Applysparingly,
As excessive amounts may cause serious damage. An example of a non-permanent locking agent commonly available in
North America is Loctite® Lock’n Seal (Blue).
PRESS
A part installed using a press or driver, such as a wheel bearing, should first be coated with oil on its outer or inner
circumference so that it will go into place smoothly.
OIL SEAL AND GREASE SEAL
Replace any oil or grease seals that were removed with new parts, since removal generally damages seals. When pressing
in a seal containing manufacturer’s marks, press it in with the marks facing out. Seals should be pressed into place using a
suitable driver (which contacts evenly with the side of the seal) until the face of the seal is even with the end of the hole.
Always use assembly oil or grease on the lip (sealing edge) of any seal prior to assembly.

CIRCLIP, RETAINING RING
Replace any removed circlips and retaining rings with new ones, as removal weakens and deforms them. When installing
circlips and retaining rings, take care to compress or expand them only enough to install them and no more.
COTTER PIN
Replace any cotter pins that were removed with new ones, since removal deforms and breaks them.
REPLACEMENT PARTS
When there is a replacement instruction, replace these parts with new ones every time they are
removed. Removed parts will be damaged and/or lose their original function.
INSPECTION
When parts have been disassembled, visually inspect these parts for the following conditions or other damage (If there
is any doubt as to their condition, replace them with new parts): abrasions, cracks, hardening, warping, bends, dents,
scratches, wear, color change, deterioration, or seizure.
SPECIFICATIONS
Specification terms are defined as follows:
“Standards”: show dimensions or performances which brand-new parts or systems have.
“Service Limits”: indicate the usable limits. If measurement shows excessive wear or deteriorated performance, replace
the damaged parts.

0General Data and
Maintenance.
1Boat Top
Assembly
2Boat Hull -
Lower Assembly
3Motor Assembly
(Electric-powered)
4Basic Electrical
Troubleshooting
5Engine assembly
(Gas-powered)
6Decals
7Care & Storage
0-7 Specifications
0-9 Monthly maintenance chart
0-13 Pre-opening daily checklist
0-17 Bumper boat area checklist
0-18 Printable work order tags
0-19 How a warranty is processed
0-20 Product return procedures
0-21 Limited warranty-bumper boat
0-22 Limited warranty-super tube II
0-23 Unpacking & setup
0-25 Tube setup
0-26 Boat assembly
0-27 Battery installation
0-31 Boat launch procedure
0-32 Motor installation
2-1 General boat hull assembly
2-2 Main power post
2-4 Boat half protector
2-6 Bilge pump
2-11 Battery-full kit
2-13 Super tube
2-14 Super tube inflation
2-16 Checking super tube for leaks
2-17 Patching super tube
2-19 Super tube valve replacement
3-1 General information
3-2 Motor cover
3-4 Control rods/grips/handle bar
3-8 Flex wire
3-11 Motor
3-19 Magnetic trigger
3-21 Motor relay
3-25 Solid State Switch
3-27 Boat captain
3-29 Pivot
3-33 Lower unit assembly
3-37 Squirt pump Assembly
3-42 SB-120 terninal
1-2 Breaker/main cutoff switch
1-5 Volt meter
1-7 Bilge pump
1-8 Pivot receiver
1-10 Safety & dock rail hooks
1-12 Dock rail rope installation
1-18 Trim
1-21 Vent plate
1-23 Reinforced rubber hinge
1-27 Battery charging cable
1-30 Battery-fill quick-release coupler
1-31 Motor power supply cable
4-1 General information
4-2 Basic electrical troubleshooting
4-4 Voltage drop test
4-6 Testing fuse
4-7 Major electrical components
4-13 Specific gravity test
4-15 Equalizing batteries
4-16 Battery maintenance - winter
4-17 Master charger
4-18 Wiring schematic
4-19 Motor wiring schematic
4-20 Boat Captain Wiring Schematic
6-1 General information
6-2 Motor cover decals 6-3 Boat top decals
6-5 Decal removal/installation
7-1 General information
7-2 Fiberglass care & maintenance 7-4 303 Aerospace protectant
7-6 Storage
5-1 General information
5-2 Handle bar 5-3 Pivot
5-4 Prop guard

0-6
NOTES:

0-7
SPECIFICATIONS: ELECTRIC-POWERED
BLASTER BOAT.
DIMENSIONS:
Overall diameter .......................................................................................................................................72”(182 cm)
Overall height ...........................................................................................................................................40”(101 cm)
Wet weight.............................................................................................................................................488lbs(222kg)
Total battery weight................................................................................................................................248lbs(113kg)
Super Tube II weight...................................................................................................................................23lbs(11kg)
Hull & deck weight ..................................................................................................................................139lbs(63kg)
Minimum water depth....................................................................................................................................3ft(.91m)
MOTOR:
Model.....................................................................................................................................................24v 1750 rpm
Type......................................................................................Continuous duty 3/4 hp(1118w) 24v, permanent magnet
Motor weight..............................................................................................................................................78lbs(36kg)
Cooling system........................................................................................................................................................ Air
Maximum horsepower.......................................................................................................................3/4 hp(1750 rpm)
Maximum speed..............................................................................................................................3.5 mph(4.8 km/h)
Throttle........................................................................................................................Green rod / push button (on/off)
Squirt.............................................................................................................................Blue rod / push button (on/off)
Squirter Type.......................................................................................................................................24v submersible
BATTERY:
Type...................................................................................................................................6 volt deep cycle (225 AH)
Weight ....................................................................................................................................................62 lbs (28 kg)
Length.................................................................................................................................................10 3/8(264 mm)
LOWER UNIT:
Gear ratio................................................................................................................................................................1:1
Propeller......................................................................................................................3-7.2 x 4.7 in(3-184 x 120 mm)
Rotating direction............................................................................................................Clockwise (viewed from rear)

0-8
SPECIFICATIONS: GAS-POWERED
WATER BUG.
DIMENSIONS:
Overall diameter .......................................................................................................................................72”(182 cm)
Overall height ...........................................................................................................................................40”(101 cm)
Wet weight...............................................................................................................................................194lbs(88kg)
Super Tube II weight...................................................................................................................................23lbs(11kg)
Hull & deck weight ..................................................................................................................................139lbs(63kg)
Minimum water depth....................................................................................................................................3ft(.91m)
ENGINE:
Model..............................................................................................................................J&J equipped Honda BF2.3D
Type............................................................................................................. 4-stroke, overhead valve, single cylinder
Engine weight.......................................................................................................................................................32.0
lbs (14.6kg)
Cooling system............................................................................................................................................. Forced air
Starting system....................................................................................................................................................Recoil
Lubrication system..............................................................................................................................................Splash
Fuel capacity ........................................................................................................................................1.16 US qt (1L)
LOWER UNIT:
Gear ratio...................................................................................................................................................2.42(29/12)
Gear case oil capacity................................................................................................................................. 0.05 US qt
Propeller......................................................................................................................3-7.2 x 4.7 in(3-184 x 120 mm)
Rotating direction............................................................................................................Clockwise (viewed from rear)

0-9
Item # Item Service type Check
Frequency 1st
20 hrs Every
50 hrs Monthly or every
200 hrs
Log hours of operation to determine proper maintenance intervals.
1 SB-120 Plug(s)
Check Daily
Replace When damaged
Grease terminals (2)
2 Motor Check condition
Check wires
3 Batteries
Check water level Weekly
Check electrolyte level
Clean connections
4 Pivot (1) Check Daily
Grease (3)
5Motor & charger power
cables
Check for damage
Clean and grease terminals (2)
Replace When damaged
6 Sump pump (1) Clean strainer
7 Propeller guard Inspect
Replace When damaged
8 Hull
Inspect & clean
Safety decals
Polish
9General wires &
connections
Check for damage
Clean connections
Replace When necessary
Spay corrosion protectant
10 Anode Clean
Replace When damaged
11 Squirter
Replace filter When needed
Check for damage
Check hose & fitting
Clean & grease terminals
12 Tubes
Clean
Check pressure Weekly
Check visually Daily
MONTHLY SERVICE SCHEDULE (Electric)
NOTE: This is a sample form. Your checklist should include but not be limited to these items. Make extra copies for future use.
(1) Service more frequently when used in dusty areas.
(2) Use dielectric grease only.
(3) Use marine grease only.

0-10
Below are explanations of service listed in the monthly maintenance charts on previous page.
Explanations of monthly maintenance shall include, but are not limited to the following:
1. SB-120 PLUG(S): Make sure that the plug is lubed with dielectric grease. Inspect the plug for deep grooving or signs of arcing.
2. MOTOR: Remove hood and check connections. Spray motor and wiring with corrosion block (J&J #99101).
3. BATTERIES: Check for corrosion, and spray terminals with battery protectant (J&J #99101). Fill batteries with distilled
water weekly, or as needed. Make sure compartment is ventilated.
‹ DANGER › : ***READ BATTERY SAFETY PRECAUTIONS BEFORE HANDLING BATTERIES***
4. PIVOT: Turn motor and check for smooth operation. If motor doesn’t turn easily, visually inspect pivot and grease if
necessary. Electric motor can turn 270°. Motor stops must be in place and in working order.
5. MOTOR /CHARGER POWER CABLES: Disconnect and grease terminals. Look for signs of wear (Replace as need-
ed).
6. SUMP PUMP: Clean strainer as needed. Check pump operation. If pump is not cycled periodically, check all wiring
connections. Repair or replace pump as needed.
7. PROPELLER GUARD: Inspect for damage or foreign materials. Replace if damaged.
‹ SAFETY ITEM › ***WARNING: DO NOT OPERATE IF PROPELLER GUARD IS DAMAGED OR MISSING***
8. HULL: Keep clean and wax every 200 hours or every 2 months. Use a UV protectant weekly to reduce color fading
(J&J part # 3-60-0034).
9. GENERAL WIRES & CONNECTIONS: Check all wires and connections for damage and corrosion. Clean or replace
as needed.
10. ANODE: Clean monthly. For year-round parks, replace anode every 6 months. For seasonal parks, replace anode
at end of the season.
11. SQUIRTER: Replace filter if necessary. Check integrity of hose, mount and pump. Check pump inlet for obstruc-
tions. Replace as needed.
12. TUBE: Clean with mild detergent. Check condition of tube daily. Check tube pressure weekly using low pressure
gauge (J&J #3-96-0024) and set pressure to 2-3 PSI.
NOTE: ALL NECESSARY REPAIRS NEED TO BE DONE BEFORE BOAT IS OPERATED. USE J&J AMUSEMENTS
OR EQUIVALENT REPLACEMENT PARTS. INSPECTIONS SHOULD BE DONE BY TRAINED AND QUALIFIED
PERSONNEL.
MONTHLY SERVICE SCHEDULE (Electric)

0-11
Item # Item Service type Check
Frequency 1st
20 hrs Every
50 hrs Every
150 hrs
Monthly or
every
200 hrs
Log hours of operation to determine proper maintenance intervals.
1 Engine(*) Check level Daily
Change oil
2 Gear case(*) Check level
Change oil
3 Spark plug(*) Check-adjust
Replace
4 Valve clearance(*) Check-adjust
5 Idle speed(*) Check-adjust
6 Carburetor linkage(*) Check-adjust
7 Fuel tank & tank filter(*) Clean
8 Fuel line(*) Check
Replace When needed
9 Starter rope(*) Check
10 Propeller guard Inspect
Replace When damaged
11 Hull
Inspect & clean
Safety decals
Polish
12 Anode Clean
Replace When damaged
13 Pivot(1) Check Daily
Grease (3)
14 Tubes
Clean
Check pressure Weekly
Check visually Daily
MONTHLY SERVICE SCHEDULE (Gas)
(1) Service more frequently when used in dusty areas.
(*) See Honda Shop Manual
NOTE: This is a sample form. Your checklist should include but not be limited to these items. Make extra copies for future use.

0-12
Below are explanations of service listed in the monthly maintenance charts on previous page.
Explanations of monthly maintenance shall include, but are not limited to the following:
1. ENGINE: Always use API service SG.SF/CC.CD. designation shown on the container; see “Engine Oil” in the Honda Shop
Manual.
2. GEAR CASE: Always use API service SG.SF/CC.CD. designation shown on the container; see “Engine Oil” in the Honda Shop
Manual.
3. SPARK PLUG: Clean and replace spark plugs with the type listed in the Honda Shop Manual.
4. VALVE CLEARANCE: Check and adjust at the specified intervals; see the Honda Shop Manual.
5. IDLE SPEED: Check and adjust at the specified intervals; see the Honda Shop Manual.
6. CARBURETOR LINKAGE: Check and adjust at the specified intervals; see the Honda Shop Manual.
7. FUEL TANK & TANK FILTER: Check and replace at the specified intervals; see the Honda Shop Manual.
8. FUEL LINE: Check and replace at the specified intervals; see the Honda Shop Manual.
9. STARTER ROPE: Check and replace at the specified intervals; see the Honda Shop Manual.
10. PROPELLER GUARD: Inspect for damage or foreign materials. Replace if damaged.
‹ SAFETY ITEM › ***WARNING: DO NOT OPERATE IF PROPELLER GUARD IS DAMAGED OR MISSING***
11. HULL: Keep clean and wax every 200 hours or every 2 months. Use a UV protectant weekly to reduce color fading
(J&J part # 3-60-0034).
12. ANODE: Clean monthly. For year-round parks, replace anode every 6 months. For seasonal parks, replace anode
at end of the season.
13. PIVOT: Turn motor and check for smooth operation. If motor doesn’t turn easily, visually inspect pivot and grease
if necessary. Electric motor can turn 270°. Motor stops must be in place and in working order.
14. TUBE: Clean with mild detergent. Check condition of tube daily. Check tube pressure weekly using low pressure
gauge (J&J #3-96-0024) and set pressure to 2-3 PSI.
NOTE: ALL NECESSARY REPAIRS NEED TO BE DONE BEFORE BOAT IS OPERATED. USE J&J AMUSEMENTS OR
EQUIVALENT REPLACEMENT PARTS. INSPECTIONS SHOULD BE DONE BY TRAINED AND QUALIFIED PERSON-
NEL.
MONTHLY SERVICE SCHEDULE (Gas)

0-13
**See explanation of check procedure**
Pre-Opening Daily Checklist (Electric)Week of / /
Bumper boat ID# Attendant must initial each
empty box every day. If any-
thing is not OK, see a supervi-
sor.
Body color
Item Service type Mon Tues Wed Thu Fri Sat Sun
BOAT
Tube - Check pressure
Hull - Visually inspect
Receiver - Visually inspect
Handrails & hardware - Visually inspect
Sump pump - Visually inspect
Batteries - Visually inspect volt meter
MOTOR
Motor -Physically inspect
Motor & charger cables - Visually inspect
Pivot -Physically inspect
Prop guard - Visually inspect
**Download extra copies of this and other check list on our web site at www.jjamusements.com**

0-14
Below are explanations of service listed in the Pre-Opening Checklist chart on previous page.
Explanations of Pre-Opening Checklist shall include, but are not limited to the following:
BOATS:
TUBE - Check air pressure using a high-quality, low-pressure gauge. Super Tube should be inflated to 2-3 PSI.
HULL - Check for cracks and missing hardware.
.
RECEIVER - Check for loosening or missing hardware, and cracking around mount.
HANDRAILS & HARDWARE - Check for loosening and missing hardware.
SUMP PUMP - View through hull vent to check for excessive water.
BATTERIES - Check volt meter for full charge of 24-26 volts. Viewing through hull vent, check battery terminals for vis-
ible corrosion.
MOTOR:
MOTOR - Visually and physically check motor operation, “go” and “squirt” function, loose hardware, grips, handlebar
condition and abnormal noises during operation.
MOTOR POWER CABLE - Check for bare wires, proper connection, and any signs of excessive heat or melting.
‹ WARNING › ***DO NOT OPERATE UNTIL DAMAGED CONNECTORS AND/ OR CABLE ARE REPLACED***
PIVOT - Check for smooth operation by rotating motor lock to lock.
PROP GUARD - Check for damage and foreign material.
‹ WARNING › ***DO NOT OPERATE IF PROPELLER GUARD IS DAMAGED OR MISSING***
NOTICE: ALL NECESSARY REPAIRS NEED TO BE DONE BEFORE BOAT IS OPERATED. USE OF J&J AMUSEMENTS
OR EQUIVALENT REPLACEMENT PARTS IS RECOMMENDED. INSPECTIONS SHOULD BE DONE BY QUALIFIED
PERSONNEL.
Pre-Opening Checklist - Explanation (Electric)

0-15
Pre-Opening Daily Checklist (Gas)
Bumper boat ID# Attendant must initial each
empty box every day. If any-
thing is not OK, see a supervi-
sor.
Body color
Item Service type Mon Tues Wed Thu Fri Sat Sun
BOAT
Tube - Check pressure.
Hull - Visually inspect.
Receiver - Visually inspect.
Handrails & hardware - Visually inspect.
Water in hull - Drain if needed.
ENGINE
Engine & gear case - Check oil Level.
Throttle - Check operation.
Fuel system - Visually inspect.
Pivot -Physically inspect.
Prop guard - Visually inspect.

0-16
Pre-Opening Checklist - Explanation (Gas)
Below are explanations of service listed in the Pre-Opening Checklist chart on previous page.
Explanations of Pre-Opening Checklist shall include, but are not limited to the following:
BOATS:
TUBE - Check air pressure using a high-quality, low-pressure gauge. Super Tube should be inflated to 2-3 PSI.
HULL - Check for cracks and missing hardware.
.
RECEIVER - Check for loosening or missing hardware, and cracking around mount.
HANDRAILS & HARDWARE - Check for loosening and missing hardware.
WATER IN HULL - Drain if excessive water is present inside hull.
ENGINE:
ENGINE & GEAR CASE - Visually and physically check engine operation, grips, handlebar condition and abnormal
noises during operation.
THROTTLE: Check for smooth operation and full return when released.
FUEL SYSTEM: Check for any signs of fuel leaks from the tank, cap, fuel filter, etc. If no leakage, top off fuel tank.
PIVOT - Check for smooth operation by rotating motor.
PROP GUARD - Check for damage and foreign material.
‹ WARNING › ***DO NOT OPERATE IF PROPELLER GUARD IS DAMAGED OR MISSING***
NOTICE: ALL NECESSARY REPAIRS NEED TO BE DONE BEFORE BOAT IS OPERATED. USE OF J&J AMUSEMENTS
OR EQUIVALENT REPLACEMENT PARTS IS RECOMMENDED. INSPECTIONS SHOULD BE DONE BY QUALIFIED
PERSONNEL.

0-17
Bumper Boat Area Checklist Week of / /
Attendant must initial each
empty box every day. If any-
thing is not OK, see a supervi-
sor.
Item Service type Mon Tues Wed Thu Fri Sat Sun
POND
Boat rope & hooks -Check for broken hooks
and unsafe ropes.
Dock Rail -Check for cracks or loose
hardware.
Pond Water -Check chemical condition
and clarity.
FILTRATION
Pump -Follow manufacturer’s
recommendation.
SAFETY
Equipment - Visually inspect
Signage - Visually inspect
Fencing - Visually inspect
Dock area - Visually inspect
**Download extra copies of this and other checklists on our website at www.jjamusements.com**

0-18
FOLD HERE
FOLD HERE
FOLD HERE
FOLD HERE
MAINTENANCE
WORK ORDER
GO-KART #
BUMPERBOAT #
Explanation of problem:
Employee Name:
Description of Work Performed:
Parts Used:
Front Back
Mechanic:
Date/Time:
Manager:
This sample maintenance work order tag can be copied for use in your facility. Copy and cut tag along dashed line and
fold along the fold line indicated. Simply attach a maintenance work order tag to a machine in need of repair. When
maintenance is complete, file with other service and maintenance information.
Printable Work Order Tags

0-19
1. The customer contacts J&J with the warranty problem. The product warranty department or parts department
gathers information and makes arrangements to send the needed replacement to the customer. The parts department
also gives the customer an RMA # (Return Merchandise Authorization) at that time. (Please note: RMA # must appear
on returned goods package. Goods may be refused if no RMA# is present.)
2. Replacement goods are shipped AND ACCOUNT IS CHARGED according to established account terms, i.e. net
30, credit card, C.O.D. etc. J&J pays for the most economical shipping method. If the customer desires faster service,
the customer account will be billed for the price difference.
3. The customer returns the warantied parts at their expense to J&J with RMA # on the outside of package. The
warranty manager inspects the goods and one of two things will happen:
a. Credit will be authorized to the customer’s account in the amount charged for the replacement.
Note: Cash refunds are not given on warranty items.
b. If part is not warrantable because of normal wear and tear, damage by accident, etc, the warranty will be
denied and no credit will be issued; shipping charges will be billed. **See limited warranty for details**
Please make sure goods are returned using a traceable and insured method. Items lost or damaged in transit cannot be
the responsibility of J&J.
If this simple procedure is followed, the warranty usually goes smoothly. We seldom refuse to warranty an item.
Problems come from short-paying statements or refusing to pay for new replacement items. The most common reason
for a customer to not receive credit is failure to return the warranty item to J&J. If we do not receive the item, we
cannot get credit from our vendors, and therefore cannot issue credit to the customer.
HOW A WARRANTY IS PROCESSED

0-20
RETURNED GOODS POLICY:
No merchandise may be returned, nor any account adjustments made, unless authorized by J&J Amusements, Inc. A
Return Merchandise Authorization (RMA#) is required for all returns. Only items authorized (listed) on an RMA# may
be returned. Obsolete and discontinued merchandise may not be returned (current merchandise is that which appears
in the current annual parts catalog). A 15% restocking fee will be charged on all returns except for errors caused by J&J
Amusements, Inc. The customer (except for errors caused by J&J Amusements, Inc) will pay freight. Returned merchan-
dise must be in good condition, in the original package (where applicable), and cannot be altered with custom labels,
stickers, numbers, etc. Merchandise that is returned without an RMA# will be refused.
WARRANTY RETURN POLICY:
All warranty item returns must be authorized by the Warranty Department and have an assigned RMA number before
any adjustment or credit will be given. All merchandise that is returned to J&J and is proven defective in manufacture
or workmanship upon examination will be replaced or repaired.
THE RMA NUMBER MUST APPEAR NEXT TO THE SHIPPING LABEL ON ALL RETURNED ITEMS FOR PROPER
CREDIT TO BE ISSUED. IF THERE IS NO RMA NUMBER ON THE BOX/CARTON, IT WILL BE REFUSED AND
RETURNED TO SHIPPER.
BE ADVISED THAT RMA’S ARE VALID FOR 15 DAYS FROM DATE OF ISSUE. AFTER 15 DAYS, ALL RMA’S ARE VOID
AND FURTHER RETURN ATTEMPTS WILL REQUIRE RE-ISSUE OF A NEW RMA#.
PRODUCT RETURN PROCEDURES
This manual suits for next models
2
Table of contents
Other J&J Amusements Boat manuals
Popular Boat manuals by other brands

Boston Whaler
Boston Whaler 190 Outrage user manual

Sea Eagle Boats
Sea Eagle Boats Explorer 300x Instruction & owner's manual

Williams
Williams SportJet 345 Owner's handbook

Ocean Kayak
Ocean Kayak Nalu brochure

Creek Company
Creek Company ODC 915 Assembly instructions

Dragonfly
Dragonfly 25 Touring owner's manual