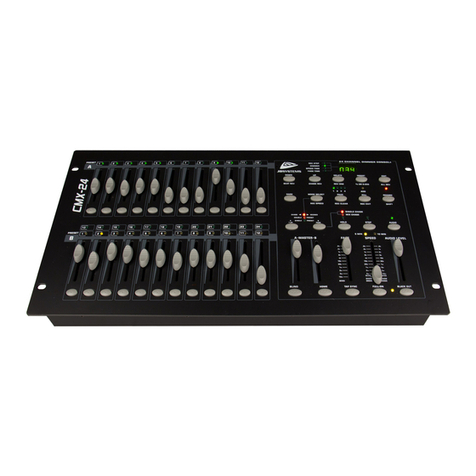
JB Systems CMX 24 User manual

WWW.BEGLEC.COM
Copyright © 2008 by BEGLEC cva.
Reproduction or publication of the content in any manner, without express permission of the publisher, is prohibited.
CMX-24
Version: 1.1
Operation Manual
Mode d'emploi
Gebruiksaanwijzing
Bedienungsanleitung
EN
FR
NL
DU

EN - DISPOSAL OF THE DEVICE
Dispose of the unit and used batteries in an environment friendly manner
according to your country regulations.
FR - DÉCLASSER L’APPAREIL
Débarrassez-vous de l’appareil et des piles usagées de manière écologique
Conformément aux dispositions légales de votre pays.
NL - VERWIJDEREN VAN HET APPARAAT
Verwijder het toestel en de gebruikte batterijen op een milieuvriendelijke
manier conform de in uw land geldende voorschriften.
DU - ENTSORGUNG DES GERÄTS
Entsorgen Sie das Gerät und die Batterien auf umweltfreundliche Art und
Weise gemäß den Vorschriften Ihres Landes.
ES - DESHACERSE DEL APARATO
Reciclar el aparato y pilas usadas de forma ecologica conforme a las
disposiciones legales de su pais.
PT - COMO DESFAZER-SE DA UNIDADE
Tente reciclar a unidade e as pilhas usadas respeitando o ambiente e em
conformidade com as normas vigentes no seu país.

ENGLISH OPERATION MANUAL
JB SYSTEMS®1/93 CMX24
Thank you for buying this JB Systems®product. To take full advantage of all possibilities, please read these
operating instructions very carefully.
FEATURES
This unit is radio-interferencesuppressed. This product meets the requirements of the current European and
national guidelines.Conformity has been established and the relevant statementsand documentshave been
deposited by the manufacturer.
Scene-setter with 12 up to24 DMX channels
48 programs spread over 4 pages
Chase of the programs (automatic or manual)
Manual control by24 faders (speed control,dimming,...)
Other functions: black-out,tap sync, step change, dimming curve
Perfect for use on stages and in theaters
BEFORE USE
Check the contents:
Check that the carton contains the following items:
CMX24
User manual
DMXcable
AC/DC adapter
Some important instructions:
Before you start using this unit, please check if there’s no transportation damage. Should there be any, do
not use the device and consult your dealerfirst.
Important: This device left our factory in perfect condition and well packaged. It is absolutely necessary
for the user to strictly follow the safety instructions and warnings in this user manual. Any damage caused
bymishandling is not subject to warranty. The dealer will not accept responsibility for any resulting defects
or problems caused by disregarding this user manual.
Keep this booklet in a safe place for future consultation. If you sell the fixture, be sure to add this user
manual.
To protect the environment, please try to recyclethe packing material as much as possible.
SAFETY INSTRUCTIONS:
CAUTION: To reduce the risk of electric shock, do not remove the top cover.
No user-serviceable parts inside. Refer servicing to qualified service
personnel only.
The lightning flash with arrowhead symbol within the equilateral triangle is intended to alert the use
or the presence of un-insulated “dangerous voltage” within the product’s enclosure that may be of
sufficient magnitude to constitute a risk of electric shock.
The exclamation point within the equilateral triangle is intended to alert the user to the presence of
important operation and maintenance (servicing) instructions in the literature accompanying this
appliance.
This symbol means: indoor use only.
This symbol means: Lamp Control Gear
Thissymbol means:Readinstructions.
To prevent fire or shock hazard, do not expose this applianceto rain or moisture.
To avoid condensation to be formed inside, allow the unit to adapt to the surrounding temperatures when
bringing it into a warm room after transport. Condense sometimes prevents the unit from working at full
performance or may even cause damages.
This unit is for indoor use only.
CAUTION
ENGLISH OPERATION MANUAL
JB SYSTEMS®2/93 CMX24
Don’t placemetal objects or spill liquid inside the unit. No objects filled with liquids, such as vases, shall be
placed on this appliance. Electric shock or malfunction may result. If a foreign object enters the unit,
immediately disconnect the mains power.
No naked flame sources, such as lighted candles, should be placed on the appliance.
Don’t cover any ventilation openings as this may result in overheating.
Prevent use in dusty environments and clean the unit regularly.
Keep the unit away from children.
Inexperienced persons should not operate this device.
Maximum save ambient temperature is 40°C. Don’t use this unit at higher ambient temperatures.
Always unplug the unit when it is not used for a longer time or before you start servicing.
The electrical installation should be carried out by qualified personal only, according to the regulations for
electrical and mechanical safety in your country.
Check that the available voltage is not higher than the one stated on the rear panel of the unit.
The socket inlet shall remain operable for disconnection from the mains.
The power cord should always be in perfect condition: switch the unit immediately off when the power cord
is squashed or damaged. It must be replaced by the manufacturer, its service agent or similarly qualified
persons in order to avoid a hazard
Never let the power-cord come into contact with other cables!
In order to avoid a hazard, the unit shall only be used with the AC-adaptor delivered with it. If the AC-
adaptor is damaged,a same model adaptorshall be used only.
In order to prevent electric shock, do not open the cover. Apart from the mains fuse there are no user
serviceablepartsinside.
Never repair a fuse or bypass the fuse holder. Always replace a damaged fuse with a fuse of the same
type and electrical specifications!
In the event of serious operating problems, stop using the appliance and contact yourdealer immediately.
Please usethe original packing when the device is to be transported.
Due to safety reasons it is prohibited to make unauthorized modifications to the unit.
CONNECTIONS
The termination ofthe signalreduces signal errorsandavoids problems with transmission and interruptions.
It’s always recommended to connect a DMX signal terminator (a resistor of 120 Ohm 1/4W) between pin2
(DMX-) and pin3 (DMX+)on the last fixture in the chain
MAINTENANCE
Clean by wiping with a polished cloth slightly dipped with water. Avoid getting water inside the unit. Do not
use volatile liquids such as benzene or thinner which willdamage theunit.
CONVENTIONS
In this manual, a button is presented as<BUTTON>
VERY IMPORTANT TO UNDERSTAND THIS MANUAL ARE THE NEXT CONCEPTS:
-Press and release a button: <BLACK OUT>
-Press and hold a button: <RECORD/SHIFT>+
For example: <RECORD/SHIFT> + <CHASE REV>
Press and hold SHIFT button, then press the CHASE REV button and release the SHIFT button.
The rank is important !!
When a button has several meanings then they will be separated by a / sign. The text above the button will
be mentioned first, then the / sign and then the text below the button.
For example: <RECORD/SHIFT>
All indicators (lamps, display) are presented as [XXX]
For example [LAMPJE FADER 1]
All faders are presented as {FADER}

ENGLISH OPERATION MANUAL
JB SYSTEMS®3/93 CMX24
FUNCTIONS (FRONT)
1. BLACK OUT button: Used to switch between black out (every DMX value at 0) and normal. The led
beside the button blinks when the BLACK OUT function is activated. The DMX values will nevertheless
be shown trough thegreen leds. (see number30/31)
2. FULL-ON button: As long as this button is pushed in, all channels will have the same maximal intensity,
regardless the working mode and the black outfunction. The dark button (number 15) has priority above
the full-on button
3. TAP SYNC button: By pressing this button twice you will adjust the chase speed. By moving the
{SPEED} fader, this stored speed will be erased. This doesn’t apply for the preset B faders (number 29)
of which the speed is stored.
4. HOME button: Only useful in Chase/Scenes mode (check the chapter “How to use” for more
information). Using this button you can switch a channel that is set in BLIND mode (see <BLIND>
button) back in normal mode. So you have to press <HOME> + <PRESET A/B x> to switch a preset B
fader back in normal mode.
5. BLIND button: Only useful in Chase/Scenes mode (check the chapter “How to use” for more
information). With this button you can switch a channel in BLIND mode. In this mode, the intensity of the
channel will only be determined by the preset fader (A for the channels 1 to 12, B for the channels 13 to
24) and the master A fader. Chases or scenes that are stored in a preset B fader don’t have an
influence. So, you have to press <BLIND> + <PRESET A/B x> to switch a channel in blind mode.
6. AUDIO button: Using this button you can (de)activate the audio function (LED above the Audio button
is ON/OFF). When the audio function is active, the speed of the passing of scenes of chases will be
determined by an audio signal, acquired by the internal microphone or supplied by the LINE IN
connector (number 5 on the rear side of the CMX24). The {SPEED} fader, <STEP> and <TAP SYNC>
buttons don’t have an influence. You cannot use the audio function for chases of which the speed is
stored in a preset B fader.,
7. STEP button: Using this button, you can view the scenes of chases manually. The {SPEED} fader has
to be set in the lowest position (SHOW MODE) or you have to work in the EDIT mode. This button
doesn’t have and influence on chases of which thespeed is stored in a preset B fader.
8. HOLD button: As long as you press this button,the current scene will be maintained. When you release
this button, the new scene will fade in with a time that is set with the FADE fader.With the DARK, FULL-
ON, BLACK OUT, PRESET buttons you can still change the scene.
ENGLISH OPERATION MANUAL
JB SYSTEMS®4/93 CMX24
9. PARK button:
Single Preset mode: no function
Double Preset mode: flash button for MASTER B fader ( take the {FADE} fader into account)
Chase/Scene mode: button to choose between Single chase or Mix chase
10. 1-24 Button: Flash button for the MASTER A fader ( take the {FADE} fader into account)
11. RECORD/SHIFT button: Used to program steps or to switch to the program mode. This button has,
when pressed together with the shiftbutton, different functions depending of the combination of buttons:
Examples:
<RECORD/SHIFT>: Store a scène in theworking memory.
<RECORD/SHIFT> + <REC EXIT>: For programming or leaving the Edit mode.
<RECORD/SHIFT>+ <RECCLEAR>: Erasing theworking memory
<RECORD/SHIFT> + <1>, <5>, <6>, <8>: Activate the program mode
<RECORD/SHIFT> + <1>, <3>, <2>, <3>: Erasing thewhole memory can only be done from the
program mode.
<RECORD/SHIFT> + <% or 0-255>: Choosing the display mode (% or DMX-value)
<RECORD/SHIFT> + <5>, <5>,<5>: Choosing the 5 min range forthe {SPEED}fader.
<RECORD/SHIFT> + <10>,<10>, <10>: Choosing the 10 min range for the {SPEED} fader.
12. ADD KILL/RECEXIT button:
ADD mode: ([ADD KILL] led OFF) When you press a preset flash button, it will have the maximal
intensity, without taking the {FADE} fader into account.
KILL mode: ([ADD KILL] LED ON)
oSingle/Double presetmode: Pressing one or more preset A or B buttons will put these
channels on 100% intensity. Theother channels will be put out.
oChase/Scenes mode: Pressing one or more preset A buttons will put these channels
on 100% intensity. The other channels will be put out. Pressing a preset B button will
put this channels on 100% intensity, without taking the {FADE} fader into account.
This last is in fact the ADD mode.
<RECORD/SHIFT> + <ADD KILL/REC EXIT>: With this combination of buttons you can leave
the program or edit mode.
13. PAGE/REC CLEAR button:
<PAGINA/RECCLEAR>: With this button you can flip trough the 4 pages. The 4 LEDs above
this button show which page is currently active.
<RECORD/SHIFT>+<PAGINA/RECCLEAR>: Used to clearthe working memory.
14. MODE SELECT/REC SPEED button:
MODE SELECT: With this button you can choose between Chase/Scenes, Single preset and
Double preset mode.
RECSPEED: (in MIX mode!) In combination with a preset B fader, this button also allows you to
store the speed of a chase in a preset B fader in Chase/Scenes mode.
oSet the chase on the wanted speed with the {SPEED} fader or the <TAP SYNC>
button. Place the {SPEED} fader in the lowest position (SHOW MODE) to erase the
speed.
oPress <MODUS SELECT/REC SPEED> + <PRESET B x> to store the speed.
15. DARK button: As long as this button is pressed all the channels will be set at zero, regardless the
mode, the black out, and the full-on function.
16. EDIT/ALL REV button:
Edit: used to switch to the edit mode:<EDIT/ALL REV> + <PRESET B x>
ALL REV: Used to change the direction of all chases
17. INSERT/% or 0-255 button:
INSERT: Used to add a scene to a chase (for more info, see “editing a Chase”)
% or 0-255: Changing thedisplay mode (switching between % and DMX-values)
18. DELETE/REV ONE button:
DELETE: used to delete a scene in a chase for more info, see “editing a Chase” and “deleting
scenes”)
REV ONE: Changing the directionof one chase: <DELETE/REV ONE> + <PRESET B x>
19. UP/ CHASE REV button:
UP: Increasing the level of a channel in edit mode: <UP/CHASE REV> + <PRESET A/B x>
CHASE REV: used to change the direction of all the chases of which the speed isn’t stored in a
preset B fader.
ENGLISH OPERATION MANUAL
JB SYSTEMS®5/93 CMX24
20. DOWN/BEAT REV button:
DOWN: Decreasing the level of a channel in edit mode: <DOWN/BEAT REV> + <PRESET A/B
x>
CHASE REV: used to change the direction of all the chases of which the speed is stored in a
preset B fader.
21. AUDIO LEVEL fader: This fader allows you to set the audio level. When the audio mode is active (see
number 6),scenes and chases will be played on the rhythm ofthe music.
22. SPEED fader: Used to set the chase speed. Look at the schedule below to easily set your speed (x
means a digit between 0 and 9):
Display Time
0.xx Milliseconds: For example 0.10 means 100 milliseconds
x.xx Seconds: For example 1.20 means 1 second and 200 milliseconds
xx.0 Seconds: For example 10.1 means 10 second and 100 milliseconds
x.xx. Minutes: For example 1.05 means 1 minute and 5seconds
xx.x. Minutes For example 10.0. means 10 minutes
Sho Show mode
There are 2 possibilities ofrange for the speed fader:
o<RECORD/SHIFT> + <5>, <5>, <5> forthe 5 min range
o<RECORD/SHIFT> + <10>,<10>,<10> forthe10 min range
You can store the speed in a preset B fader with
o<MODUS SELECT/REC SPEED> + <PRESET B x>
oPut the SPEED fader in the lowest position (SHOWMODUS) to erase the stored time
23. FADEfader: Used to store the fade time. Look at the schedule below to easily set your speed (x means
a digit between 0 and 9):
24. MASTER B fader:
Singlepreset mode: no influence
Doublepreset and Chase/Scene mode: Master of the preset B faders, the lowest position means
100%, the upperposition is 0%
25. MASTER A fader:
Single preset mode: Master of Preset A and B faders, the lowest position is 0%, the upper
position is100%
Double preset and Chase/Scene mode: Master of Preset A faders, the lowest position is 0%, the
upperpositionis 100%
26. PRESETA faders: Use these faders to set thevalues of channels 1 to 12
27. FLASH A buttons: When you press aflash buttonyou willset theintensityof this channel to100%
28. PRESET B faders:
Single preset mode: use these faders to set thevalues ofchannels 12 to 24.
Double preset mode: using this mode, you will work with a 12 channels A/B control, by which
every channel A/B fader will lead up to the same.
Chase/scene mode: This mode of the control allows you to store a whole (24 channels)
scene/chase on apreset B fader. You have 4 pages and 12 preset B faders,so you can store48
scenes/chases.
Display Time
0.xx Milliseconds: For example 0.10 means 100milliseconds
x.xx Seconds: For example 1.20 means 1 second and 200milliseconds
xx.0 Seconds: For example 10.1
means 10 seconds and 100
milliseconds
x.xx. Minutes: For example 1.05 means 1 minute and 5 seconds
xx.x. Minutes: For example 10.0.means 10 minutes
ENGLISH OPERATION MANUAL
JB SYSTEMS®6/93 CMX24
29. FLASH B buttons:
Single preset mode: use these buttons to maximize the intensity ofthe channels 12 to 24 temporary
(See flash A buttons for more information)
Double preset mode: The flash B buttons control the flash A buttons
Chase/scenes mode: Used, together with the RECORD/SHIFT button, to store chase in preset B
faders. When you press and hold these flash buttons, the chase that is stored in the channels will
start to play.
30. STATE LEDs channel 1-12: Showthe intensity of the channel in question.
31. STATE LEDs channel 13-24: Show the intensity of the channel in question.
32. STATE LEDschases: when you move a preset B fader and the orange led above this channel is lit, a
chase is stored in this channel. The intensity of the leds corresponds with the intensity of the chase.
33. SPEED/FADER/DIMMER/REC STEP ACTIVITY LEDs: The speed time led will be for example lit when
you move the speed fader.
34. DISPLAY: shows the currentaction or the stateof programming of the scenes/chases.
FUNCTIONS (REAR)
1. DC INPUT: connect the supplied AC/DC adapter to this input. If you should use another adapter, please
make surethat it has 9 ~ 12Vdc and minimum 300mAwith + in the center.
2. MIDI TRU(left)/OUT(middle)/IN(right): You can attach an external MIDI-controller to these connections
(for more information, see chapter “how to use”)
3. DMX OUTPUT: SendsDMX-signals to the connected fixtures
4. DMX POLARITY SWITCH: A DMX-signal normally has the following connections:
1=ground * 2=Data- * 3=Data+
In some cases it happens that a cable is inversed, as a result of this the DMX-connection doesn’t work.
This can be solved by using this switch. If your DMX connection doesn’t work and all your DMX-
receivers areproperly addressed, you can check this switch. In normal conditions always put thisswitch
in the left position.
5. AUDIO input: Here, you connect an audio line signal, so the connected light effects/lamps will react to
themusic.
6. REMOTEconnector: Using a stereo JACK you can switch the output in BLACK OUT or FULL ON:
The Ring of the JACK to the mass: BLACK OUT can be switched ON/OFF.
The Tip of the JACK to the mass: FULL ON is active as long as the tip is connected tothe mass.
HOW TO USE…
This chapter will explain step by step how the CMX24 works. We advise to read this text step by step.
Switching on:
The CMX24 hasn’t got an ON/OFF switch. You have to connect the adapter that is delivered together with
the CMX24 to the DC INPUT connector and the mains. As soon as this happens, the CMX24 will be switch
on.
Connectingwithdimmers:
The CMX24 is equipped with an 3 contactfemale XLR connector DMX OUT. Besides the connector there is
a slide switch that selects the polarity of the DMX-signal. Normally, this slide switch is switched towards the
side of the XLR-connection.
When theconnected DMX-devicesdon’t function correctly, switch this slide switch in theother position.

ENGLISH OPERATION MANUAL
JB SYSTEMS®7/93 CMX24
!!! Important: do not forget to set the start addresses of the dimmers correctly !!!
Basis
The CMX24 can be placed in different modes and some buttons can behave different depending of the
current mode. To know for certain that the control is working in the right mode tounderstand this tutorial you
have to do the next steps
Turn the CMX24 off and then backon
Move the next faders to the lowest position
oAll the {PRESET A} faders (12 faders)
oAll the {PRESET B} faders (12 faders)
o{MASTER B} fader
o{AUDIOLEVEL} fader
o{SPEED} fader
Move the next faders to the highest position
o{MASTER A} fader
o{FADE} fader
Select the single preset mode
oPress and release the <MODUS SELECT/REC SPEED> button until the [SINGLE
PRESET] lamp is lit (above the master A and Bfader)
Select page 1
oPress and release the <PAGINA/RECCLEAR> button until [PAGINA 1] lamp is lit. This
is placed above thePAGE button
oPress and hold the <RECORD/SHIFT> button
oPress and release the <PRESET A 5> button
oRelease <RECORD/SHIFT> button
oThe [5 min] led above the SPEED fader should now be lit.
Leave the program and edit mode, go to the safe mode
oPress and hold the <RECORD/SHIFT> button.
oPress and release the <ADD KILL/REC EXIT> button.
oRelease the <RECORD/SHIFT> button.
oWhen red led above the RECORD/SHIFT is lit, you repeat this procedure again, until the
let isn’t lit anymore.
When the audio modeis active (the [AUDIO] led is lit), shut off the mode
oPress and release the <AUDIO> button above the AUDIO fader
Put out theblack out lamp
oNormally, the [BLACK OUT] led willblink, besides the BLACK OUT button
oPress and release the <BLACK OUT> button to put out the led
oAs long as this led blinks, there is no output.
Display Mode
While moving a fader, the intensity is shown on the display. The [DIMMER] LED will be lit besides the
display to indicate that the display shows the intensity of the dimmer. When you have connected dimmers
and light effects, you will see that the connected light effects will be lit on the same intensity.
You can choose if the display shows values from 0 (%) to 100 (%), or values from 0 to 255 ( DMX-values).
You can change thedisplay (between % and DMX) this way:
Press and hold the <RECORD/SHIFT>button
Press and release the <INSERT/% or 0-255> button
Release <RECORD/SHIFT>button
By repeatingthis process you will return to the original display.
Attention: The display always shows the value of the fader and not the real intensityof the lamp.
SinglePreset mode:
Using this mode, you can set the intensity of all 24 channels of the CMX24. You can set a scene by moving
all the PRESET A and PRESET B faders to the preferred position.
Look at the green LEDs aboveeach PRESET A and PRESET B fader. These LEDs show theintensity of the
channels. If you have connected dimmers and light effects, then the light effects should also be lit.
Move {MASTERA} fader slowly down. You will seethat all leds (and your light effects) will be put out slowly.
In the single preset mode, MASTER B has no function.
ENGLISH OPERATION MANUAL
JB SYSTEMS®8/93 CMX24
Keep the <1-24> button above the MASTER A fader pushed in. You will see that the green LEDs (and your
light effects) will be litagain. As long as this button is pushed, master A will have 100 % intensity, even when
the fader is not placed at 100%
Press and hold the <PRESET A 2> button beneath the PRESET A 2 fader. The green led will start to lit at
full intensity (as well as the connected light effect). With the buttons below the faders you can place the
channels temporally at full intensity, regardless of the position of MASTER A.
Press and hold the <FULL-ON> button beneath the SPEED fader. All green leds will be lit now. Every
channel is set now at full intensity.
Press and hold the <DARK> button (above the master A fader). There’s no output now. As long as this
button is pressed, all lamps will be put out. This is a blackout function but without the latch function of the
blackoutbutton.
Press and release the <BLACK OUT> button (beneath the AUDIO LEVEL fader). The led beside this button
will start to blink and all the lamps will be put out
Keep the <FULL-ON> button pressed while your CMX24 is still in Black out. The connected light effects will
be lit at full intensity. The full-on button has priority above the black out function.
Press and hold the <DARK> button while your CMX24 is still in Black out and you’re pressing the <FULL-
ON> button. Allconnected light effects will be put out. The dark button has priority above the full-on button.
Release the dark and the full-on button. All connected light effects will be put out because of the black out
function. Now press a PRESET A or PRESET B button (belowthe faders). The connected lamp will be lit at
full intensity, regardless of the black out function. The presetbutton has priority above the blackout.
Press a PRESET A or PRESET B button and then press the <DARK> button. The lamp will be put out now.
The dark button has priority above the preset button.
The table below shows the priorityofthe buttons.
Fade time:
With the FADE fader, you can set the transition time between 0 (INSTANT) seconds and 10 minutes. Every
change of the lights will happen with the set time. This function is very handy to make flexible transitions
between different scenes. You can set the fade time as long as the transition is in progress (you accelerate
or delay the transition)
Move the {MASTER A} fader to the lowest position. Move {PRESET A 1} fader to the lowest position
Move the {FADE} fader until the display shows [1.00]. This means afade time of 1 second.
Press the <PRESET A 1> button beneath the fader. The green led (and your connected light effect) will be lit
immediately. So, the fade time isn’t used on the preset buttons. This also applies for the DARK, FULL-ON,
BLACK-OUT, 1-24 and PARK button. The fade time only influences faders.
Depending of the decimal points, another time is showed. The table below gives you all the information to set
your fade time (x is a digit between 0 and 9)
Display Time
0.xx millisecond
Forexample: 0.10 is 100 milliseconds
x.xx second
For example: 1.20 is 1 second and 200 milliseconds
xx.0 second
For example: 10.1 is 10 second en 100 milliseconds
x.xx. minutes
For example: 1.05 is 1 minuut en5seconds
xx.x. minutes
For example: 10.0. is 10 minutes
DARK
FULL-ON
PRESET
BLACK OUT
1-24
PARK

ENGLISH OPERATION MANUAL
JB SYSTEMS®9/93 CMX24
HOLD
The {FADE} fader has to be placed in the highest position.
The {MASTER A} fader has to be placed in the highest position.
All the preset faders (A and B) have to be placed in the lowest position.
Place {PRESET A 1} at 75%.
Place {PRESET A 2} at 50%.
Press and hold the <HOLD> button above the FADE fader. The led above this button is lit.
Place {PRESET A 1} at 0%.
Place {PRESET A 2} at 100%.
Place {PRESET A 3} at 75%.
Place {PRESET A 4} at 100%.
The light effects keep the actual intensity.
Release the <HOLD> button.
The light effects will adapt directly to the new intensities.
Using the HOLD button you can maintain the current scene while setting the next scene.
Move the {FADE} fader until the display shows [10.0] (a fade time of 10 seconds)
Press and hold the <HOLD> button.
Place {PRESET A 1} at 100%.
Place {PRESET A 2} at 10%.
Place {PRESET A 3} at 75%.
Place {PRESET A 4} at 0%.
Release the <HOLD> button.
The scène willchange slowly (within 10 seconds) from the previous to the next. You’ll get a perfect fade. The
HOLD button always works despite of the current mode.
DOUBLE PRESET MODE:
In this mode you can use the control as an 12 channel A-B control. Change the mode to double preset:
Press and release <MODUS SELECT/REC SPEED> until the [DOUBLE PRESET] lamp will be
lit above the master A and master B faders.
Set the following faders:
Place {PRESET A 1} fader at 100%
Place {PRESET A 2} fader at 50%
Place {PRESET A 3} fader at 25%
Place {PRESET A 4 - 12} faders at 0%
Place {PRESET B 1} fader at 0%
Place {PRESET B 2} fader at 50%
Place {PRESET B 3} fader at 75%
Place {PRESET B 4} fader at 100%
Place {PRESET B 5} fader at 50%
Place {PRESET B 6 - 12} faders at 0%
Place {MASTERA} fader at 0% (lowest position!!!)
Place {MASTER B} fader at 0% (highest position!!!)
No lamps will be lit.
Move the {MASTER A} fader slowly to 100% (highest position). Channels 1 to 3 will be lit immediately to
100%,50%and25%
Move {MASTER A} fader and {MASTER B} fader simultaneously to the lowest position. Master A will
change to 0% and Master B will change to 100%. Channels 1 to 5 will be lit at 0%, 50%, 75%, 100% and
50%. You have made a fade from the first to the second scene.
You can change this scene by moving the PRESET B faders. Moving the PRESET A faders doesn’t change
anything.
Now, you can set the PRESET A faders to a new scene.
ENGLISH OPERATION MANUAL
JB SYSTEMS®10/93 CMX24
Move {MASTER A} fader and {MASTER B} fader simultaneously to the highest position. Master A changes
to 100% and Master B changes to 0%. You will a slow fade from the first scene to the second scene. You
are working in the A-B preset mode.
IMPORTANT: Move the {MASTER A} fader to 100% (highest position) and the {MASTER B} fader to 100%
(lowest position). The CMX24 will choose for the highest values.
Channel 1 at100%
Channel 2 at50% (A:50% is higher then B:25%)
Channel 3 at75% (B:75% is higher then A:25%)
This only works when BOTH masters are set at 100%. The highest intensity has priority
PARK
Set {MASTER A} fader and {MASTER B} fader at 50%, middle position. Thescène is a combination of both
presets.
Press and hold the <PARK> button above the Master B fader. Master B will be set at 100% ( this is visible
on the green leds).When a fade timeis set,this will happen slowly.
Press and hold the <1-24> button above the Master A fader. Master A will be set at 100% ( this is visible on
the green leds). Whena fade time is set, this will happen slowly.
CHASE/SCENES mode
This control mode allows you to store a scène or a chase of 24 channels in every Preset B fader. The
CMX24 has 4 pages,so you can storealtogether 48 scenes/chases.
You can activate this mode like this:
Press and release the <MODUS SELECT/REC SPEED> button until the [CHASE SCENES]
lamp is lit above the master A/B faders.
Concepts:
Scene/Chase:
A scène is 1 setting of the intensity of the 24 channels. This is in fact a chase with 1 scene. Only this setting
will be showed constantly.
A chase contains multiple scenes and each scene contains the intensity for24 channels. The scenes will be
showed oneby one(and you can set the speed/fade time).
You have 4 pages with each 12 PRESET B faders which each can contain a scene or a chase. So you can
store48chases/scenes.
Record mode:
The CMX24 can work in 3 modes:
oSafemode, in this mode you can’t change the programs
oProgram mode, in this mode you can save/erase programs
oEdit mode, in this modeyou can changeprograms
Safe mode and program mode are always available, whether you are working in Single Preset, Double
Preset or Chase/Scenes mode. The Edit mode is only available in the Chase/Scenes mode. Next drawing
shows you how you can change from one modus to another.

ENGLISH OPERATION MANUAL
JB SYSTEMS®11/93 CMX24
oHow to recognize the mode:
Safe mode : red lamp above the <RECORD/SHIFT> button isn’t lit.
Program mode : red lamp above the <RECORD/SHIFT> button is lit.
Edit mode: yellow lamp above Preset B fader is lit, despite of the position of the
fader.
Working memory
During the programming (program mode) you will use the working memory. You will store the setting of light
effects/lamps in this memory and afterwards to you will assign this setting to a Preset B fader. The working
memory will maintain his content until you assign or erase (<RECORD/KILL> + <REC CLEAR>) the
settings.
This memory isn’t used in Edit mode, there you change the setting of light effects/lamps that are already
stored in a Preset B fader.
In the next paragraphs, the methods to program and change chases/scenes are explained.
Activate program mode
Activate Program mode
oPress and hold the <RECORD/SHIFT> button.
oPress and release the <PRESET A 1> button
oPress and release the <PRESET A 5> button
oPress and release the <PRESET A 6> button
oPress and release the <PRESET A 8> button
oRelease the <RECORD/SHIFT> button
The red lamp above the RECORD/SHIFT button is lit.
!! This mode will stay activated, even if the CMX24 is turned off, until you leave the mode. It’s advised
to leave this mode as soon as the scenes are programmed/changed. Doing this, you can avoid that
other people, who are notused to work with the controller, will change your program.
Leave programmode, go to secured mode
To leave theprogram mode:
Press and hold the <RECORD/SHIFT> button
Press and release the <KILL/REC EXIT> button.
Release the <RECORD/SHIFT> button
The red lamp above the RECORD/SHIFT button goes out.
If the lamp doesn’t go out, it means that you are in Edit mode, repeat the complete procedure.
Delete all
You can delete the complete memory by doing this:
ENGLISH OPERATION MANUAL
JB SYSTEMS®12/93 CMX24
Activate the program mode
Press and hold the <RECORD/SHIFT> button
Press and release the <PRESET A 1> button
Press and release the <PRESET A 5> button
Press and release the <PRESET A 6> button
Press and release the <PRESET A 8> button
Release the <RECORD/SHIFT> button
The lamp above the RECORD/SHIFT button is lit.
!! The next procedure will delete the complete memory. Remember there is no way back!!
Delete the complete memory:
Press and hold the <RECORD/SHIFT> button
Press and release the <PRESET A 1> button
Press and release the <PRESET A 3> button
Press and release the <PRESET A 2> button
Press and release the <PRESET A 3> button
Release the <RECORD/SHIFT> button
Recorda Scene
(ONLY possible in program mode.)
Be sure that the work memory is empty:
Press and hold the <RECORD/SHIFT> button
Press and release the <PAGINA/RECCLEAR> button
Release the <RECORD/SHIFT> button
Makeyour settings:
If you want to set only 12 channels, u can usethe Preset A faders.
If you want to set 24 channels, you first have to select the Single Preset mode by using the
<MODUS SELECT/REC SPEED> button. Set your channels by using the Preset A and Preset B
faders.
Example:
Channel 1 = 100%
Channel 2 = 27%
Channel 3 = 60%
Channel 4 to channel 8 = 0%
Channel 9 = 72%
Channel 10 = 30%
Channel 11 = 0%
Channel 12 = 95%
Record this preset in the work memory:
Press and release the <RECORD/SHIFT> button
Thedisplayshows [001]
001 on the display indicates that you haverecorded 1 scene in the working memory.
Storethe content of theworking memory in the Preset B 1 fader ofpage 1:
Select page 1 by pressing several times the <PAGINA/REC CLEAR> button till the lamp “1” is
lit.
Press and hold the <RECORD/SHIFT> button
Press and release the <PRESET B 1> button
Release the <RECORD/SHIFT> button
You have now stored a scene in the PRESET B 1 fader of page 1. The working memory has been deleted.

ENGLISH OPERATION MANUAL
JB SYSTEMS®13/93 CMX24
ShowScene
You can recall a scène in the Chase/Scenesmode. Besure that:
The Chase/Scenes mode is activated (byusing the <MODUS SELECT/RECSPEED> button)
The {Master B} fader is at its lowest position
MIX Chase is activated; select this by using the <PARK> button, just on top of the MASTER B
fader in Chase/Scenes mode. The [MIX CHASE] led is situated above the FADE fader and must
be lit.
The Black-out function is not activated.
All the PRESET faders (A & B) are set at their lowest position.
Move the {PRESET B 1} fader to its highest position. The stored scene will appear on the green Leds (and
on your projectors).
By setting several Preset B faders at the same time on a position that is higher than 0, you can create a
combined scene. You can modifythe intensity ofthe scene by using the Master B fader.
You can quickly set the scenes at 100% by using the Preset B flash buttons. Repeat the procedure to store
scenes in page 2. Be sure that the Preset B faders 1 to 3 of page 2 contain alsoscenes (make them different
from the other scenes). Check alsothese scenes.
Page to page
Now you have scenes for the preset Bfaders 1 to 6 from page 1 and the preset B faders 1 to 3 from page 2.
The preset faders 1 to 3 can nowshow 2 different scenes, depending of the selected page.
Execute the next position:
Move all the {Preset B} faders to the lowest position.
Activate page 1 byusing the <PAGINA/RECCLEAR> button
Move {Preset B 1} fader 1 to the highest position. The stored scene is shown.
Activate Page 2 by using the <PAGINA/REC CLEAR> button
The same scene is still shown.
Move the {Preset B 1} fader to the lowest position.
Move the {Preset B 1} fader to the highest position. The scene stored in preset B 1 of page 2 is
shown.
The content of the Preset B fader haschanged. This happened when the fader was in its lowest
position.
Modify a Scene
If you need to have another scene, you can:
Compose a completely new scene and store it
Adapt a scene by modifying the intensityofcertain channels
Follow the normal procedure to store a scene. when you have stored the working memory in the Preset B
fader by pressing <RECORD/SHIFT> + <PRESET B x>, the old scene will be replaced by the new scene.
If only a few channels of a scene need to be adapted, it is easier to recall the scène and to adapt it than to
create a complete new scene. The CMX24 has a special edit mode that allows you to modify the channels of
ascene.
First of all, youneed to place the PresetB fader with the stored scene in edit mode:
Be sure that programmode is activated.
Be sure that Chase/Scenes mode is activated.
Bring all the Preset Afaders to their lowest position
Select a page by using the <PAGINA/RECCLEAR> button
Place the Preset B fader in edit mode:
oPress and hold the <EDIT/ALL REV> button
oPress and release the <PRESET B x> button. X has to be replaced by 1, 2, 3, 4, 5, 6, 7,
8, 9, 10, 11 or 12 depending ofthe preset B fader that you want to edit
oRelease the <EDIT/ALL REV> button
oThe yellow led on top of the Preset B fader willLit and the actual scène is shown.
Increase the intensityof channels:
Press and hold the <UP/CHASEREV> button
Press and hold the <PRESET A x> button of the channel where you want to have the intensity
increased
ENGLISH OPERATION MANUAL
JB SYSTEMS®14/93 CMX24
Use the <PRESET Bx> button for the channels 13 to 24.
The intensity will slowly increase on you fixtures and on your display
Release the buttons, as soon as you have reached the desired intensity.
Reduce the intensity of channels:
Press and hold the <DOWN/BEAT REV> button
Press and hold the <PRESET A x> button of the channel where you want to have the intensity
reduced
Use the <PRESET Bx> button for the channels 13 to24.
The intensity will slowly decrease on your fixtures an on your display.
Release the buttons as soon as you have reached the desired intensity.
!! The intensity that you have set will be directly stored, it is not possible to undo the modifications.
To Exit the Edit mode:
Press and hold the <RECORD/SHIFT> button
Press and release the <KILL/REC EXIT> button
Release the <RECORD/SHIFT> button
The normal output isshown.
Store a Chase
A chaseis a succession of scenes that areshown on a certain rhythm.
The controller makes no difference between scenes and chases. A scene is in fact a chase with only 1step.
So you will notice that the method of storing a chaseis almost identical to the method of storing a scene.
(At this time, program mode has to be active, if it is not; you will have to do that first)
Be sure that the working memory is emtpy:
Press and hold the <RECORD/SHIFT> button
Press and release the <PAGINA/RECCLEAR> button
Release the <RECORD/SHIFT> the
We are going to make a chase, composed out of 4 scenes. Be sure that you work in program mode and that
your master is not set to 0.
Scene 1
Set the first scene:
Channel 1 = 100%
All the other chanels = 0%
Now store this scene in the working memory:
Press and release the <RECORD/SHIFT> button
[001] appears on the display = first scene
Scene 2
Set thesecond scene:
Channel 2 = 100%
All the other channels = 0%
Now store this scene in the working memory:
Press and release the <RECORD/SHIFT> button
[002] appearson thedisplay = second scene
Scene 3
Set thethird scene:
Channel 3 = 100%
All the other channels = 0%
Now store thisscene in the working memory:
Press and release the <RECORD/SHIFT> button
[003] appears on the display = third scene
Scene 4
Set the fourth scene:
Channel 4 = 100%
All the other channels = 0%
Now store this scene in the working memory:

ENGLISH OPERATION MANUAL
JB SYSTEMS®15/93 CMX24
Press and release the <RECORD/SHIFT> button
[004] appears on the display = fourth scene
The four scenes are now stored in the working memory. Now we will store the working memory in the Preset
B 7 fader of page 1:
Select page 1 by pressing several times on the <PAGINA/REC CLEAR> till the Led 1 will lit.
Press and hold the <RECORD/SHIFT> button
Press and release the <PRESET B 7> button
Release the <RECORD/SHIFT> button
Now you just have stored a chase in the Preset B 7 fader. The working memory has been cleared.
Play a Chase
You can recall the stored chasein Chase/Scenesmode. Be sure that:
Chase/Scenes mode is activated (by using the <MODUS SELECT/REC SPEED> button)
{MASTER B} fader is at its lowest position
{SPEED} fader is at its highest position
{FADER} fader is at its highest position
MIX Chase is activated; make this selection with the <PARK> button above the MASTER B
fader, in Chase/Scenes mode. The [MIX CHASE] Led is situated at the top of the FADE fader,
this mustbe Lit.
Blackout is not activated
Audio is not activated: press/releasethe <AUDIO> button till the [AUDIO] Led goes out.
All the preset faders (A & B) are set at their lowest position.
Move the {PRESET B 7} fader upwards. The chase will appearon thegreen Leds (and on your fixtures).
U can also work with the:
{SPEED}fader, thechasespeed will be modified
{FADE} fader: the scene will fade into the next scene. If the fade time is set too high, it can be
possible that the lamps will not lit at full level, or maybe the chase will not move anymore.
Manual activation of a Chase
Sometimes it is usefull to activate manually every step in a chase.
This can be done in a very easy way:
{SPEED}fader at its lowest position: SHOW MODE
Press and release the <STEP> button, situated at the top of the speed fader.
Each time thatyou press the STEP button,the next step of the chase will be activated.
Synchronize a Chase
Very often, when you play music, you want to synchronize the speed of the chase with the beat of the music.
The CMX24 offers you the possibility to press twice on a button, so that the interval time between the two
moments will be used as speed setting forthe chase. you can do it like this:
Press twice the <TAP SYNC> button on the beat of the music.
The interval time will be used to set automatically the chase speed. The position of the {SPEED} is not
important.
! As soon as you move the{SPEED} fader, the chase time will becontrolled again by this speed fader!
Memorize the speed
When several chases are running, the {SPEED} fader, the <STEP> button and the <TAP SYNC> button will
influence all the chases. Sometimes it is useful to program a fix speed, so that the chase can not be
influenced by the speed fader,the step and tap sync buttons while running.
This can be done in a very easy way:
Set the chase time by using the {SPEED} fader or the <TAP SYNC> button.
Be sure that the {SPEED} fader is not set at its lowest position (SHOW MODUS).
Press and hold the <MODUS SELECT/RECSPEED>
Press and release the <PRESET B x> button of the PRESET B fader where the chase is stored
Release the <MODUS SELECT/RECSPEED> button
The chase speed is now stored in the PRESET B fader, together with the chase.
ENGLISH OPERATION MANUAL
JB SYSTEMS®16/93 CMX24
To delete:
To delete the stored speed:
Be sure that the {SPEED} fader is at its lowest position: SHOW MODE.
Press and hold the <MODUS SELECT/RECSPEED> button
Press and release the <PRESET B x> button of the PRESET B fader where the chase is stored
Release the <MODUS SELECT/RECSPEED> button
The time (speed) is erased from the PRESET B fader. Now you can modify again the speed of the chase by
using the {SPEED}fader or the <TAP SYNC> button.
Audio
The CMX24 has a built-inmicrophone
If you dispose of an audio source (CD player, audio mixer, etc) you can synchronise the speed of the chase
with the sound. Connect the audio source with the LINE IN Cinch connector of the CMX24. Press the
<AUDIO> button till the [AUDIO] Led will lit. Move the {AUDIO FADER} fader till the chase is synchronized
with themusic.
To switch off the audio function:
- Press and release the <AUDIO> button till the [AUDIO] Led goes out.
Chase reverse
You can reverse theworking direction of a chase. Thereare4 possibilities:
ALL REV
All the chases will be reversed.
Press and release the <EDIT/REV ALL> button, the chase direction will bereversed.
Repeat this to reverseagain the chase direction.
REV ONE
Only one particular chase will be reversed
Press and hold the <DELETE/REV ONE> button
Press a <PRESET B x> button thatis containig a chase.
Release the <DELETE/REV ONE> button
CHASE REV
All the chases that have no speed stored in the preset B fader will bereversed.
Press and release the <UP/CHASEREV> button: the case will be reversed.
Repeat this to reverse again the chase direction.
BEAT REV
All the chases that have a speed stored in the preset B fader will bereversed.
Press and release the <DOWN/BEAT REV> button: thechase will be reversed.
Repeat this to reverse again the chase direction.
To modify a Chase
There are 3 ways to modify a chase. You can:
A. Modify the output levels
B. Addscenes
C. Deletescenes
A. Modify the output levels:
Be sure that the program mode is activated.
Be sure that Chase/Scenes is activated.
Bring all the preset A faders to their lowest position
Choosethe page by using the <PAGINA/RECCLEAR> button
Set the Preset B x fader in edit mode
oPress and hold the <EDIT/ALL REV> button
oPress and release the <PRESET B x> button
oRelease the <EDIT/ALL REV> button
oThe yellow Led on the top of the Preset B fader will Lit while the actual value is shown,
Select the scene thatyou would like to modify bypressing the <STEP> button.

ENGLISH OPERATION MANUAL
JB SYSTEMS®17/93 CMX24
To increase the intensity of the channels:
oPress and hold the <UP/CHASEREV> button
oPress and hold the <PRESET A x> button for channels 1 to 12. Use the <PRESET B x>
button forchannels 13 to 24.
oYou will see that the intensity will slowly increase on your display (and your fixtures)
oRelease the buttons as soon as you have reached the desired intensity.
To decreasethe intensity of the channels:
oPress and hold the <DOWN/BEAT REV> button
oPress and hold the <PRESET A x> button forchannels 1 to 12. Use the <PRESET B x>
button forchannels 13 to 24.
oYou will see that the intensity will slowly derease on your display (and your fixtures)
oRelease the buttons as soon as you have reached the desired intensity.
Repeat thesesteps till you have the desired settings
To exit the edit mode:
oPress and hold the <RECORD/SHIFT> button
oPress and release the <KILL/REC EXIT> button
oRelease the <RECORD/SHIFT> button
oThe normal output of the controller is shown again
!! The modifications will be stored directly; there is no possibility to undo the modifications.
B. Addscenes:
This method gives you the possibility to add a new scène to the chase. Repeat this method to add several
scenes.
Be sure that the program mode is activated.
Be sure that Chase/Scenes is activated.
Bring all the Preset B faders to theirlowest position
Clear theworking memory:
oPress and hold the <RECORD/SHIFT> button
oPress and release the <PAGINA/RECCLEAR> button
oRelease the <RECORD/SHIFT> button
Set the new scene, so that it appears on the green leds (and fixtures), eventually in Single
Preset mode to be able to use 24 channels
Press and hold the <RECORD/SHIFT> button. The scene is now recorded in the working
memory
If you have activated the Single Preset mode to compose scenes, you have now to activate
again the Chase/Scenesmode.
Bring all the Preset A and B faders to their lowest position
Choosethe desired page by using the <PAGINA/RECCLEAR> button
Place the Preset B x fader in edit mode
oPress and hold the <EDIT/ALL REV> button
oPress and release the <PRESET B x> button
oRelease the <EDIT/ALL REV> button
oThe yellow Led above the Preset B fader will lit and the actualscène is shown.
Press the <STEP> till you havereached the scene that should come NEXT to the scene that you
want to insert.
Press and release the <INSERT/0% OR 0-255> button.
To exit the edit mode:
oPress and hold the <RECORD/SHIFT> button
oPress and release the <KILL/REC EXIT> button
oRelease the <RECORD/SHIFT> button
oThe normal output of the controller is shown again
C. Deletescenes:
!! It is inpossible to recover deleted scenes.
Be sure that the program mode is activated.
Be sure that Chase/Scenes is activated.
Move all the Preset A faders to their lowest position
Choosethedesired page by using the <PAGINA/RECCLEAR> button
ENGLISH OPERATION MANUAL
JB SYSTEMS®18/93 CMX24
Place the Preset B x fader in edit mode:
oPress and hold the <EDIT/ALL REV> button
oPress and release the <PRESET B x> button
oRelease the <EDIT/ALL REV> button
oThe yellow Led on top of the de Preset B will Lit and theactual sceneis shown.
Select the scene that you wantto delete by using the <STEP> button.
Press and release the <DELETE/REV ONE> button
If needed, choose another scene by using the <STEP> button en delete it by using the
<DELETE/REV ONE> button
To exit the edit mode:
oPress and hold the <RECORD/SHIFT> button
oPress and release the <KILL/REC EXIT> button
oRelease the <RECORD/SHIFT> button
oThe normal output of the controller is shown again
Empty a preset B fader
!! it will not bepossible to undo this action !!
Be sure that the program mode is activated.
Press and hold the <RECORD/SHIFT> button
Press and release the <PRESET B x> button of the desired preset B fader
(So the preset B x button has to be pressed 2 times).
Release the <RECORD/SHIFT> button
Copy Preset Bfader
!! Only possible with scenes!!
If you want to copy a scene to another preset B fader to use again the same scène or to use it as a base for
a new scene.
Be sure that the Chase/Scene mode is activated
Bring all the preset A faders (or the master Afader) to their lowest position
Bring all the preset B faders to their lowest position
Bring the Master B fader to its lowest position (100%)
Modify the page if necessary
Move the preset B fader of the scene that you want to copy to 100%
<RECORD/SHIFT>+<PAGINA/RECCLEAR> to delete the working memory
<RECORD/SHIFT> to store the scene
Modify the page if necessary
<RECORD/SHIFT> + <PRESET B x> to store the scene in another preset B fader, the sceneis
nowcopied
Delete a CHASE
To delete a chase or a scene from a preset B fader in Chase/Scenes mode:
Use the <PAGINA/RECCLEAR> button to select the page
Press and hold the <RECORD/SHIFT> button
Press and release the <PRESET B x> button
Press and release the <PRESET B x> buttonagain
Release the <RECORD/SHIFT> button
Blind/Home
In Chase/Scenes mode u can use the <Blind> and the <Home> buttons. These buttons are not used in
SinglePreset and Double Preset mode.
Preset A
To disconnect the channels 1 to 12 from the preset B scenes/chases:
oPress and hold the <BLIND> button
oPress and release the <Preset A x> button
oRelease the <BLIND> button
The level will only be determinated byusing the preset A fader, master A fader and the flash buttons.

ENGLISH OPERATION MANUAL
JB SYSTEMS®19/93 CMX24
The easiest wayto test this is to activate a chase (by using a preset B fader), then place one of the cannels
in BLIND. Now you can adapt the intensity by using the preset A fader. This channel will notfollow the chase
anymore. However, the FULL-ON button will still activate the channel.
To placethe channelback in normal mode:
oPress and hold the <HOME> button
oPress and release the <Preset A x> button
oRelease the <HOME> button
Preset B
Todisconnect thechannels 13 to 24 from the presetBscenes/chases:
oPress and hold the <BLIND> button
oPress and release the <Preset Bx> button
oRelease the <BLIND> button
The level will only be determinated byusing the preset B fader, master A fader and the flash buttons.
You can set the intensity of the channel by using the preset B fader. The preset B fader will not be linked
anymoreto its stored scene/chases.
To placethe channelback in normal mode:
oPress and hold the <HOME> button
oPress and release the <Preset Bx> button
oLaat de <HOME> toets los
oYou will notice that the Preset B fader is directly used to activate the programmed
scene/chase. That’s why it is better to place the de Preset B fader in the lowest position,
before to activate the normal mode
SINGLECHASE
De single chase mode is useful to create quickly different chases.
When Single chase (indicate with the PARK button) is activated, the CMX24 will create chase, based on all
the preset B faders that are notset to zero. Each preset B fader will be activated till all the fader positions are
shown. Then, the next preset B fader will be shown.
In this text, we consider that all the preset B faders in output 1 have a scene (1 to 6) or a chase (7 to 12)
stored.
Place the controller in Single Chasemode:
Bring all the Preset A and B faders to the lowest position
Be sure that the Chase/Scenes mode is activated
Press and release the <PARK> button on top of the Master B fader
The [SINGLE CHASE] Led on top of the {FADE} fader must be lit, if it is not, you will have to
pressagain the <PARK> button
To have a clear view of the effect you should first place the {FADE} fader in highest position and move the
{SPEED} fader till the display shows [1.05](1,05 second).
Bring the preset B faders 1 to 4 to their highest position. Now you see a chase, composed of 4 scenes that
are stored in the faders. You can set the speed by using the {SPEED} fader, the <STEP> button and the
<TAP SYNC> button. By moving the preset B faders you can modify the chase. Try also to activate the
preset B 7 to 12 faders.
Like this you can quickly create several chases bycombining scenes/chases that are stored in the preset B
faders.
Notice:
If the preset B fader includes aspeed setting (stored with REC SPEED), it will not be used.
You can reverse the chase direction of the preset B faders with the REV ALL, REV ONE,
CHASE REVand BEAT REV buttons, but you can not reverse the global chase, this one always
goes from preset B 1 to preset B 12
Sometimes it looks like if the chase includes extra steps. You have to be sure that the preset B
faders are set to zero. Control this with the display.
Pressing the flash buttons of the preset B faders will add presets to the chase, sop you will have
to wait till the chase activates the preset
ENGLISH OPERATION MANUAL
JB SYSTEMS®20/93 CMX24
MIDI function:
Set the MIDI IN channel: Press and hold the Record button and press 3x Flash button 1. The
display will show “CHI”. Press one of the Flash buttons (1-16) to assign the MIDI in channel (1-
16). If the relevant channel LED is lit, the MIDI IN channel is correctly set.. Press and hold the
Record button and press the Exit button to exit MIDI setup.
Set the MIDI OUT channel: Press and hold the Record button and press 3x Flash button 2.
The display will show “CHO”. Press one of the Flash buttons (1-16) to assign the MIDI out
channel (1-16). If the relevant channel LED is lit, the MIDI OUT channel is correctly set. Press
and hold theRecord button and press the Exit button to exit MIDI setup.
Receive MIDI file dump: Press and hold the Record button and press 3x Flash button 3. The
display willshow “IN”, indicating thecontroller is ready to receive the file dump.
Send MIDI file dump:Press and hold the Record button and press 3x Flash button 4.The
display willshow “OUT”, indicating thecontrolleris ready tosend the file dump.
IMPORTANT:
oDuring a file dump, the other functions of the CMX24 will not work. You will be able to use
them again as soon as the file dump is completed
WORKMODES (SEE PREVIOUS PART)
Activate the secured mode
<RECORD/SHIFT> + <KILL/REC EXIT> till the Led on top of the record button goes out.
In this modeit is not possible to modify chases/scenes programs.
Activate the program mode
Press and hold the <RECORD/SHIFT> button
Press and release the <PRESET A 1> button
Press andrelease the <PRESET A 5> button
Press and release the <PRESET A 6> button
Press and release the <PRESET A 8> button
Release the <RECORD/SHIFT> button
Activate edit mode
<EDIT/ALL REV> + <PRESET B x>
!! This is only possible if the program mode is activated.
Delete all
!! This will erase the complete memory !!
The program mode must be activated !!
Press and hold the <RECORD/SHIFT> button
Press and release the <PRESET A 1> button

ENGLISH OPERATION MANUAL
JB SYSTEMS®21/93 CMX24
Press and release the <PRESET A 3> button
Press and release the <PRESET A 2> button
Press and release the <PRESET A 3> button
Release the <RECORD/SHIFT> button
Clear theworking memory
<RECORD/SHIFT>+ <RECCLEAR>
Store a Scene
Program mode= activated
<RECORD/SHIFT>+<PAGINA/RECCLEAR> Working memory is empty
<RECORD/SHIFT> Store scene in working memory
<PAGINA/RECCLEAR> Select page
<RECORD/SHIFT> + <PRESET B x> Workingmemory in preset B
Modify a scene
Program mode= activated
<PAGINA/RECCLEAR> Select page
<EDIT/ALL REV> + <PRESET B x> Activate Edit mode
<UP/CHASE REV> + <PRESET A/B x> Increase intensity
<DOWN/BEAT REV> + <PRESET A/B x> Decrease intensity
<RECORD/SHIFT>+<PAGINA/RECCLEAR> Exit edit mode
Store a chase
Program mode= activated
<RECORD/SHIFT>+<PAGINA/RECCLEAR> Working memoryis empty
<RECORD/SHIFT> Store scène in working memory
Repeat this for every scene
<PAGINA/RECCLEAR> Select page
<RECORD/SHIFT> + <PRESET B x> Workingmemory in preset B
Modify Chase / Scene
Program mode= activated:
<PAGINA/RECCLEAR> Select page
<EDIT/ALL REV> + <PRESET B x> Activate Edit mode
<STEP> Select scene
<UP/CHASE REV> + <PRESET A/B x> Increase intensity
<DOWN/BEAT REV> + <PRESET A/B x> Decrease intensity
<RECORD/SHIFT>+<PAGINA/RECCLEAR> Exit edit mode
Add Chase / Scene
Program mode= activated
<RECORD/SHIFT>+<PAGINA/RECCLEAR> Working memory is empty
<RECORD/SHIFT> Store scène in working memory
<PAGINA/RECCLEAR> Select page
<EDIT/ALL REV> + <PRESET B x> Activate edit mode
<STEP> Select the scene that will be next to the one
you are going to add
<INSERT/% or 0-255> Add scene
<RECORD/SHIFT>+<PAGINA/RECCLEAR> Exit edit mode
Delete Chase / Scene
Program mode= activated
<PAGINA/RECCLEAR> Select page
<EDIT/ALL REV> + <PRESET B x> Activate edit mode
<STEP> Select scene
<DELETE/REV ONE> Delete scene
<RECORD/SHIFT>+<PAGINA/RECCLEAR> Exit edit mode
ENGLISH OPERATION MANUAL
JB SYSTEMS®22/93 CMX24
SPECIFICATIONS
Power Input: DC 12V-18V500mA.
AC/DCPoweradapter: AC 230V, 50Hz 12Vdc / 500mA
DMX outputs: 3pinXLR
MIDI Signal: 5pin standard DINplug
Audio input: 100 mV~1 Vpp & internalmicrophone
Size: 482 x 264 x85 mm
Weight: 4,3kg
Every information is subject to change withoutprior notice
You can download the latest version of thisuser manual on our website: www.beglec.com

FRANCAIS MODE D’EMPLOI
JB SYSTEMS®23/93 CMX24
CAUTION
Nous vous remercions d’avoir acheté ce produit JB Systems®. Veuillez lire ce mode d’emploi très
attentivement afin de pouvoir exploiter toutes les possibilités de cet appareil.
EN VOUS INSCRIVANT POUR LA LETTRE D’INFORMATION VOUS SEREZ TOUJOURS
TENU AU COURANT DES DERNIERES NOUVELLES CONCERNANT NOS PRODUITS:
NOUVEAUTES, ACTIONS SPECIALES,JOURNEES PORTES OUVERTES, ETC.
SURFEZ SUR: WWW.BEGLEC.COM ET INSCRIVEZ-VOUS
CARACTERISTIQUES
Cet appareil ne produit pas d’interférences radio. Il répond aux exigences nationales et européennes. La
conformité a été établie et les déclarations et documents correspondants ont été déposés parle fabricant.
Consoleproduisant des jeux de lumière sur 12 à 24 canauxDMX
48 programmes sur 4 pages
Nombreux programmes (automatiques ou manuels) avec effets de chenillard
Micro incorporé pourapplications audio
Utilisation manuelleà l’aide de24 curseurs
Parfait pour la scène et les théâtres
AVANT L’UTILISATION
Vérifiez le contenu:
Vérifiez si l’emballage contient bien les articles suivants:
AppareilCMX24
Moded’emploi
Adaptateur CA/CC
CâbleDMX
Quelques instructionsimportantes:
Avant d’utiliser cet appareil, assurez-vous de l’absence de dommages liés au transport. En cas de
dommages, n’utilisez pas l’appareil et contactez le vendeur.
Important: Cet appareil a quitté notre usine en parfaite condition et bien emballé. Il est primordial que
l’utilisateur suive les instructions de sécurité et avertissements inclus dans ce manuel. La garantie ne
s’applique pas en cas de dommage lié à une utilisation incorrecte. Le vendeur ne prend pas la
responsabilité des défauts ou de tout problème résultant du fait de n’avoir pas tenu compte des mises en
garde de ce manuel.
Conservez ce manuel dans un endroit sûr pour toute consultation future. Si vous vendez l’appareil,
assurez-vous d’y joindre ce manuel également.
Afin de protéger l’environnement, merci de recycler les emballages autant que possible.
INSTRUCTIONS DE SECURITE:
ATTENTION: afin de réduire le risque d’électrocution, n’enlevez jamais le
couvercle de l’appareil. Il n’y a aucune pièce à l’intérieur de l’appareil que
vous puissiez remplacer vous-même. Confiez l’entretien uniquement à
des techniciensqualifiés.
La flèche dans un triangle met l'utilisateur en garde contre la présence de haute tension sans
isolation dans l'appareil, ce qui peut causer un risque d'électrocution.
Un point d'exclamation dans un triangle prévient de la présence d'instructions relatives au
fonctionnement et à la maintenance se trouvant dans le manuel fourni avec l'appareil.
Ce symbole signifie : uniquement pour usage à l'intérieur.
Ce symbole signifie : Lire le mode d’emploi.
FRANCAIS MODE D’EMPLOI
JB SYSTEMS®24/93 CMX24
Afin d’éviter tout risque d’incendie ou de décharge électrique, ne pas exposer cet appareil à la pluie ou
l’humidité.
Pour éviter la formation de condensation à l’intérieur de l’appareil, patientez quelques minutes pour laisser
l’appareil s’adapter à la température ambiante lorsqu’il arrive dans une pièce chauffée après le transport.
La condensation empêche l'appareil de fonctionner manière optimale, et elle peut même causer des
dommages.
Cet appareil est destiné à une utilisation à l’intérieur uniquement.
Ne pas insérer d’objetmétallique ou renverser de liquide dans l’appareil. Aucun objet contenant un liquide,
tels que des vases, ne peut être placé sur cet appareil. Cela risquerait de provoquer une décharge
électrique ou un dysfonctionnement. Si un corps étranger est introduit dans l’appareil, déconnectez
immédiatement de la source d’alimentation.
Aucune sourcede flammenue, telle que des bougies allumées, ne peut être placée sur l'appareil.
Ne pas couvrir les orifices de ventilation, un risque de surchauffe en résulterait.
Ne pas utiliser l'appareil dans un environnement poussiéreux et le nettoyer régulièrement.
Ne pas laisser l'appareil à portée des enfants.
Les personnes non expérimentées ne doivent pas utiliser cet appareil.
La température ambiantemaximale d’utilisation de l’appareil est de 45°C. Ne pas l’utiliser au-delà de cette
température.
Débranchez toujours l’appareil si vous ne l’utilisez pas de manière prolongée ou avant d’entreprendre des
réparations.
Les installations électriques ne peuvent être faites que par du personnel qualifié et conformément aux
règlements de sécurité électrique et mécanique en vigueur dans votre pays.
Assurez-vous que la tension d’alimentation de la source d’alimentation de la zone dans laquelle vous vous
trouvez nedépasse pas celle indiquée à l’arrière de l’appareil.
La prise sera toujours accessible pour que le cordon secteur puisse être enlevé à chaque moment.
Le cordon d’alimentation doit toujours être en condition parfaite. Mettez immédiatement l’unité hors tension
si le cordon est écrasé ou endommagé. Pour éviter tout risque de choc électrique, le cordon doit être
remplacé par le constructeur, son agent ou un technicien qualifié.
Ne laissez jamais le cordon d’alimentation entrer en contact avecd’autres câbles !
Pour éviter tout risque de choc électrique, cet appareil doit être utilisé uniquement avec l’adaptateur
secteur inclus. Si l’adaptateur est défectueux, il sera utilisé seulement parun modèle identique.
L’appareil doit êtreà la masse selon lesrègles desécurité.
Utilisez toujours des câbles appropriés et certifiés lorsque vous installez l'appareil.
Pour éviter toute décharge électrique, ne pas ouvrir l’appareil. En dehors des ampoules et du fusible
principal, iln’y a pas de pièces pouvant être changées par l’utilisateur à l’intérieur.
Nejamais réparer ou court-circuiter un fusible. Remplacez systématiquement un fusible endommagépar
un fusible de même type etayant les mêmes spécifications électriques !
En cas de problèmes de fonctionnement sérieux, arrêtez toute utilisation de l’appareil et contactez votre
revendeur immédiatement.
Utilisez l’emballage d’origine si l’appareil doit être transporté.
Pour des raisons de sécurité, il est interdit d’apporter une quelconque modification à l’unité non
spécifiquement autorisée par lesparties responsables.
CONNEXIONS
Le fait d'indiquer au système le dernier endroit de la chaîne où le signal DMX doit parvenir diminue les
erreurs de signaux et évite les problèmes de transmission ainsi que les perturbations. A ceteffet, il est tout à
faitindiqué de raccorder un indicateur d'arrêt du signal DMX (résistancede 120 Ohms et de ¼ de watt) entre
la broche 2 (DMX-) et la broche 3 (DMX+) sur le dernier appareil de la chaîne.
ENTRETIEN
Nettoyez l’appareil à l’aide d’un chiffon doux, légèrement humide. Evitez d’introduire de l’eau à l’intérieur de
l’appareil. N’utilisez pas de produits volatils tels que le benzène ou le 'thinner' qui peuvent endommager
l’appareil.

FRANCAIS MODE D’EMPLOI
JB SYSTEMS®25/93 CMX24
CONVENTIONS D'ECRITURE
Toutes les touches mentionnées sont "encadrées" par des crochets : <TOUCHE>.
IL EST TRES IMPORTANT DE BIEN COMPRENDRE COMMENT SONT IDENTIFIEES LES NOTIONS CI-
DESSOUS DANS CE MODE D'EMPLOI !
- Pour appuyer sur une touche et la relâcher aussitôt : <BLACK OUT>.
- Pour appuyer sur une touche et la maintenir enfoncée : <RECORD/SHIFT>+.
Par exemple : <RECORD/SHIFT> + <CHASE REV>.
La combinaison de ces deux touches veut donc dire : appuyer sur la touche SHIFT et la maintenir ; ensuite,
appuyer sur la touche CHASE REV et la relâcher aussitôt ; ensuite et à ce moment seulement, relâcher la
touche SHIFT.
Effectuer les opérations dans le bonordre est donc très important !!
Lorsqu'une touche porte plusieurs inscriptions, celles-ci sont mentionnées en étant séparées par le signe /.
C'est le texte situé au dessus de la touche qui vient en premier, ensuite le signe /, et enfin le texte situé en
dessous de la touche.
Par exemple : <RECORD/SHIFT>.
Tous les indicateurs (lampes témoins, écrans) sontidentifiés par les signes suivants : [XXX].
Par ex. : [LAMPE FADER 1].
Tous les curseurs (nous utilisons ce terme pour désigner les potentiomètres à glissière) sont identifiés par
les signes suivants : {FADER}.
FONCTIONS (FACE AVANT)
1. Touche BLACK OUT : va et vient entre black out (toutes les valeurs DMX sont à 0) et normal. La lampe
témoin à côté de la touche clignote quand la fonction black out est active. Néanmoins, les valeurs DMX
sont toujours affichées par les LED vertes (se reporter aux N° 30 et 31 sur la figure ci-dessus).
2. Touche FULL-ON : Aussi longtemps que cette touche sera maintenue, tous les canaux donneront leur
luminosité maximale, quel que soit le mode en cours ou l'état de la fonction black out. Par contre, la
touche DARK est prioritaire.
FRANCAIS MODE D’EMPLOI
JB SYSTEMS®26/93 CMX24
3. Touche TAP SYNC : En appuyant deux fois de suite sur cette touche, on règle la vitesse des effets
chenillards. En manipulant le curseur {SPEED}, cettevitesse peut être réglée en continu. Cette dernière
remarque n'est pas d'application pour les curseurs des présélections B (N° 29), dont la vitesse est mise
en mémoire.
4. Touche HOME : Ne fonctionne que dans le mode Chase/Scenes (se reporter au chapitre 'Comment
utiliser l'appareil …' pour plus d'infos). Grâce à cette touche, on est en mesure de faire repasser un
canal en mode normal quand il est en mode 'BLIND' (se reporter à la touche <BLIND>). Il faut donc
appuyersur <HOME> + <PRESET A/B x> pour faire repasser un curseur des présélections B en mode
normal.
5. Touche BLIND : Ne fonctionne que dans le mode Chase/Scenes (se reporter au chapitre 'Comment
utiliser l'appareil …' pour plus d'infos). Grâce à cette touche, on est en mesure de faire passer un canal
en mode BLIND. Dans ce mode, la luminosité lumineuse du canal n'est déterminée que par le curseur
de présélection (A pour les canaux 1 à 12 inclus et B pour les canaux 13 à 24 inclus) et par le curseur
Master A. Les séquences de poursuite ou les 'scenes' qui sont en mémoire via un curseur des
présélections B n'ont donc aucune influence. Il faut donc appuyer sur <BLIND> + <PRESET A/B x> pour
faire passer un canal en mode BLIND.
6. Touche AUDIO : Grâce à cette touche, on est en mesure de mettre en ou hors service la fonction audio
(la LED au dessus de la touche audio est allumée ou pas). Quand la fonction audio est active, la vitesse
de défilement des scènes ou des effets chenillards est déterminée par un signal audio recueilli par le
micro interne ou en provenance du connecteur LINE IN (N° 5 sur la face arrière de l'appareil). Dans ce
cas, le curseur {SPEED} et les touches <STEP> et <TAP SYNC> n'ont donc aucune influence. La
fonction audio n'est pas utilisable pour les effets chenillards dont la vitesse est mise en mémoirevia un
curseurdes présélectionsB.
7. Touche STEP : Grâce à cette touche, on est en mesure de parcourir manuellement les scènes de
séquences de poursuite. Le curseur {SPEED} doit se trouver en position minimum (SHOW MODE) ou
alors, il faut travailler en mode EDIT. Ceci n'a pas d'influence sur les séquences de poursuite dont la
vitesseestmise en mémoire via un curseur des présélections B.
8. Touche HOLD : Aussi longtemps que cette touche sera maintenue, l'état de l'ensemble des lumières
restera inchangé. Lorsqu'on relâchera la touche, l'ensemble des lumières commencera à s'actualiservia
un fondu enchaîné dont la durée aura été déterminée par le curseur FADE. Grâce aux touches DARK,
FULL-ON, BLACK OUT et PRESET, il est toujours possible d'influer sur l'ensemble des sources de
lumière.
9. Touche PARK :
En mode Single Preset: pas de fonction.
En mode Double Preset : touche flash pour le curseur MASTER B (tenir compte du curseur
{FADE})
Mode Chase/Scene : touche qui permet de choisir entre Single chase et Mix chase
10. Touches 1 à 24 : touche flash pour le curseur MASTER A (tenir compte du curseur {FADE})
11. Touche RECORD/SHIFT : est utilisée pour programmer des pas (étapes) ou pour naviguer vers le
mode Programme. Lorsqu'on appuie sur cette touche en combinaison avec d'autres touches, elle a
diverses fonctions selon la combinaison utilisée.
Exemples :
<RECORD/SHIFT>: enregistrer une scène dans la mémoire de travail.
<RECORD/SHIFT> + <CHASE REV> : quitter le mode PROGRAMMATION ou le mode
EDITION.
<RECORD/SHIFT> + <REC CLEAR> : effacer la mémoire de travail.
<RECORD/SHIFT> + <1>, <5>,<6>, <8> : activer le mode PROGRAMATION.
<RECORD/SHIFT> + <1>, <3>, <2>, <3> : effacer l'ensemble de la mémoire, et ce, seulement
depuis le mode PROGRAMMATION.
<RECORD/SHIFT> + <% or 0-255> : choisir le mode d'écran (en % ou en valeurs DMX)
<RECORD/SHIFT> + <5>, <5>, <5> : choisir une fourchette de 5 minutes pour le curseur
{SPEED}.
<RECORD/SHIFT> + <10>, <10>, <10> : choisir une fourchette de 10 minutes pour le curseur
{SPEED}.
12. Touche ADD KILL/RECEXIT :
En mode ADD : la lampe témoin [ADD KILL] est éteinte, et le fait d'appuyer sur une touche de
présélection flash a pour conséquence que la présélection passera à la valeur de 100 %, sans
tenir compte de la position du curseur {FADE}.

FRANCAIS MODE D’EMPLOI
JB SYSTEMS®27/93 CMX24
Mode KILL : (la lampe témoin [ADD KILL] est allumée)
oen mode Singlepreset ou en mode Double preset : le fait d'appuyer sur une touche de
présélection flash A ou B a pour conséquence que les canaux correspondants
passent à la valeur de 100 %. Les autres canaux sont éteints.
oEn mode Chase/Scene : le fait d'appuyer sur une touche de présélection A a pour
conséquence que les canaux dont la présélection A est enfoncée passent à une
valeur de 100 %. Les autres canaux sont éteints. Le fait d'appuyer sur une touche de
présélection B a pour conséquence que la présélection B passe à une valeur de 100
%, sans tenir compte de la position du curseur. Il s'agit en fait du mode ADD.
<RECORD/SHIFT> + <ADD KILL/REC EXIT> : grâce à la combinaison de ces deux touches, on
peut également quitter le modePROGRAMMATION ou le mode EDITION.
13. Touche PAGE/REC CLEAR :
<PAGE/REC CLEAR> : Grâce à cette touche, on est en mesure de naviguer à travers les
quatre pages. Les quatre LED qui surmontent cette touche montrent dans quelle page on se
trouve à cet instant.
<RECORD/SHIFT> + <PAGE/REC CLEAR> : cette combinaison est utilisée afin de vider la
mémoire de travail.
14. Touche MODE SELECT/REC SPEED :
MODE SELECT : grâce à cette touche, on peut choisir entre trois modes : Chase/Scenes,
Single preset et Double preset.
REC SPEED : en mode MIX, en combinaison avec un fader des présélections B, cette touche
permet également de mettre en mémoire la vitesse d'un effet chenillard sur un curseur d'une
présélection B, à condition d'êtreen mode Chase/Scene.
oVeillez à ce que l'effet chenillard soit en train de fonctionner avec la vitesse voulue via
le curseur {SPEED} ou la touche <TAP SYNC>. Etant en mode SHOW, mettez le
curseur {SPEED} en positionminimum pour annuler ce rythme.
o<MODE SELECT/REC SPEED> +<PRESET B x>
15. Touche DARK : Aussi longtemps que cette touche reste enfoncée, tous les canaux seront à leur valeur
zéro, sans tenir compte du mode en cours ou des fonctions BlackOut ou Full-On.
16. Touche EDIT/ALL REV :
Edit : Grâce à cette touche, on accède au mode EDITION : <EDIT/ALL REV> + <PRESET Bx>
ALL REV : cette touche fait changer tous les effets chenillards de direction.
17. Touche INSERT / % or 0-255 :
INSERT : sert à attribuer une ambiance lumineuse à un effet chenillard (se reporter au chapitre
'Modifier un effet chenillard').
% or 0-255 : sert à changer le mode de l'écran (bascule entre les valeurs en % et les valeurs
DMX).
18. Touche DELETE/REV ONE :
DELETE : sert à supprimer une scène d'un effet chenillard (se reporter au chapitre 'Modifier un
effetchenillard', ou enlever une ambiancelumineuse).
REV ONE : sert à inverser le sens d'un seul effet chenillard : <DELETE/REV ONE> + <PRESET
B x>
19. Touche UP/CHASE REV :
UP : sert à hausser le niveau d'un canal en mode EDITION : <UP/CHASE REV> + <PRESET
A/B x>
CHASE REV : sert à inverser le sens de tous les effets chenillards dont la vitesse n'est PAS
mise en mémoire via un curseur des présélections B.
20. Touche DOWN/BEAT REV :
DOWN : sert à baisser le niveau d'un canal en mode EDITION : <DOWN/BEAT REV> +
<PRESET A/B x>
CHASE REV : sert à inverser le sens de tous les effets chenillards dont la vitesse est mise en
mémoire via un curseurdes présélections B.
21. Curseur AUDIO LEVEL : Ce curseur permet de régler le niveau du signal audio. Lorsque le modeaudio
est actif (se reporter au N° 6), les scènes et les effets chenillards seront reproduits en suivant le rythme
de la musique.
22. Curseur SPEED : est utilisé pour régler la vitesse des effets chenillards. Reportez-vous à la grille ci-
dessous afin de régler facilement la vitesse (x représente un chiffre entre 0 et 9) :
FRANCAIS MODE D’EMPLOI
JB SYSTEMS®28/93 CMX24
Ecran Vitesse
0.xx Millisecondes : Par ex. : 0.10 signifie 100 millisecondes
x.xx Secondes : Par ex. : 1.20 signifie 1 seconde et 200 millisecondes
xx.0 Secondes : Par ex. : 10.1 signifie 10 secondes en 100 millisecondes
x.xx. Minutes : Par ex. : 1.05. signifie 1 minute et 5 secondes
xx.x. Minutes : Par ex. : 10.0. signifie 10 minutes
Sho ModeSHOW
Il y a deux fourchettes possibles pour régler le curseur de vitesse :
o<RECORD/SHIFT> + <5>, <5>, <5> pour lafourchette allant jusqu'à 5 minutes ;
o<RECORD/SHIFT> + <10>, <10>, <10> pour lafourchette allant jusqu'à 10 minutes.
On peut mettre en mémoire la vitesse sur un curseur desprésélections Bde lafaçon suivante :
o<MODE SELECT/REC SPEED> + <PRESET B x> ;
oEtant en mode SHOW, mettez le curseur {SPEED} en position minimum pour annuler
ce rythme.
23. Curseur FADE : est utilisé pour régler le 'fade time' (vitesse de fondu enchaîné). Reportez-vous à la
grille ci-dessous afin de régler facilement cette vitesse depassage…(x représente un chiffre entre 0 et 9)
24. Curseur MASTER B :
mode Single Preset : Pas de fonction ;
Mode Double Preset et mode Chase/Scene : Il s'agit du Master des présélections B ; en position la
plus basse,sa valeur estde 100 %, en position laplus haute, savaleur est de 0 %.
25. Curseur MASTER A :
mode Single Preset : Il s'agit du Master des présélections A et B ; en position la plus basse, sa
valeur est de 0 %,en position la plus haute, sa valeur est de 100 % ;
Mode Double Preset et mode Chase/Scene : Il s'agit du Master des présélections A ; en position la
plus basse, sa valeur est de 0 %, en position la plus haute, sa valeur est de 100 %.
26. CURSEURS DES PRESELECTIONS A: utilisez ces curseurs afin de régler lesvaleurs des canaux1 à
12.
27. Touches FLASH A : Lorsque vous appuyez sur une des touches FLASH, vous portez la luminosité de
ce canal à 100 %.
28. CURSEURS DES PRESELECTIONS B :
mode SinglePreset : utilisez ces curseursafin de régler les valeurs des canaux12 à 24 ;
mode Double Preset : Via ce mode, on peut utiliser les commandes comme s'il s'agissait d'un
appareil à 12 canaux A-B, et où tous les curseurs pilotent les canaux A-B de lamême manière ;
Mode Chase/Scene : Ce mode opératoire permet à chaque curseur de présélection B de mémoriser
une ambiance lumineuse complète (24 canaux), une scène ou un effet chenillard. En outre, on
dispose de quatre pages, de sorte qu'au total, on peut mémoriser au total 48 scènes / effets
chenillards.
29. Touches FLASH B :
mode Single Preset : utilisez ces touches pour porter temporairement la puissance des canaux 13 à
24 à leur maximum (sereporter aux touches FLASH A).
mode Double Preset : ici, les touches FLASH B pilotent les touches FLASH A.
Mode Chase/Scene : ici, les touches sont utilisées en combinaison avec la touche RECORD/SHIFT
pour mettre en mémoire des effets chenillards sur les curseurs des présélections B. Lorsqu'on
pousse temporairement sur ces touches FLASH, l'effet chenillard qui est en mémoire sur ce canal
Ecran Vitesse
0.xx Millisecondes : Par ex. : 0.10 signifie 100 millisecondes
x.xx Secondes : Par ex. : 1.20 signifie 1 seconde et 200 millisecondes
xx.0 Secondes : Par ex. : 10.1 signifie 10 secondes en 100 millisecondes
x.xx. Minutes : Par ex. : 1.05. signifie 1 minute et 5 secondes
xx.x. Minutes : Par ex. : 10.0. signifie 10 minutes

FRANCAIS MODE D’EMPLOI
JB SYSTEMS®29/93 CMX24
serareproduit.
30. LED de STATUT des canaux 1 à 12 : Elles montrent la luminosité du canal qui leur correspond.
31. LED de STATUT des canaux 13 à 24 : Elles montrent la luminosité du canal qui leurcorrespond.
32. LED de STATUT des effets chenillards : Lorsque vous déplacez les curseurs des présélections B et
que la LED orange au dessus de ce canal commence à s'allumer, cela vous signale qu'un effet
chenillard est en mémoire sur ce canal. Ces LED montrent la luminosité avec laquelle l'effet chenillard
est joué.
33. LED D'ACTIVITE SPEED/FADER/DIMMER/REC STEP : Par exemple, la LED qui montre la vitesse
s'allumera quand vous déplacerez le curseur devitesse.
34. ECRAN : Montre les actions que l'on est en train d'effectuer, ou le statut de programmation des scènes
et des effets chenillards.
FONCTIONS (FACE ARRIERE)
1. ENTREE CC : connectez l'adaptateur CA/CC livré à l'appareil à cette connexion. Si, pour certaines
raisons, vous devez raccorder un autre adaptateur, dans ce cas, utilisez toujours un adaptateur de 9 ~
12V CC, de minimum 300 mA,et dont lepôle positif se situe au centre.
2. MIDI THRU (gauche) / OUT (centre) / IN (droit) : C'est à ces trois prises que vous pouvez brancher
un contrôleur MIDI externe (pour plus d'informations, se reporter au chapitre 'Comment utiliser
l'appareil'.
3. SORTIE DMX : Envoie les signauxDMX vers les appareils raccordés au CMX24.
4. INVERSEUR DE POLARITE DMX : Normalement, un signal DMX a les connexions suivantes :
1 = masse * 2 = - (données négatives) * 3 = + (données positives)
Dans certains cas, il peut arriver que le câble soit raccordé en sens inverse, mais dans ce cas, le
résultat sera que la connexion DMX ne fonctionnera pas. Ce problème trouve sa solution en utilisant cet
inverseur. Si votre signal DMX ne fonctionne pas et que tous vos appareils ont reçu des adresses
correctes, c'est le moment d'essayer cet inverseur ! Dans des conditions normales, il faut toujours
positionner cet inverseur le plus à gauche possible.
5. Entrée AUDIO : Cette connexion doit recevoir un signal audio de niveau ligne : de cette manière, les
effets lumineuxet les spots raccordés seront pilotés par lesignal sonore.
6. Entrée REMOTE : Au moyen d'un jack stéréo, vous pouvez piloter la sortie via les fonctions BLACK
OUT etFULL-ON :
si l'anneau du jack està la masse : la fonction BLACK OUT peut êtremise en ethors service.
si la pointe du jack est à la masse : la fonction FULL-ON reste active aussi longtemps que la
pointe est reliée à la masse.
COMMENT UTILISER L'APPAREIL …
Ce chapitre explique pas à pas le fonctionnement du CMX24. Il est vivement conseillé de lire ces lignes en
détail.
Mise sous tension
Le CMX24 n'est paspourvu d'un interrupteur de mise en et hors service. Il faut donc se servir directement de
l'adaptateur inclus, etle relier d'une part à l'entrée CC de l'appareil, et à une prise de tension secteur d'autre
part. Dès que cela est fait, le CMX24 sera en état de marche.
FRANCAIS MODE D’EMPLOI
JB SYSTEMS®30/93 CMX24
Connexionà des gradateurs (dimmers)
Le CMX24 est équipé d'une prise femelle XLR à 3 broches : il s'agit de sa sortie DMX (DMX OUT). Juste à
côté de cette prise se trouve un inverseur à glissière grâce auquel on peut sélectionner la polarité du signal
DMX. Normalement,cet inverseur doit se trouver du côtéoù se trouve la prise XLR.
Si les appareils DMX raccordés au CMX24 ne fonctionnent pas correctement, faites alors glisser l'inverseur
vers son autre position.
!!! Important : n'oubliez pas de fixer correctement l'adresse de départ des gradateurs !!!
Généralités
Le CMX24 peut fonctionner en plusieurs modes différents : cela a pour conséquence que certaines touches
se comporteront différemment selon le mode en cours. Pour être sûr que l'appareil se trouve dans le mode
correct, vous devez suivre les instructions suivantes pour pouvoir avoir accès à un petit écolage de
vérification :
Coupez le CMX24, puis remettez-le sous tension.
Faites glisser les curseurs suivantsvers leur position la plus basse:
otouslescurseurs {PRESET A} (12 au total) ;
otouslescurseurs {PRESET B} (12 au total) ;
oCurseur {MASTER B} ;
oCurseur {AUDIO LEVEL} ;
oCurseur {SPEED}.
Faites glisser les curseurs suivants vers leur position la plus haute :
oCurseur {MASTER A} ;
oCurseur {FADE}.
Sélectionnez le modeSingle Preset
oAppuyez sur / relâcher la touche <MODE SELECT/REC SPEED> jusqu'à ce que la
lampe témoin [SINGLE PRESET] s'allume (elle se trouve au dessus des curseurs
Master A et Master B).
Sélectionnez la page 1 :
oAppuyez sur / relâcher la touche <PAGE/REC CLEAR> jusqu'à ce que la lampe témoin
[PAGE 1] s'allume (elle se trouve au dessus de la touche PAGE). Sélectionnez la
fourchette de temps de 5 min. ;
oappuyez sur la touche <RECORD/SHIFT>+ et maintenez-la enfoncée ;
oAppuyez sur la touche <PRESET A 5> puis relâchez-la ;
oAppuyez sur la touche <PRESET A 5> puisrelâchez-la ;
oRelâchez la touche <RECORD/SHIFT> ;
ola lampe témoin [5 min] se trouvant au dessus de SPEED doit maintenant êtreallumée.
Quittez éventuellement le mode PROGRAMMATION ou le mode EDITION, et allez donc vers le
modesécurisé :
oappuyez sur la touche <RECORD/SHIFT>+ et maintenez-la enfoncée ;
oAppuyez sur la touche <ADD KILL/REC EXIT> puisrelâchez-la ;
oRelâchez la touche <RECORD/SHIFT> ;
oSi la lampe témoin au dessus de la touche RECORD/SHIFT est allumée, répétez cette
procédure jusqu'à ce que lalampes'éteigne.
Si le mode audio est actif, la lampe témoin [AUDIO] est allumée, et il faut l'éteindre :
oAppuyez sur la touche <AUDIO> située au dessus du curseur AUDIOpuis relâchez-la.
Eteignez la lampe témoin BLACK OUT :
oNormalement, à présent, la lampe témoin [BLACK OUT], située près de la touche
BLACK OUT, est en train de clignoter ;
oAppuyez sur la touche <BLACK OUT> puisrelâchez-la pour éteindre la lampe témoin ;
oTant que la lampe témoin clignote, les sources de lumière restent déconnectées.
Mode d'affichage
Pendantle déplacement d'un curseur, la luminosité en cours est affichée sur l'écran.
La lampe témoin [DIMMER] située à côté de l'écran s'allume afin de signaler que l'écran montre la
luminosité d'un curseur. Si vous avez raccordé des spots et d'autres sources de lumière, vous devez
égalementvoir ces sources de lumière émettre laluminosité correspondante.
Vous pouvez choisir entreles deux modes de fonctionnement de l'écran : soit il affiche des valeurs entre 0 et
100, et ce sont des valeurs en pourcentages ; soit il affiche des valeurs entre 0 et 255, et ce sont alors des
valeursDMX.

FRANCAIS MODE D’EMPLOI
JB SYSTEMS®31/93 CMX24
Vous pouvez modifier cet affichage (entre % et DMX) en procédant comme suit :
appuyez sur la touche <RECORD/SHIFT>+ et maintenez-la enfoncée ;
Appuyez sur la touche <INSERT/% or 0-255> puisrelâchez-la ;
Relâchez la touche <RECORD/SHIFT>.
En répétant cette opération une nouvelle fois, vous revenez au mode d'affichage dedépart.
Attention : L'écran montre toujours la valeur du curseur, et donc, pas la luminosité réelle de la lampe
correspondante.
SinglePreset
Dans ce mode, on est à même de régler la luminosité de l'ensemble des 24 canaux du CMX24. Déterminez
une ambiance lumineuseen plaçant tous les curseurs des présélections A et B dans les positions désirées.
Jettez un coup d'œil vers les LED vertes qui se trouvent au dessus de chaque présélection A et B. Ces LED
indiquent la luminosité des canaux. Si vous avez raccordé des spots et d'autres sources de lumière, ces
sources de lumière devraient également être allumées.
Faites lentement glisser le curseur {MASTER A} vers le bas. Vous constaterez que toutes les lampes
témoins (et vos sources de lumière) s'éteindront progressivement. Ce curseur détermine donc la luminosité
maximale des sources de lumière.
Dans le mode Single Preset, le curseur {MASTER B} n'a pas de fonction.
Maintenez la touche <1-24> enfoncée (elle est située au dessus du curseur MASTER A). Vous constaterez
que les lampes témoins (et vos sources de lumière) sont de nouveau allumées. Tant que cette touche
restera enfoncée, le MASTER A se trouvera à sa valeur 100, même si le curseur ne se trouve pas à sa
position la plus haute.
Maintenez la touche de la présélection A2 enfoncée(en dessous du curseur de présélection A2). La lampe
témoin verte va s'allumer à sa luminosité maximale (tout comme sa source de lumière correspondante).
Grâce aux touches situées en dessous des curseurs, on peut donc mettre les canaux à leur luminosité
maximale, et ce, indépendamment de la position du MASTER A.
Maintenez la touche <FULL-ON> enfoncée (elle est située sous le curseur SPEED). Toutes les lampes
témoins vont s'allumer. Tous les canaux sont donc maintenant à leur luminosité maximale.
Maintenez la touche <DARK> enfoncée (elle est située au dessus du curseur MASTER A). Toutes les
lampes sont maintenant éteintes. Tant que cette touche restera enfoncée, les lampes resteront éteintes.
C'est une sorte de fonction BLACK OUT, mais, contrairement à la touche BLACK OUT, son effet ne se
maintient pas si on la relâche.
Appuyez sur la touche <BLACK OUT> puis relâchez-la (elle se trouve sous le curseur AUDIO LEVEL). La
lampe témoin à côté de cette touche commence à clignoter et toutes les sources lumineuses resteront
éteintes.
Maintenez la touche <FULL-ON> enfoncée pendant que l'appareil est toujours en BLACK OUT. Les lampes
s'allumeront à leur luminosité maximale. La touche FULL-ON a donc priorité sur la fonction BLACK OUT.
Appuyez sur la touche <DARK>+ et maintenez-la enfoncée pendant que l'appareil est toujours en BLACK
OUT et que vous appuyez sur la touche <FULL-ON>. Les lampes vont s'éteindre. La touche DARK a donc
priorité sur la touche FULL-ON.
Relâchez les touches DARK et FULL-ON. Toutes les lampes s'éteindront à cause de la fonction BLACK
OUT, toujours active.
Appuyez maintenant sur l'une des touches des présélections A ou B, sous les curseurs. La lampe témoin
s'allume à sa luminosité maximale, malgré la fonction BLACK OUT. Les touches de présélection ont donc
priorité sur la fonction BLACK OUT.
Faites en sorte qu'une touche des présélections A ou B soit maintenue enfoncée, et appuyez alors sur la
touche <DARK>. La lampe va s'éteindre. La touche DARK a donc priorité sur les touchesde présélection.
Le tableau ci-dessous donne les priorités des touches les unes par rapport aux autres :
DARK
FULL-ON
PRESET
BLACK OUT
1-24
PARK
FRANCAIS MODE D’EMPLOI
JB SYSTEMS®32/93 CMX24
Vitesse des fondus enchaînés
Grâce au curseur FADE, le temps de passage peut être réglé entre 0 seconde (= instantané) et 10 minutes.
Tous les changements d'éclairage auront lieu en "suivant" le laps de temps choisi. Cette fonction est très
pratique pour passer d'une ambiance lumineuse à une autre tout en souplesse. On peut adapter ce temps
de passagependant que le fondu enchaîné est actif, soit pour l'accélérer,soit pour le ralentir.
Veillez bien à ce que le curseur {MASTER A} soit à sa position la plus basse. Veillez aussi à ce que le
curseur dela présélection {A1} soit à sa position laplus basse.
Déplacez le curseur {FADE} jusqu'à ce que l'écran affiche le message [1.00]. Cela correspond à un laps de
temps d'uneseconde.
Appuyez sur la touche de présélection <A 1>, sous le curseur correspondant. La lampe témoin verte
s'allume directement (ainsi que la source lumineuse correspondante). Le fondu enchaîné n'est donc pas
d'application pour les touches de présélection. Cette mesure est également valable pour les touches DARK,
FULL-ON, BLACK OUT, 1-24 et PARK. Donc, seuls les curseurs obéissent à la durée des fondus
enchaînés.
Selon l'endroit où se trouve le point décimal, les chiffres font référence à des laps de temps différents. Le
tableau ci-dessous en explique la logique (xreprésenteun chiffre entre 0 et 9) :
Ecran Vitesse
0.xx millisecondes
Par ex. : 0.10 signifie 100 millisecondes
x.xx secondes
Par ex. : 1.20 signifie1 seconde et 200
millisecondes
xx.0 secondes
Par ex. : 10.1signifie 10 secondes en 100
x.xx. minutes
Par ex. : 1.05. signifie 1 minute et 5secondes
xx.x. minutes
Par ex. : 10.0. signifie 10 minutes
Fonction HOLD
Veillez bien à ce que le curseur {FADE} soit à sa position la plus haute.
Veillez bien à ce que le curseur {MASTERA} soit à sa position la plus haute.
Veillez bien à ce que tous les curseurs des présélections (tant A que B)soient à leur position la plus basse.
Mettez le curseur de la présélection A 1 à 75 % ;
Mettez le curseur de la présélection A 2 à 50 %.
Appuyez sur la touche <HOLD> (au dessus du curseur FADE) et maintenez-la enfoncée. La lampe témoin
située au dessus de cette touche va s'allumer.
Mettez le curseur de la présélection A 1 à 0 % ;
Mettez le curseur de la présélection A 2à 100 % ;
Mettez le curseur de la présélection A 3 à 75 % ;
Mettez le curseur de laprésélection A 4 à 100 %.
Les spots ne prennent pas la luminosité correspondante, mais conservent leur luminosité en cours.
Laissez revenir la touche <HOLD>.
Directement, les spots prennent la nouvelle luminosité.
Donc, grâce à la touche HOLD, une ambiance lumineuse peut être conservée pendant qu'on en prépare une
suivante.
Déplacez le curseur {FADE} jusqu'à ce que l'écran affiche le message [10.0] (= 10 secondes de fondu
enchaîné).
Appuyez sur la touche <HOLD> et maintenez-la enfoncée.
Mettez le curseur de la présélection A1 à 100 % ;
Mettez le curseur de la présélection A 2 à 10 % ;
Mettez le curseur de la présélection A 3 à 75 % ;
Mettez le curseur de la présélection A 4 à 0 %.

FRANCAIS MODE D’EMPLOI
JB SYSTEMS®33/93 CMX24
Laissez revenir la touche <HOLD>.
L'ambiance lumineuse va maintenant passer de l'ancienne à la nouvelle, mais tout en douceur, pendant les
10 secondes prévues. On assiste donc à un fondu enchaîné parfait. La touche HOLD fonctionne toujours
sans tenir compte du mode actif.
DOUBLE PRESET
Ce mode permet de piloter l'appareil comme s'il n'avait que 12 canaux A-B, les canaux A réagissant donc
comme les canaux B. Changez de mode et allez vers Double Preset.
Appuyez sur / relâcher la touche <MODE SELECT/REC SPEED> jusqu'à ce que la lampe
témoin [DOUBLE PRESET] s'allume (elle se trouve au dessus des curseurs Master A et Master
B).
Réglez les curseurs suivant comme suit :
le curseur {PRESET A1} en position 100 %;
le curseur {PRESET A2} en position 50 % ;
le curseur {PRESET A3} en position 25 % ;
lescurseurs {PRESET A 4 à A 12} en position 0 % ;
le curseur {PRESET B 1} en position 0 % ;
le curseur {PRESET B 2} en position 50 % ;
le curseur {PRESET B 3} en position 75 % ;
le curseur {PRESET B 4} en position 100 % ;
le curseur {PRESET B 5} en position 50 % ;
lescurseurs {PRESET B 6 à B 12} en position 0% ;
le curseur {MASTERA} en position 0 % (la position la plus basse !!!) ;
le curseur {MASTER B} en position 0 % (la position la plus haute !!!).
Pas la moindre lampe ne s'allumera.
Déplacez lentement le curseur {MASTER A} vers 100 % (la position la plus haute). Les canaux 1 à 3 vont
s'allumer, leur luminosité respectiveétant de100 %, 50 % et 25 %.
Déplacez maintenant en même temps les curseurs {MASTER A} et {MASTER B} vers la position la plus
basse. Le Master A tendra vers le 0 %, tandis que le Master B tendra vers le 100 %. Les canaux 1 à 5 vont
s'allumer, leur luminosité respective étant de 0 %, 50 %, 75 %,100 % et 50 %. Nous venons de réaliser un
fondu enchaîné entredeuxambiances lumineuses.
On peut modifier cette ambiance lumineuse en changeant la position des curseurs des présélections B. Par
contre, changer la position des curseurs des présélections An'a aucune influence.
On peut maintenant régler une nouvelle ambiance lumineuse via les présélections A.
Déplacez maintenant en même temps les curseurs {MASTER A} et {MASTER B} vers la position la plus
haute. Le Master A tendra vers le 100 %, tandis que le Master B tendra vers le 0 %. On assiste à un fondu
enchaîné lent (de 5 secondes) d'une ambiancelumineuse vers l'autre. C'est ce que l'on appelle le mode de
présélection A-B.
Important : Déplacez maintenant le curseur {MASTER A} vers 100 % (la position la plus haute) et le
curseur {MASTER B} vers 100 % (la position la plus basse). Le CMX24 choisira maintenant toujours les
valeurs les plus hautes.
canal 1 sur 100 % ;
canal 2 sur 50 % (A= 50 %, est plus élevé que B = 25 %) ;
canal 3 sur 75 % (B = 75 %, est plus élevé que A= 25 %).
Dans ce cas de figure, il est important de garder en mémoire que ce processus ne fonctionne que lorsque
les DEUX masters se trouventen position 100 %.
La valeur lumineuse la plus élevée a donc priorité. Dans la pratique, la valeur des canaux se calcule comme
suit :
PARK
Réglez les curseurs {MASTER A} et {MASTER B} sur 50 %, tous deux en position médiane. L'ambiance
lumineuse est unecombinaison desdeuxprésélections.
Appuyez sur la touche <PARK> (au dessus du curseur Master B) et maintenez la enfoncée. Le Master B est
maintenant à 100 %, ce qui est visible en regardant les lampes témoins vertes. Si un temps de fondu
enchaîné a été programmé,le passagese feraprogressivement.
FRANCAIS MODE D’EMPLOI
JB SYSTEMS®34/93 CMX24
Appuyez sur la touche <1-24> (au dessus du curseur Master A) et maintenez-la enfoncée. Le Master A est
maintenant à 100 %, ce qui est visible en regardant les lampes témoins vertes. Si un temps de fondu
enchaîné a été programmé,le passagese feraprogressivement.
ModeCHASE/SCENES :
Ce mode opératoire permet à chaque curseur de présélection B de mémoriser une ambiance lumineuse
complète (24 canaux), une scène ou un effet chenillard. En outre, on dispose de quatre pages, de sorte
qu'au total, on peut mémoriser 48 scènes / effets chenillards.
Ce mode peut être activé de la façon suivante :
Appuyez sur / relâcher la touche <MODE SELECT/REC SPEED> jusqu'à ce que la lampe témoin
[CHASE/SCENES] s'allume (elle se trouve au dessus des curseurs Master A etMaster B).
Concepts :
Scene/Chase:
Une scène est une ambiance lumineuse qui garde en mémoire la luminosité des 24 canaux, c'est un peu
comme un effet chenillard qui n'aurait qu'une seule ambiance lumineuse. Etant donné qu'il n'y a qu'une
ambiance lumineuse, c'est celle-ci qui est reproduite en permanence.
Au contraire, un effet chenillard ('chase') possède plusieurs ambiances lumineuses, avec, pour chacune
d'entre elles, des luminosités propres à chacun des 24 canaux. Ces ambiances lumineuses sont reproduites
l'une après l'autre (la vitesse est réglable).
Il y a 4 pages dont chacune représente les 12 curseurs des présélections B : chacun conserve en mémoire
une scène ou un effet chenillard. Au total, on peut doncmémoriser 48 scènes et effets chenillards.
Mode RECORD:
Le CMX24 possède troismodes d'enregistrement (RECORD) :
oMode sécurisé : dans ce mode, on nepeut modifier aucun programme ;
oMode de programmation : dans ce mode, on peut enregistrer et modifier des
programmes ;
oMode d'édition : dans ce mode, on peut modifier les programmes existants.
Le mode sécurisé et le mode de programmation sont toujours accessibles, quel que soit le mode actif
(Single Preset, Double Preset ou Chase/Scenes). Le mode d'édition n'est accessible que quand le mode
Chase/Scenes est actif.
La figure ci-dessous montre comment faire pour passer d'un mode à l'autre.

FRANCAIS MODE D’EMPLOI
JB SYSTEMS®35/93 CMX24
oVoici comment reconnaître les différents modes :
Mode sécurisé : la lampe témoin rouge au dessus de la touche
<RECORD/SHIFT> est éteinte ;
Mode de programmation : la lampe témoin rouge au dessus de la touche
<RECORD/SHIFT> est allumée ;
Mode d'édition : la lampetémoin jaune au dessus du curseur des présélections
B est allumée, quelle que soitla position du curseur.
Mémoire de travail
Pendant la programmation (en mode de programmation), l'appareil fait appel à une mémoire de travail. On
enregistre la ou les ambiances lumineuses dans cettemémoire, etensuite, ces présélections sont assignées
auxcurseurs des présélections B. La mémoirede travail conserve son contenu jusqu'à ce qu'on l'assigne ou
qu'on l'efface (<RECORD/KILL>+ <REC CLEAR>).
Cette mémoire n'est pas utilisée en mode d'édition, car dans ce cas, on modifie directement les ambiances
lumineusesenregistrées sur un curseur desprésélectionsB.
Dans les paragraphes qui suivent, nous expliquons comment programmer et modifier lesscènes etles effets
chenillards.
Activer le mode PROGRAMATION.
Pour activer le mode programmation :
oMaintenez latouche <RECORD/SHIFT> enfoncée ;
oAppuyez sur la touche de présélection <A 1> puisrelâchez-la ;
oAppuyez sur la touche de présélection <A 5> puisrelâchez-la ;
oAppuyez sur la touche de présélection <A 6> puisrelâchez-la ;
oAppuyez sur la touchede présélection <A 8> puisrelâchez-la ;
oLaissez revenir la touche <RECORD/SHIFT>.
La lampe témoin rouge au dessus de la touche <RECORD/SHIFT> est maintenant allumée.
!! A présent, ce mode restera activé jusqu'à ce qu'on veuille le quitter, et ce, même si l'appareil est
mis hors tension. Il est donc conseillé de sortir de ce mode dès que les ambiances lumineuses ont
été programmées ou modifiées. Grâce à cette mesure, vous éviterez que quelqu'un qui n'est pas
habitué à se servir de l'appareil ne risque de modifier vos programmes.
Quitter le mode de programmation, et donc, revenirau modesécurisé
Pour quitter le mode programmation :
Maintenez la touche <RECORD/SHIFT> enfoncée ;
Appuyez sur la touche <KILL/REC EXIT> puisrelâchez-la ;
Laissez revenir la touche <RECORD/SHIFT>.
La lampe témoin rouge au dessus de la touche <RECORD/SHIFT> est maintenant éteinte.
Si la lampe témoin n'est pas éteinte, c'est que vous étiez en mode d'édition, répétez alors une nouvelle fois
la procédure.
Touteffacer
Vous pouvez effacerl'entièreté de la mémoire en suivant les instructions ci-dessous :
Activez le mode programmation :
Maintenez la touche <RECORD/SHIFT> enfoncée ;
Appuyez sur la touche de présélection <A 1> puisrelâchez-la ;
Appuyez sur la touche de présélection <A 5> puisrelâchez-la ;
Appuyez sur la touche de présélection <A 6> puisrelâchez-la ;
Appuyez sur la touche de présélection <A 8> puisrelâchez-la ;
Laissez revenir la touche <RECORD/SHIFT>.
la lampe témoin rouge au dessus de la touche <RECORD/SHIFT> est maintenant allumée.
!! La procédure qui suit efface l'entièretéde la mémoire. Attention : cette procédure est irréversible!!
Pour effacer l'entièreté de la mémoire :
Maintenez la touche <RECORD/SHIFT> enfoncée ;
Appuyez sur la touche de présélection <A 1> puisrelâchez-la ;
Appuyez sur la touche de présélection <A 3> puisrelâchez-la ;
FRANCAIS MODE D’EMPLOI
JB SYSTEMS®36/93 CMX24
Appuyez sur la touche de présélection <A 2> puisrelâchez-la ;
Appuyez sur la touche de présélection <A 3> puisrelâchez-la ;
Laissez revenir la touche <RECORD/SHIFT>.
Enregistrerdesscènes
(Ne peut sefaire qu'en mode deprogrammation)
Veillez à ce que la mémoire de travail soit vide :
Maintenez la touche <RECORD/SHIFT> enfoncée ;
Appuyez sur la touche <PAGE/RECCLEAR> puisrelâchez-la ;
Laissez revenir la touche <RECORD/SHIFT>.
Réglezl'ambiance lumineusedésirée:
Si vous ne voulez régler que 12 canaux, servez-vous alors des curseurs des présélections A ;
Si vous voulez régler 24 canaux, vous devez alors changer de mode et choisir le mode Single
Preset via la touche <MODE SELECT/REC SPEED>. Dans ce cas, réglez les canaux via les
curseurs des présélections A etB.
Par exemple :
canal1 sur 100 % ;
canal2 sur 27 % ;
canal3 sur 60 % ;
canaux 4 à 8 sur 0 % ;
canal9 sur 72 % ;
canal10 sur 30 % ;
canal11 sur 0 % ;
canal 12 sur 95 %.
Mettez maintenant cette ambiance lumineuse en mémoire :
Appuyez sur la touche <RECORD/SHIFT> puisrelâchez-la ;
L'écran affichealors [001].
Ce '001' affiché par l'écran signale que vous avez mémorisé une ambiance lumineuse dans la mémoire de
travail.
A présent, conservez le contenu de la mémoire via le curseur de la présélection B 1 de la page1 :
Sélectionnez la page 1 en appuyant sur la touche <PAGE/REC CLEAR> puis en la relâchant
jusqu'à ce que lalampetémoin au dessus dela présélection 1 s'allume ;
Maintenez la touche <RECORD/SHIFT> enfoncée ;
Appuyez sur la touche de présélection <PRESET B 1> puisrelâchez-la ;
Laissez revenir la touche <RECORD/SHIFT>.
A présent, vous avez donc enregistré une scène via le curseur de la présélection B 1 de la page 1. De ce
fait, lamémoire de travail s'est vidée.
Reproduireunescène
En étant en mode Chase/Scenes, vous êtes en mesure de reproduire les scènes mémorisées. Pour cela,
veillez aux points suivants :
Le mode Chase/Scenes doit être actif (via la touche <MODUS SELECT/REC SPEED>) ;
le curseur {Master B} doit se trouverdans sa position la plus basse ;
MIX Chase doit être actif : étant donc en mode Chase/Scenes, sélectionnez-le via la touche
<PARK> située au dessus du curseur MASTER B ; la lampe témoin [MIX CHASE] se trouve au
dessus du curseur FADE, etelle doit être allumée ;
Le mode Black Out ne doit pas être actif ;
Tous les curseurs des présélections Aet B doivent êtredans leur position la plus basse.
A présent, déplacez le curseur de la présélection B 1 vers le haut. Vous constaterez que l'ambiance
lumineuse enregistrée estvisible sur les LED vertes (etsur les sources lumineuses correspondantes).
En amenant simultanément plusieurs curseurs des présélections B sur une position au dessus de zéro,
créez une combinaison d'ambiances lumineuses. Ambiance dont vous pouvez modifier la luminosité via le
curseur Master B.
Other manuals for CMX 24
1
Table of contents
Languages:
Other JB Systems Network Router manuals

JB Systems
JB Systems TUBELED User manual

JB Systems
JB Systems LM 140 User manual

JB Systems
JB Systems SCANMASTER SM-1612 User manual

JB Systems
JB Systems ScanMaster 1612 User manual

JB Systems
JB Systems RF-DMX Converter User manual

JB Systems
JB Systems Scene Master User manual

JB Systems
JB Systems CA-32 Colormix User manual

JB Systems
JB Systems Strobe Master BF-04A User manual

JB Systems
JB Systems CMX 24 User manual