JB Systems ScanMaster 1612 User manual

Version: 1.2
WWW.BEGLEC.COM
Copyright © 2005 by BEGLEC cva.
Reproduction or publication of the content in any manner, without express permission of the publisher, is prohibited.
Operation Manual
Mode d'emploi
Gebruiksaanwijzing
Bedienungsanleitung
Manual de instrucciones
Manual do utilizador
EN
FR
NL
DU
ES
PT

EN - DISPOSAL OF THE DEVICE
Dispose of the unit and used batteries in an environment friendly manner
according to your country regulations.
FR - DÉCLASSER L’APPAREIL
Débarrassez-vous de l’appareil et des piles usagées de manière écologique
Conformément aux dispositions légales de votre pays.
NL - VERWIJDEREN VAN HET APPARAAT
Verwijder het toestel en de gebruikte batterijen op een milieuvriendelijke
manier conform de in uw land geldende voorschriften.
DU - ENTSORGUNG DES GERÄTS
Entsorgen Sie das Gerät und die Batterien auf umweltfreundliche Art und
Weise gemäß den Vorschriften Ihres Landes.
ES - DESHACERSE DEL APARATO
Reciclar el aparato y pilas usadas de forma ecologica conforme a las
disposiciones legales de su pais.
PT - COMO DESFAZER-SE DA UNIDADE
Tente reciclar a unidade e as pilhas usadas respeitando o ambiente e em
conformidade com as normas vigentes no seu país.

ENGLISH OPERATION MANUAL
JB SYSTEMS® 1/82 SCANMASTER 1612 (SM-1612)
OPERATION MANUAL
Thank you for buying this JB Systems product. To take full advantage of all
possibilities, please read these operating instructions very carefully.
FEATURES
•192 DMX channels
•12 Fixtures of 16 channels each (best used with fixtures having up to 8 channels)
•30 Banks of 8 programmable scenes (total = 240 scenes)
•6 Programmable chases of 240 scenes
•8 Sliders for manual control of channels
•Assignable joystick for ease of use
•File Dump allows data to be sent or received between two units
•Auto mode program controlled by speed and fade time sliders
•Fade time/Assign fade time
•Reversible DMX channels allows fixture to react in opposition to others in a chase
•8 channel or 16 channel mode
•Fine adjustment for joystick pan and tilt
•Blackout master button
•Manual Override button allows you to grab any fixture on the fly
•Built in microphone for music triggering
•MIDI control over banks, chases and blackout
•DMX Polarity selector
•Power failure memory
BEFORE USE
Check the contents:
Check that the carton contains the following items:
•Scanmaster 1612 (SM-1612)
•AC/DC adapter
•Operating instructions
Some important instructions:
•To prevent fire or shock hazard, do not expose this appliance to rain or moisture.
•In order to prevent electric shock, do not open the cover. If a problem occurs, contact
your dealer.
•Don’t place metal objects or spill liquid inside the unit. Electric shock or malfunction
may result.
•Prevent use in dusty environments, clean the unit regularly.
ENGLISH OPERATION MANUAL
JB SYSTEMS® 2/82 SCANMASTER 1612 (SM-1612)
Some words explained:
•SCENE: A scene is a set of different fader values that describes a certain condition
at a given moment.
Example: You have set the faders on the SM-1612 to put a fixture in a certain
direction, with a certain gobo and a certain color. The combination of these different
fader values is called “SCENE”
•BANK: On the SM-1612 there are 8 scene buttons. Under each scene button a
scene can be stored. To have a total of 240 scene memories you need to put these
scenes in banks. That is why you have 30 banks with each 8 scenes: 30 x 8 = 240
scenes.
Example:
BANK1 (scene1 ; scene2 ; scene3 ; … scene8)
BANK2 (scene1 ; scene2 ; scene3 ; … scene8)
BANK3 (scene1 ; scene2 ; scene3 ; … scene8)
…
BANK30 (scene1 ; scene2 ; scene3 ; … scene8)
•CHASE: On the SM-1612 there are 6 programmable chases. A chase is a
succession of scenes. This succession of scenes can be programmed by the user in
any order. One chase contains a maximum of 240 scenes.
•SPEED: time between 2 scenes in a chase running in automatic mode.
•FADE TIME: This is the amount of time it takes for a fixture (or fixtures) to move from
one place to another.
•PAN/TILT: PAN means moving horizontally or moving on the X-axis.
TILT means moving vertically or moving on the Y-axis.
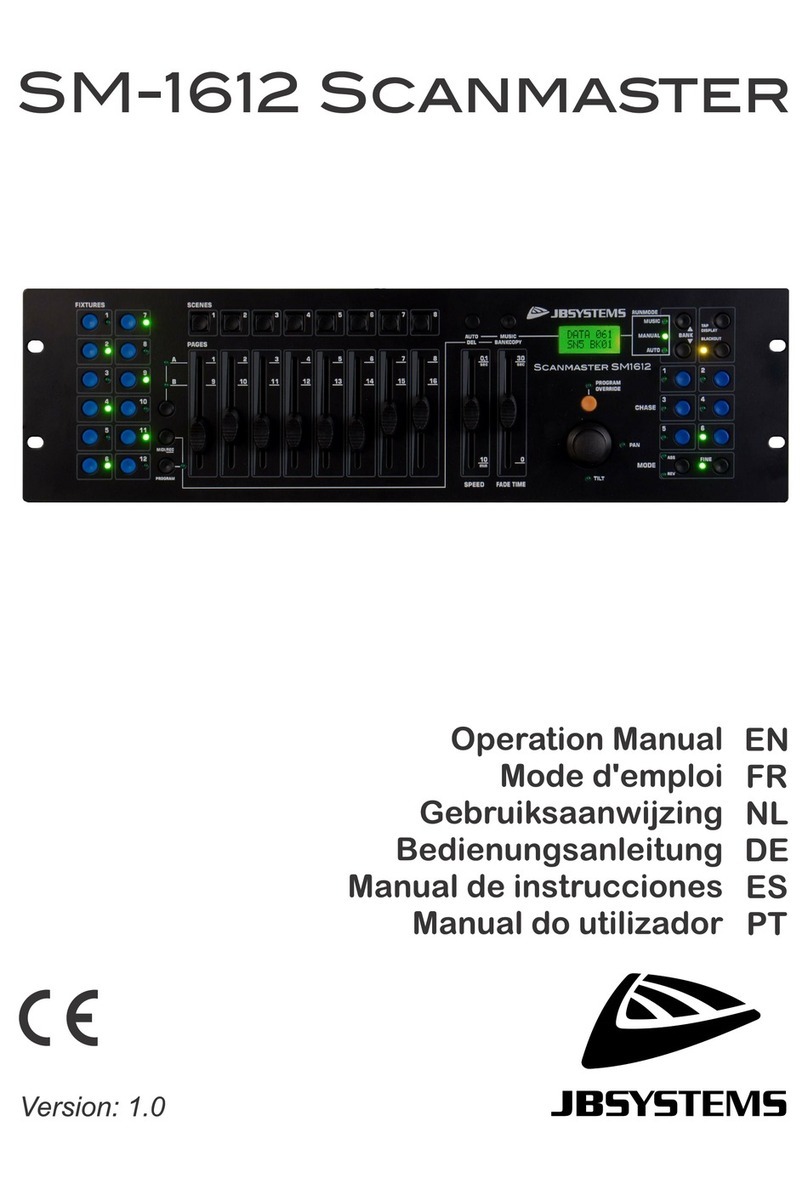
FUNCTIONS (FRONT)
1. FIXTURE BUTTONS: Used to select one or more fixtures.
2. SCENE BUTTONS: Used to load or store a certain scene.
3. FADERS: Used to control the values of the different channels.
4. PAGE SELECT BUTTON: Every fixture can have up to 16channels. These 16
channels are divided over 2 pages with each 8 channels (faders):
•PAGE A: channels 1Æ8
•PAGE B: channels 9Æ16

ENGLISH OPERATION MANUAL
JB SYSTEMS® 3/82 SCANMASTER 1612 (SM-1612)
5. OVERRIDE BUTTON: When a chase is running, you can select 1 or more fixtures
and control them independently from the chase running at that moment.
6. SPEED SLIDER: Used to select the chase speed within a range of 0.1seconds to
10minutes.
7. FADE TIME SLIDER: Used to adjust the fade time within a range of 0 to 30sec.
8. LCD DISPLAY: Shows the current activity or programming state. The LCD Display
contains 2 lines of 8 characters each. Below is a list of abbreviations used:
LCD DISPLAY FULL MESSAGE
•SN1 scene1 is active
•BK1 bank1 is active
•CHASE1 chase1 is active
•STEP 009 step 9 of a chase
•DATA 184 DMX-value the last fader used = 184 (0
Æ
255)
•SP:1m34s Speed is set to 1minute and 34 seconds.
•FT:3.31s Fade time is set to 3,31seconds
•ASS04 05 Joystick is assigned to channels 4 & 5 (PAN=4 * TILT=5)
•RES10 13 DMX channels 10 & 13 are reversed
9. JOYSTICK PAN: Used to control the panning (horizontal movements) of the
selected fixture(s)
10.JOYSTICK TILT: Used to control the tilt (up/down movements) of the selected
fixture(s)
11.PROGRAM BUTTON: Used to enter or leave the program mode.
12.MIDI/RECORD BUTTON: Used to record actions in memory or to set a MIDI
channel.
13.AUTO/DELETE BUTTON:
•Running mode: Used to switch between manual and automatic chase mode.
•Program mode: Used to delete scenes or chases.
14.MUSIC/BANK COPY BUTTON:
•Running mode: Used to switch between manual and music chase mode.
•Program mode: Used to copy banks.
15.BANK UP/DOWN BUTTON: Used to select one of the 30 banks or to select one of
the steps in a chase.
16.TAP/DISPLAY BUTTON: Used to select different display modes.
Used to change the readout of the channel DMX-values: you can change between
real DMX-values (0 Æ255) or values in percentage (0 Æ100%)
Also used as TAP-function in auto chase mode to set the chase speed: tap the
button twice with a certain time interval. (alternative to the speed fader)
17.BLACKOUT BUTTON: Used to stop all DMX output.
18.CHASE BUTTON: Used to activate one or more chases.
19.FINE BUTTON: Used to control the PAN/TILT functions of a fixture with the
smallest increment. This gives you the possibility to position the fixtures with high
precision. (sometimes using the channel faders can give you even better results)
20.MODE: Pushing Mode and Fine buttons together activates joystick assign and
channel reverse modes.
ENGLISH OPERATION MANUAL
JB SYSTEMS® 4/82 SCANMASTER 1612 (SM-1612)
FUNCTIONS (rear)
1. MIDI INPUT: Can be used to receive MIDI data.
2. DMX POLARITY SWITCH: A DMX-signal normally has the following connections:
1=ground * 2=Data- * 3=Data+
In some cases it happens that a cable is inversed, as a result of this the DMX-
connection doesn’t work. This can be solved by using this switch. If your DMX
connection doesn’t work and all your DMX-receivers are properly addressed, you
can check this switch. In normal conditions always put this switch in the left
position.
3. DMX OUTPUT: Sends DMX-signals to the connected fixtures
4. FILE DUMP INPUT: Used to connect to a second SM-1612 and copy its chases
and scenes. Don’t use this connector to daisy chain the DMX-signal of two
controllers!
5. DC INPUT: connect the supplied AC/DC adapter to this input. If you should use
another adapter, please make sure that it has 9 ~ 12Vdc and minimum 300mA with
+ in the center.
6. POWER SWITCH: Used to switch the unit ON/OFF
7. AUDIO input: receives audio from any line or record output on audio equipment. If
this input is not used, the internal microphone of SM-1612 takes over.

ENGLISH OPERATION MANUAL
JB SYSTEMS® 5/82 SCANMASTER 1612 (SM-1612)
SET UP
1. FIXTURE SETUP: SM-1612 has 12 “fixtures buttons”. Each fixture button
represents 16 DMX-addresses. (8faders on page A and 8faders on page B) In
most cases SM-1612 will be used with fixture having 8 or less DMX addresses.
This means that in most cases only page A will be used.
The following chart helps you setting up the DMX-start address on your fixtures:
Fixture # Digital Setting Dip Switch Setting
1 1 1 “On”
2 17 1 and 5 “On”
3 33 1 and 6 “On”
4 49 1,5 and 6 “On”
5 65 1 and 7 “On”
6 81 1,5 and 7 “On”
7 97 1,6 and 7 “On”
8 113 1,5,6 and 7 “On”
9 129 1 and 8 “On”
10 145 1,5 and 8 “On”
11 161 1,6 and 8 “On”
12 177 1,5,6 and 8 “On”
2. JOYSTICK SETUP: For each fixture any 2 addresses can be assigned to the PAN
and TILT of the joystick:
•Press and hold the “Program” button until its LED blinks.
•Press 2 times the “Mode” and “Fine” buttons at the same time. The assign LED
should light. (if reverse LED is lit, press both buttons a second time together)
•Use the bank UP and DOWN keys to select the axis you wish to assign (PAN or
TILT).
•If your fixture has more than 8 DMX addresses, you can use the “Tap/Display”
button to select 16 or 8 channel mode.
•Press the button corresponding to the fixture you wish to edit.
•While holding the mode button press the scene number corresponding to the
slider which controls the movement. (Example: If pan is controlled by slider
number 4, press and hold the “Mode” button while pressing scene button 4).
•When both PAN and TILT are assigned, press the “Mode” and “Fine” buttons at
the same time again to exit Assign mode.
Note: you can still use the channel faders instead of the joystick to control the
movements of the fixture.
1. DELETE JOYSTICK SETUP FOR A FIXTURE:
•Enable Programming Mode. (Press and hold the “Program” button until its LED blinks)
•Press 2 times the “Mode” and “Fine” buttons at the same time. The assign LED
should light. (if reverse LED is lit, press both buttons a second time together)
•If your fixture has more than 8 DMX addresses, you can use the “Tap/Display”
button to select 16 or 8 channel mode.
•Press the button corresponding to the fixture you wish to edit.
•While holding the mode button, press the “Auto/Del” button.
•Press the program button for some seconds to stop program mode
ENGLISH OPERATION MANUAL
JB SYSTEMS® 6/82 SCANMASTER 1612 (SM-1612)
4. FADE TIME SETUP: During auto and music chase playback you can introduce a
fade time between the steps of the chase. You can choose to affect only the
PAN/TILT channels or ALL channels. If you select X/Y channels you won’t have
the inconvenience that gobo’s, colors also change slowly while the slow PAN/TILT
movements take place.
•With the power off, press the mode and Tap/Display buttons at the same time.
•Turn the unit on and press the Tap/Display button to change between ONLY X/Y
(fade time only for PAN/TILT) and ALL CH (fade time affects all channels)
The LCD reads:
ALL ONLY
FD FD
CH X/Y
OR
TIME TIME
•First press the Mode button and hold it, now press the Tap/Display button at the
same time to store your setting into memory. All LEDs will flash 3times. If you do
not wish to save your setting, press the blackout key to exit this operation.
Important note: first assign the PAN/TILT of the joystick (see earlier) before you
set up the fade times. If you change the fixture PAN/TILT assignments later, you
have to restart the fade time setup!
5. REVERSE JOYSTICK MOVEMENT/DMX CHANNEL: The PAN and/or TILT
movements, or even certain channels can be reversed. (DMX value is 255 when
the fader is down and 000 when the fader is in upper position)
•Enable Programming Mode. (Press and hold the “Program” button until its LED blinks)
•Press 1 time the “Mode” and “Fine” buttons at the same time. The reverse LED
should light. (if assign LED is lit, press both buttons a second time together)
•If your fixture has more than 8 DMX addresses, you can use the “Tap/Display”
button to select 16 or 8 channel mode.
•Press the button corresponding to the fixture you wish to edit.
•While holding the mode button, press the corresponding scene button the
channel you wish to reverse. (Example: You want to reverse the TILT on a
fixture. In program mode press the “mode” and “fine” buttons together until the
reverse led is lit. Choose the fixture you want to modify. Hold the “mode” button
and press the “scene” button of the slider which corresponds with the channel for
TILT movements. Press the mode and fine buttons together until both the assign
and reverse leds are turned off. Press the program button for some seconds to
stop program mode).
Note: you can reverse a maximum of 48 channels.
6. DELETE REVERSE FUNCTION ON JOYSTICK MOVEMENT/DMX CHANNEL:
•Enable Programming Mode. (Press and hold the “Program” button until its LED blinks)
•Press 1 time the “Mode” and “Fine” buttons at the same time. The reverse LED
should light. (if assign LED is lit, press both buttons a second time together)
•If your fixture has more than 8 DMX addresses, you can use the “Tap/Display”
button to select 16 or 8 channel mode.
•Press the button corresponding to the fixture you wish to edit.
•While holding the mode button, press the “Auto/Del” button.
•Press the program button for some seconds to stop program mode
Note: all inversed addresses for that fixture will be reset to normal.
ENGLISH OPERATION MANUAL
JB SYSTEMS® 7/82 SCANMASTER 1612 (SM-1612)
7. MIDI CHANNEL SETTING:
•Press and hold down the MIDI/Rec button for three seconds: the display shows “
“MIDI xx” (xx is the midi channel: between 01 and 16)
•Use the Up/Down buttons to select the MIDI channel 1 to 16 you would like the
SM-1612 to be activated from.
•Press and hold down the MIDI/Rec button again for three seconds: the MIDI
operation is now on.
MIDI CHANNEL SETTING:
BANK (Octave) NOTE NUMBER FUNCTION
BANK 1 00 TO 07 1 to 8 of Bank 1 on or off
BANK 2 08 TO 15 1 to 8 of Bank 2 on or off
BANK 3 16 TO 23 1 to 8 of Bank 3 on or off
BANK 4 24 TO 31 1 to 8 of Bank 4 on or off
BANK 5 32 TO 39 1 to 8 of Bank 5 on or off
BANK 6 40 TO 47 1 to 8 of Bank 6 on or off
BANK 7 48 TO 55 1 to 8 of Bank 7 on or off
BANK 8 56 TO 63 1 to 8 of Bank 8 on or off
BANK 9 64 TO 71 1 to 8 of Bank 9 on or off
BANK 10 72 TO 79 1 to 8 of Bank10 on or off
BANK 11 80 TO 87 1 to 8 of Bank11 on or off
BANK 12 88 TO 95 1 to 8 of Bank12 on or off
BANK 13 96 TO 103 1 to 8 of Bank13 on or off
BANK 14 104 TO 111 1 to 8 of Bank14 on or off
BANK 15 112 TO 119 1 to 8 of Bank14 on or off
CHASES 120 TO 125 1 to 6 Chases
BLACK OUT 126 BLACKOUT
The SCANMASTER 1612 only receives MIDI notes and you may have to
transpose your keyboard to find the proper notes
SCENES
1. PROGRAMMING A SCENE:
a. Enter program mode (Press and hold the “Program” button until its LED blinks)
b. Check the blackout button and verify that the LED is not lit, if it is, press it once
to exit blackout mode.
c. Verify that the speed and fade time sliders are positioned at zero.
d. Press the fixture button corresponding to the unit you wish to control. You may
control several fixtures together by pressing the button corresponding to the
fixture(s) you wish to program.
e. Move the faders and joystick to the desired position. (In some rare cases, if
necessary, you may select page B to control channels 9-16.)
f. Press the bank Up/Down button to choose the bank you want to store this
scene into. There are a total of 30 banks you can select, you may store up to 8
scenes in each bank.
g. Once all fixtures are programmed into the desired position for the scene, press
the MIDI/Rec button.
ENGLISH OPERATION MANUAL
JB SYSTEMS® 8/82 SCANMASTER 1612 (SM-1612)
h. Press the scene button you wish to store your scene into. All LEDs will flash
three times to confirm the operation. The LCD readout will show the bank and
scene.
i. Repeat steps dÆh until all scenes have been programmed.
j. If you don’t intend to continue programming at this time, press and hold the
program button for some seconds to exit program mode. The LED will turn off.
2. EDITING A SCENE:
a. Enter program mode (Press and hold the “Program” button until its LED blinks)
b. Check the blackout button and verify that the LED is not lit, if it is, press it once
to exit blackout mode.
c. Press the Bank Up/Down button to select the bank containing the scene you
wish to edit.
d. Select the scene you wish to edit by pressing it’s scene button.
e. Select the fixtures and use the faders and/or joystick to make the desired
adjustments to the scene.
f. Once you have completed the changes, press the MIDI/Rec button.
g. Press the scene button that corresponds to the scene you’re editing. This will
override the existing scene.
h. Press and hold the program button for some seconds to exit program mode.
The LED will turn off.
Note: Be sure to select the same scene in steps d and g, otherwise you may
accidentally record over an existing scene.
3. COPY A SCENE:
a. Enter program mode (Press and hold the “Program” button until its LED blinks)
b. If you want to check the output, verify that the blackout LED is not lit, if it is,
press it once to exit blackout mode.
c. Press the Bank Up/Down buttons to select the bank containing the scene you
wish to copy.
d. Press the scene button of the scene you wish to copy.
e. Press the Bank Up/Down buttons to select the bank you wish to copy the scene
to.
f. Press the MIDI/Rec button.
g. Press the scene button you wish to copy the scene to. If you want to copy other
scenes, you can repeat steps c to g.
h. Press and hold the program button for some seconds to exit program mode.
The LED will turn off.
4. DELETE A SCENE:
a. Enter program mode (Press and hold the “Program” button until its LED blinks)
b. If you want to check the output, verify that the blackout LED is not lit, if it is,
press it once to exit blackout mode.
c. Press the Bank Up/Down buttons to select the bank containing the scene you
wish to delete.
d. Press and hold down the Auto/Del button. While holding the button, press the
scene button that corresponds with the scene you wish to delete. All LEDs will
blink 3 times. When the programmed scene is deleted, all DMX channel values
will be set to 0. If you want to delete other scenes, you can repeat steps c & d.

ENGLISH OPERATION MANUAL
JB SYSTEMS® 9/82 SCANMASTER 1612 (SM-1612)
e. Press and hold the program button for some seconds to exit program mode.
The LED will turn off.
5. DELETE ALL SCENES:
a. Switch the unit off.
b. Switch the unit back on while you press and hold down the Program and Bank
Down buttons at the same time. All scenes should be cleared.
Note: Be aware that all your scenes will be lost, to be used with care!
6. COPY A BANK OF SCENES:
a. Enter program mode (Press and hold the “Program” button until its LED blinks)
b. If you want to check the output, verify that the blackout LED is not lit, if it is,
press it once to exit blackout mode.
c. Press the Bank Up/Down buttons to select the bank containing the scenes you
wish to copy.
d. Press the MIDI/Rec button.
e. Press the Bank Up/Down buttons to select the bank you wish to copy to.
f. Press the Music/Bank Copy button, all LEDs will blink three times indicating the
function has been completed.
g. Press and hold the program button for some seconds to exit program mode.
The LED will turn off.
CHASES
A chase is a succession of scenes in a certain order so you must have already
programmed these scenes in order to program a chase. Before programming chases
for the first time it is recommended you delete all chases in the controller.
See Delete All Chases for instructions on how to do so.
1. DELETE ALL CHASES:
a. Switch the unit off.
b. Switch the unit back on while you press and hold down the Auto/Del and Bank
Down buttons at the same time. All chases should be cleared.
Note: Be aware that all your chases will be lost, to be used with care!
2. PROGRAMMING A CHASE:
a. Enter program mode (Press and hold the “Program” button until its LED blinks)
b. Check the blackout button and verify that the LED is not lit, if it is, press it once
to exit blackout mode.
c. Press the button of the chase you wish to program.
d. Press the Bank Up/Down buttons to select the bank containing the scene(s)
you wish to program in your chase.
e. Press the button of the desired scene.
f. Press the MIDI/Rec button.
g. Repeat steps d to g until all desired scenes have been entered.
h. Press and hold the program button for some seconds to exit program mode.
The LED will turn off.
ENGLISH OPERATION MANUAL
JB SYSTEMS® 10/82 SCANMASTER 1612 (SM-1612)
3. INSERT A CHASE STEP:
a. Enter program mode
(Press and hold the “Program” button until its LED blinks)
b. Check the blackout button and verify that the LED is not lit, if it is, press it once
to exit blackout mode.
c. Press the button of the chase you wish to program.
d. Press the TAP/Display button, the LCD display will show the current chase
step.
e. Press the Bank Up/Down button and scroll to the step you wish to insert the
step after.
f. Press the MIDI/Rec button, the segment display will read the step one step
higher than before. The LCD shows the current chase, scene, and bank.
g. Press the Bank Up/Down buttons to select the bank containing the scene you
wish to insert in your chase.
h. Once you have selected the scene you wish to insert, press the MIDI/Rec
button again. All LEDs will blink three times indicating the new step has been
inserted into the chase.
i. Repeat steps e to h until all desired scenes have been inserted.
j. Press and hold the program button for some seconds to exit program mode.
The LED will turn off.
4. DELETE A CHASE STEP:
a. Enter program mode
(Press and hold the “Program” button until its LED blinks)
b. Check the blackout button and verify that the LED is not lit, if it is, press it once
to exit blackout mode.
c. Press the button of the chase that contains the step you want to delete.
d. Press the Tap/Display button, the LCD shows the current step.
e. Press the Bank Up/Down buttons and scroll to the step you wish to delete.
f. Press the Auto/Del button to delete the step. All LEDs will flash three times
indicating the requested operation has been performed.
g. Eventually repeat steps e and f until all desired steps have been deleted.
h. Press and hold the program button for some seconds to exit program mode.
The LED will turn off.
5. ADDING A BANK OF SCENES TO A CHASE:
Note: The bank of scenes will be added at the end of the chase.
a. Enter program mode (Press and hold the “Program” button until its LED blinks)
b. Check the blackout button and verify that the LED is not lit, if it is, press it once
to exit blackout mode.
c. Press the button of the chase you wish to edit.
d. Use the Bank Up/Down key to select the bank of scenes you wish to add.
e. Press the Music/Bank Copy button.
f. Press the MIDI/Rec copy button, all LEDs will blink three times indicating that
the requested operation has been performed.
g. Press and hold the program button for some seconds to exit program mode.
The LED will turn off.

ENGLISH OPERATION MANUAL
JB SYSTEMS® 11/82 SCANMASTER 1612 (SM-1612)
PLAYBACK OF SCENES
There are three modes in which you can playback scenes:
1. Manual Mode: You can select and show one or more scenes manually.
a. When the power is turned on, the unit starts automatically in manual mode.
b. Check if the Manual mode LED is lit.
c. Check the blackout button and verify that the LED is not lit, if it is, press it once
to exit blackout mode.
d. Use the Bank Up/down button to select the bank with the scenes you wish to
run.
e. Press the scene button corresponding to the scene you wish to display.
f. Eventually repeat steps d and e to select others scenes.
2. Auto Mode: You can run a bank of programmed scenes in sequence. You can
use the Manual override button, see further for more information.
a. Press the Auto/Del button to enter into Auto mode. The Auto LED turns on.
b. Use the bank Up/Down button to select a bank of scenes to run.
c. After selecting the bank of scenes to run, you can use the speed slider and
Fade Time slider to adjust the speed of the scene progression.
d. You can use the TAP/Display button to set the speed instead. The time between
the last two taps equals the length of time between steps. This setting will stay
in effect until the speed slider is moved.
e. Press the Auto/Display button to exit Auto mode.
3. Music Mode: You can run a bank of programmed scenes to the beat of the music.
You can use the internal microphone or add an external music signal. You can use
the Manual override button, see further for more information.
a. Press the Music/Bank copy button to activate Music mode. The Music LED
turns on.
b. Use the bank Up/Down button to select a bank of scenes you wish to run. The
scenes selected will run through sequentially to the beat of the music.
c. Press the Music/Bank Copy button again to exit music mode.
PLAYBACK OF CHASES
There are three modes in which you can playback chases:
1. Manual Mode: You can select and show a chase manually.
a. When the power is turned on, the unit starts automatically in manual mode.
b. Check if the Manual mode LED is lit.
c. Check the blackout button and verify that the LED is not lit, if it is, press it once
to exit blackout mode.
d. Select the chase you want to use. The LCD display shows the chase number.
e. Press the TAP/Display button, the LCD display now shows the STEP-numbers
of the selected chase.
f. Use the Bank Up/down buttons to manually show the different steps of the
chase.
ENGLISH OPERATION MANUAL
JB SYSTEMS® 12/82 SCANMASTER 1612 (SM-1612)
g. Eventually select another chase and repeat steps e and f. (pressing the same
chase a second time unselects it)
2. Auto Mode: You can run one or more chases at an adjustable speed. If you select
more than one chase, all chases will be run one by one. The LED of the active
chase blinks. You can use the Manual override button, see further for more
information.
a. Press the Auto/Del button to enter into Auto mode. The Auto LED turns on.
b. Select one or more chases. (pressing the same chase a second time unselects
it) The LEDs of the selected chases are lit. The active chase blinks and its name
+ active scene/bank are shown on the display.
c. Use the speed slider and Fade Time slider to adjust the speed of the chases.
d. You can use the TAP/Display button to set the speed instead. The time between
the last two taps equals the length of time between steps. This setting will stay
in effect until the speed slider is moved.
e. Press the Auto/Display button to exit Auto mode.
3. Music Mode: You can run one or more chases to the beat of the music. You can
use the internal microphone or add an external music signal. If you select more
than one chase, all chases will be run one by one. The active chase blinks. You
can use the Manual override button, see further for more information.
a. Press the Music/Bank copy button to activate Music mode. The Music LED
turns on.
b. Select one or more chases. (pressing the same chase a second time unselects
it) The LEDs of the selected chases are lit. The active chase blinks and its name
+ active scene/bank are shown on the display.
c. Press the Music/Bank Copy button again to exit music mode.
Note: You can use the fade time slider to make the movement a little smoother.
Don’t add too much fade time, the music synchronization will be completely lost!
OVERRIDE FUNCTION
During playback of scenes and chases in auto and music mode, it is possible to select
one or more fixtures and manipulate their functions manually.
To do this just select the fixtures you want to lift out of the running sequence and press
the override button. Now you can manipulate all functions of the selected fixtures,
completely independent from the running sequence. At any moment you can select or
unselect additional fixtures. Once a fixture in unselected or the override function is
disabled, the fixtures continue the sequence.
FILE DUMP
It is possible a memory dump from one SM-1612 to another SM-1612. This saves you
a lot of programming work!
1. Prepare to send file dump: these actions have to be carried out on the
Scanmaster that has to send the file dump.
a. Turn the power off.

ENGLISH OPERATION MANUAL
JB SYSTEMS® 13/82 SCANMASTER 1612 (SM-1612)
b. Press the following buttons at the same time and hold down while you turn on
the power:
•fixture2 button
•fixture3 button
•scene1 button
The display shows “TRANSMIT” to indicate that the SM-1612 is ready to send.
2. Prepare to receive file dump: these actions have to be carried out on the
Scanmaster that has will receive the file dump.
a. Turn the power off.
b. Press the following buttons at the same time and hold down while you turn on
the power:
•Fixture8 button
•Fixture9 button
•Scene2 button
The display shows “RECEIVE” to indicate that the SM-1612 is ready to receive.
3. Start sending file dump:
On the Scanmaster showing “TRANSMIT” on its display, press the scene buttons 7
and 8 at the same time.
The display shows a small progression bar. Don’t touch both Scanmasters during
this operation. At the end of the operation both units will automatically return to
normal.
Before you start using the unit that received the file dump, switch it off and on!
MAINTENANCE
The unit should be cleaned regularly using a wet cloth. We recommend internal
cleaning to be carried out by qualified personnel.
SPECIFICATIONS
Power Input: DC 9 ~ 12V 300mA minimum.
AC/DC Power adapter: AC 240V, 50Hz Æ12Vdc / 300mA
DMX outputs: 3pin XLR; DMX, channels 001 Æ192
Midi input: 5pin Din
Audio input: Cinch 0.1V ~ 1Vpp
Size: 48.3 x 13.4 x 8.5cm (19”/ 3U)
Weight: 2.7kg
SURF TO:
WWW.JBSYSTEMS.BE
AND LOOK FOR OTHER PRODUCTS FROM JB SYSTEMS
FRANCAIS MODE D’EMPLOI
JB SYSTEMS® 14/82 SCANMASTER 1612 (SM-1612)
MODE D’EMPLOI
Nous vous remercions d’avoir acheté ce produit JB Systems. Veuillez lire ce mode
d’emploi très attentivement afin de pouvoir exploiter toutes les possibilités de cet
appareil.
CARACTERISTIQUES
•192 canaux DMX
•12 appareils (fixtures) de 16 canaux peuvent être programmés (il est conseillé
d’utiliser des appareils de max. 8 canaux)
•30 banques de 8 scènes programmables (total = 240 scènes)
•6 chases programmables de 240 scènes
•8 curseurs pour un contrôle manuel des canaux
•joystick assignable pour une utilisation plus aisée
•File Dump vous permet d’échanger des informations entre 2 appareils
•Pendant le déroulement automatique des programmes, la vitesse d’exécution
(speed) et le temps de transition (fade time) peuvent être contrôlés par 2 curseurs
•Fade time/ fade time assigné
•Des canaux DMX réversibles permettent aux appareils de réagir à l’opposé en mode
chase
•Mode 8 canaux ou 16 canaux
•Ajustage fin des fonctions pan et tilt du joystick
•Touche Black-out du master (sortie générale)
•Une touche Manual Override vous permet de contrôler manuellement n’importe quel
appareil a n’importe quel moment
•Micro incorporé pour un fonctionnement au rythme de la musique
•Contrôle MIDI des banques, chases et black-out
•Sélecteur d’inversion de polarité DMX
•Mémoire en cas de panne électrique
AVANT L’UTILISATION
Vérifiez le contenu:
Vérifiez si la boite contient les articles suivants :
•Scanmaster 1612 (SM-1612)
•adaptateur secteur AC/DC
•Mode d’emploi
Quelques instructions importantes:
•Pour éviter l’incendie ou l’électrocution, n’exposez jamais cet appareil à la pluie ou à
l’humidité.

FRANCAIS MODE D’EMPLOI
JB SYSTEMS® 15/82 SCANMASTER 1612 (SM-1612)
•Afin de ne pas vous faire électrocuter, n’enlevez jamais le couvercle. Si vous êtes
confrontés à un problème, contactez votre dealer.
•N’insérez jamais d’objets métalliques et ne renversez jamais de liquides dans
l’appareil. L’électrocution ou le mal fonctionnement de l’appareil peut en résulter.
•Evitez les endroits poussiéreux, nettoyez l’appareil régulièrement.
Lexique:
•SCENE: Une scène est un groupement de différentes valeurs de réglage de
curseurs, qui décrit une certaine condition a un certain moment.
Par exemple: Vous avez réglé les curseurs du SM-1612 pour positionner un appareil
dans une certaine direction, avec un certain gobo et une certaine couleur. La
combinaison de toutes ces valeurs de réglage est appelée “SCENE”
•BANK: Le SM-1612 possède 8 touches de scène (scene) On peut programmer une
scène différente sous chaque touche. Pour pouvoir arriver à un total de 240 scènes
mémorisées vous devez les stocker dans des banques (BANK) C’est pour cela que
vous disposez de 30 banques de 8 scènes chacune. (30 x 8 = 240 scènes).
Exemple:
BANK1 (scene1 ; scene2 ; scene3 ; … scene8)
BANK2 (scene1 ; scene2 ; scene3 ; … scene8)
BANK3 (scene1 ; scene2 ; scene3 ; … scene8)
…
BANK30 (scene1 ; scene2 ; scene3 ; … scene8)
•CHASE: Le SM-1612 possède 6 « chases » programmables. Un « chase » est une
succession de scènes. Cette succession de scènes peut être programmée par
l’utilisateur dans n’importe quel ordre. Un « chase » peut contenir un maximum de
240 scènes.
•SPEED: Le temps entre 2 scènes quant un « chase » se déroule automatiquement.
•FADE TIME: Ceci est le temps qu’il faut à un appareil (ou plusieurs) pour bouger
d’une position à la suivante.
•PAN/TILT: PAN = mouvement horizontal ou mouvement dans l’axe X.
TILT= mouvement vertical ou mouvement dans l’axe Y.
FONCTIONS (FACE AVANT)
1. Touches FIXTURES: Utilisés pour sélectionner un ou plusieurs appareils.
FRANCAIS MODE D’EMPLOI
JB SYSTEMS® 16/82 SCANMASTER 1612 (SM-1612)
2. TOUCHES SCENE: Sont utilisés pour charger ou stocker des scènes.
3. CURSEURS: Sont utilisés pour contrôler les valeurs des différents canaux.
4. Touche PAGE SELECT: Chaque appareil peut avoir jusqu’à 16 canaux. Ces 16
canaux sont repartis sur 2 pages de 8 canaux chacune (curseurs):
•PAGE A: canaux 1Æ8
•PAGE B: canaux 9Æ16
5. Touche OVERRIDE: Quant un « chase » est activé, vous pouvez sélectionner 1
ou plusieurs appareils et les commander indépendamment du programme
« chase » qui court.
6. Curseur SPEED: Il est utilisé pour sélectionner la vitesse de déroulement du
« chase » dans une gamme allant de 0.1secondes à 10minutes.
7. Curseur FADE TIME: il est utilisé pour régler le temps de transition dans une
gamme allant de 0 à 30sec.
8. LCD DISPLAY: Affiche l’activité en cours d’exécution. L’écran LCD contient 2
lignes de 8 caractères chacune. Ci-dessous vous trouverez une liste des
abréviations affichées:
LCD DISPLAY MESSAGE COMPLET
•SN1 scene1 est activée
•BK1 bank1 est activée
•CHASE1 chase1 est activé
•STEP 009 pas N° 9 d’un chase
•DATA 184 valeur DMX du dernier curseur utilisé = 184 (0
Æ
255)
•SP:1m34s Speed (vitesse)est réglé à 1minute, 34 seconds.
•FT:3.31s Fade time est réglé à 3,31secondes
•ASS04 05 Le Joystick est assigné aux canaux 4 & 5 (PAN=4 * TILT=5)
•RES10 13 Les canaux DMX 10 & 13 sont inversés
9. JOYSTICK PAN: Il est utilisé pour contrôler le mouvement horizontal de/des
l’appareil(s) sélectionné(s)
10.JOYSTICK TILT: Il est utilisé pour contrôler le mouvement « tilt » (haut/bas)
de/des l’appareil(s) sélectionné(s)
11.Touche PROGRAM: Elle est utilisée pour activer ou pour quitter le mode de
programmation.
12.Touche MIDI/RECORD: Vous permet d’enregistrer des actions dans la mémoire
ou pour régler un canal MIDI.
13.Touche AUTO/DELETE:
•Pendant le déroulement d’un programme chase: Vous permet de passer du
mode de fonctionnement manuel en automatique ou inversement.
•Pendant la programmation: Vous permet de supprimer des scènes ou des
« chases »
14.Touche MUSIC/BANK COPY:
•Pendant le déroulement d’un programme: Elle est utilisée pour passer du
mode manuel en mode musical ou inversement.
•Pendant la programmation: Elle est utilisée pour copier des banques.
15.Touche BANK UP/DOWN: Vous permet de sélectionner une des 30 banques ou
pour sélectionner un des pas d’un « chase »
16.Touche TAP/DISPLAY: Vous permet de sélectionner plusieurs modes d’affichage.
Affichage des valeurs DMX: vous pouvez choisir entre l’affichage des valeurs DMX
réelles (0 Æ255) ou des valeurs en pourcentage (0 Æ100%)

FRANCAIS MODE D’EMPLOI
JB SYSTEMS® 17/82 SCANMASTER 1612 (SM-1612)
En mode « chase » vous pouvez utiliser la fonction TAP pour régler la vitesse de
déroulement du programme : appuyez 2 fois sur cette touche. Le temps écoulé
entre les 2 coups définira la vitesse. (alternative au curseur de réglage de vitesse)
17.Touche BLACKOUT: Coupe l’envoi des signaux DMX.
18.Touche CHASE: Elle est utilisée pour activer un ou plusieurs « chases »
19.Touche FINE: Contrôle les fonctions PAN/TILT d’un appareil par de tout petit pas.
Ceci vous offre la possibilité de positionner les appareils avec une grande
précision. (parfois il est plus facile de positionner les appareils en utilisant les
curseurs)
20.MODE: Appuyez simultanément sur les touches Mode et Fine pour activer
l’assignation du joystick et les modes « channel reverse »
FONCTIONS (arrière)
1. MIDI INPUT: peut être utilise pour recevoir des informations MIDI.
2. DMX POLARITY: Un signal DMX utilise la plupart du temps les connections
suivantes: 1=masse * 2=Data- * 3=Data+
Parfois les câbles sont inversés, dans ce cas la connexion DMX ne fonctionnera
pas. Ceci peut être résolu en utilisant cet inverseur de polarité. Ci votre connexion
DMX ne fonctionne pas et que toutes vos appareils DMX sont correctement
adressés, vous pouvez essayer cet inverseur. Dans des conditions de
fonctionnement normales, mettez toujours cet inverseur tout à fait à gauche.
3. DMX OUTPUT: Cette sortie envoie les signaux DMX aux appareils connectés.
4. FILE DUMP INPUT: cette entrée peut être utilisée pour connecter un deuxième
SM-1612 et copier ainsi ses « chases » et ses « scenes » N’utilisez pas ce
connecteur pour relier en chaîne le signal DMX de 2 contrôleurs!
5. DC INPUT: connectez l’adaptateur AC/DC qui est fourni avec l’appareil a cette
entrée. Si vous devez utiliser un autre adaptateur, vérifiez toujours s’il possède les
caractéristiques suivantes : 9 ~ 12Vdc et minimum 300mA avec le pôle + au
centre.
6. POWER: Utilisez cet interrupteur pour éteindre ou allumer l’appareil.
7. Entrée AUDIO: Peut recevoir des signaux de n’importe quelle sortie « line » ou
« record » (enregistrement) d’un appareil audio. Si cette entrée n’est pas utilisée,
le micro interne du SM-1612 prendra automatiquement la relève.
FRANCAIS MODE D’EMPLOI
JB SYSTEMS® 18/82 SCANMASTER 1612 (SM-1612)
SET UP
1. ADRESSAGE DES APPAREILS (fixtures): Le SM-1612 possède 12 touches
« fixtures » Chaque touche représente 16 adresses DMX. (8 curseurs pour la page
A et 8 curseurs pour la page B) Dans la plupart des cas le SM-1612 sera utilisé
avec des appareils (scans) qui possèdent maximum 8 canaux DMX. Dans ce cas,
seul la page A sera utilisée.
Le tableau suivant vous aidera régler vos adresses de départ de vos appareils
DMX:
Appareil
(fixture)#
Adresse de
départ
Réglage des
Dip Switch
1 1 1 “On”
2 17 1 et 5 “On”
3 33 1 et 6 “On”
4 49 1,5 et 6 “On”
5 65 1 et 7 “On”
6 81 1,5 et 7 “On”
7 97 1,6 et 7 “On”
8 113 1,5,6 et 7 “On”
9 129 1 et 8 “On”
10 145 1,5 et 8 “On”
11 161 1,6 et 8 “On”
12 177 1,5,6 et 8 “On”
2. JOYSTICK SETUP: Pour chaque appareil (scan ou autre) 2 adresses peuvent être
assignées au joystick pour les fonctions PAN et TILT:
•Tenez la touche “Program” enfoncée jusqu’à ce que le LED clignote.
•Appuyez 2 fois simultanément sur les touches “Mode” et “Fine”. Le LED
« assign » devrait s’allumer. (Si le LED « reverse » est allumé : appuyez une
deuxième fois simultanément sur les 2 touches)
•Utilisez les touches UP et DOWN des banques « bank » pour sélectionner l’axe
que vous voulez assigner (PAN ou TILT)
•Si votre scan possède plus de 8 adresses DMX, vous pouvez utiliser la touche
“Tap/Display” pour sélectionner le mode de fonctionnement en 16 ou 8 canaux.
•Appuyez sur la touche correspondant à l’appareil que vous voulez régler.
•Pendent que vous tenez la touche « mode » enfoncée, appuyez sur le numéro
de scène, correspondant au curseur qui contrôle le mouvement. (Exemple: Si le
« pan » est contrôlé par le curseur N° 4, tenez la touche « mode » enfoncée
pendant que vous appuyez sur la touche de scène 4).
•Quant PAN et TILT sont assignés, appuyez à nouveau simultanément sur les
touches “Mode” et “Fine” pour sortir du mode « Assign »
Remarque: Vous pouvez toujours utiliser les curseurs au lieu du joystick pour
contrôler les mouvements de l’appareil (fixture)
3. SUPPRIMER LE SETUP DU JOYSTICK D’UN SCAN:
•Activez le mode de programmation. (Tenez la touche “Program” enfoncée
jusqu’à ce que le LED clignote)
•Appuyez 2 fois simultanément sur les touches “Mode” et “Fine”. Le LED
« assign » devrait s’allumer. (Si le LED « reverse » est allumé :appuyez une

FRANCAIS MODE D’EMPLOI
JB SYSTEMS® 19/82 SCANMASTER 1612 (SM-1612)
deuxième fois simultanément sur les 2 touches)
•Si votre scan possède plus de 8 adresses DMX, vous pouvez utiliser la touche
“Tap/Display” pour sélectionner le mode de fonctionnement en 16 ou 8 canaux.
•Appuyez sur la touche correspondant à l’appareil que vous voulez régler.
•Pendant que vous tenez la touche « mode » enfoncée, appuyez sur la touche
“Auto/Del”.
•Appuyez pendant quelques secondes sur la touche « program » pour arrêter le
mode de programmation.
4. REGLAGE DU FADE TIME: Durant le déroulement automatique ou musical d’un
programme « chase » vous pouvez introduire un temps de transition entre deux
pas du programme. Vous pouvez attribuer ce temps de transition à tous les canaux
ou uniquement aux canaux PAN/TILT. Si vous sélectionnez les canaux X/Y vous
n’aurez pas l’inconvénient que les gobos et les couleurs changent aussi lentement
pendant les mouvements lents PAN/TILT.
•Appuyez simultanément sur les touches « mode » et Tap/Display pendant que le
Scanmaster SM-1612 est éteint.(alimentation coupée)
•Allumez l’appareil et appuyez sur la touche « Tap/Display » pour choisir soit
ONLY X/Y (temps de transition affecte uniquement les canaux PAN/TILT) soit
ALL CH (temps de transition affecte tous les canaux)
L’écran LCD affiche:
ALL ONLY
FD FD
CH X/Y
OR
TIME TIME
•Tenez d’abord la touche « mode » enfoncée, puis appuyez sur la touche
Tap/Display pour mémoriser vos réglages. Tous les LED’s flasheront 3 fois. Si
vous ne voulez pas sauvegarder vos réglages, vous pouvez appuyer sur la
touche black-out pour quitter ce mode.
Remarque importante: Assignez d’abord le PAN/TILT du joystick (voir
précédemment) avant de régler les temps de transition. Si vous changez les
valeurs d’assignation du PAN/TILT d’un appareil plus tard, vous devrez
recommencer les réglages de temps de transition!
5. INVERSION DU MOUVEMENT DU JOYSTICK / CANAL DMX: Les mouvements
PAN et/ou TILT, ou même d’autres canaux peuvent être inversés. (La valeur DMX
est 255 quant le curseur est en position fermé (bas) et 000 quant le curseur est
ouvert (haut)
•Ouvrez le mode de programmation. (Tenez la touche “Program” enfoncée
jusqu’à ce que le LED clignote)
•Appuyez 1 fois simultanément sur les touches “Mode” et “Fine”. Le LED
« reverse » devrait s’allumer. (Si le LED « assign » est alumé, appuyez une
seconde fois simultanément sur les 2 touches)
•Si votre scan possède plus de 8 adresses DMX, vous pouvez utiliser la touche
“Tap/Display” pour sélectionner le mode de fonctionnement en 16 ou 8 canaux.
•Appuyez sur la touche correspondant à l’appareil que vous voulez régler.
•Pendant que vous tenez la touche « mode » enfoncée, appuyez sur la touche de
scène correspondant au canal que vous voulez inverser (Exemple: Vous voulez
inverser le mouvement TILT d’un appareil. En mode de programmation, appuyez
simultanément sur les touches “mode” et “fine” jusqu’à ce que le LED « reverse »
est allumé. Choisissez l’appareil que vous voulez modifier (touches scanner)
FRANCAIS MODE D’EMPLOI
JB SYSTEMS® 20/82 SCANMASTER 1612 (SM-1612)
Tenez la touche “mode” enfoncée et appuyez sur la touche “scene” du curseur
qui corresponds avec le canal des mouvements TILT. Appuyez simultanément
sur les touches « mode » et « fine » jusqu’à-ce que les 2 LED’s de « assign » et
« reverse » s’éteignent. Appuyez sur la touche « program » pendant quelques
secondes pour arrêter le mode de programmation.
Remarque: vous pouvez inverser au maximum 48 canaux.
6. SUPPRIMER LA FONCTION REVERSE DU JOYSTICK / CANAL DMX:
•Ouvrez le mode de programmation. (Tenez la touche “Program” enfoncée
jusqu’à ce que le LED clignote)
•Appuyez 1 fois simultanément sur les touches “Mode” et “Fine”. Le LED
« reverse » devrait s’allumer. (Si le LED « assign » est allumé, appuyez une
seconde fois simultanément sur ces 2 touches)
•Si votre scan possède plus de 8 adresses DMX, vous pouvez utiliser la touche
“Tap/Display” pour sélectionner le mode de fonctionnement en 16 ou 8 canaux.
•Appuyez sur la touche correspondant à l’appareil que vous voulez régler.
•Pendant que vous tenez la touche « mode » enfoncée, appuyez sur la touche
“Auto/Del”.
•Appuyez pendant quelques secondes sur la touche « program » pour arrêter le
mode de programmation.
Remarque: Toutes les adresses inversées de cet appareil seront remis en mode
de fonctionnement normal.
7. REGLAGE DES CANAUX MIDI:
•Tenez la touche MIDI/Rec enfoncée pendant 3 secondes : le display affiche
“MIDI xx” (xx est le canal MIDI: entre 01 et 16)
•Utilisez les touches Up/Down pour sélectionner les canaux MIDI de 1 à 16 que
vous voulez utiliser pour commander votre SM-1612.
•Tenez la touche MIDI/Rec a nouveau enfoncée pendant 3 secondes : le mode
d’opération en MIDI est maintenant activé.
FONCTIONS MIDI:
BANK (Octave) NUMÉRO DE NOTE FONCTION
BANK 1 00 à 07 1 à 8 de Bank 1 on ou off
BANK 2 08 à 15 1 à 8 de Bank 2 on ou off
BANK 3 16 à 23 1 à 8 de Bank 3 on ou off
BANK 4 24 à 31 1 à 8 de Bank 4 on ou off
BANK 5 32 à 39 1 à 8 de Bank 5 on ou off
BANK 6 40 à 47 1 à 8 de Bank 6 on ou off
BANK 7 48 à 55 1 à 8 de Bank 7 on ou off
BANK 8 56 à 63 1 à 8 de Bank 8 on ou off
BANK 9 64 à 71 1 à 8 de Bank 9 on ou off
BANK 10 72 à 79 1 à 8 de Bank10 on ou off
BANK 11 80 à 87 1 à 8 de Bank11 on ou off
BANK 12 88 à 95 1 à 8 de Bank12 on ou off
BANK 13 96 à 103 1 à 8 de Bank13 on ou off
BANK 14 104 à 111 1 à 8 de Bank14 on ou off
BANK 15 112 à 119 1 à 8 de Bank14 on ou off
CHASES 120 à 125 1 à 6 Chases
BLACK-OUT 126 BLACK-OUT

FRANCAIS MODE D’EMPLOI
JB SYSTEMS® 21/82 SCANMASTER 1612 (SM-1612)
Le SCANMASTER 1612 ne reçoit que des notes MIDI, il est possible que vous
devez transposer votre clavier pour trouver les notes qui correspondent.
SCÈNES
1. PROGRAMMER UNE SCÈNE:
a. Ouvrez le mode de programmation. (Tenez la touche “Program” enfoncée jusqu’à ce
que le LED clignote)
b. Vérifiez si le LED de la touche black-out est éteint, si ce n’est pas le cas,
appuyez 1 fois sur cette touche pour sortir du mode black-out.
c. Vérifiez si les curseurs « speed » et « fade time » sont positionnés à zéro.
d. Sélectionnez l’appareil que vous voulez contrôler. Vous pouvez contrôler
plusieurs appareils en même temps en appuyant sur les touches correspondant
aux appareils que vous voulez programmer
e. Bougez les curseurs et le joystick jusqu’à la position désirée. (Si nécessaire,
sélectionnez page B pour contrôler les canaux 9 à 16 de l’appareil)
f. Appuyez sur les touches Up/Down pour choisir la banque dans laquelle vous
voulez stocker la scène. Vous disposez de 30 banques au total ; vous pouvez
stocker jusqu’à 8 scènes dans chaque banque.
g. Quant tous les appareils sont réglés dans les positions désirés d’une scène,
appuyez sur la touche MIDI/Rec.
h. Appuyez sur la touche de scène dans laquelle vous voulez stocker la scène.
Tous les LED’s flasheront pour confirmer l’opération. L’écran LCD affichera la
banque et la scène.
i. Répétez les pas de dÆh jusqu’à ce que toutes les scènes soient programmées.
j. Si vous ne voulez pas continuer la programmation, tenez la touche « program »
enfoncée pendant quelques secondes pour sortir du mode de programmation.
Le LED s’éteindra.
2. EDITER UNE SCÈNE:
a. Ouvrez le mode de programmation. (Tenez la touche “Program” enfoncée jusqu’à ce
que le LED clignote)
b. Vérifiez si le LED de la touche black-out est éteint, si ce n’est pas le cas,
appuyez 1 fois sur cette touche pour sortir du mode black-out.
c. Appuyez sur les touches Bank Up/Down pour sélectionner la banque qui
contient la scène que vous voulez éditer.
d. Sélectionnez la scène que vous voulez éditer en appuyant sur sa touche de
scène désirée.
e. Sélectionnez les appareils (scans) et réglez les curseurs et/ou le joystick pour
effectuer les nouveaux réglages de la scène.
f. Une fois ces réglages terminés, appuyez sur la touche MIDI/Rec.
g. Appuyez sur la touche de scène correspondant à la scène que vous éditez.
Ceci remplacera l’ancienne scène par la nouvelle.
h. Tenez la touche « program » enfoncée pendant quelques secondes pour quitter
le mode de programmation. Le LED s’éteindra.
Remarque: Soyez sûr de sélectionner la même scène dans les pas d et g, sinon
vous risquez d’effacer accidentellement une scène existante
FRANCAIS MODE D’EMPLOI
JB SYSTEMS® 22/82 SCANMASTER 1612 (SM-1612)
3. COPIER UNE SCÈNE:
a. Ouvrez le mode de programmation. (Tenez la touche “Program” enfoncée jusqu’à ce
que le LED clignote)
b. Si vous voulez vérifier la sortie du signal, il faut que le LED du black-out soit
éteint, si ce n’est pas le cas, appuyez 1 fois sur la touche pour sortir du mode
black-out.
c. Appuyez sur les touches Bank Up/Down pour sélectionner la banque qui
contient la scène que vous voulez copier.
d. Appuyez sur la touche de la scène que vous voulez copier
e. Appuyez sur les touches Up/Down pour sélectionner la banque dans laquelle
vous voulez copier la scène.
f. Appuyez sur la touche MIDI/Rec.
g. Appuyez sur la touche de la scène vers laquelle vous voulez envoyer la copie.
Si vous voulez copier d’autres scènes, vous pouvez répéter les pas c à g.
h. Tenez la touche « program » enfoncée pendant quelques secondes pour quitter
le mode de programmation. Le LED s’éteindra.
4. SUPPRIMER UNE SCÈNE:
a. Ouvrez le mode de programmation. (Tenez la touche “Program” enfoncée jusqu’à ce
que le LED clignote)
b. Si vous voulez vérifier la sortie du signal, il faut que le LED du black-out soit
éteint, si ce n’est pas le cas, appuyez 1 fois sur la touche pour sortir du mode
black-out.
c. Appuyez sur les touches Bank Up/Down pour sélectionner la banque qui
contient la scène que vous voulez supprimer.
d. Tenez la touche Auto/Del enfoncée. Appuyez sur la touche de la scène que
vous voulez supprimer. Tous les LED ‘s clignoteront 3 fois. Si la scène est
supprimée, tous les niveaux DMX sont mis à zéro. Si vous voulez supprimer
d’autres scènes, répétez les pas c & d.
e. Tenez la touche « program » enfoncée pendant quelques secondes pour quitter
le mode de programmation. Le LED s’éteindra.
5. SUPPRIMER TOUTES LES SCÈNES:
a. Eteignez le SM-1612.
b. Rallumez l’appareil pendant que vous tenez les touches « program » et « bank
down » enfoncés simultanément. Toutes les scènes devraient être effaces. .
Attention: Sachez que toutes les scènes seront perdues, à utiliser avec
prudence!
6. COPIER UNE BANQUE DE SCÈNES:
a. Ouvrez le mode de programmation. (Tenez la touche “Program” enfoncée jusqu’à ce
que le LED clignote)
b. Si vous voulez vérifier la sortie du signal, il faut que le LED du black-out soit
éteint, si ce n’est pas le cas, appuyez 1 fois sur la touche pour sortir du mode
black-out.
c. Appuyez sur les touches Bank Up/Down pour sélectionner la banque que vous
voulez copier
d. Appuyez sur la touche MIDI/Rec.
e. Appuyez sur les touches Bank Up/Down pour sélectionner la banque vers
laquelle vous voulez copier.

FRANCAIS MODE D’EMPLOI
JB SYSTEMS® 23/82 SCANMASTER 1612 (SM-1612)
f. Appuyez sur la touche Music/Bank Copy, tous les LED ‘s clignoteront 3 fois
pour signaler que la fonction à été complétée.
g. Tenez la touche « program » enfoncée pendant quelques secondes pour quitter
le mode de programmation. Le LED s’éteindra.
CHASES
Un « chase » est une succession de scènes dans un certain ordre, ce qui implique
que vous devez déjà avoir crée des scènes avant de pouvoir programmer un chase.
Avant de programmer des chases pour la première fois il est conseillé d’effacer tous
les « chases » qui se trouvent dans le SM-1612.
Voir « Supprimer tous les chases » ci dessous.
1. SUPPRIMER TOUS LES CHASES:
a. Eteignez le contrôleur.
b. Rallumez le contrôleur en tenant enfoncés les touches « Auto/Del » et « Bank
Down » simultanément. Tous les « chases »devraient être effaces.
Attention: Sachez que tous vos « chases » seront perdus, à utiliser avec
prudence!
2. PROGRAMMER UN CHASE:
a. Ouvrez le mode de programmation. (Tenez la touche “Program” enfoncée
jusqu’à ce que le LED clignote)
b. Si vous voulez vérifier la sortie du signal, il faut que le LED du black-out soit
éteint, si ce n’est pas le cas, appuyez 1 fois sur la touche pour sortir du mode
black-out.
c. Appuyez sur la touche du chase que vous voulez programmer.
d. Utilisez les touches Bank Up/Down pour sélectionner la banque qui contient les
scènes que vous voulez programmer dans votre chase.
e. Appuyez sur la touche de la scène désirée.
f. Appuyez sur la touche MIDI/Rec.
g. Répétez les pas d à g jusqu’à ce que toutes les scènes soient programmées
dans le chase.
h. Tenez la touche « program » enfoncée pendant quelques secondes pour quitter
le mode de programmation. Le LED s’éteindra.
3. INSERER UN PAS DANS UN PROGRAMME CHASE:
a. Ouvrez le mode de programmation. (Tenez la touche “Program” enfoncée
jusqu’à ce que le LED clignote)
b. Si vous voulez vérifier la sortie du signal, il faut que le LED du black-out soit
éteint, si ce n’est pas le cas, appuyez 1 fois sur la touche pour sortir du mode
black-out.
c. Appuyez sur la touche correspondant au chase que vous voulez programmer.
d. Appuyez sur la touche TAP/Display, l’écran LCD affichera le pas actuel du
chase.
e. Appuyez sur les touches Bank Up/Down jusqu’à ce que vous arriviez au pas,
derrière lequel vous voulez insérer un nouveau pas
f. Appuyez sur la touche MIDI/Rec, les caractères afficheront le pas, un pas plus
haut qu’avant. L’écran LCD affiche le chase actuel, la scène et la banque
FRANCAIS MODE D’EMPLOI
JB SYSTEMS® 24/82 SCANMASTER 1612 (SM-1612)
g. Appuyez sur les touches Bank Up/Down pour sélectionner la banque qui
contient la scène que vous voulez insérer dans votre programme « chase »
h. Une fois cette scène sélectionnée, appuyez à nouveau sur la touche MIDI/Rec.
Tous les LED ‘s clignoteront trois fois pour indiquer que le nouveau pas a été
inséré dans le programme « chase »
i. Répétez les pas e à h jusqu’à ce que toutes les scènes désirées aient été
insérées.
j. Tenez la touche « program » enfoncée pendant quelques secondes pour quitter
le mode de programmation. Le LED s’éteindra.
4. SUPPRIMER UN PAS D’UN PROGRAMME CHASE:
a. Ouvrez le mode de programmation. (Tenez la touche “Program” enfoncée
jusqu’à ce que le LED clignote)
b. Si vous voulez vérifier la sortie du signal, il faut que le LED du black-out soit
éteint, si ce n’est pas le cas, appuyez 1 fois sur la touche pour sortir du mode
black-out.
c. Appuyez sur la touche correspondant au chase que vous voulez supprimer.
d. Appuyez sur la touche Tap/Display, l’écran LCD affiche le pas actuel.
e. Appuyez sur les touches Bank Up/Down jusqu’à ce que vous arriviez au pas
que vous voulez supprimer.
f. Appuyez sur la touche Auto/Del pour supprimer le pas. Tous les LED ‘s
clignoteront 3 fois pour indiquer que l’opération à été exécutée.
g. Répétez si nécessaire les pas e et f afin d’effacer tous les pas non-désirés.
h. Tenez la touche « program » enfoncée pendant quelques secondes pour quitter
le mode de programmation. Le LED s’éteindra.
5. AJOUTER UNE BANQUE DE SCÈNES AU CHASE:
Remarque: La banque de scènes sera ajoutée à la fin du « chase ».
a. Ouvrez le mode de programmation. (Tenez la touche “Program” enfoncée jusqu’à ce que
le LED clignote)
b. Si vous voulez vérifier la sortie du signal, il faut que le LED du black-out soit
éteint, si ce n’est pas le cas, appuyez 1 fois sur la touche pour sortir du mode
black-out..
c. Appuyez sur la touche correspondant au chase que vous voulez retravailler.
d. Utilisez les touches Bank Up/Down pour sélectionner la banque de scènes que
vous voulez ajouter.
e. Appuyez sur la touche Music/Bank Copy.
f. Appuyez sur la touche MIDI/Rec, tous les LED ‘s clignoteront 3 fois pour
indiquer que l’opération vient d’être exécutée.
g. Tenez la touche « program » enfoncée pendant quelques secondes pour quitter
le mode de programmation. Le LED s’éteindra.

FRANCAIS MODE D’EMPLOI
JB SYSTEMS® 25/82 SCANMASTER 1612 (SM-1612)
PLAYBACK DE SCÈNES
Il y a 3 modes de déroulement de scènes possible:
1. Manual Mode: vous pouvez sélectionner et exécuter une ou plusieurs scènes
manuellement.
a. Quant l’appareil est mis sous tension, il démarre automatiquement en mode
manuel.
b. Vérifiez si le LED Manual mode est allumé.
c. Si vous voulez vérifier la sortie du signal, il faut que le LED du black-out soit
éteint, si ce n’est pas le cas, appuyez 1 fois sur la touche pour sortir du mode
black-out.
d. Utilisez les touches Bank Up/down pour sélectionner la banque dans laquelle se
trouve les scènes que vous voulez exécuter.
e. Appuyez sur les touches de scène correspondant aux scènes que vous voulez
reproduire.
f. Répétez éventuellement les pas d et e pour sélectionner d’autres scènes.
2. Auto Mode: Vous pouvez faire dérouler des scènes d’une banque en séquence.
Vous pouvez aussi utiliser le « Manual override » (voir plus loin pour plus
d’informations)
a. Appuyez sur la touche Auto/Del pour activer le mode Auto. Le LED Auto
s’allume.
b. Utilisez les touches bank Up/Down pour sélectionner la banque des scènes à
exécuter.
c. Après avoir sélectionné la banque de scènes, vous pouvez utiliser les curseurs
de vitesse et du temps de transition pour régler la vitesse d’exécution et la
progression des scènes.
d. Vous pouvez aussi utiliser la touche TAP/Display pour définir la vitesse. Le
temps d’attente entre 2 tapotements déterminera le temps d’attente entre deux
pas. Ce réglage restera effectif jusqu’à ce que le curseur « speed » soit
manipulé.
e. Appuyez sur la touche Auto/Display pour sortir du mode Auto.
3. Music Mode: Vous pouvez faire dérouler des scènes d’une banque au rythme de
la musique. Vous pouvez utiliser pour cela le micro interne ou ajouter un signal
audio d’une source externe en le branchant à l’entrée audio du SM-1612. Vous
pouvez également utiliser la touche « Manual override », voyez plus loin pour plus
d’informations.
a. Appuyez sur la touche Music/Bank copy pour activer le mode Musical. Le LED
Music s’allume.
b. Utilisez les touches bank Up/Down pour sélectionner la banque de scènes que
vous voulez exécuter. Les scènes sélectionnées se dérouleront en séquence au
rythme de la musique.
c. Appuyez à nouveau sur la touche Music/Bank Copy pour quitter le mode
musical.
FRANCAIS MODE D’EMPLOI
JB SYSTEMS® 26/82 SCANMASTER 1612 (SM-1612)
PLAYBACK DES CHASES
Il y a 3 modes de déroulement de programmes « chase »:
1. Manual Mode: Vous pouvez sélectionner et exécuter un programme « chase »
manuellement.
a. Quant l’appareil est mis sous tension, il démarre automatiquement en mode
manuel.
b. Vérifiez si le LED « Manual » est allumé.
c. Verifiez si le LED de la touche black-out est éteint. S’il est allumé, appuyez une
fois sur cette touche pour désactiver le mode black-out.
d. Sélectionnez le « chase » que vous voulez utiliser. L’écran LCD affiche le
numéro du chase.
e. Appuyez sur la touche TAP/Display, l’écran LCD affiche maintenant les
numéros des pas du « chase » que vous avez sélectionné.
f. Utilisez les touches Bank Up/down pour activer manuellement les différents pas
d’un « chase »
g. Sélectionnez si nécessaire un autre « chase » et répétez les pas e et f (si vous
appuyez une deuxième fois la touche du « chase » vous le désactivez)
2. Auto Mode: vous pouvez faire dérouler les pas d’un ou de plusieurs « chase »
automatiquement tout en contrôlant la vitesse de déroulement. Si vous
sélectionnez plus d’un chase, ils seront activés automatiquement l’un après l’autre.
Le LED du « chase » actif clignotera. Vous pouvez utiliser la touche « Manual
override » (voir plus loin)
a. Appuyez sur la touche Auto/Del pour activer le mode automatique. Le LED Auto
s’allume.
b. Sélectionnez un ou plusieurs chases. (Si vous appuyez 2 fois sur le même
chase vous le désélectionnez) Les LED ‘s des chases sélectionnés sont
allumés. Le « chase » qui est actif clignote et son nom + scène/banque active
est affiché sur l’écran LCD.
c. Utilisez les curseurs « speed » et « Fade Time » pour régler la vitesse de
déroulement des « chases »
d. Vous pouvez aussi utiliser la touche TAP/Display pour régler la vitesse. Le
temps d’attente entre 2 tapotements déterminera le temps d’attente entre deux
pas. Ce réglage restera effectif jusqu’à ce que le curseur « speed » soit
manipulé.
e. Appuyez sur la touche Auto/Display pour sortir du mode automatique.
3. Music Mode: vous pouvez faire dérouler un ou plusieurs « chases » au rythme de
la musique. Vous pouvez utiliser pour cela le micro interne ou ajouter un signal
audio d’une source externe en le branchant à l’entrée audio du SM-1612. Si vous
sélectionnez plus d’un chase, ils seront activés automatiquement l’un après l’autre.
Le LED du « chase » actif clignotera. Vous pouvez utiliser la touche « Manual
override » (voir plus loin)
a. Appuyez sur la touche Music/Bank copy pour activer le mode de
fonctionnement musical. Le LED Music s’allume.
b. Sélectionnez un ou plusieurs chases. (Si vous appuyez 2 fois sur le même
chase vous le désélectionnez) Les LED ‘s des chases sélectionnés sont

FRANCAIS MODE D’EMPLOI
JB SYSTEMS® 27/82 SCANMASTER 1612 (SM-1612)
allumés. Le « chase » qui est actif clignote et son nom + scène/banque active
est affiché sur l’écran LCD.
c. Appuyez à nouveau sur la touche Music/Bank Copy pour sortir du mode
musical.
Remarque: Vous pouvez utiliser le curseur « fade time » pour rendre les
mouvements un peu moins brusques. Ne rendez pas ce temps de transition trop
long, l’effet de synchronisation au rythme de la musique pourrait se perdre!
FONCTION OVERRIDE
Pendant le déroulement de scènes ou de chases en mode automatique ou musicale, il
est possible de sélectionner un ou plusieurs appareils et de le/les commander
manuellement.
Pour cela il vous suffit de sélectionner les appareils que vous voulez sortir du mode de
commande automatique et d’appuyer sur la touche « override » Maintenant vous
pouvez manipuler toutes les fonctions des appareils que vous avez sélectionnés,
indépendamment du programme qui est activé. Vous pouvez sélectionner ou
désélectionner d’autres appareils à n’importe quel moment. Dès qu’un appareil est
désélectionné ou que la fonction « override » est désactivée, les appareils continuent
leur programme.
FILE DUMP
Il est possible de copier la mémoire d’un SM-1612 vers un autre SM-1612. Ceci peut
vous épargner beaucoup de temps de programmation!
1. Préparer l’appareil pour envoyer des informations: Ces manipulations doivent
se faire sur le Scanmaster qui va envoyer les informations :
a. Coupez l’alimentation.
b. Appuyez simultanément sur les touches suivantes et tenez les enfoncées
pendant que vous rallumez l’appareil:
•fixture2
•fixture3
•scene1
L’écran LCD affiche “TRANSMIT” pour indiquer que le SM-1612 est prêt à envoyer
les informations.
2. Préparer l’appareil pour recevoir des informations: Ces manipulations doivent
se faire sur le Scanmaster qui va recevoir les informations :
a. Coupez l’alimentation.
b. Appuyez simultanément sur les touches suivantes et tenez les enfoncées
pendant que vous rallumez l’appareil:
•Fixture8
•Fixture9
•Scene2
L’écran LCD affiche “RECEIVE” pour indiquer que le SM-1612 est prêt à recevoir
des informations.
FRANCAIS MODE D’EMPLOI
JB SYSTEMS® 28/82 SCANMASTER 1612 (SM-1612)
3. Démarrez le transfert des données:
Appuyez simultanément sur les touches 7 et 8 du Scanmaster qui affiche
“TRANSMIT” sur l’écran LCD.
L’écran affiche une petite barre de progression. Ne touchez aucun des
Scanmasters pendant cette opération. A la fin de l’opération, les 2 appareils
retourneront automatiquement en mode de fonctionnement normal.
Eteignez et rallumez l’appareil qui vient de recevoir les données avant de l’utiliser!
ENTRETIEN
L’appareil doit être nettoyé régulièrement à l’aide d’un chiffon légèrement humide.
Nous vous conseillons de faire effectuer le nettoyage à l’intérieur de l’appareil par un
technicien qualifié.
SPÉCIFICATIONS
Alimentation: DC 9 ~ 12V 300mA minimum.
Adaptateur AC/DC: AC 240V, 50Hz Æ12Vdc / 300mA
Sorties DMX: 3pin XLR; DMX, canaux 001 Æ192
Entrée Midi: 5pin Din
Entrée Audio: Cinch 0.1V ~ 1Vpp
Dimensions: 48.3 x 13.4 x 8.5cm (19”/ 3U)
Poids: 2.7kg
SURFEZ SUR:
WWW.JBSYSTEMS.BE
ET DÉCOUVREZ LES AUTRES PRODUITS DE JB SYSTEMS

NEDERLANDS GEBRUIKSAANWIJZING
JB SYSTEMS® 29/82 SCANMASTER 1612 (SM-1612)
GEBRUIKSAANWIJZING
Wij danken U voor het kopen van dit JB Systems product. Om voordeel te halen uit
alle mogelijkheden die dit toestel biedt, raden wij U aan deze gebruiksaanwijzing zeer
aandachtig te lezen.
FEATURES
•192 DMX kanalen
•12 Fixtures van elk 16 kanalen (wordt het best gebruikt met toestellen tot 8 DMX
kanalen)
•30 Banken van 8 programmeerbare scènes (totaal = 240 scènes)
•6 Programmeerbare chases van 240 scènes
•8 Schuifregelaars voor een manuele controle van de kanalen
•Configureerbare joystick voor een gemakkelijke controle van de kanalen
•File Dump laat U toe gegevens over te dragen van een SM-1612 naar een andere
SM-1612
•Automatische programmaweergave met regelbare snelheid en “fade time”
•Fade time/Assign fade time (configureerbaar)
•Omkeerbare DMX kanaalwaarden laten U toe om toestellen tegenovergesteld op
elkaar te laten reageren in een chase
•8-kanaals of 16-kanaals werking
•Fijne regeling van de joystick voor de pan en tilt bewegingen
•Black-out master toets
•Manual Override toets laat U toe om het even welk toestel manueel te bedienen
tijdens het lopen van een programma.
•Ingebouwde microfoon voor een werking op het ritme van de muziek
•MIDI controle over de banks, chases en black-out
•DMX Polariteitkeuzeschakelaar
•Geheugen tegen stroomuitval.
VÓÓR GEBRUIK
Controleer de inhoud:
Kijk na of de verpakking volgende onderdelen bevat:
•Scanmaster 1612 (SM-1612)
•AC/DC adapter
•Gebruiksaanwijzing
Belangrijke instructies:
•Stel dit toestel nooit bloot aan regen of zeer vochtige plaatsen, dit om brand en
elektrocutie te voorkomen.
NEDERLANDS GEBRUIKSAANWIJZING
JB SYSTEMS® 30/82 SCANMASTER 1612 (SM-1612)
•Om elektrocutie te voorkomen mag U het toestel nooit zelf openmaken. Contacteer
uw dealer als er zich een probleem voordoet.
•Plaats nooit metalen voorwerpen en mors geen vloeistoffen in het toestel.
Elektrocutie of een slechte werking kunnen hiervan het gevolg zijn.
•Vermijd stoffige en vochtige plaatsen, reinig het toestel regelmatig.
WOORDGEBRUIK:
•SCÈNE: een scène is a set van verschillende schuifregelaarwaarden die een zekere
toestand op een zeker moment weergeeft.
Voorbeeld: U moet de schuifregelaars van de SM-1612 instellen om een toestel in
een zekere positie te zetten, met een zekere gobo en een zeker kleur. De
combinatie van al deze waarden noemt men een scène.
•BANK: Op de SM-1612 staan 8 scènetoetsen. Onder elke scènetoets kan een
scène opgeslagen worden. Om een totaal van 240 scène geheugens te verkrijgen
moet men die opslaan in banken. Daarom beschikt men over 30 banken van elk 8
scènes: 30 x 8 = 240 scènes.
Voorbeeld:
BANK1 (scene1 ; scene2 ; scene3 ; … scene8)
BANK2 (scene1 ; scene2 ; scene3 ; … scene8)
BANK3 (scene1 ; scene2 ; scene3 ; … scene8)
…
BANK30 (scene1 ; scene2 ; scene3 ; … scene8)
•CHASE: De SM-1612 beschikt over 6 programmeerbare chases. Een chase is een
opeenvolging van scènes. Deze opeenvolging van scènes kan geprogrammeerd
worden door de gebruiker in eender welke volgorde. Een chase kan maximum 240
scènes bevatten.
•SPEED: de tijd tussen 2 scènes in een chase (automatic mode)
•FADE TIME: Dit is de tijd die een toestel (of toestellen) nodig heeft om van een
positie naar een andere over te gaan.
•PAN/TILT: PAN staat voor de horizontale beweging op de X-as.
TILT staat voor de verticale beweging op de Y-as.
FUNCTIES (VOORKANT)

NEDERLANDS GEBRUIKSAANWIJZING
JB SYSTEMS® 31/82 SCANMASTER 1612 (SM-1612)
1. FIXTURE TOETSEN: gebruik deze toetsen om één of meerdere toestellen te
selecteren.
2. SCENE TOETSEN: gebruik deze toetsen om scènes te laden of op te slaan.
3. SCHUIFREGELAARS: gebruik deze regelaars om de waarden van de
verschillende kanalen in te stellen.
4. PAGE SELECT TOETS: elk toestel kan over maximum 16 kanalen beschikken.
Deze 16 kanalen zijn verdeeld over 2 pagina’s van elk 8 kanalen (schuifregelaars):
•PAGE A: kanalen 1Æ8
•PAGE B: kanalen 9Æ16
5. OVERRIDE TOETS: wanneer een chase loopt kan men 1 of meerdere toestellen
(fixtures) selecteren om ze manueel te bedienen, ongeacht de geactiveerde chase.
6. SPEED SCHUIFREGELAAR: wordt gebruikt om de “chase speed” in te stellen van
0.1seconden tot 10 minuten.
7. FADE TIME SCHUIFREGELAAR: Wordt gebruikt om de “fade time”
(overgangssnelheid) in te stellen van 0 tot 30sec.
8. LCD DISPLAY: geeft de functie of het geactiveerde programma weer. De LCD
Display beschikt over 2 lijnen van elk 8 karakters. Hieronder vindt U een lijst van
de gebruikte afkortingen:
LCD DISPLAY VOLLEDIG BERICHT
•SN1 scene1 is actief
•BK1 bank1 is actief
•CHASE1 chase1 is actief
•STEP 009 stap 9 van een chase
•DATA 184 DMX waarde van de laatst gebruikte schuifregelaar= 184 (0
Æ
255)
•SP:1m34s Speed is afgesteld op 1minuut en 34 seconden.
•FT:3.31s Fade time is afgesteld op 3,31seconden
•ASS04 05 Joystick is toegewezen aan de kanalen 4 & 5 (PAN=4 * TILT=5)
•RES10 13 DMX kanalen 10 & 13 werken omgekeerd
9. JOYSTICK PAN: wordt gebruikt om de “pan” (horizontale bewegingen) van de
geselecteerde toestellen te controleren
10.JOYSTICK TILT: wordt gebruikt om de “tilt“ (verticale bewegingen) van de
geselecteerde toestellen te controleren
11.PROGRAM TOETS: wordt gebruikt om de programmeerfunctie in of uit te
schakelen.
12.MIDI/RECORD TOETS: wordt gebruikt om acties in het geheugen op te slaan of
om een MIDI kanaal in te stellen
13.AUTO/DELETE TOETS:
•In Running mode: laat U toe te kiezen tussen de manuele of automatische
chase.
•In Program mode: laat U toe om scènes of chases te wissen.
14.MUSIC/BANK COPY TOETS:
•In Running mode: laat U toe te kiezen tussen de manuele of de muzikale
chase.
•In Program mode: laat U toe banken te kopiëren.
15.BANK UP/DOWN TOETS: wordt gebruikt om één van de 30 banken te kiezen of
om een stap te kiezen in een chase.
16.TAP/DISPLAY TOETS: voor de keuze tussen verschillende weergave
mogelijkheden van de display. Men kan kiezen tussen reële DMX waarden (0 Æ
255) of waarden in percentage (0 Æ100%)
NEDERLANDS GEBRUIKSAANWIJZING
JB SYSTEMS® 32/82 SCANMASTER 1612 (SM-1612)
Men kan deze toets ook gebruiken voor de TAP functie in de automatische chase
mode om de snelheid in te stellen: druk 2 maal op de TAP toets met een
welbepaald tijdsinterval. Dit tijdsinterval bepaalt de nieuwe snelheid van de chase.
(alternatief voor de speed schuifregelaar)
17.BLACKOUT TOETS: wordt gebruikt om de DMX uitgangssignalen te stoppen.
18.CHASE TOETS: Wordt gebruikt om 1 of meerdere chases te activeren.
19.FINE TOETS: wordt gebruikt om fijne PAN/TILT bewegingen uit te voeren. Dit laat
U toe de toestellen preciezer te positioneren. (soms bekomt men betere resultaten
door de kanaalschuifregelaars te gebruiken)
20.MODE: Door tegelijkertijd op de Mode en Fine toetsen te drukken activeert men de
toewijzing van de joystick en de kanaalinversie modes.
FUNCTIES (achterkant)
1. MIDI INPUT: kan gebruikt worden om MIDI gegevens te ontvangen.
2. DMX POLARITY SCHAKELAAR: een DMX signaal heeft normaal volgende
verbindingen:
1=massa * 2= - gegevens * 3= + gegevens
In sommige gevallen kan het gebeuren dat de kabel omgekeerd verbonden is, met
als resultaat dat de DMX verbinding niet werkt. Dit kan opgelost worden door deze
schakelaar te gebruiken. Als uw DMX niet werkt en als alle DMX toestellen correct
geadresseerd zijn kunt u deze toets proberen. Zet in normale omstandigheden
deze schakelaar steeds in zijn uiterst linkse positie.
3. DMX OUTPUT: Zendt DMX signalen naar de verbonden toestellen
4. FILE DUMP INPUT: men kan via deze aansluiting chases en scènes kopiëren van
een andere SM-1612. Gebruik deze aansluiting niet om de DMX signalen van 2
controllers te linken!
5. DC INPUT: verbindt de meegeleverde AC/DC adapter met deze aansluiting. Indien
U om bepaalde redenen een andere adapter moet aansluiten, gebruik dan steeds
een 9 ~ 12Vdc adapter van minimum 300mA met + pool in het center.
6. POWER SWITCH: wordt gebruikt om het toestel aan en uit te zetten
7. AUDIO input: kan audio signalen ontvangen van om het even welke line of record
uitgang van andere audio toestellen. Als deze ingang niet gebruikt wordt, wordt
automatisch de ingebouwde microfoon van SM-1612 ingeschakeld.

NEDERLANDS GEBRUIKSAANWIJZING
JB SYSTEMS® 33/82 SCANMASTER 1612 (SM-1612)
SET-UP
1. FIXTURE SET-UP: de SM-1612 heeft 12 “fixtures” toetsen. Elke fixture toets
beschikt over 16 DMX adressen. (8 schuifregelaars op “page A” en 8
schuifregelaars op “page B”) In de meeste gevallen zal de SM-1612 gebruikt
worden met toestellen van 8 of minder DMX adressen. Dit betekent dat in de
meeste gevallen enkel “page A” gebruikt wordt.
De volgende tabel helpt U om de DMX startadressen van uw toestellen in te
stellen:
Fixture # Digitale Setting Dip Switch Setting
1 1 1 “On”
2 17 1 en 5 “On”
3 33 1 en 6 “On”
4 49 1,5 en 6 “On”
5 65 1 en 7 “On”
6 81 1,5 en 7 “On”
7 97 1,6 en 7 “On”
8 113 1,5,6 en 7 “On”
9 129 1 en 8 “On”
10 145 1,5 en 8 “On”
11 161 1,6 en 8 “On”
12 177 1,5,6 en 8 “On”
2. JOYSTICK SET-UP: voor elk toestel kunnen 2 adressen aan de PAN en TILT van
de joystick toegewezen worden:
•Houdt de “Program” toets ingedrukt tot de LED knippert.
•Druk 2 x tegelijkertijd op de “Mode” en “Fine” toetsen. De “assign” LED moet
branden. (als de “reverse” LED aan is, druk dan beide toetsen nogmaals
tegelijkertijd in)
•Gebruik de bank UP en DOWN toetsen om de PAN TILT functie te kiezen.
•Indien het toestel meer dan 8 DMX adressen heeft kan men de “Tap/Display”
toets gebruiken om de 16 of 8-kanaals instelling te kiezen.
•Druk op de toets die overeenkomt met het toestel dat u wilt instellen.
•Houdt de mode toets ingedrukt en druk op de scène toets die overeenstemt met
de schuifregelaar die de gewenste beweging controleert. (Voorbeeld: Als de pan
beweging gecontroleerd wordt met schuifregelaar nummer 4, houdt dan de
“Mode” toets ingedrukt terwijl U op scène toets 4 drukt).
•Wanneer PAN en TILT toegewezen zijn, druk dan terug tegelijkertijd op de
“Mode” en “Fine” toetsen om de Assign functie te verlaten.
Opmerking: men kan steeds de kanaalschuifregelaars gebruiken in plaats van de
joystick om de bewegingen van een toestel te controleren.
3. JOYSTICK SET-UP VAN EEN TOESTEL WISSEN:
•Schakel de “program mode” in. (Houdt de “Program” toets ingedrukt tot de LED knippert)
•Druk 2 x tegelijkertijd op de “Mode” en “Fine” toetsen. De “assign” LED moet
branden. (als de “reverse” LED aan is, druk dan beide toetsen nogmaals
tegelijkertijd in)
•Indien het toestel meer dan 8 DMX adressen heeft kan men de “Tap/Display”
toets gebruiken om de 16 of 8-kanaals werking te kiezen.
NEDERLANDS GEBRUIKSAANWIJZING
JB SYSTEMS® 34/82 SCANMASTER 1612 (SM-1612)
•Druk op de toets die overeenkomt met het toestel dat u wilt instellen.
•Houd de mode toets ingedrukt en druk op de “Auto/Del” toets.
•Houd de program toets gedurende enkele seconden ingedrukt om de
programmeerfunctie te stoppen
4. FADE TIME SET-UP: Gedurende de auto en music chase playback kan men de
overgangstijd tussen 2 stappen instellen. Men kan deze overgangstijd instellen
voor de PAN/TILT kanalen of voor alle kanalen. Als men enkel de X/Y kiest dan
heeft men het voordeel dat de gobo’s en de kleuren niet traag overschakelen
gedurende de trage PAN/TILT bewegingen.
•Druk tegelijkertijd op de mode en Tap/Display toetsen terwijl het toestel uit staat
(power off)
•Zet het toestel aan en druk op de Tap/Display toets om te kiezen voor ofwel
ONLY X/Y (overgangstijd enkel voor PAN/TILT) en ALL CH (overgangstijd
beïnvloed alle kanalen)
Weergave op het LCD scherm:
ALL ONLY
FD FD
CH X/Y
OR
TIME TIME
•Houd de Mode toets ingedrukt, druk vervolgens op de Tap/Display om de
instellingen in het geheugen op te slaan. Alle LED’s zullen 3 keer knipperen. Als
men de instellingen niet wil opslaan, druk dan op de black-out toets om deze
functie te verlaten.
Belangrijke opmerking: voer eerst de toewijzing van de PAN/TILT van de joystick
(zie voorgaande) uit voor U de overgangstijden instelt. Als U de toewijzing van de
PAN/TILT later uitvoert moet U achteraf de overgangsinstellingen opnieuw
uitvoeren!
5. OMKEREN VAN DE JOYSTICK BEWEGING / DMX KANAAL: De PAN en/of de
TILT bewegingen, of zelfs andere kanalen kunnen omgekeerd worden (DMX
waarde is 255 als de schuifregelaar in zijn gesloten positie is, de DMX waarde is
000 als de schuifregelaar volledig naar boven = open is)
•Schakel de “program mode” in. (Houdt de “Program” toets ingedrukt tot de LED knippert)
•Druk 1 x tegelijkertijd op de “Mode” en “Fine” toetsen. De reverse LED moet aan
zijn. (als de assign LED aan is, druk dan beide toetsen nogmaals tegelijkertijd in)
•Indien het toestel meer dan 8 DMX adressen heeft kan men de “Tap/Display”
toets gebruiken om de 16 of 8-kanaalssturing te kiezen.
•Druk op de toets die overeenkomt met het toestel dat u wilt instellen.
•Terwijl u de mode toets ingedrukt houdt, drukt u op de scènetoets van het kanaal
dat u wilt omkeren. (Bijvoorbeeld: U wilt de TILT beweging van een toestel
omkeren. Druk tegelijkertijd op de “mode” en “fine” toetsen (in program mode) tot
de reverse led aan is. Kies het toestel dat u wilt instellen. Houd de “mode” toets
ingedrukt en druk op de scènetoets van de schuifregelaar die overeenstemt met
het kanaal van de TILT bewegingen. Druk tegelijkertijd op de mode en fine
toetsen tot de assign en reverse leds uit zijn.
•Druk gedurende enkele seconden op de program toets om de
programmeerfunctie uit te schakelen.
Opgelet: men kan maximum 48 kanalen omkeren.

NEDERLANDS GEBRUIKSAANWIJZING
JB SYSTEMS® 35/82 SCANMASTER 1612 (SM-1612)
6. OMKEERFUNCTIE VAN DE JOYSTICK BEWEGING / DMX KANAAL
VERWIJDEREN:
•Schakel de “program mode” in. (Houdt de “Program” toets ingedrukt tot de LED knippert)
•Druk 1 x tegelijkertijd op de “Mode” en “Fine” toetsen. De reverse LED moet aan
zijn. (als de assign LED aan is, druk dan beide toetsen nogmaals tegelijkertijd in)
•Indien het toestel meer dan 8 DMX adressen heeft kan men de “Tap/Display”
toets gebruiken om de 16 of 8-kanaals modus te kiezen.
•Druk op de toets die overeenkomt met het toestel dat u wilt instellen.
•Terwijl u de mode toets ingedrukt houdt, drukt u op de “Auto/Del” toets.
•Druk gedurende enkele seconden op de program toets om de
programmeerfunctie uit te schakelen
Opgelet: alle omgekeerde adressen van dat toestel zullen terug naar hun gewone
werking teruggebracht worden.
7. MIDI KANALEN INSTELLEN:
•Houd de MIDI/Rec toets gedurende 3 seconden ingedrukt: op de display leest
men “MIDI xx” af (xx is het midi kanaal: tussen 01 en 16)
•Gebruik de Up/Down toetsen om het MIDI kanaal (van 1 tot 16) te kiezen
waaronder de SM-1612 moet geactiveerd worden.
•Houd opnieuw de MIDI/Rec toets gedurende 3 seconden ingedrukt: de MIDI
werking is nu ingeschakeld.
MIDI CHANNEL SETTING:
BANK (Octaaf) NOOT NUMMER FUNCTIE
BANK 1 00 TOT 07 1 tot 8 van Bank 1 aan of uit
BANK 2 08 TOT 15 1 tot 8 van Bank 2 aan of uit
BANK 3 16 TOT 23 1 tot 8 van Bank 3 aan of uit
BANK 4 24 TOT 31 1 tot 8 van Bank 4 aan of uit
BANK 5 32 TOT 39 1 tot 8 van Bank 5 aan of uit
BANK 6 40 TOT 47 1 tot 8 van Bank 6 aan of uit
BANK 7 48 TOT 55 1 tot 8 van Bank 7 aan of uit
BANK 8 56 TOT 63 1 tot 8 van Bank 8 aan of uit
BANK 9 64 TOT 71 1 tot 8 van Bank 9 aan of uit
BANK 10 72 TOT 79 1 tot 8 van Bank10 aan of uit
BANK 11 80 TOT 87 1 tot 8 van Bank11 aan of uit
BANK 12 88 TOT 95 1 tot 8 van Bank12 aan of uit
BANK 13 96 TOT 103 1 tot 8 van Bank13 aan of uit
BANK 14 104 TOT 111 1 tot 8 van Bank14 aan of uit
BANK 15 112 TOT 119 1 tot 8 van Bank14 aan of uit
CHASES 120 TOT 125 Chases1 tot 6
BLACK-OUT 126 BLACK-OUT
De SCANMASTER 1612 ontvangt enkel MIDI noten; het is dus mogelijk dat het
klavier moeten getransponeerd worden om de juiste noten te vinden
NEDERLANDS GEBRUIKSAANWIJZING
JB SYSTEMS® 36/82 SCANMASTER 1612 (SM-1612)
SCENES
1. EEN SCENE PROGRAMMEREN:
a. Schakel de “program mode” in. (Houdt de “Program” toets ingedrukt tot de LED
knippert)
b. Controleer of de LED van de black-out toets niet aan is, druk anders op deze
toets om de black-out functie uit te schakelen.
c. Controleer of de speed en de fade time schuifregelaars op nul staan.
d. Druk op de “fixture” toets die overeenkomt met het toestel dat u wilt instellen. U
kunt verschillende toestellen tegelijkertijd programmeren door op hun
respectievelijke “fixture” toetsen te drukken.
e. Beweeg de schuifregelaars en joystick tot u de gewenste positie bekomt. (In
enkele uitzonderlijke gevallen is het nodig om pagina B te selecteren om de
kanalen 9 tot 16 in te stellen)
f. Druk op de Up/Down toetsen om de bank te kiezen waarin u deze scène wilt
opslagen. U kunt in het totaal 30 banken kiezen; In elke bank kunnen tot 8
scènes opgeslagen worden.
g. Eens de gewenste posities van alle toestellen ingesteld zijn drukt u op de
MIDI/Rec toets.
h. Druk op de scène toets waarin u de scène wilt opslagen. Alle LEDs zullen 3 x
flitsen om de handeling te bevestigen. Het LCD scherm geeft de bank en de
scène weer.
i. Herhaal de stappen dÆh tot alle scènes geprogrammeerd zijn.
j. Als u het programmeren niet wenst verder te zetten kunt u de programmeer
functie verlaten door de program toets enkele seconden ingedrukt te houden.
De LED zal uitgaan.
2. EEN SCENE BEWERKEN:
a. Schakel de “program mode” in. (Houdt de “Program” toets ingedrukt tot de LED
knippert)
b. Controleer of de LED van de black-out toets niet aan is, druk anders op deze
toets om de black-out functie uit te schakelen.
c. Druk op de Bank Up/Down toetsen om de bank te kiezen die de scène bevat
die u wilt bewerken.
d. Selecteer de scène die u wilt bewerken door op de overeenstemmende
scènetoets te drukken.
e. Selecteer de toestellen en gebruik de schuifregelaars en/of joystick om de
gewenste wijzigingen aan de scène uit te voeren.
f. Eenmaal alle wijzigingen uitgevoerd zijn drukt u op de MIDI/Rec toets.
g. Druk op de scène toets die overeenstemt met de scène die u aan het bewerken
bent. Dit zal de bestaande scène vervangen.
h. Druk gedurende enkele seconden op de program toets om de
programmeerfunctie uit te schakelen.
Opgelet: wees er zeker van dat u dezelfde scène toets indrukt als in stap d en g,
anders wist u misschien een andere bestaande scène.
3. EEN SCENE KOPIËREN:
a. Schakel de “program mode” in. (Houdt de “Program” toets ingedrukt tot de LED
knippert)
Table of contents
Languages:
Other JB Systems Network Router manuals

JB Systems
JB Systems CA-32 Colormix User manual

JB Systems
JB Systems Scene Master User manual

JB Systems
JB Systems LM 140 User manual

JB Systems
JB Systems SCANMASTER SM-1612 User manual

JB Systems
JB Systems Strobe Master BF-04A User manual

JB Systems
JB Systems RF-DMX Converter User manual

JB Systems
JB Systems CMX 24 User manual

JB Systems
JB Systems TUBELED User manual

JB Systems
JB Systems CMX 24 User manual