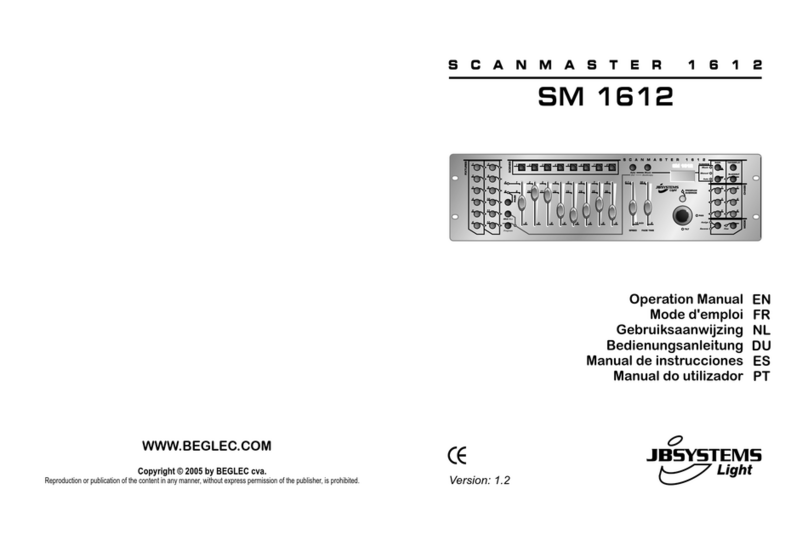
JB Systems SCANMASTER SM-1612 User manual


ENGLISH OPERATION MANUAL
JB SYSTEMS® 1/89 SM-1612 SCANMASTER
OPERATION MANUAL
Thank you for buying this JB Systems product. To take full advantage of all
possibilities, please read these operating instructions very carefully.
FEATURES
192 DMX channels
12 Fixtures of 16 channels each (best used with fixtures having up to 8 channels)
30 Banks of 8 programmable scenes (total = 240 scenes)
6 Programmable chases of 240 scenes
8 Sliders for manual control of channels
Assignable joystick for ease of use
File Dump allows data to be sent or received between two units
Auto mode program controlled by speed and fade time sliders
Fade time/Assign fade time
Reversible DMX channels allows fixture to react in opposition to others in a chase
8 channel or 16 channel mode
Fine adjustment for joystick pan and tilt
Blackout master button
Manual Override button allows you to grab any fixture on the fly
Built in microphone for music triggering
MIDI control over banks, chases and blackout
DMX Polarity selector
Power failure memory
BEFORE USE
Check the contents:
Check that the carton contains the following items:
SM-1612 SCANMASTER
AC/DC adapter
Operating instructions
Some important instructions:
To prevent fire or shock hazard, do not expose this appliance to rain or moisture.
In order to prevent electric shock, do not open the cover. If a problem occurs, contact
your dealer.
Don’t place metal objects or spill liquid inside the unit. Electric shock or malfunction
may result.
Prevent use in dusty environments, clean the unit regularly.

ENGLISH OPERATION MANUAL
JB SYSTEMS® 2/89 SM-1612 SCANMASTER
Safety instructions:
To prevent fire or shock hazard, do not expose this appliance to rain or moisture.
To avoid condensation to be formed inside, allow the unit to adapt to the surrounding
temperatures when bringing it into a warm room after transport. Condense
sometimes prevents the unit from working at full performance or may even cause
damages.
This unit is for indoor use only.
Don’t place metal objects or spill liquid inside the unit. No objects filled with liquids,
such as vases, shall be placed on this appliance. Electric shock or malfunction may
result. If a foreign object enters the unit, immediately disconnect the mains power.
No naked flame sources, such as lighted candles, should be placed on the
appliance.
Don’t cover any ventilation openings as this may result in overheating.
Prevent use in dusty environments and clean the unit regularly.
Keep the unit away from children.
Inexperienced persons should not operate this device.
Maximum save ambient temperature is 40°C. Don’t use this unit at higher ambient
temperatures.
Always unplug the unit when it is not used for a longer time or before you start
servicing.
The electrical installation should be carried out by qualified personal only, according
to the regulations for electrical and mechanical safety in your country.
Check that the available voltage is not higher than the one stated on the rear panel
of the unit.
The socket inlet shall remain operable for disconnection from the mains.
The power cord should always be in perfect condition: switch the unit immediately off
when the power cord is squashed or damaged. It must be replaced by the
manufacturer, its service agent or similarly qualified persons in order to avoid a
hazard
CAUTION: To reduce the risk of electric
shock, do not remove the top cover. No user-
serviceable parts inside. Refer servicing to
qualified service personnel only.
The lightning flash with arrowhead symbol within the equilateral triangle is
intended to alert the use or the presence of un-insulated “dangerous voltage”
within the product’s enclosure that may be of sufficient magnitude to
constitute a risk of electric shock.
The exclamation point within the equilateral triangle is intended to alert the
user to the presence of important operation and maintenance (servicing)
instructions in the literature accompanying this appliance.
This symbol means: indoor use only
This symbol means: Read instructions
This symbol means: Lamp Control Gear
The device is suitable for mounting on standard flammable surfaces.
Standard flammable surfaces include building materials such as wood and
wood-based materials more than 2mm thick.

ENGLISH OPERATION MANUAL
JB SYSTEMS® 3/89 SM-1612 SCANMASTER
Never let the power-cord come into contact with other cables!
In order to avoid a hazard, the unit shall only be used with the AC-adaptor delivered
with it. If the AC-adaptor is damaged, a same model adaptor shall be used only.
In order to prevent electric shock, do not open the cover. Apart from the mains fuse
there are no user serviceable parts inside.
Never repair a fuse or bypass the fuse holder. Always replace a damaged fuse with
a fuse of the same type and electrical specifications!
In the event of serious operating problems, stop using the appliance and contact
your dealer immediately.
Please use the original packing when the device is to be transported.
Due to safety reasons it is prohibited to make unauthorized modifications to the unit.
Some words explained:
SCENE: A scene is a set of different fader values that describes a certain condition
at a given moment.
Example: You have set the faders on the SM-1612 to put a fixture in a certain
direction, with a certain gobo and a certain color. The combination of these different
fader values is called “SCENE”
BANK: On the SM-1612 there are 8 scene buttons. Under each scene button a
scene can be stored. To have a total of 240 scene memories you need to put these
scenes in banks. That is why you have 30 banks with each 8 scenes: 30 x 8 = 240
scenes.
Example: BANK1 (scene1 ; scene2 ; scene3 ; … scene8)
BANK2 (scene1 ; scene2 ; scene3 ; … scene8)
BANK3 (scene1 ; scene2 ; scene3 ; … scene8)
…
BANK30 (scene1 ; scene2 ; scene3 ; … scene8)
CHASE: On the SM-1612 there are 6 programmable chases. A chase is a
succession of scenes. This succession of scenes can be programmed by the user in
any order. One chase contains a maximum of 240 scenes.
SPEED: time between 2 scenes in a chase running in automatic mode.
FADE TIME: This is the amount of time it takes for a fixture (or fixtures) to move from
one place to another.
PAN/TILT: PAN means moving horizontally or moving on the X-axis.
TILT means moving vertically or moving on the Y-axis.

ENGLISH OPERATION MANUAL
JB SYSTEMS® 4/89 SM-1612 SCANMASTER
FUNCTIONS (FRONT)
1. FIXTURE BUTTONS: Used to select one or more fixtures.
2. SCENE BUTTONS: Used to load or store a certain scene.
3. FADERS: Used to control the values of the different channels.
4. PAGE SELECT BUTTON: Every fixture can have up to 16channels. These 16
channels are divided over 2 pages with each 8 channels (faders):
PAGE A: channels 18
PAGE B: channels 916
5. OVERRIDE BUTTON: When a chase is running, you can select 1 or more fixtures
and control them independently from the chase running at that moment.
6. SPEED SLIDER: Used to select the chase speed within a range of 0.1seconds to
10minutes.
7. FADE TIME SLIDER: Used to adjust the fade time within a range of 0 to 30sec.
8. LCD DISPLAY: Shows the current activity or programming state. The LCD Display
contains 2 lines of 8 characters each. Below is a list of abbreviations used:
LCD DISPLAY FULL MESSAGE
SN1 scene1 is active
BK1 bank1 is active
CHASE1 chase1 is active
STEP 009 step 9 of a chase
DATA 184 DMX-value the last fader used = 184 (0
255)
SP:1m34s Speed is set to 1minute and 34 seconds.
FT:3.31s Fade time is set to 3,31seconds
ASS04 05 Joystick is assigned to channels 4 & 5 (PAN=4 * TILT=5)
RES10 13 DMX channels 10 & 13 are reversed
9. JOYSTICK PAN: Used to control the panning (horizontal movements) of the
selected fixture(s)
10.JOYSTICK TILT: Used to control the tilt (up/down movements) of the selected
fixture(s)
11.PROGRAM BUTTON: Used to enter or leave the program mode.
12.MIDI/RECORD BUTTON: Used to record actions in memory or to set a MIDI
channel.
13.AUTO/DELETE BUTTON:
Running mode: Used to switch between manual and automatic chase mode.
Program mode: Used to delete scenes or chases.

ENGLISH OPERATION MANUAL
JB SYSTEMS® 5/89 SM-1612 SCANMASTER
14.MUSIC/BANK COPY BUTTON:
Running mode: Used to switch between manual and music chase mode.
Program mode: Used to copy banks.
15.BANK UP/DOWN BUTTON: Used to select one of the 30 banks or to select one of
the steps in a chase.
16.TAP/DISPLAY BUTTON: Used to select different display modes.
Used to change the readout of the channel DMX-values: you can change between
real DMX-values (0 255) or values in percentage (0 100%)
Also used as TAP-function in auto chase mode to set the chase speed: tap the
button twice with a certain time interval. (alternative to the speed fader)
17.BLACKOUT BUTTON: Used to stop all DMX output.
18.CHASE BUTTON: Used to activate one or more chases.
19.FINE BUTTON: Used to control the PAN/TILT functions of a fixture with the
smallest increment. This gives you the possibility to position the fixtures with high
precision. (sometimes using the channel faders can give you even better results)
20.MODE: Pushing Mode and Fine buttons together activates joystick assign and
channel reverse modes.
FUNCTIONS (rear)
1. MIDI INPUT: Can be used to receive MIDI data.
2. DMX POLARITY SWITCH: A DMX-signal normally has the following connections:
1=ground * 2=Data- * 3=Data+
In some cases it happens that a cable is inversed, as a result of this the DMX-
connection doesn’t work. This can be solved by using this switch. If your DMX
connection doesn’t work and all your DMX-receivers are properly addressed, you
can check this switch. In normal conditions always put this switch in the left
position.
3. DMX OUTPUT: Sends DMX-signals to the connected fixtures
4. FILE DUMP INPUT: Used to connect to a second SM-1612 and copy its chases
and scenes. Don’t use this connector to daisy chain the DMX-signal of two
controllers!
5. DC INPUT: connect the supplied AC/DC adapter to this input. If you should use
another adapter, please make sure that it has 9 ~ 12Vdc and minimum 300mA with
+ in the center.
6. POWER SWITCH: Used to switch the unit ON/OFF

ENGLISH OPERATION MANUAL
JB SYSTEMS® 6/89 SM-1612 SCANMASTER
7. AUDIO input: receives audio from any line or record output on audio equipment. If
this input is not used, the internal microphone of SM-1612 takes over.
SET UP
1. FIXTURE SETUP: SM-1612 has 12 “fixtures buttons”. Each fixture button
represents 16 DMX-addresses. (8faders on page A and 8faders on page B) In
most cases SM-1612 will be used with fixture having 8 or less DMX addresses.
This means that in most cases only page A will be used.
The following chart helps you setting up the DMX-start address on your fixtures:
Fixture #
Digital Setting
Dip Switch Setting
1
1
1 “On”
2
17
1 and 5 “On”
3
33
1 and 6 “On”
4
49
1,5 and 6 “On”
5
65
1 and 7 “On”
6
81
1,5 and 7 “On”
7
97
1,6 and 7 “On”
8
113
1,5,6 and 7 “On”
9
129
1 and 8 “On”
10
145
1,5 and 8 “On”
11
161
1,6 and 8 “On”
12
177
1,5,6 and 8 “On”
2. JOYSTICK SETUP: For each fixture any 2 addresses can be assigned to the PAN
and TILT of the joystick:
Press and hold the “Program” button until its LED blinks.
Press 2 times the “Mode” and “Fine” buttons at the same time. The assign LED
should light. (if reverse LED is lit, press both buttons a second time together)
Use the bank UP and DOWN keys to select the axis you wish to assign (PAN or
TILT).
If your fixture has more than 8 DMX addresses, you can use the “Tap/Display”
button to select 16 or 8 channel mode.
Press the button corresponding to the fixture you wish to edit.
While holding the mode button press the scene number corresponding to the
slider which controls the movement. (Example: If pan is controlled by slider
number 4, press and hold the “Mode” button while pressing scene button 4).
When both PAN and TILT are assigned, press the “Mode” and “Fine” buttons at
the same time again to exit Assign mode.
Note: you can still use the channel faders instead of the joystick to control the
movements of the fixture.
1. DELETE JOYSTICK SETUP FOR A FIXTURE:
Enable Programming Mode. (Press and hold the “Program” button until its LED blinks)
Press 2 times the “Mode” and “Fine” buttons at the same time. The assign LED
should light. (if reverse LED is lit, press both buttons a second time together)
If your fixture has more than 8 DMX addresses, you can use the “Tap/Display”
button to select 16 or 8 channel mode.
Press the button corresponding to the fixture you wish to edit.

ENGLISH OPERATION MANUAL
JB SYSTEMS® 7/89 SM-1612 SCANMASTER
While holding the mode button, press the “Auto/Del” button.
Press the program button for some seconds to stop program mode
4. FADE TIME SETUP: During auto and music chase playback you can introduce a
fade time between the steps of the chase. You can choose to affect only the
PAN/TILT channels or ALL channels. If you select X/Y channels you won’t have
the inconvenience that gobo’s, colors also change slowly while the slow PAN/TILT
movements take place.
With the power off, press the mode and Tap/Display buttons at the same time.
Turn the unit on and press the Tap/Display button to change between ONLY X/Y
(fade time only for PAN/TILT) and ALL CH (fade time affects all channels)
The LCD reads:
ALL ONLY
FD FD
CH X/Y
OR
TIME TIME
First press the Mode button and hold it, now press the Tap/Display button at the
same time to store your setting into memory. All LEDs will flash 3times. If you do
not wish to save your setting, press the blackout key to exit this operation.
Important note: first assign the PAN/TILT of the joystick (see earlier) before you
set up the fade times. If you change the fixture PAN/TILT assignments later, you
have to restart the fade time setup!
5. REVERSE JOYSTICK MOVEMENT/DMX CHANNEL: The PAN and/or TILT
movements, or even certain channels can be reversed. (DMX value is 255 when
the fader is down and 000 when the fader is in upper position)
Enable Programming Mode. (Press and hold the “Program” button until its LED blinks)
Press 1 time the “Mode” and “Fine” buttons at the same time. The reverse LED
should light. (if assign LED is lit, press both buttons a second time together)
If your fixture has more than 8 DMX addresses, you can use the “Tap/Display”
button to select 16 or 8 channel mode.
Press the button corresponding to the fixture you wish to edit.
While holding the mode button, press the corresponding scene button the
channel you wish to reverse. (Example: You want to reverse the TILT on a
fixture. In program mode press the “mode” and “fine” buttons together until the
reverse led is lit. Choose the fixture you want to modify. Hold the “mode”button
and press the “scene”button of the slider which corresponds with the channel for
TILT movements. Press the mode and fine buttons together until both the assign
and reverse leds are turned off. Press the program button for some seconds to
stop program mode).
Note: you can reverse a maximum of 48 channels.
6. DELETE REVERSE FUNCTION ON JOYSTICK MOVEMENT/DMX CHANNEL:
Enable Programming Mode. (Press and hold the “Program” button until its LED blinks)
Press 1 time the “Mode” and “Fine” buttons at the same time. The reverse LED
should light. (if assign LED is lit, press both buttons a second time together)
If your fixture has more than 8 DMX addresses, you can use the “Tap/Display”
button to select 16 or 8 channel mode.
Press the button corresponding to the fixture you wish to edit.
While holding the mode button, press the “Auto/Del” button.
Press the program button for some seconds to stop program mode

ENGLISH OPERATION MANUAL
JB SYSTEMS® 8/89 SM-1612 SCANMASTER
Note: all inversed addresses for that fixture will be reset to normal.
7. MIDI CHANNEL SETTING:
Press and hold down the MIDI/Rec button for three seconds: the display shows “
“MIDI xx” (xx is the midi channel: between 01 and 16)
Use the Up/Down buttons to select the MIDI channel 1 to 16 you would like the
SM-1612 to be activated from.
Press and hold down the MIDI/Rec button again for three seconds: the MIDI
operation is now on.
MIDI CHANNEL SETTING:
BANK (Octave) NOTE NUMBER FUNCTION
BANK 1 00 TO 07 1 to 8 of Bank 1 on or off
BANK 2 08 TO 15 1 to 8 of Bank 2 on or off
BANK 3 16 TO 23 1 to 8 of Bank 3 on or off
BANK 4 24 TO 31 1 to 8 of Bank 4 on or off
BANK 5 32 TO 39 1 to 8 of Bank 5 on or off
BANK 6 40 TO 47 1 to 8 of Bank 6 on or off
BANK 7 48 TO 55 1 to 8 of Bank 7 on or off
BANK 8 56 TO 63 1 to 8 of Bank 8 on or off
BANK 9 64 TO 71 1 to 8 of Bank 9 on or off
BANK 10 72 TO 79 1 to 8 of Bank10 on or off
BANK 11 80 TO 87 1 to 8 of Bank11 on or off
BANK 12 88 TO 95 1 to 8 of Bank12 on or off
BANK 13 96 TO 103 1 to 8 of Bank13 on or off
BANK 14 104 TO 111 1 to 8 of Bank14 on or off
BANK 15 112 TO 119 1 to 8 of Bank14 on or off
CHASES 120 TO 125 1 to 6 Chases
BLACK OUT 126 BLACKOUT
The SM-1612 SCANMASTER only receives MIDI notes and you may have to
transpose your keyboard to find the proper notes
SCENES
1. PROGRAMMING A SCENE:
a. Enter program mode (Press and hold the “Program” button until its LED blinks)
b. Check the blackout button and verify that the LED is not lit, if it is, press it once
to exit blackout mode.
c. Verify that the speed and fade time sliders are positioned at zero.
d. Press the fixture button corresponding to the unit you wish to control. You may
control several fixtures together by pressing the button corresponding to the
fixture(s) you wish to program.
e. Move the faders and joystick to the desired position. (In some rare cases, if
necessary, you may select page B to control channels 9-16.)
f. Press the bank Up/Down button to choose the bank you want to store this
scene into. There are a total of 30 banks you can select, you may store up to 8
scenes in each bank.
g. Once all fixtures are programmed into the desired position for the scene, press
the MIDI/Rec button.

ENGLISH OPERATION MANUAL
JB SYSTEMS® 9/89 SM-1612 SCANMASTER
h. Press the scene button you wish to store your scene into. All LEDs will flash
three times to confirm the operation. The LCD readout will show the bank and
scene.
i. Repeat steps dh until all scenes have been programmed.
j. If you don’t intend to continue programming at this time, press and hold the
program button for some seconds to exit program mode. The LED will turn off.
2. EDITING A SCENE:
a. Enter program mode (Press and hold the “Program” button until its LED blinks)
b. Check the blackout button and verify that the LED is not lit, if it is, press it once
to exit blackout mode.
c. Press the Bank Up/Down button to select the bank containing the scene you
wish to edit.
d. Select the scene you wish to edit by pressing it’s scene button.
e. Select the fixtures and use the faders and/or joystick to make the desired
adjustments to the scene.
f. Once you have completed the changes, press the MIDI/Rec button.
g. Press the scene button that corresponds to the scene you’re editing. This will
override the existing scene.
h. Press and hold the program button for some seconds to exit program mode.
The LED will turn off.
Note: Be sure to select the same scene in steps d and g, otherwise you may
accidentally record over an existing scene.
3. COPY A SCENE:
a. Enter program mode (Press and hold the “Program” button until its LED blinks)
b. If you want to check the output, verify that the blackout LED is not lit, if it is,
press it once to exit blackout mode.
c. Press the Bank Up/Down buttons to select the bank containing the scene you
wish to copy.
d. Press the scene button of the scene you wish to copy.
e. Press the Bank Up/Down buttons to select the bank you wish to copy the scene
to.
f. Press the MIDI/Rec button.
g. Press the scene button you wish to copy the scene to. If you want to copy other
scenes, you can repeat steps c to g.
h. Press and hold the program button for some seconds to exit program mode.
The LED will turn off.
4. DELETE A SCENE:
a. Enter program mode (Press and hold the “Program” button until its LED blinks)
b. If you want to check the output, verify that the blackout LED is not lit, if it is,
press it once to exit blackout mode.
c. Press the Bank Up/Down buttons to select the bank containing the scene you
wish to delete.
d. Press and hold down the Auto/Del button. While holding the button, press the
scene button that corresponds with the scene you wish to delete. All LEDs will
blink 3 times. When the programmed scene is deleted, all DMX channel values
will be set to 0. If you want to delete other scenes, you can repeat steps c & d.

ENGLISH OPERATION MANUAL
JB SYSTEMS® 10/89 SM-1612 SCANMASTER
e. Press and hold the program button for some seconds to exit program mode.
The LED will turn off.
5. DELETE ALL SCENES:
a. Switch the unit off.
b. Switch the unit back on while you press and hold down the Program and Bank
Down buttons at the same time. All scenes should be cleared.
Note: Be aware that all your scenes will be lost, to be used with care!
6. COPY A BANK OF SCENES:
a. Enter program mode (Press and hold the “Program” button until its LED blinks)
b. If you want to check the output, verify that the blackout LED is not lit, if it is,
press it once to exit blackout mode.
c. Press the Bank Up/Down buttons to select the bank containing the scenes you
wish to copy.
d. Press the MIDI/Rec button.
e. Press the Bank Up/Down buttons to select the bank you wish to copy to.
f. Press the Music/Bank Copy button, all LEDs will blink three times indicating the
function has been completed.
g. Press and hold the program button for some seconds to exit program mode.
The LED will turn off.
CHASES
A chase is a succession of scenes in a certain order so you must have already
programmed these scenes in order to program a chase. Before programming chases
for the first time it is recommended you delete all chases in the controller.
See Delete All Chases for instructions on how to do so.
1. DELETE ALL CHASES:
a. Switch the unit off.
b. Switch the unit back on while you press and hold down the Auto/Del and Bank
Down buttons at the same time. All chases should be cleared.
Note: Be aware that all your chases will be lost, to be used with care!
2. PROGRAMMING A CHASE:
a. Enter program mode (Press and hold the “Program” button until its LED blinks)
b. Check the blackout button and verify that the LED is not lit, if it is, press it once
to exit blackout mode.
c. Press the button of the chase you wish to program.
d. Press the Bank Up/Down buttons to select the bank containing the scene(s)
you wish to program in your chase.
e. Press the button of the desired scene.
f. Press the MIDI/Rec button.
g. Repeat steps d to g until all desired scenes have been entered.
h. Press and hold the program button for some seconds to exit program mode.
The LED will turn off.

ENGLISH OPERATION MANUAL
JB SYSTEMS® 11/89 SM-1612 SCANMASTER
3. INSERT A CHASE STEP:
a. Enter program mode (Press and hold the “Program” button until its LED blinks)
b. Check the blackout button and verify that the LED is not lit, if it is, press it once
to exit blackout mode.
c. Press the button of the chase you wish to program.
d. Press the TAP/Display button, the LCD display will show the current chase
step.
e. Press the Bank Up/Down button and scroll to the step you wish to insert the
step after.
f. Press the MIDI/Rec button, the segment display will read the step one step
higher than before. The LCD shows the current chase, scene, and bank.
g. Press the Bank Up/Down buttons to select the bank containing the scene you
wish to insert in your chase.
h. Once you have selected the scene you wish to insert, press the MIDI/Rec
button again. All LEDs will blink three times indicating the new step has been
inserted into the chase.
i. Repeat steps e to h until all desired scenes have been inserted.
j. Press and hold the program button for some seconds to exit program mode.
The LED will turn off.
4. DELETE A CHASE STEP:
a. Enter program mode (Press and hold the “Program” button until its LED blinks)
b. Check the blackout button and verify that the LED is not lit, if it is, press it once
to exit blackout mode.
c. Press the button of the chase that contains the step you want to delete.
d. Press the Tap/Display button, the LCD shows the current step.
e. Press the Bank Up/Down buttons and scroll to the step you wish to delete.
f. Press the Auto/Del button to delete the step. All LEDs will flash three times
indicating the requested operation has been performed.
g. Eventually repeat steps e and f until all desired steps have been deleted.
h. Press and hold the program button for some seconds to exit program mode.
The LED will turn off.
5. ADDING A BANK OF SCENES TO A CHASE:
Note: The bank of scenes will be added at the end of the chase.
a. Enter program mode (Press and hold the “Program” button until its LED blinks)
b. Check the blackout button and verify that the LED is not lit, if it is, press it once
to exit blackout mode.
c. Press the button of the chase you wish to edit.
d. Use the Bank Up/Down key to select the bank of scenes you wish to add.
e. Press the Music/Bank Copy button.
f. Press the MIDI/Rec copy button, all LEDs will blink three times indicating that
the requested operation has been performed.
g. Press and hold the program button for some seconds to exit program mode.
The LED will turn off.

ENGLISH OPERATION MANUAL
JB SYSTEMS® 12/89 SM-1612 SCANMASTER
PLAYBACK OF SCENES
There are three modes in which you can playback scenes:
1. Manual Mode: You can select and show one or more scenes manually.
a. When the power is turned on, the unit starts automatically in manual mode.
b. Check if the Manual mode LED is lit.
c. Check the blackout button and verify that the LED is not lit, if it is, press it once
to exit blackout mode.
d. Use the Bank Up/down button to select the bank with the scenes you wish to
run.
e. Press the scene button corresponding to the scene you wish to display.
f. Eventually repeat steps d and e to select others scenes.
2. Auto Mode: You can run a bank of programmed scenes in sequence. You can
use the Manual override button, see further for more information.
a. Press the Auto/Del button to enter into Auto mode. The Auto LED turns on.
b. Use the bank Up/Down button to select a bank of scenes to run.
c. After selecting the bank of scenes to run, you can use the speed slider and
Fade Time slider to adjust the speed of the scene progression.
d. You can use the TAP/Display button to set the speed instead. The time between
the last two taps equals the length of time between steps. This setting will stay
in effect until the speed slider is moved.
e. Press the Auto/Display button to exit Auto mode.
3. Music Mode: You can run a bank of programmed scenes to the beat of the music.
You can use the internal microphone or add an external music signal. You can use
the Manual override button, see further for more information.
a. Press the Music/Bank copy button to activate Music mode. The Music LED
turns on.
b. Use the bank Up/Down button to select a bank of scenes you wish to run. The
scenes selected will run through sequentially to the beat of the music.
c. Press the Music/Bank Copy button again to exit music mode.
PLAYBACK OF CHASES
There are three modes in which you can playback chases:
1. Manual Mode: You can select and show a chase manually.
a. When the power is turned on, the unit starts automatically in manual mode.
b. Check if the Manual mode LED is lit.
c. Check the blackout button and verify that the LED is not lit, if it is, press it once
to exit blackout mode.
d. Select the chase you want to use. The LCD display shows the chase number.
e. Press the TAP/Display button, the LCD display now shows the STEP-numbers
of the selected chase.
f. Use the Bank Up/down buttons to manually show the different steps of the
chase.
g. Eventually select another chase and repeat steps e and f. (pressing the same
chase a second time unselects it)

ENGLISH OPERATION MANUAL
JB SYSTEMS® 13/89 SM-1612 SCANMASTER
2. Auto Mode: You can run one or more chases at an adjustable speed. If you select
more than one chase, all chases will be run one by one. The LED of the active
chase blinks. You can use the Manual override button, see further for more
information.
a. Press the Auto/Del button to enter into Auto mode. The Auto LED turns on.
b. Select one or more chases. (pressing the same chase a second time unselects
it) The LEDs of the selected chases are lit. The active chase blinks and its name
+ active scene/bank are shown on the display.
c. Use the speed slider and Fade Time slider to adjust the speed of the chases.
d. You can use the TAP/Display button to set the speed instead. The time between
the last two taps equals the length of time between steps. This setting will stay
in effect until the speed slider is moved.
e. Press the Auto/Display button to exit Auto mode.
3. Music Mode: You can run one or more chases to the beat of the music. You can
use the internal microphone or add an external music signal. If you select more
than one chase, all chases will be run one by one. The active chase blinks. You
can use the Manual override button, see further for more information.
a. Press the Music/Bank copy button to activate Music mode. The Music LED
turns on.
b. Select one or more chases. (pressing the same chase a second time unselects
it) The LEDs of the selected chases are lit. The active chase blinks and its name
+ active scene/bank are shown on the display.
c. Press the Music/Bank Copy button again to exit music mode.
Note: You can use the fade time slider to make the movement a little smoother.
Don’t add too much fade time, the music synchronization will be completely lost!
OVERRIDE FUNCTION
During playback of scenes and chases in auto and music mode, it is possible to select
one or more fixtures and manipulate their functions manually.
To do this just select the fixtures you want to lift out of the running sequence and press
the override button. Now you can manipulate all functions of the selected fixtures,
completely independent from the running sequence. At any moment you can select or
unselect additional fixtures. Once a fixture in unselected or the override function is
disabled, the fixtures continue the sequence.
FILE DUMP
It is possible a memory dump from one SM-1612 to another SM-1612. This saves you
a lot of programming work!
1. Prepare to send file dump: these actions have to be carried out on the
Scanmaster that has to send the file dump.
a. Turn the power off.
b. Press the following buttons at the same time and hold down while you turn on
the power:
fixture2 button
fixture3 button
scene1 button

ENGLISH OPERATION MANUAL
JB SYSTEMS® 14/89 SM-1612 SCANMASTER
The display shows “TRANSMIT” to indicate that the SM-1612 is ready to send.
2. Prepare to receive file dump: these actions have to be carried out on the
Scanmaster that has will receive the file dump.
a. Turn the power off.
b. Press the following buttons at the same time and hold down while you turn on
the power:
Fixture8 button
Fixture9 button
Scene2 button
The display shows “RECEIVE” to indicate that the SM-1612 is ready to receive.
3. Start sending file dump:
On the Scanmaster showing “TRANSMIT” on its display, press the scene buttons 7
and 8 at the same time.
The display shows a small progression bar. Don’t touch both Scanmasters during
this operation. At the end of the operation both units will automatically return to
normal.
Before you start using the unit that received the file dump, switch it off and on!
MAINTENANCE
Clean by wiping with a polished cloth slightly dipped with water. Avoid getting water
inside the unit. Do not use volatile liquids such as benzene or thinner which will
damage the unit.
SPECIFICATIONS
This unit is radio-interference suppressed. This product meets the requirements of the
current European and national guidelines. Conformity has been established and the
relevant statements and documents have been deposited by the manufacturer.
Power Input: DC 9 ~ 12V 300mA minimum.
AC/DC Power adapter: AC 240V, 50Hz 12Vdc / 300mA
DMX outputs: 3pin XLR; DMX, channels 001 192
Midi input: 5pin Din
Audio input: Cinch 0.1V ~ 1Vpp
Size: 48.3 x 13.4 x 8.5cm (19”/ 3U)
Weight: 2.7kg
Every information is subject to change without prior notice
You can download the latest version of this user manual on our website:
www.jb-systems.eu

FRANCAIS MODE D’EMPLOI
JB SYSTEMS® 15/89 SM-1612 SCANMASTER
MODE D’EMPLOI
Nous vous remercions d’avoir acheté ce produit JB Systems. Veuillez lire ce mode
d’emploi très attentivement afin de pouvoir exploiter toutes les possibilités de cet
appareil.
CARACTERISTIQUES
192 canaux DMX
12 appareils (fixtures) de 16 canaux peuvent être programmés (il est conseillé
d’utiliser des appareils de max. 8 canaux)
30 banques de 8 scènes programmables (total = 240 scènes)
6 chases programmables de 240 scènes
8 curseurs pour un contrôle manuel des canaux
joystick assignable pour une utilisation plus aisée
File Dump vous permet d’échanger des informations entre 2 appareils
Pendant le déroulement automatique des programmes, la vitesse d’exécution
(speed) et le temps de transition (fade time) peuvent être contrôlés par 2 curseurs
Fade time/ fade time assigné
Des canaux DMX réversibles permettent aux appareils de réagir à l’opposé en mode
chase
Mode 8 canaux ou 16 canaux
Ajustage fin des fonctions pan et tilt du joystick
Touche Black-out du master (sortie générale)
Une touche Manual Override vous permet de contrôler manuellement n’importe quel
appareil a n’importe quel moment
Micro incorporé pour un fonctionnement au rythme de la musique
Contrôle MIDI des banques, chases et black-out
Sélecteur d’inversion de polarité DMX
Mémoire en cas de panne électrique
AVANT L’UTILISATION
Vérifiez le contenu:
Vérifiez si la boite contient les articles suivants :
SM-1612 SCANMASTER
adaptateur secteur AC/DC
Mode d’emploi
Quelques instructions importantes:
Pour éviter l’incendie ou l’électrocution, n’exposez jamais cet appareil à la pluie ou à
l’humidité.
Afin de ne pas vous faire électrocuter, n’enlevez jamais le couvercle. Si vous êtes
confrontés à un problème, contactez votre dealer.

FRANCAIS MODE D’EMPLOI
JB SYSTEMS® 16/89 SM-1612 SCANMASTER
N’insérez jamais d’objets métalliques et ne renversez jamais de liquides dans
l’appareil. L’électrocution ou le mal fonctionnement de l’appareil peut en résulter.
Évitez les endroits poussiéreux, nettoyez l’appareil régulièrement.
INSTRUCTIONS DE SECURITE:
Afin d’éviter tout risque d’incendie ou de décharge électrique, ne pas exposer cet
appareil à la pluie ou l’humidité.
Pour éviter la formation de condensation à l’intérieur de l’appareil, patientez
quelques minutes pour laisser l’appareil s’adapter à la température ambiante lorsqu’il
arrive dans une pièce chauffée après le transport. La condensation empêche
l'appareil de fonctionner manière optimale, et elle peut même causer des
dommages.
Cet appareil est destiné à une utilisation à l’intérieur uniquement.
Ne pas insérer d’objet métallique ou renverser de liquide dans l’appareil. Aucun objet
contenant un liquide, tels que des vases, ne peut être placé sur cet appareil. Cela
risquerait de provoquer une décharge électrique ou un dysfonctionnement. Si un
corps étranger est introduit dans l’appareil, déconnectez immédiatement de la
source d’alimentation.
Aucune source de flamme nue, telle que des bougies allumées, ne peut être placée
sur l'appareil.
Ne pas couvrir les orifices de ventilation, un risque de surchauffe en résulterait.
Ne pas utiliser l'appareil dans un environnement poussiéreux et le nettoyer
régulièrement.
Ne pas laisser l'appareil à portée des enfants.
Les personnes non expérimentées ne doivent pas utiliser cet appareil.
La température ambiante maximale d’utilisation de l’appareil est de 45°C. Ne pas
l’utiliser au-delà de cette température.
Débranchez toujours l’appareil si vous ne l’utilisez pas de manière prolongée ou
avant d’entreprendre des réparations.
Les installations électriques ne peuvent être faites que par du personnel qualifié et
conformément aux règlements de sécurité électrique et mécanique en vigueur dans
votre pays.
CAUTION
ATTENTION: afin de réduire le risque
d’électrocution, n’enlevez jamais le couvercle
de l’appareil. Il n’y a aucune pièce à l’intérieur
de l’appareil que vous puissiez remplacer
vous-même. Confiez l’entretien uniquement à
des techniciens qualifiés.
La flèche dans un triangle met l'utilisateur en garde contre la présence de
haute tension sans isolation dans l'appareil, ce qui peut causer un risque
d'électrocution.
Un point d'exclamation dans un triangle prévient de la présence d'instructions
relatives au fonctionnement et à la maintenance se trouvant dans le manuel
fourni avec l'appareil.
Ce symbole signifie: uniquement pour usage à l'intérieur.
Ce symbole signifie : Lire le mode d’emploi.

FRANCAIS MODE D’EMPLOI
JB SYSTEMS® 17/89 SM-1612 SCANMASTER
Assurez-vous que la tension d’alimentation de la source d’alimentation de la zone
dans laquelle vous vous trouvez ne dépasse pas celle indiquée à l’arrière de
l’appareil.
La prise sera toujours accessible pour que le cordon secteur puisse être enlevé à
chaque moment.
Le cordon d’alimentation doit toujours être en condition parfaite. Mettez
immédiatement l’unité hors tension si le cordon est écrasé ou endommagé. Pour
éviter tout risque de choc électrique, le cordon doit être remplacé par le
constructeur, son agent ou un technicien qualifié.
Ne laissez jamais le cordon d’alimentation entrer en contact avec d’autres câbles !
Pour éviter tout risque de choc électrique, cet appareil doit être remplacé
uniquement avec l’adaptateur secteur inclus . Si l’adaptateur est défectueux, il
sera utilisé seulement par un modèle identique.
Utilisez toujours des câbles appropriés et certifiés lorsque vous installez l'appareil.
Pour éviter toute décharge électrique, ne pas ouvrir l’appareil. En dehors des
ampoules et du fusible principal, il n’y a pas de pièces pouvant être changées par
l’utilisateur à l’intérieur.
Ne jamais réparer ou court-circuiter un fusible. Remplacez systématiquement un
fusible endommagé par un fusible de même type et ayant les mêmes spécifications
électriques !
En cas de problèmes de fonctionnement sérieux, arrêtez toute utilisation de
l’appareil et contactez votre revendeur immédiatement.
Utilisez l’emballage d’origine si l’appareil doit être transporté.
Pour des raisons de sécurité, il est interdit d’apporter une quelconque modification à
l’unité non spécifiquement autorisée par les parties responsables.
Lexique:
SCENE: Une scène est un groupement de différentes valeurs de réglage de
curseurs, qui décrit une certaine condition a un certain moment.
Par exemple: Vous avez réglé les curseurs du SM-1612 pour positionner un appareil
dans une certaine direction, avec un certain gobo et une certaine couleur. La
combinaison de toutes ces valeurs de réglage est appelée “SCENE”
BANK: Le SM-1612 possède 8 touches de scène (scene) On peut programmer une
scène différente sous chaque touche. Pour pouvoir arriver à un total de 240 scènes
mémorisées vous devez les stocker dans des banques (BANK) C’est pour cela que
vous disposez de 30 banques de 8 scènes chacune. (30 x 8 = 240 scènes).
Exemple: BANK1 (scene1 ; scene2 ; scene3 ; … scene8)
BANK2 (scene1 ; scene2 ; scene3 ; … scene8)
BANK3 (scene1 ; scene2 ; scene3 ; … scene8)
…
BANK30 (scene1 ; scene2 ; scene3 ; … scene8)
CHASE: Le SM-1612 possède 6 « chases » programmables. Un « chase » est une
succession de scènes. Cette succession de scènes peut être programmée par
l’utilisateur dans n’importe quel ordre. Un « chase » peut contenir un maximum de
240 scènes.
SPEED: Le temps entre 2 scènes quant un « chase » se déroule automatiquement.
FADE TIME: Ceci est le temps qu’il faut à un appareil (ou plusieurs) pour bouger
d’une position à la suivante.

FRANCAIS MODE D’EMPLOI
JB SYSTEMS® 18/89 SM-1612 SCANMASTER
PAN/TILT: PAN = mouvement horizontal ou mouvement dans l’axe X.
TILT= mouvement vertical ou mouvement dans l’axe Y.
FONCTIONS (FACE AVANT)
1. Touches FIXTURES: Utilisés pour sélectionner un ou plusieurs appareils.
2. TOUCHES SCENE: Sont utilisés pour charger ou stocker des scènes.
3. CURSEURS: Sont utilisés pour contrôler les valeurs des différents canaux.
4. Touche PAGE SELECT: Chaque appareil peut avoir jusqu’à 16 canaux. Ces 16
canaux sont repartis sur 2 pages de 8 canaux chacune (curseurs):
PAGE A: canaux 18
PAGE B: canaux 916
5. Touche OVERRIDE: Quant un « chase » est activé, vous pouvez sélectionner 1
ou plusieurs appareils et les commander indépendamment du programme
« chase » qui court.
6. Curseur SPEED: Il est utilisé pour sélectionner la vitesse de déroulement du
« chase » dans une gamme allant de 0.1secondes à 10minutes.
7. Curseur FADE TIME: il est utilisé pour régler le temps de transition dans une
gamme allant de 0 à 30sec.
8. LCD DISPLAY: Affiche l’activité en cours d’exécution. L’écran LCD contient 2
lignes de 8 caractères chacune. Ci-dessous vous trouverez une liste des
abréviations affichées:
LCD DISPLAY MESSAGE COMPLET
SN1 scene1 est activée
BK1 bank1 est activée
CHASE1 chase1 est activé
STEP 009 pas N° 9 d’un chase
DATA 184 valeur DMX du dernier curseur utilisé = 184 (0
255)
SP:1m34s Speed (vitesse)est réglé à 1minute, 34 seconds.
FT:3.31s Fade time est réglé à 3,31secondes
ASS04 05 Le Joystick est assigné aux canaux 4 & 5 (PAN=4 * TILT=5)
RES10 13 Les canaux DMX 10 & 13 sont inversés
9. JOYSTICK PAN: Il est utilisé pour contrôler le mouvement horizontal de/des
l’appareil(s) sélectionné(s)
10.JOYSTICK TILT: Il est utilisé pour contrôler le mouvement « tilt » (haut/bas)
de/des l’appareil(s) sélectionné(s)
Table of contents
Languages:
Other JB Systems Network Router manuals

JB Systems
JB Systems CMX 24 User manual

JB Systems
JB Systems ScanMaster 1612 User manual

JB Systems
JB Systems RF-DMX Converter User manual

JB Systems
JB Systems CA-32 Colormix User manual

JB Systems
JB Systems Scene Master User manual

JB Systems
JB Systems TUBELED User manual

JB Systems
JB Systems LM 140 User manual

JB Systems
JB Systems Strobe Master BF-04A User manual

JB Systems
JB Systems CMX 24 User manual