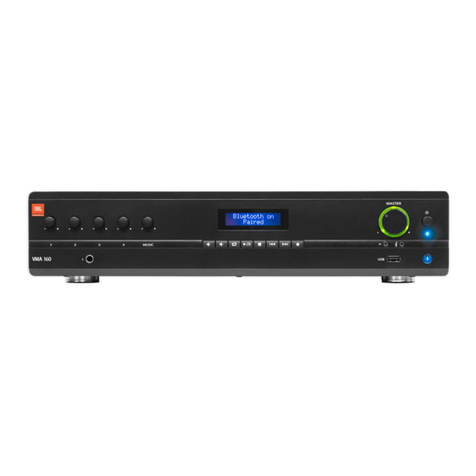
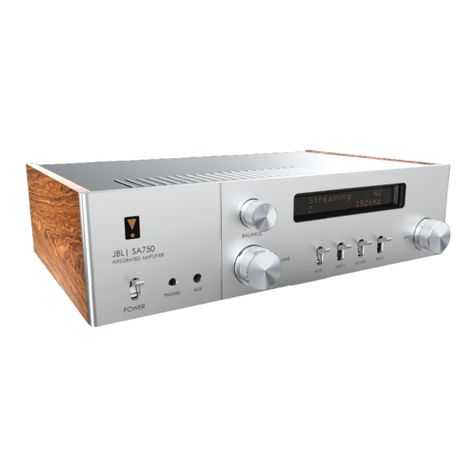
JBL SA550 Classic User manual

©
JBL SA550 Classic Owner's Manual EN
–
Harman
International In ustries, Incorporate
.
Features, specifications, an appearance subject to change without notice.
SA550 Classic - Integrated Amplifier with
Bluetooth
Owner’s Manual

Pg 2 JBL SA550 Classic Owner's Manual EN
IMPORTANT SAFETY
INSTRUCTIONS
1. Read these instructions.
2. Keep these instructions.
3. Heed all warnings.
4. Follow all instructions.
5. Clean only with a dry cloth.
6. Do not block any ventilation openings. Install this
apparatus in accordance with the manufacturer’s
instructions.
7. Do not install this apparatus near any heat sources
such as radiators, heat registers, stoves or other
apparatus that produce heat.
8. Do not defeat the safety purpose of the polarized or
grounding-type plug. A polarized plug has two blades
with one wider than the other. A grounding-type plug
has two blades and a third grounding prong. The wide
blade or the third prong is provided for your safety. If
the provided plug does not fit into your outlet, consult
an electrician for replacement of the obsolete outlet.
9. Protect the power cord from being walked on or
pinched, particularly at plugs, convenience receptacles
and the point where they exit from the apparatus.
10. Use only attachments/accessories specified by the
manufacturer.
11. Use only with the cart, stand,
tripod, bracket, or table
specified by the manufacturer
or sold with the apparatus.
When a cart is used, use
caution when moving the
cart/apparatus combination to
avoid injury from tip-over.
12. Unplug this apparatus during lightning storms or when
unused for long periods of time.
13. Refer all servicing to qualified service personnel.
Servicing is required when the apparatus has been
damaged in any way, such as when the power-supply
cord or plug is damaged, liquid has been spilled or
objects have fallen into the apparatus, or the
apparatus has been exposed to rain or moisture, does
not operate normally or has been dropped.
14. To disconnect this apparatus from the AC mains
completely, disconnect the power-supply cord plug
from the AC receptacle.
15. The mains plug of the power-supply cord shall remain
readily operable.
16. This apparatus is intended to be used only with the
power supply and/or charging cable provided by the
manufacturer.
The following instructions may not apply to waterproof devices. Refer to your device user manual or quick
start guide for more waterproof instruction if any.
•Do not use this apparatus near water.
•Do not expose this apparatus to dripping or splashing, and ensure that no objects filled with liquids,
such as vases, are placed on the apparatus.
WARNING: TO REDUCE THE RISK OF FIRE OR ELECTRIC SHOCK, DO NOT EXPOSE THIS
APPARATUS TO RAIN OR MOISTURE.
CAUTION
RISK OF ELECTRIC SHOCK. DO NOT OPEN.
THIS SYMBOL ON THE PRODUCT MEANS
THERE IS UNINSULATED, DANGEROUS
VOLTAGE WITHIN THE PRODUCT
ENCLOSURE THAT MAY PRESENT A RISK
OF ELECTRICAL SHOCK.
THIS SYMBOL ON THE PRODUCT MEANS
THERE ARE IMPORTANT OPERATING AND
MAINTENANCE INSTRUCTIONS IN THIS
GUIDE.
Visit the product page at JBL.com and download the Safety Sheet for a full list of safety instructions.
Class II Product
This equipment is a Class II or double insulated electrical appliance. It has been designed in such a way
that it does not require a safety connection to electrical earth (“ground” in the U.S.).
Pg 3 JBL SA550 Classic Owner's Manual EN
Table of Contents
IMPORTANT SAFETY INSTRUCTIONS ......................................................................................................2
Class II Product.........................................................................................................................................2
TABLE OF CONTENTS................................................................................................................................3
THANK YOU FOR CHOOSING JBL.............................................................................................................4
Package Contents ........................................................................................................................................4
PLACING THE UNIT ....................................................................................................................................5
FRONT PANEL ............................................................................................................................................ 6
REAR PANEL............................................................................................................................................... 7
REMOTE CONTROL....................................................................................................................................8
CONNECTING LOUDSPEAKERS................................................................................................................9
Top Tips.................................................................................................................................................... 9
BLUETOOTH OPERATION........................................................................................................................10
Volume Control .......................................................................................................................................10
Transport Control .................................................................................................................................... 10
OPERATION .............................................................................................................................................. 11
Power .........................................................................................................................................................11
Standby ...................................................................................................................................................... 11
Auto Standby ..........................................................................................................................................11
Selecting Inputs .......................................................................................................................................... 11
Phono Input.............................................................................................................................................11
USB............................................................................................................................................................ 11
Headphones ...............................................................................................................................................12
Balance Control .......................................................................................................................................... 12
Processor Mode..........................................................................................................................................12
MENU......................................................................................................................................................... 13
Menu Tree...............................................................................................................................................13
TROUBLESHOOTING................................................................................................................................ 14
SPECIFICATIONS...................................................................................................................................... 15

Pg 4 JBL SA550 Classic Owner's Manual EN
Thank you for choosing JBL
For over 75 years, JBL has been creating best in class audio equipment for concerts, studios, theaters, and
homes around the world. JBL is the trusted choice of leading recording artists and sound engineers.
The JBL SA550 is designed to provide you with reliable amplification for decades to come, all with
exceptional musicality so you get the most enjoyment from your music.
This handbook is a guide to installing and using the SA550 and includes information on its more advanced
features.
In the unlikely event of any fault, or you require technical assistance, please contact our dedicated support
teams by email using luxurysupport@harman.com, or by telephone using +44 (0) 1707 668012 or +1 888
6914 171. Or, if you simply require further information about JBL products, our network of dealers will be
happy to help you. Further information can also be found on the JBL website at JBL.com.
Package Contents
JBL SA550 Classic integrated amplifier
IR Remote
2x AAA Batteries for the remote control
Region Specific Power Cords
Quick Start Guide
Safety and Compliance Document

Pg 5 JBL SA550 Classic Owner's Manual EN
Placing The Unit
Place the amplifier on a level, firm surface, avoiding direct sunlight and sources of heat or damp.
Do not place the SA550 on top of a power amplifier or other source of heat.
Do not place the amplifier in an enclosed space such as a bookcase or closed cabinet unless there
is good provision for ventilation. The SA550 is designed to run warm during normal operation.
Do not place any other component or item on top of the amplifier as this may obstruct airflow around
the heat-sink, causing the amplifier to run hot (the unit placed on top of the amplifier would become
hot too).
Make sure the remote-control receiver to the right of the front panel display is unobstructed,
otherwise this will impair the use of the remote-control.
Do not place your record deck on top of this unit. Record decks are very sensitive to the noise
generated by mains power supplies which will be heard as a background ‘hum’ if the record deck is
too close.
The normal function of the unit may be disturbed by strong electromagnetic interference. If this
occurs, simply reset the unit with the power button, or move the unit to another location.
The SA550 is designed to run warm in
normal use, however extended use at high
volume levels can result in the amplifier
casework becoming hot to the touch.

Pg 6 JBL SA550 Classic Owner's Manual EN
Front Panel
Front Panel Buttons
MENU Enter the settings menu – see page 13
DISPLAY Dim or switch off the display
FILTER Select a different Digital Audio filter
MUTE Mute and unmute the audio output
Standby
Button
Switches the
amplifier into, or
out of standby
mode
AUX Input
Analog
3.5mm stereo
input socket
Input
Selector
Select from
the available
audio inputs
Volume
Control
Display
Headphones
Output
Analog 3.5mm
headphone
output socket

Pg 7 JBL SA550 Classic Owner's Manual EN
Rear Panel
This terminal
must not be used
as a safety earth.
Phono Ground
Ground terminal for
turntables
Speaker
Outputs
See
“Connecting
speakers” on
page 10
Pre-amp
Outputs
Outputs for
power
amplifiers
Analog
Audio Inputs
Digital
Audio Inputs
RS232
Input Voltage
Selector
Set for the power
supplied in your
region.
Power Input
Connect the
supplied power
cable here
Power Switch
Switch the
amplifier on or off
USB-A Input
USB Socket for
software service
Phono Input
Input for turntables
fitted with a moving
magnet (MM) cartridge

Pg 8 JBL SA550 Classic Owner's Manual EN
Remote Control
Note: Incorrect use of batteries can have hazardous results. Do not mix old and new
batteries together. Do not use non-identical batteries together. Although they may look
similar, different batteries may have different voltages. Ensure the batteries are
inserted in the correct direction.
Remove batteries from equipment that is not going to be used for a month or more.
When disposing of used batteries, please comply with governmental or local
regulations that apply in your country or area.
Toggle Standby Operation
Menu Navigation
Center button to select
Volume Control
Mute On or Off
Display Brightness
Transport Keys (Play/Pause, Skip back/forward)
Menu button
Music info button

Pg 9 JBL SA550 Classic Owner's Manual EN
Connecting Loudspeakers
Step 1, ensure power is disconnected from the amplifier.
Step 2, using speaker cables, connect the red positive terminal of the right speaker output (R+) on the
amplifier to the positive (+) terminal of your right speaker.
Step 3, connect the black negative terminal of the right speaker output (R-) on the amplifier to the negative
(-) terminal of your speaker.
Step 4, repeat the process for the left speaker, using the terminals labelled L+ and L- and on the amplifier.
Top Tips
Check all connections thoroughly. Ensure that exposed wires or cables are not touching each other
or the amplifier’s chassis (which can cause a short circuit), and that you have connected the positive
(+) and negative (–) terminals correctly. Be sure to check the wiring for both the amplifier and the
speakers.
After making connections: switch the amplifier on with no input and reduce the volume to minimum.
Select a source signal, and then slowly increase the volume to a suitable listening level to avoid loud
sounds or product damage in the event of incorrect connection.
If you are unsure as to how your system should be connected, please contact your JBL dealer who
will be happy to help you.
RIGHT
Speaker
LEFT
Speaker
JBL SA550

Pg 10 JBL SA550 Classic Owner's Manual EN
Bluetooth Operation
To pair your Bluetooth source device with the SA550, open the Bluetooth settings on your source device
and scan for discoverable products to pair with. Select JBL SA550 #### from the list.
By default, the amplifier can be discovered and paired to when switched on and not connected to another
Bluetooth device – it does not need to be on the BT input. This function can be overridden by changing
the BT Auto SW setting in the menu. To use the menu, see Page 13.
Note: With the BT Auto SW setting changed to Off, the amplifier must be on the
BT input to be discovered by a new device and paired for playing music.
Devices are paired to the amplifier without the sharing of a numerical code.
The amplifier can recall 5 device pairings. If 5 pairings already exist and a new pairing is made, the oldest
pairing will be replaced.
Volume Control
When playing music from Bluetooth, the volume of the amplifier can be controlled from your device.
Because portable devices often have a volume slider, there is a maximum volume setting in the amplifier to
prevent excessive volume output being selected accidentally.
Note: To adjust the maximum volume from Bluetooth, adjust the BT Volume
setting in the menu. The default is 50. To use the menu, see Page 13.
Transport Control
Use the buttons on the remote to control music playback of your device.

Pg 11 JBL SA550 Classic Owner's Manual EN
Operation
Power
The power switch on the rear panel switches the amplifier on or off. When you have finished making
connections, switch the amplifier on.
Standby
The Standby button on the front panel switches the amplifier between standby and on (operating).
Auto Standby
By default, this amplifier is set to enter standby automatically after 20 minutes with no audio playing and no
user interaction. This is to meet international power consumption regulations. This can be changed in the
menu. To use the menu, see Page 13.
Selecting Inputs
Audio sources can be selected either using the INPUT selector on the front panel or using the remote
control. In each case, the source name corresponds to the labelled input sockets.
The Inputs are:
BT (Bluetooth)
Phono (analog – turntable with moving magnet cartridge)
AUX (analog – front input)
CD (analog)
PVR (analog)
STB (analog)
CD Digital
SAT Digital
MP Digital
Note: The digital inputs only support stereo (PCM) audio. Multichannel audio or encoded
audio of any type is not supported.
Phono Input
The Phono Input includes a pre-amplifier to work with a MM (moving magnet) cartridge on a turntable for
playing vinyl.
NEVER connect anything other than a turntable through this input. This can result in
serious damage to both your amplifier and speakers and will not be covered under
warranty.
USB
The USB socket on this amplifier is only intended for software updates. It is not an audio input.

Pg 12 JBL SA550 Classic Owner's Manual EN
Headphones
The headphone socket (PHONES) accepts headphones fitted with a 3.5mm stereo jack. By default, the pre-
amp outputs and speakers are muted when the headphones are plugged in.
Note: the speakers and pre-amp outputs can be configured to remain active when
headphones are connected using the Headphone Override function in the setup menu.
To use the menu, see Page 13.
Balance Control
The balance of sound between the left and right speakers can be adjusted using the balance control in the
menu. To use the menu, see Page 13.
Processor Mode
Processor mode will fix the volume for one input. It can be assigned to any analog input (excluding Phono).
This allows the amplifier to be used in conjunction with a home cinema receiver in a combined home
cinema and two channel system.
The input and volume level can be set in the menu. To use the menu, see Page 13.

Pg 13 JBL SA550 Classic Owner's Manual EN
Menu
Press the MENU button on the amplifier or the on the remote control.
Use the Input and Volume controls to navigate the menu, or use the navigation buttons on the remote
control.
Menu Tree
Display Select Display Brightness. Default is Full.
Balance Set left / right output balance.
Phones Ovr
Control whether the speaker outputs and pre-outs are muted when a pair of headphones are connected.
The default is Off (speakers muted). On = speakers unmuted.
Timeout Auto standby duration. Select Off to disable. Default is 20m.
BT Auto Sw Automatically select BT input when BT device starts playing. Default is On.
BT Volume Set maximum volume for BT Input. Default is 40.
PM Input Select input for fixed volume. Default is None.
PM Volume Set volume for fixed volume input. Default is 40.
Filter Select a digital input filter from the options. Default is Apodizing.
PLL (input)
Adjusts sensitivity to a digital source device’s clock. Normal is suitable for most sources. Select WIDE if noises or
audio interruptions occur (most likely from high jitter sources such as a TV or set-top box). Default is Normal.
System Code
Change the IR code set if the amplifier remote commands conflict with another device in your home. Changing this
setting does not affect the remote handset. Default is 16.
Version Displays the software version of the amplifier.
System Update Initiates a software update from the USB connector.
System Reset Restores factory settings.
BT Reset Restores factory settings to Bluetooth only – this will delete all stored pairing.
RS232 Stdby Enables RS232 operation when the amplifier is in standby. Default is Off.

Pg 14 JBL SA550 Classic Owner's Manual EN
Troubleshooting
Problem Check the following
No sound
Is the amplifier correctly plugged in and switched on?
Is the audio source correctly connected, with the correct input selected?
Is the amplifier muted?
Is the amplifier in protection mode (as described below)?
Sound cuts-out unexpectedly
The amplifier may enter a protection mode. The front panel LED indicates the fault type:
FLASHING BLUE: The internal temperature of the unit reached an unsafe level.
Allow the amplifier to cool.
FLASHING ORANGE: The amplifier detected an overload (DC offset).
FLASHING RED: The amplifier detected a speaker short circuit. Inspect all the
speaker cables to make sure none of them are shorted together. This fault is
more common when exposed wires are being used to make speaker connections.
In protection mode, the amplifier will turn itself off and power to the speakers will be
removed. To continue using the amplifier, the fault must be treated, and the amplifier must
be turned OFF then back ON from the power switch on the rear panel.
The amplifier does not respond to the remote control Are there fresh batteries in the remote control?
Are you pointing the remote control towards the amplifier window without obstruction?
The front panel display is blank
Is the amplifier correctly plugged in and switched on?
Is the amplifier in standby?
Is the display dimmed to “Off”?
Press the button on the remote control.
Hum on the analogue input
Ensure all cables are making a good connection.
Try disconnecting the input cable and plug it fully in again (turn the power off before doing
this).
If the Hum stops when the source is disconnected, the problem is most likely to be in the
cable or the source device to which it is connected.

Pg 15 JBL SA550 Classic Owner's Manual EN
Specifications
Contin
uous
power output (0.5% THD), per channel
Both channels, 8Ω, 20Hz
—
20kHz
90W
Both channels, 4Ω, at 1kHz
150W
Harmonic distortion, 80% power, 8Ωat 1kHz
0.002%
Phono
Input
Phono Input
Moving Magnet
(
MM
)
Input sensitivity at 1kHz
5mV
Input
impedance
47kΩ+ 100pF
Frequency response (ref. RIAA curve)
20Hz
–
20kHz ± 1dB
Signal/Noise ratio (A
-
wtd) 50W, ref. 5mV input
80dB
Overload margin, ref. 5mV at 1kHz
21dB
Line Inputs
Nominal sensitivity
1V
Input impedance
10kΩ
Maximum input
6Vrms
Frequency response
20Hz
–
20kHz ± 0.2dB
Signal/Noise ratio (A
-
wtd) 50W, ref. 1V input
106dB
Digital Inputs
DAC
ESS9038K2M
Frequency response
20Hz
-
20kHz ± 0.05dB
Supported sample rates
Optical
32kHz, 44.1kHz, 48kHz, 88.2kHz, 96kHz
Coaxial
32kHz, 44.1kHz, 48kHz, 88.2kHz, 96kHz, 176.4kHz, 192kHz
Bit depth
16
-
bit
–
24
-
bit
Total harmonics distortion + Noise
0.0007%
Signal/Noise ratio (A
-
wtd)
115dB
Pre
-
amplifier output
Nominal output level
630mV
Output impedance
230Ω
Headphone output
Load range
16Ω
–
2kΩ
Output impedance
1Ω
Maximum output level into 600Ω
5Vrms
General
Mains voltage
100V or
110
–
120V or 220
–
240V, 50
–
60Hz
Maximum power consumption
5
00W
Dimensions in mm (including feet, control knob and
connector
s)
448 W x 124 H x 321 D
Weight (net)
11.2
kg
Weight (gross)
1
4.0
kg
Other manuals for SA550 Classic
1
This manual suits for next models
1
Table of contents
Other JBL Amplifier manuals