JBL LSR4300 User manual

LSR4300
Control Center Software
User’s Guide

2
Table Of Contents
Introduction ....................................................................................3
System Requirements ...................................................................3
Installation ......................................................................................4
Launching The Software ...............................................................4
Reference .......................................................................................5
Main Screen ...........................................................................................5
Room View .............................................................................................6
Speaker Pop-Up Window .......................................................................8
Control Panel ..........................................................................................9
Equalization Controls ............................................................................12
Options Menu .......................................................................................15
Technical Support .......................................................................18
Copyright © Harman International Industries, Incorporated. All Rights Reserved.

3
Introduction
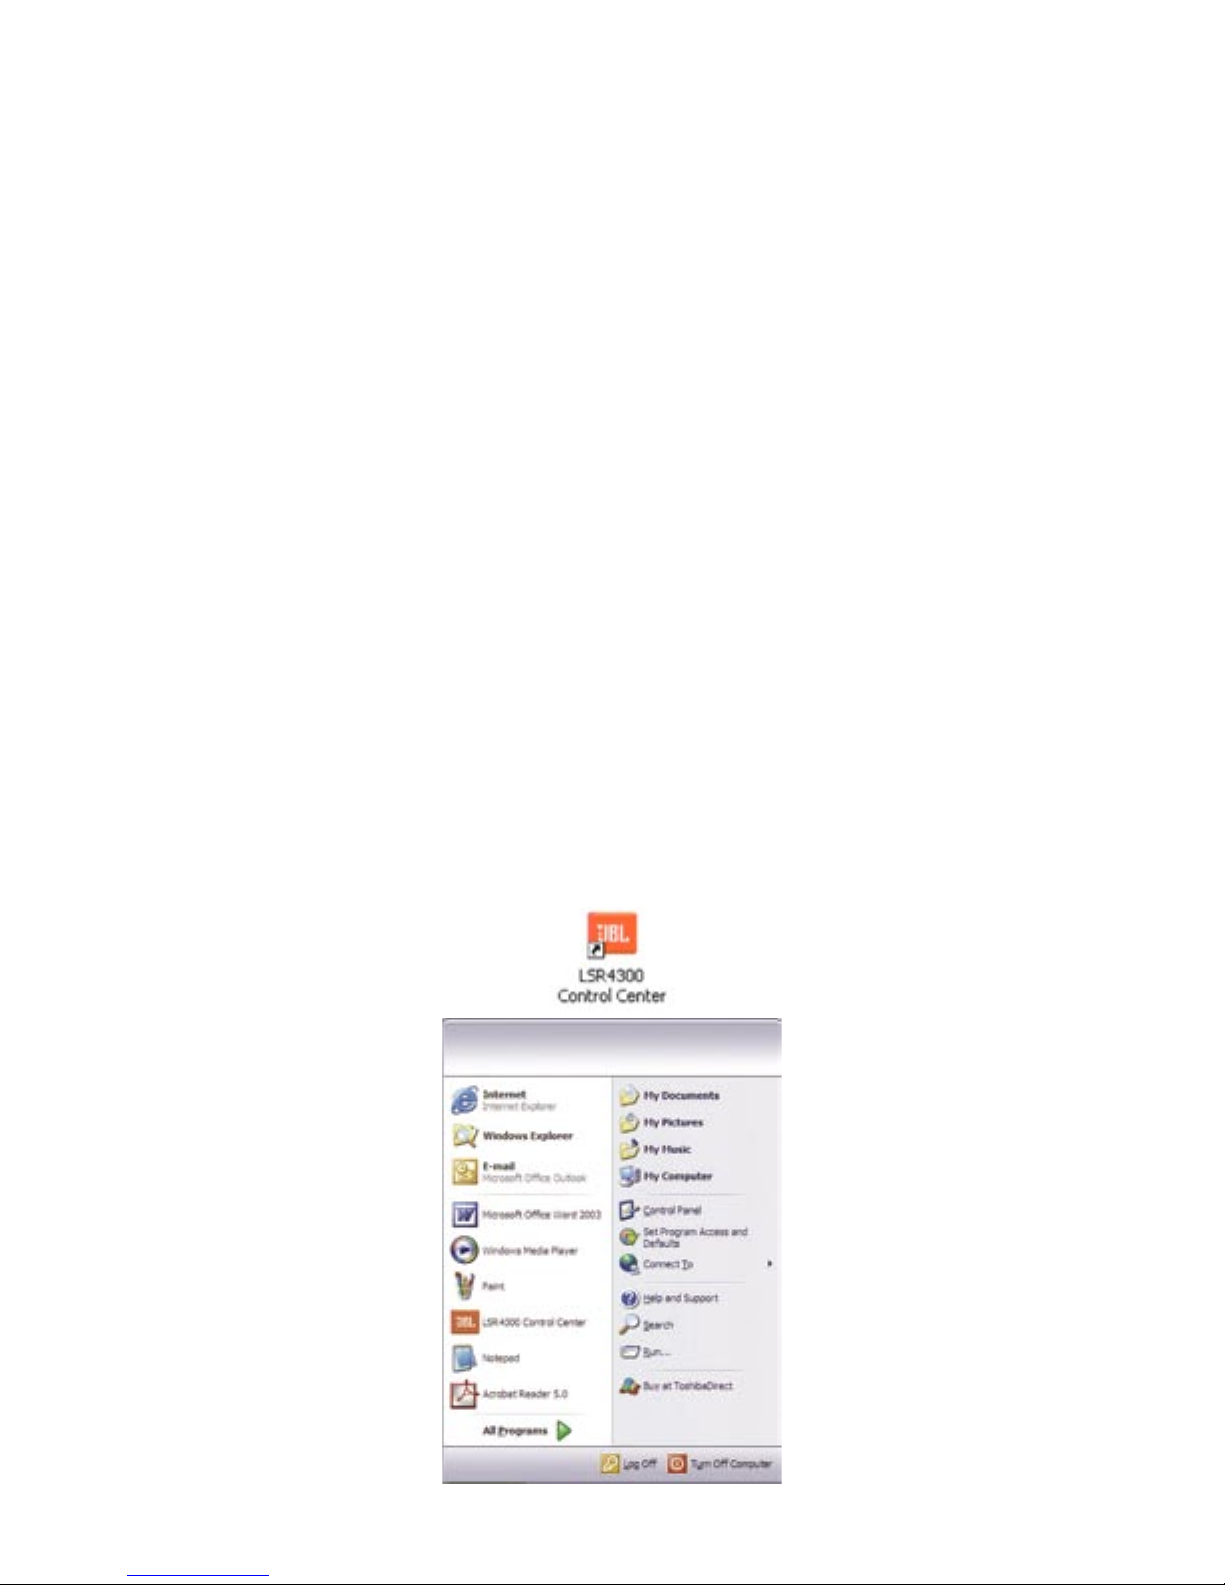
LSR4300 Control Center Software is a useful system set-up utility that allows you to ac-
cess any of the functions of your LSR4300 speakers using a computer. Without leaving
your mix position, LSR4300 Control Center Software gives you the ability to modify sys-
tem settings, and also view multiple speaker parameters at once in an easy-to-understand,
user-configurable graphic display.
In addition, the Control Center Software provides a number of advanced capabilities not
available from the speaker’s front panel or remote control:
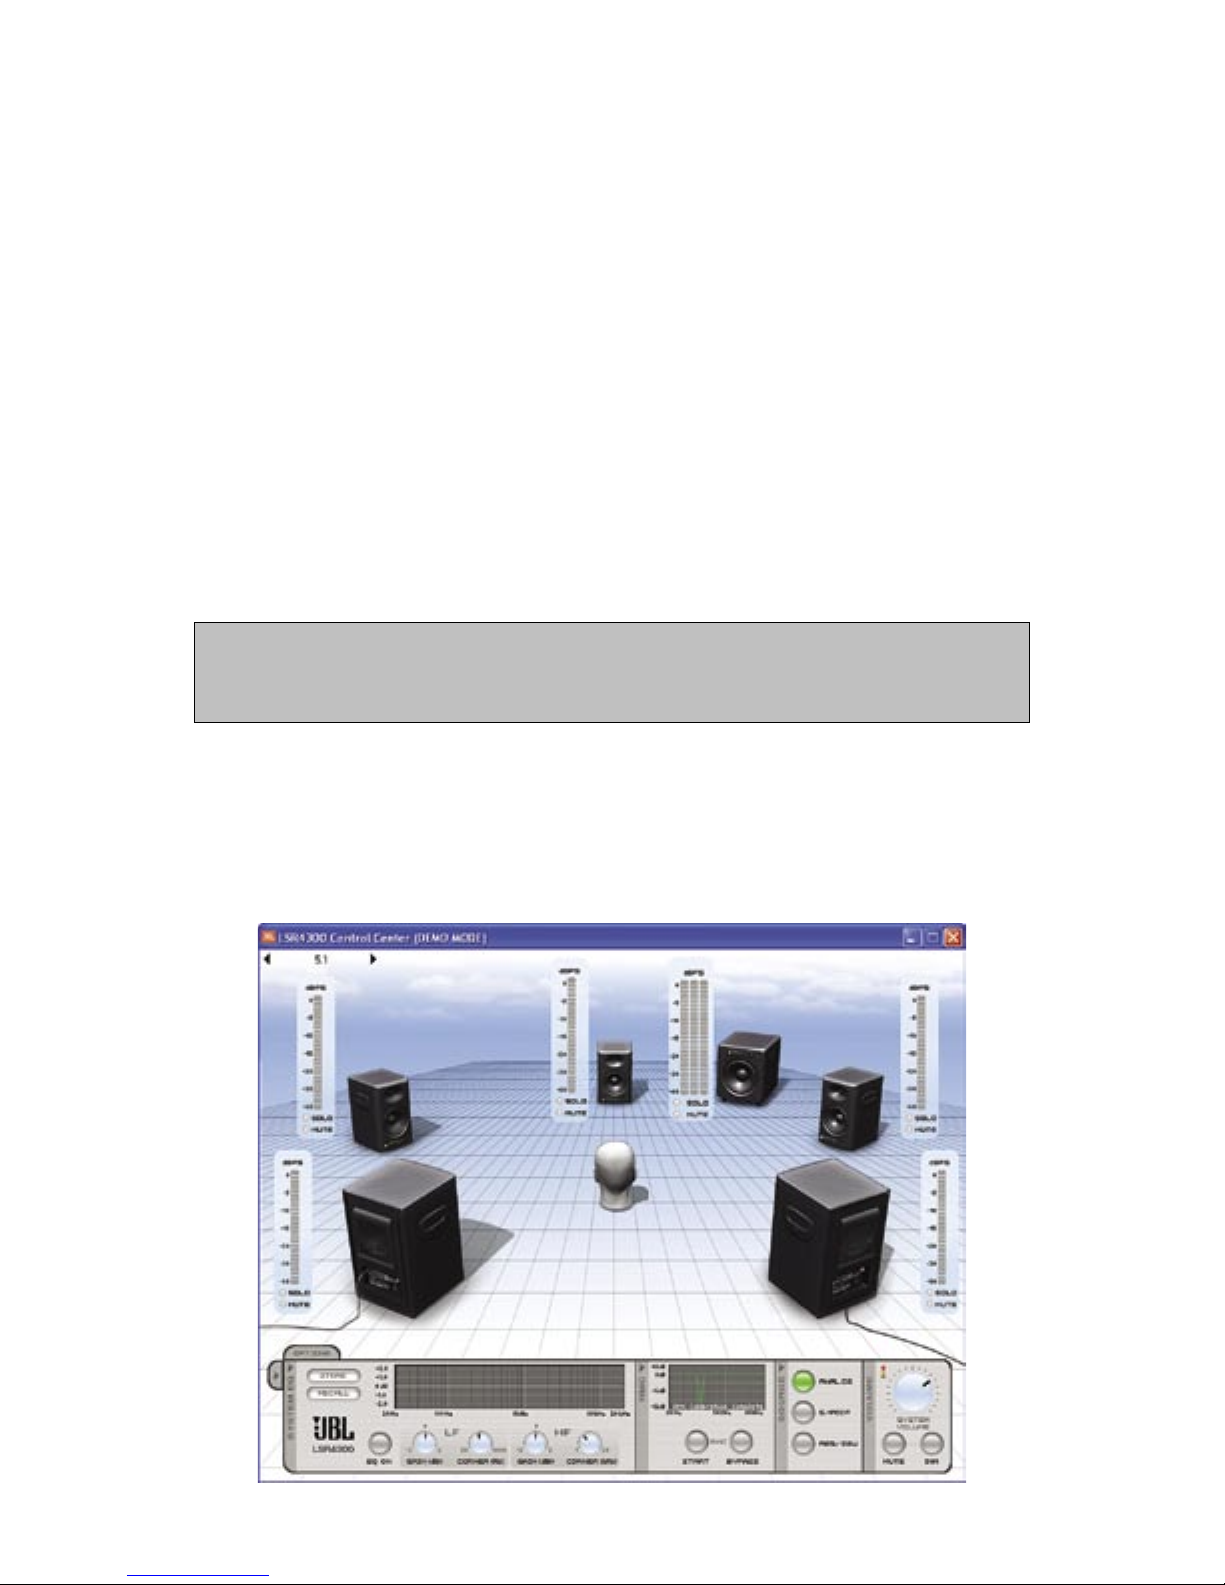
• Custom EQ presets can be created and stored in the connected speakers or memory
on disk. EQ settings can also be downloaded from speakers or loaded from disk.
• LF and HF corner frequencies for the EQ can be changed.
• Independent fine speaker Level Trim controls in 0.25 dB increments are provided,
from +3 dB to -10 dB.
• Independent speaker muting and soloing as well as overall system Mute and Dim.
• You can view all filter and delay settings created for each speaker during RMC cali-
bration. Delay settings can be displayed in feet, meters, or milliseconds.
• Complete system configurations (including system volume, EQ presets, input selec-
tion, and other settings) can be saved to and loaded from your computer.
In the following pages, we’ll take you through all the necessary procedures to install and
run your LSR Control Center Software, and explain all screen displays and functions.
We’ll
assume that you are already familiar with basic computer operations such as launching
applications and using a mouse to select parameters and navigate through screens and
menus. If not, consult the documentation provided with your computer.
Throughout this manual, important tips and cautions will be presented like this.
System Requirements
Hard Drive: 100 MB space available
RAM: 128 MB minimum required by this application, over and above the memory re-
quired by other applications running simutaneously.
Operating System: Windows 2000, Windows XP
Introduction - System Requirements

4
CPU: Pentium III 750 MHz or higher
Installation
1. Insert the CD-ROM in an available CD-ROM drive.
2. From the Start Menu, click RUN.
3. Click BROWSE.
4. Locate the JBL CD containing LSR4300 Control Center Software.
5. Click on the file named dotnetfx.exe to install the .NET framework required by
the application. An installer will automatically install the file in the correct location
on your computer.
6. When dotnetfx installation is complete, click on the file named
LSR4300ControlCenter.exe (lableled a “Setup Launcher” in Windows XP).
An installer will appear. Follow the prompts to complete the installation.
There is no need to restart your computer.
Launching The Software
1. Following installation, a shortcut to the LSR4300 Control Center Software is placed
on your desktop and in your computer’s Start menu.
Installation - Launching The Software

5
Double-click on the desktop icon (or single-click on the Start menu icon) to launch the
software. See the Reference section below for details about all LSR4300 Control Center
display and menu options.
2. If no speakers are connected to your computer, the LSR4300 Control Center Software
will launch in “Demo” mode, which allows you to explore its features and learn about
LSR4300 capabilities. However, there is no communication between the software and
your speakers in Demo mode, so if you want the software to be fully functional, first
make sure that all speakers are networked together properly and that their DIP switches
are correctly set.
(Refer to the LSR4300 Owner’s Manual for more information.) Then use the supplied
USB cable to make a connection between your computer and the LSR4300 speaker
labeled “Left” (LEFT DIP switch up). Finally, press the “Left” speaker Power button
so that the JBL logo is glowing brightly. All networked speakers should power up at the
same time.
3.
If no LSR4300 Series studio monitors are connected to your computer via the supplied USB
cable, the Control Center Software will automatically start up in Demo mode.
Reference
Main Screen
Whenever you first launch the LSR4300 Control Center Software, you will be shown the
main screen, which consists of two sections:
Launching The Software/Reference/Main Screen

6
• A Room View, which allows you to view settings and make changes to individual
speakers
• A Control Panel, which allows you to make global changes to your entire LSR4300
system.
Room View
The upper area of the Main Screen is the “Room View.” It provides a graphic display
showing all the connected LSR4300 speakers in your network, along with meters for each.
When audio signal is actively passing through the speakers, the meters in the Room View
are active and show the continuous output level of each speaker, same as the meters
on the front panels of the speakers themselves. By clicking on the “Solo” and “Mute”
buttons in each meter, you can selectively solo or mute individual speakers within your
network. Simply click on them a second time to un-solo or un-mute the speaker(s).
All front-panel buttons on connected LSR4300 speakers and wireless remote control buttons re-
main fully functional even when the Control Center Software is running. Thus, you can, for example,
Solo a speaker from your computer and un-solo it by pressing the speaker’s SOLO button, or vice
versa.
The Room View can show configurations of up to eight LSR4328P or LSR4326P speak-
ers (and up to two LSR4312SP subwoofers) that range from a single mono speaker on its
own to a full-fledged eight-speaker surround system with two subwoofers. You can view
systems other than the connected system using the Demo mode. (See Options Menu, page
17) The illustration below shows the Room View display for a standard 5.1 surround
system:
Reference - Main Screen/Room View

7
Rolling the mouse over any speaker in the Room View (sometimes called a “mouse-over”)
and pausing for a moment causes a small informational window to pop up which shows
the designation of the speaker (as set by its rear panel DIP switch) and the amount of de-
lay that has been applied by RMC calibration.* The delay time can be displayed in feet,
meters, or milliseconds. See “Options Tab” below.
The “head” in the Room View is an icon which represents the listener at the mix position
if all speakers are positioned correctly. (See the LSR4300 Owner’s Manual for hints and
tips about speaker positioning.) The appearance of this “listener” as well as the overall
appearance of the Room View can be changed if desired. See “Options Tab” below.
*In LSR4300 firmware version 1.1, delay for all speakers is set to 0. Delay will be enabled
in future firmware releases to enhance functionality for surround sound production.
Reference - Room View

8
Speaker Pop-Up Window
Double-clicking on any speaker in the Room View causes a pop-up window to appear, as
follows:
This window is divided into three sections and provides the following important informa-
tion about each individual speaker:
1. The “Speaker” section presents information about each speaker’s model and ID (i.e.,
Left, Right, Center, Left Surround, Right Surround, etc.)
2. The “Settings” section allows you to Solo and Mute individual speakers and also
enables you to set a “Level Trim” for each speaker, adjustable in 0.25 increments,
from -10 to + 3 dB. Level Trim is a fine control that gives you the ability to manually
compensate for perceived level differences which may occur if your listening position
is not equidistant from all speakers. Other displays in this section show whether the
speaker is carrying the left (“Ch A”) or right (“Ch B”) signal if connected to a digital
signal source and the amount of level adjustment and delay (RMC Trim and RMC
Delay) that has been applied by RMC calibration. For more information about input
selection and RMC calibration, refer to the LSR4300 Owner’s Manual.
3. The “Correction” section shows a simulated graph representing the effect of filters
applied by RMC calibration. Double-click on the simulated RMC graph to view the
actual NUMERIC RMC settings for all connected speakers. For more information
about RMC calibration, refer to the LSR4300 Owner’s Manual.
Reference - Speaker Pop-Up Window

9
Each time you double-click on a different speaker, a new pop-up Speaker window is generated,
but it will be overlaid directly on top of the previous one. To have multiple Speaker pop-up windows
open at the same time, simply move each new one by clicking on the dark gray vertical area at the far
left and dragging it to a new location.
Control Panel
The bottom area of the Main Screen houses the Control Panel, which allows you to make
global changes to all LSR4300 speakers in your network.
Reference - Speaker Pop-Up Window/Control Panel

10
The Control Panel is divided into the following four sub-panels, from right to left:
1. Volume – enables you to change the overall volume (simply click on the onscreen
dial and drag it), instantly mute the entire system, or DIM (partially reduce) system
volume. (When the system is set to full volume, and DIM is selected, the amount of
attenuation is -12 dB). For best results, click directly on the black indicator of the
knob and apply a circular motion.
Rapid movement of the onscreen volume control can cause a delayed response in the speak-
er system. This is normal. This delayed response can be alleviated by slowing your movement
of the volume control, or by using the supplied remote control.
System volume settings are stored when using the Save Configuration function in the
Options Menu. Using a calibrated signal and the Save Configuration function, it is
possible to store and recall calibrated volume settings for the system. For more infor-
mation, see Appendix E in the LSR4300 Owner’s Manual.
Clicking on the red, amber and green squares above the volume control reveals a set of
meters that you can position on your desktop. These remain in view even when the LSR
Control Center Software is minimized.
Reference - Control Panel

11
2. Source – displays the currently selected input source, and allows you to change it.
When changing input selection, signal is muted in all connected LSR4300 speakers for approxi-
mately 3 seconds to allow you to confirm your selection. The 3-second wait time can be bypassed
and selection can be initiated immediately by pressing the INPUT button on the remote control or the
speaker itself.
3. RMC – enables you to initiate a new RMC calibration or bypass the existing one.
The graph in the RMC section of the control panel is a simulated graph. After per-
morming an RMC calibration, text at the bottom of the graph indicates the RMC
calibration has been performed. Lack of text indicates RMC calibration has not been
performed.
Double-clicking on the graph opens up an RMC window, which displays the precise
frequency of the filter applied in each speaker by the RMC system, as well as its “Q”
(bandwidth) and amount of gain reduction.
For more information about RMC, refer to the LSR4300 Owner’s Manual.
Reference - Control Panel

12
The RMC window can be moved anywhere onscreen by clicking and dragging.
4. System EQ - allows you to switch equalization on or off and make changes to the
equalization of all networked speakers. User settings can then be saved to disk or
uploaded to any speaker Preset. For more information, see the section entitled
“Equalization Controls” below.
For convenience, you can “collapse” individual sub-panels you aren’t using (except the
Volume sub-panel, which must always remain open), simply by clicking on the right-fac-
ing arrow above each sub-panel name. To collapse the System EQ, RMC, and Source
sub-panels all at once, click on the right-facing arrow tab at the far left:
To open up any or all of the sub-panels again, simply click on the left-facing arrow(s).
Equalization Controls
The System EQ sub-panel provides one of the Control Center Software’s most powerful
“value-added” features in that it significantly expands on the capabilities offered by the
speaker itself. From this sub-panel, you can create custom equalization settings – even
change the corner frequency of the speaker’s onboard LF and HF shelf equalizers (some-
thing that is not possible from the speaker itself) – and save them to disk or upload them
directly to the speakers.
Reference - Control Panel/Equalization Controls

13
To change equalization settings, simply use your mouse to “grab” any of the four con-
trols – LF Gain, LF Corner, HF Gain, or HF Corner – and then move the onscreen knob
by moving it in a circular clockwise or counter clockwise motion, to increment or decre-
ment the value, respectively. As you do so, the onscreen graph will change to reflect your
new settings. For best results, click on the black indicator of the control and apply circu-
lar motion.
Rapid movement of the EQ Gain and Frequency controls can cause a delayed response in the
speaker system. This is normal. This can be alleviated by slowing your movement of the controls.
The EQ “on” button in the System Equalization sub-panel will automatically turn on (light green)
whenever you begin altering any onscreen EQ settings. To compare your custom settings with the un-
equalized (flat) response, simply click on the EQ button again to turn it off and bypass all EQ settings.
As you make onscreen changes, they are automatically uploaded to a temporary memory
area in your connected LSR4300 speakers and so become instantly active. These settings
will remain active in the speakers even if they are powered off. However, because they
reside only in a temporary “edit buffer,” they will be lost when an EQ Preset is called up
unless you have first stored them.
Storing EQ Settings:
To store your custom EQ settings, click on the “Store” button in the upper left-hand cor-
ner of the System Equalization sub-panel. The following Store dialog will appear:
This dialog gives you the option of storing your custom settings in any of the six EQ
Presets in your speakers’ memory, or on disk. Storing to a Preset will overwrite the data
currently in that Preset, so be sure to select one that you do not use frequently.
Reference - Equalization Controls

14
When an EQ Preset is stored, it is loaded into the speaker that has the “LEFT” DIP switch setting.
The LEFT speaker then issues the EQ settings to all other speakers in the network. As a result, when
speakers are disconnected from the network, only the LEFT speaker retains the custom presets.
NOTE: You can restore factory settings in any speaker (including the equalization data in
all six Presets) using this simple procedure, as described in the LSR4300 Owner’s Manual:
1. Turn the speaker off and disconnect its power cable.
2. Set all eight DIP switches to the ON position.
3. Re-connect the power cable, wait for the speaker logo to dim, and turn the speaker
back on. All front panel controls will blink and the LED display will flash a left-right
pattern to show that memory settings are being recalled.
4. Reset all DIP switches to the desired positions for network operation.
5. Perform this procedure for each speaker that requires it.
Recalling EQ Settings:
You can also upload Preset EQ data from connected speakers to the Control Center Soft-
ware by pressing the “Recall” button in the System Equalization sub-panel. The follow-
ing Recall dialog will appear:
To upload data from a Preset in your speakers, simply select the Preset number and click
on “Recall.” The data will be placed in a temporary memory area (“edit buffer”) in the
Control Center Software and the EQ settings will appear onscreen and be reflected in the
graph. If you wish to make changes to that Preset and save those changes, remember to
Store it back to the same Preset number (using the “Store” procedure described above)
before powering the system down.
Reference - Equalization Controls

15
The “Recall” dialog also allows you to load equalization data previously stored to disk.
Simply select “Disk,” then click on “Recall,” and a standard Windows dialog will allow
you to select the location and name of the file you wish to load. Data recalled from disk
becomes immediately active.
Options Menu
Clicking on the Options Tab in the upper left-hand corner of the Control Panel brings up
the following Options menu, which allows you to change various miscellaneous parameters:
The Options menu can be moved anywhere onscreen by clicking on the vertical gray area on the
right and then dragging it.
The “Save Configuration” and “Load Configuration” buttons, respectively, allow you to
store and recall complete system configurations to and from disk. Configuration files
contain the following data:
• Equalization settings for all six Presets
• Input source
• System volume
• System mute and dim status
• All other settings in the Options menu (see below)
Reference - Equalization Controls/Options Menu

16
Configuration files do NOT contain parameters set during RMC calibration such as frequency, Q,
gain, RMC level trim, and delay.
The Brightness control allows you to set the illumination level of the buttons and display
meter in all connected speakers. Clicking on the control brings up a “mini” front panel,
with the buttons and LEDs illuminated to reflect the current setting.
Click on the +/- buttons on the right side of the display to increase or decrease the
illumination settings. Changes made here are instantly reflected in all connected
speakers. Move the mouse anywhere outside of this display to close it.
The “Options” area provides two important buttons that set communications parameters.
• To place the Control Center Software in Demo mode, click on the Demo button.
In this mode, you can view and explore alternate system configurations by clicking
on the left-right arrows at the upper left-hand corner of the screen.
Reference - Equalization Controls/Options Menu

17
All onscreen buttons and switches work in Demo mode; however, there is no
communication with connected speakers so parameter changes are not implemented.
• To enable the Control Center Software to display the RMC delay in connected speak-
ers when you “mouse-over” them, click on the Show Speaker Info button.
• The third function in the “Options” area allows you to display delay time in feet,
meters, or milliseconds.
The “Background” and “Listener” sections of the Options menu allow you to change the
appearance of the Room View. Choose from among daylight, dusk, or sunset back-
grounds (or go for stark white if you prefer), and select any of four “listener” heads.
Finally, double-click on the “About This Software” section at the bottom of the Options
menu to view the version number of the software currently installed. This dialog also
provides a hot-link to the JBL Pro website in order to enable you to get technical support
information.
Reference - Equalization Controls/Options Menu

18
Technical Support
For technical support in the USA, contact JBL Customer Service
Monday through Friday, 8:00am - 5:00pm Pacific Coast Time
Call (800) 8JBLPRO (800-852-5776)
or go to our website at www.jblproservice.com
LSR4300 Control Center Software © 2005 Harman International Industries, Incorporated. All Rights Reserved.
Technical Support

19
Notes

20
Notes
Table of contents
Other JBL Speakers manuals

JBL
JBL VP7210 User manual

JBL
JBL SP6CSII SoundPoint Assembly instructions

JBL
JBL Control 24C/CT Micro User manual

JBL
JBL AQUARIUS IV S109 User manual

JBL
JBL Harman WIND3 User manual

JBL
JBL PROPERFORMER User manual

JBL
JBL Bar 5.1 Surround User manual

JBL
JBL Intellivox ADC V90 Mark II User manual

JBL
JBL Bar 3.1 User manual

JBL
JBL FS400BLK User manual