Jecod AK-70 User manual
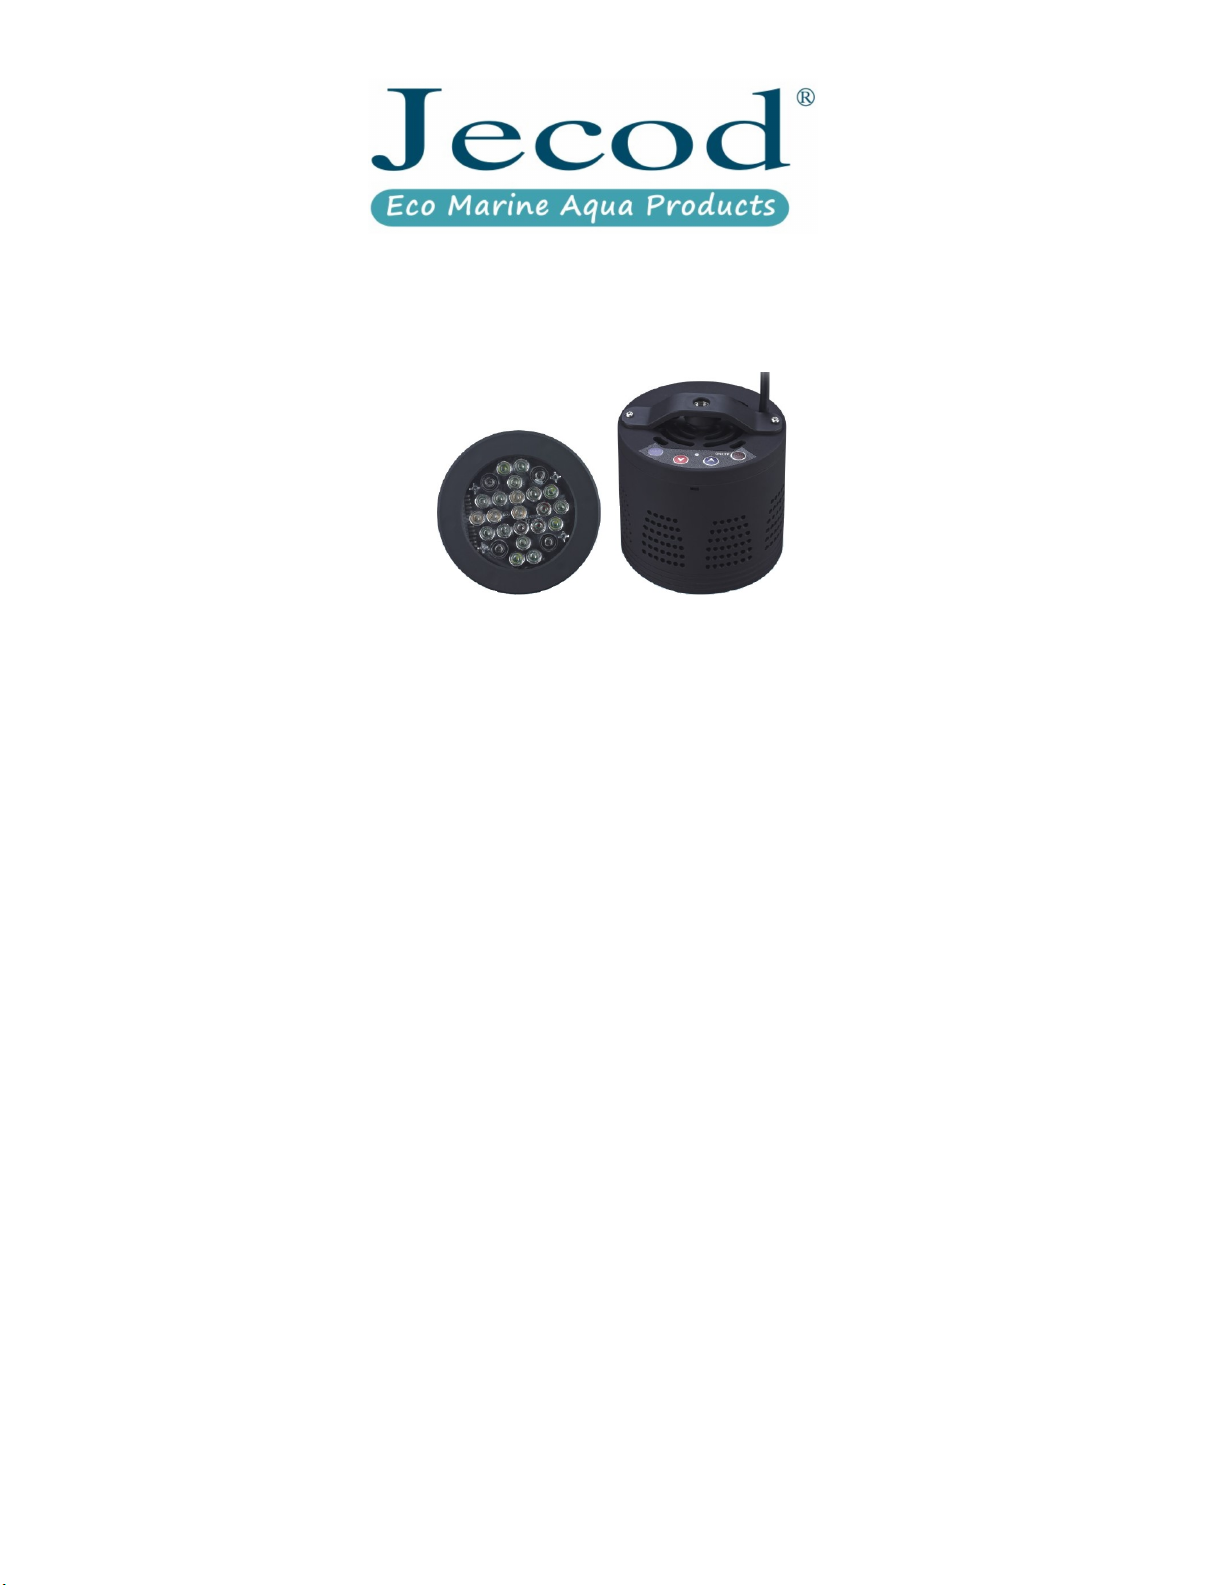
LED Aquarium Lights
Model:AK-70
User's Manual
Introduction
AK-70 Aquarium Light can imitate the natural light under the
sea. It can create a natural and comfortable living environment for
your marine creatures such as fish and corals etc. AK-70 consists
of six groups of LEDs including White, Blue 1, Blue 2, Violet,
Green and Red. Users can adjust the brightness of each group of
LEDs to reach a different light effects, which also brings you
satisfied visual enjoyment.
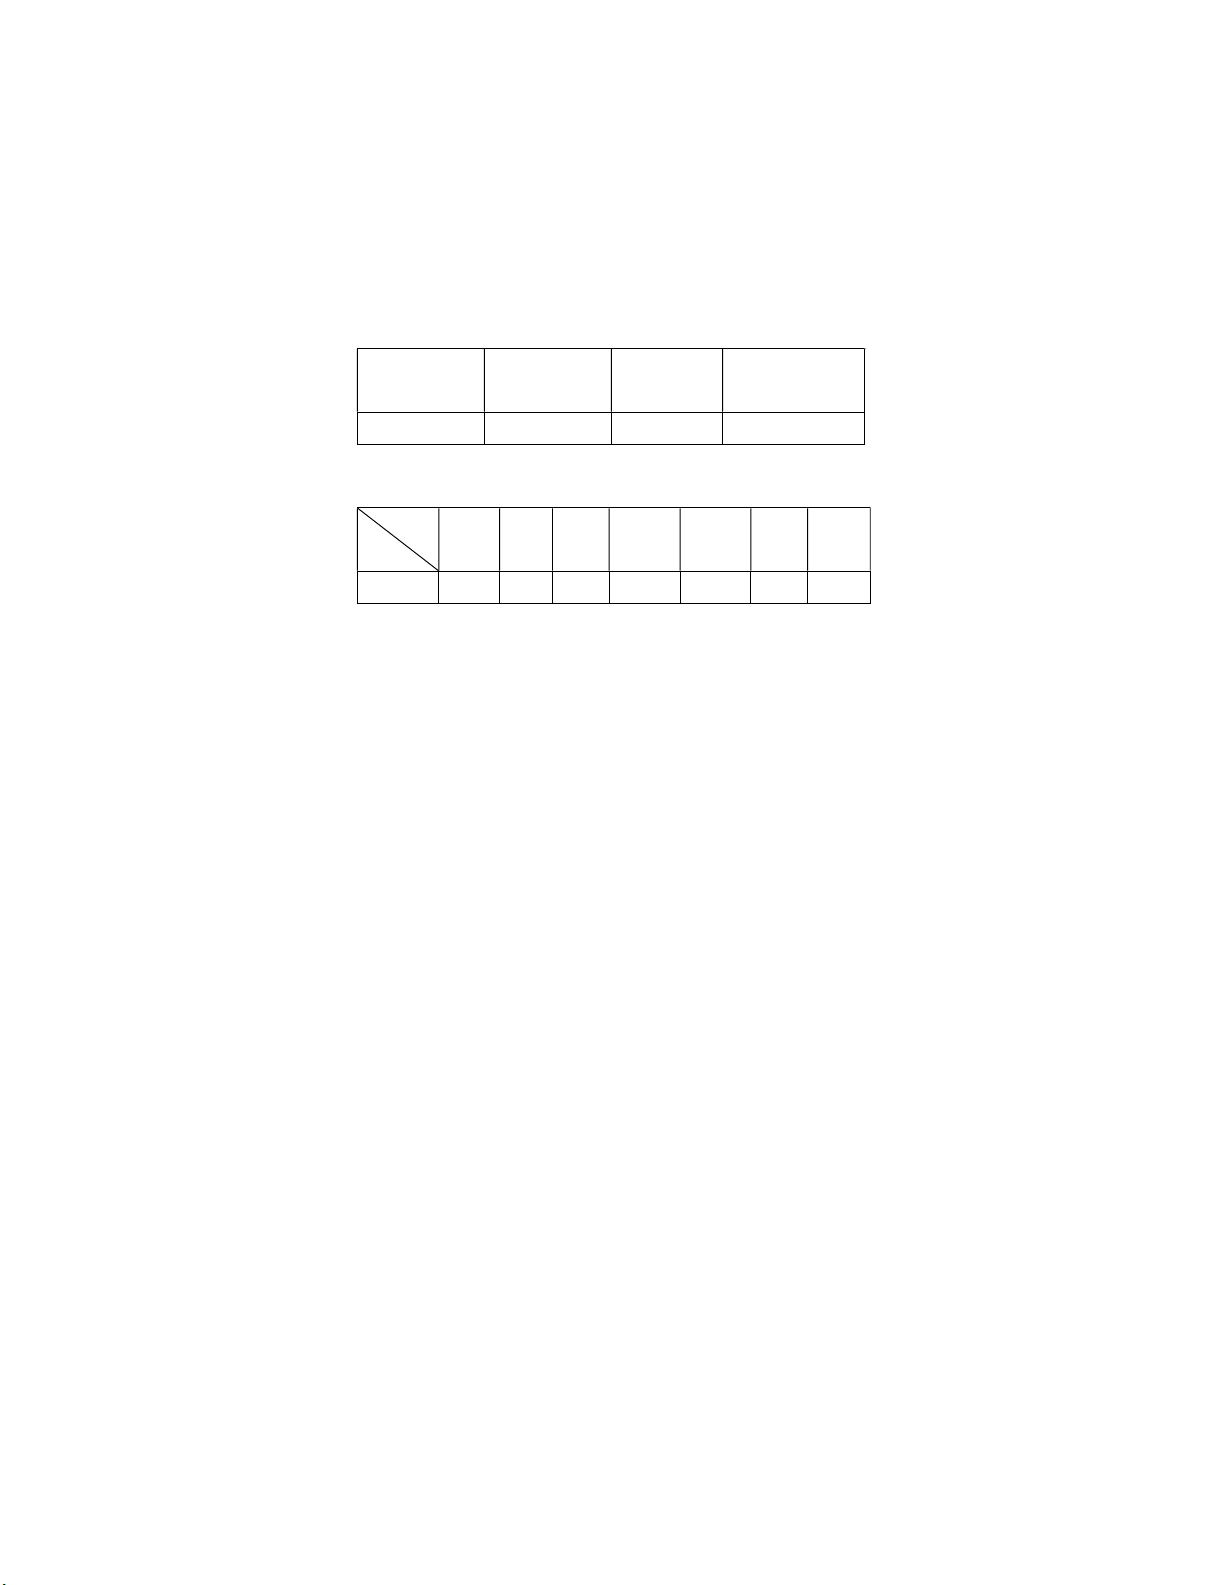
Specification
Lamp Body
Dimension
Lamp body
Height
Adaptor
Extendable Holder
Range
10.6cm 8.0cm DC15V/6A 0~30cm
LED
Watts
White Blue
1
Blue
2
Violet Green Red Total
W 17 17 17 18 9 9 65
Remark: The above-mentioned power is the sum of the fan, Wi-Fi
and all LED.
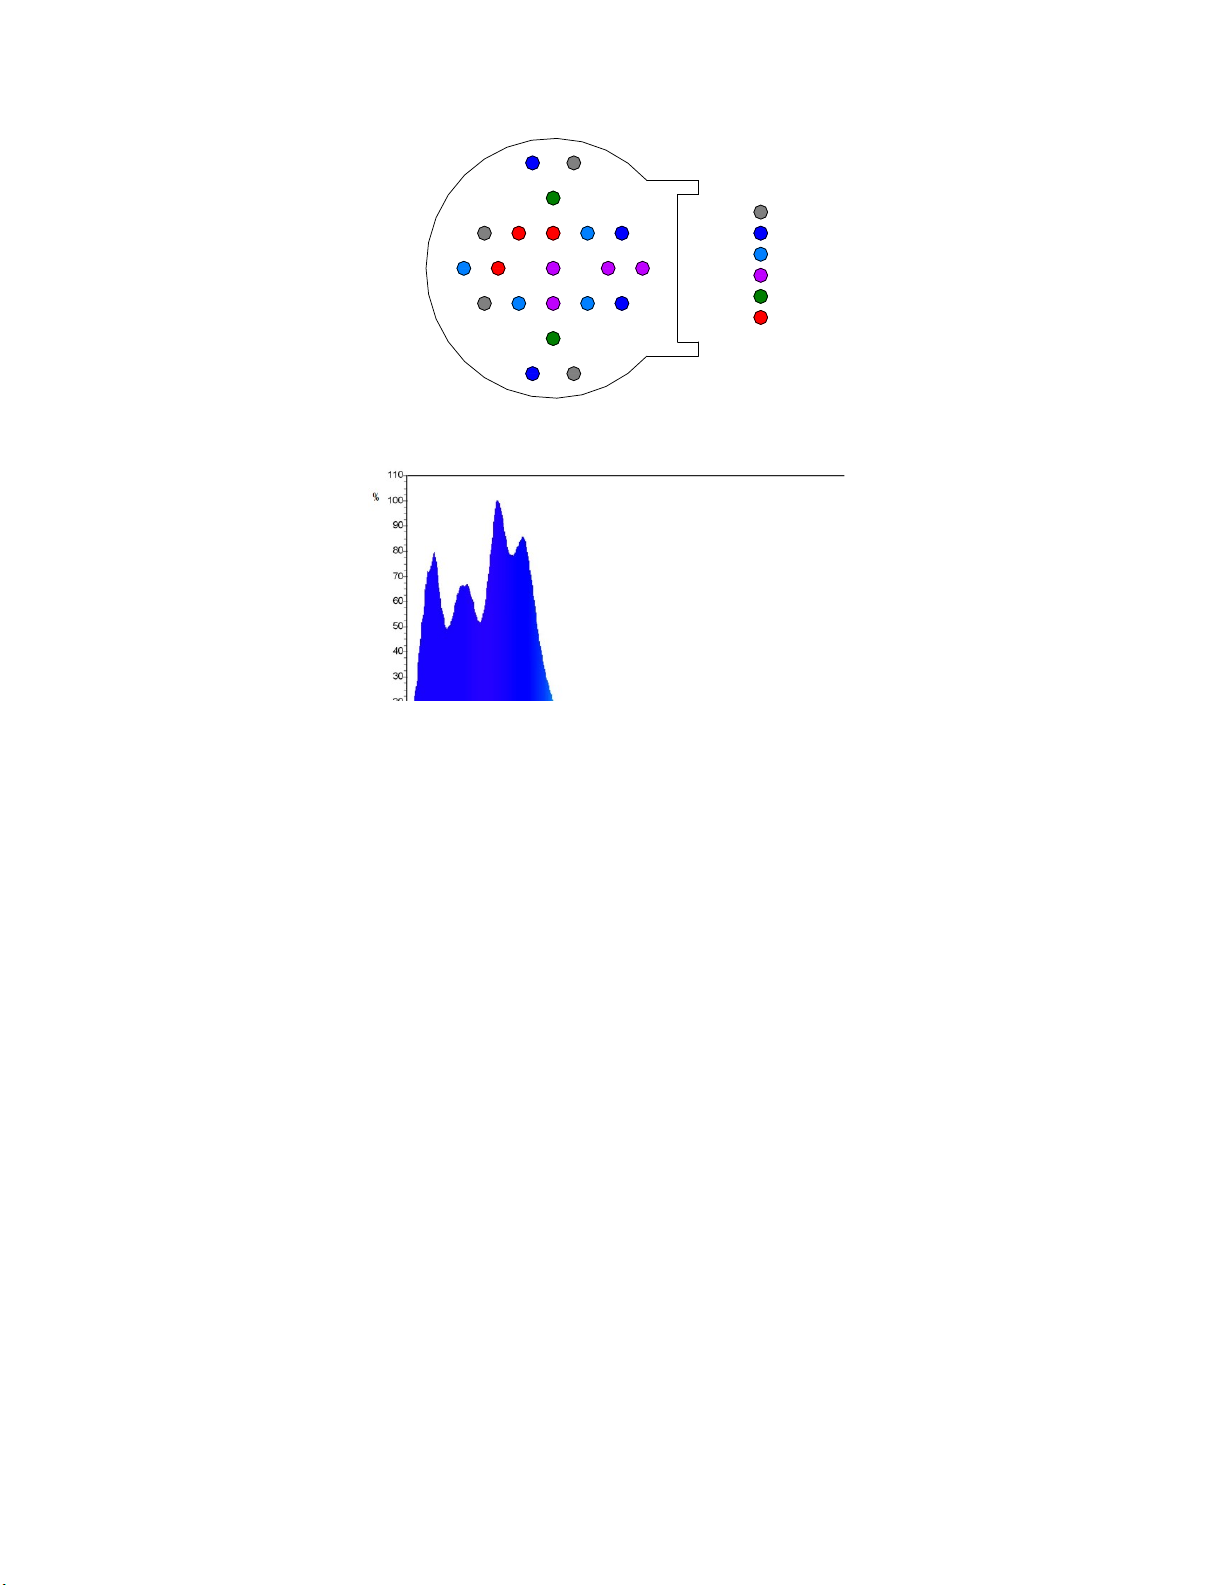
Lamp layout
white
blue1
blue2
voilet
green
red
LED Spectrogram

Installation Diagram
Installation Steps
1. Connect the Curve Rod and Holder. Tighten by
revolve clockwise the screw thread at both ends.
2. Screw Join 2 to the nut on the lamp body.
Join Lever
Fix Screw
Holder
Curve Rod
Lamp body
Nut
Lower
Join
Upper Join

3. Insert the Screw to the nut.
4. Place Join 1 to the end of Curve Rod. Screw the nut
to the Curve Rod to secure Join 1.
5. Connect the Join1 and Join 2 with Join Lever.
You could bend the Curve Rod to your desired angle.
AK-70 Structure Drawing

APP User Guide
1. Scan the below barcode to install the application to your
phone or tablet. Alternately, IOS user can search “Jebao” in
App Store, and Android user can use the link below to
download the application.
http://iot.ekewe.net/tools/jebao-lamp.apk
2. Open the APP, click “Regedit” to crew a new account. Or sign
in by input your account ID and password (skip Step○
3).
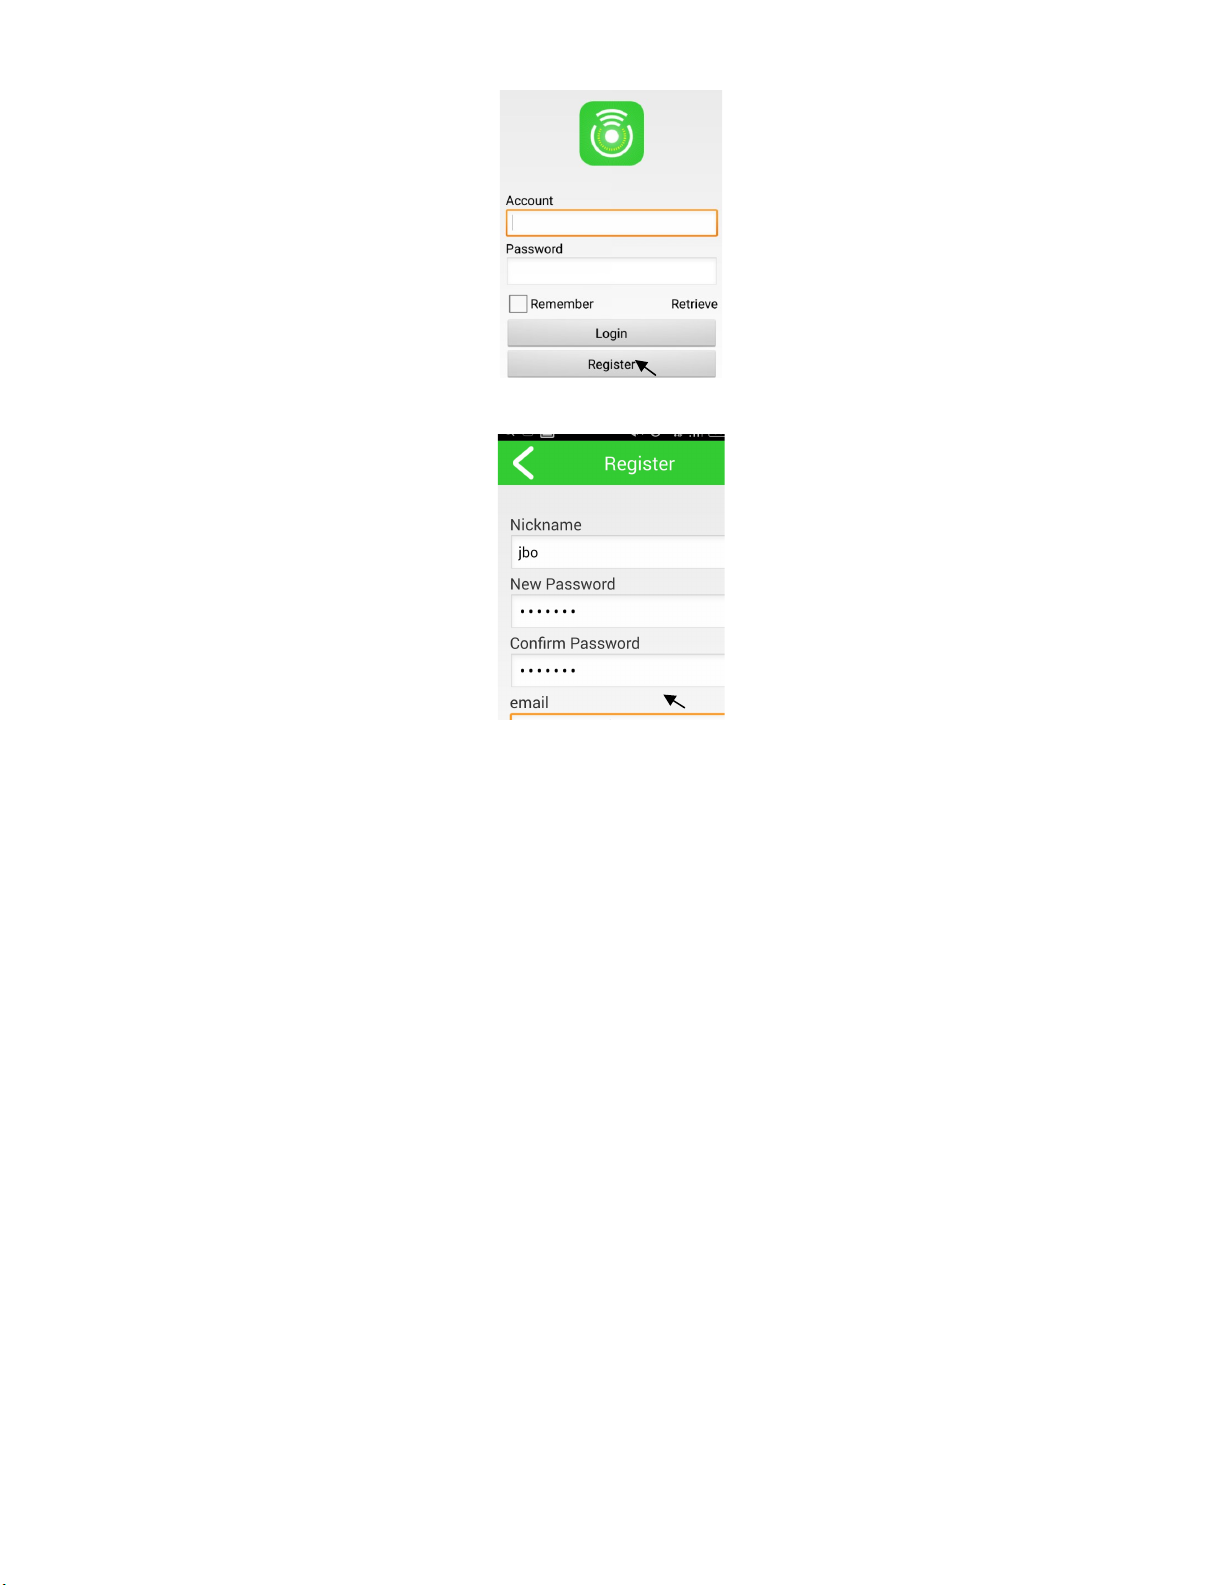
3. Fill in the information and click "Register complete”
4. Add Device: two methods available

Note :Android user can use both methods. (Method Ⅰ is
recommended). IOS user can use Method Ⅰ only.
Method Ⅰ: Return to your phone’s home page and click on WLAN
(Android) or Wi-Fi (IOS) under “Setting”. Find the AK-70 Wi-Fi,
which starts with JEBAOLL in the network lists, and click it to
connect. Making sure Wi-Fi is successfully connected, return to the
APP. Click on “+” (android) or “ ” (IOS).
WLAN network list
Android
AK-70 WI-FI starts
with JEBAO

IOS
Note: When connecting with the Method 1, AK-70 shall be
subjected to Wi-Fi resetting.
Method Ⅱ: click "+" in the interface that pops up. (Only for
Android)
5. Click refresh button in the interface ( skip to Step 6 if the
device has been already shown on the page)
6. Click on the lamp
7. Input your Wi-Fi name and password correctly on the pop up
interface and click OK. (This step is not required for Method
Ⅱ).
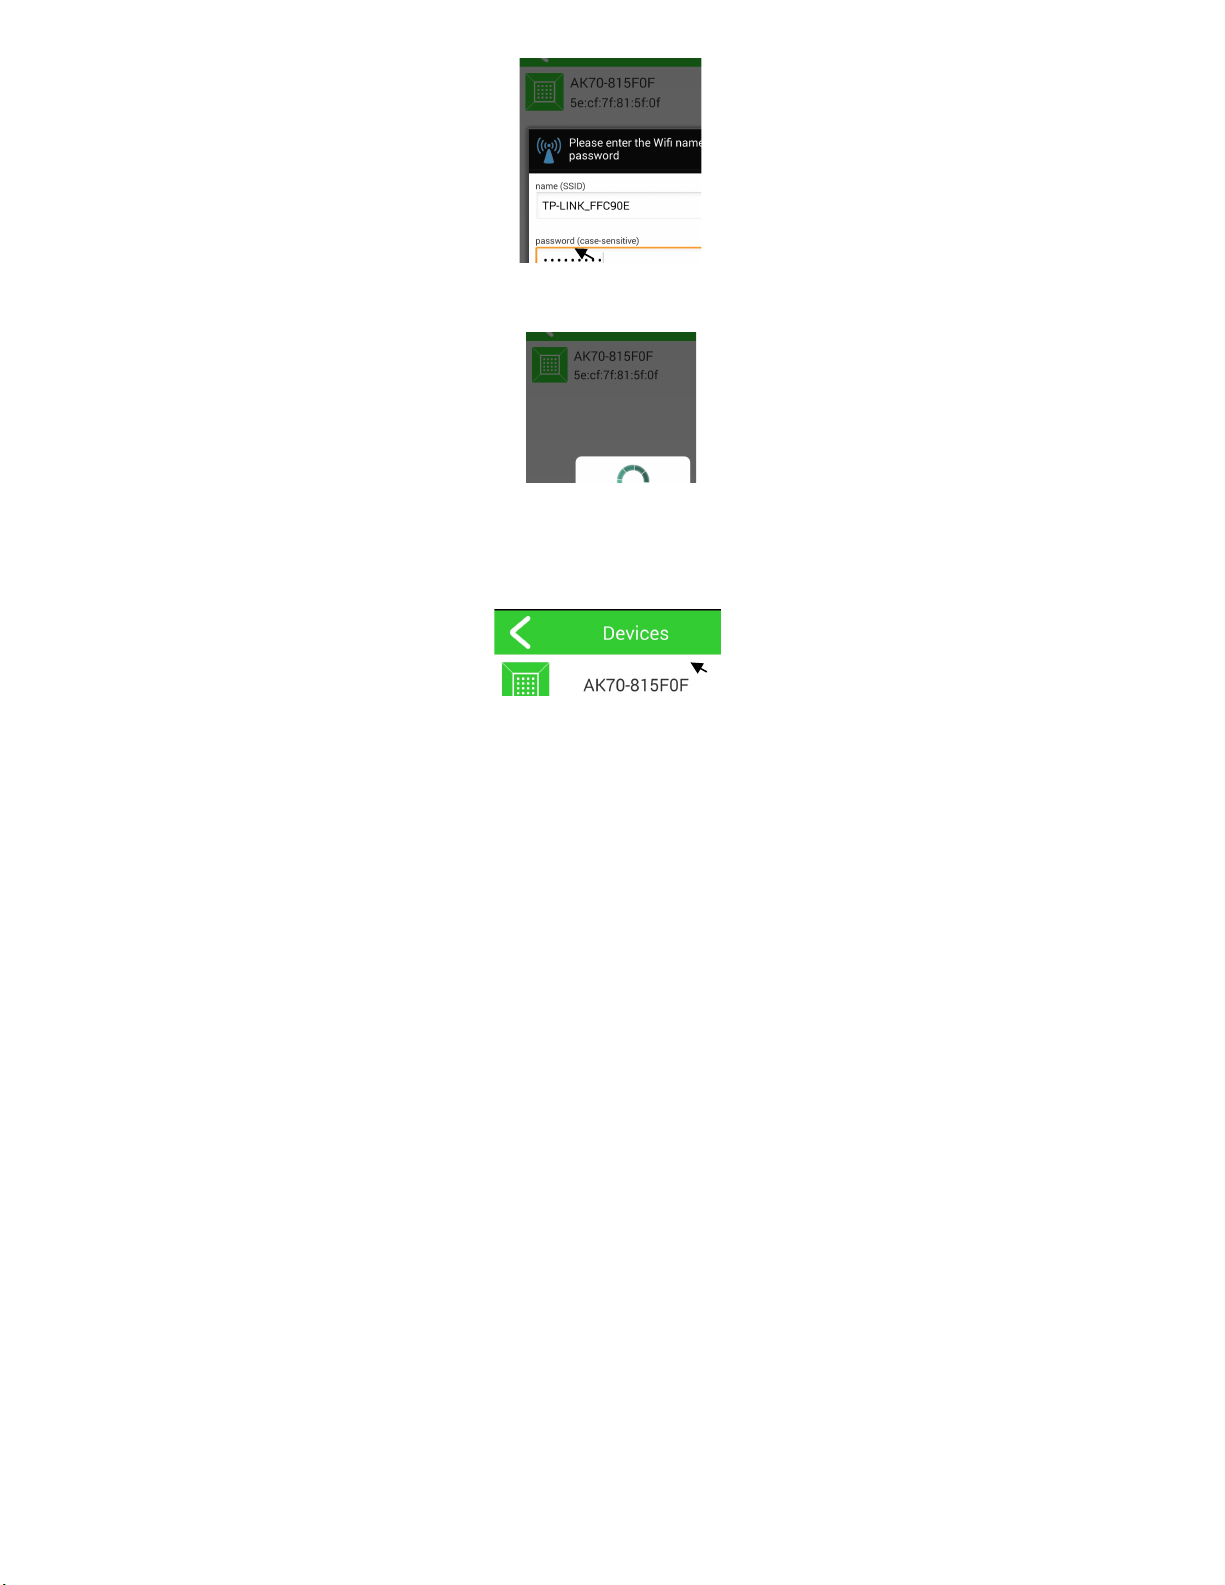
8. The configuration starts automatically.
9. The name of the lamp shall occur in the "Devices" when the
Android system is configured; Click < in the IOS system to
return "Devices" to see the lamp name.
Click on the device name to operate the corresponding lamp while

the indicator light on the lamp body is green and the device
displays ONLINE in the interface.
Note: If the indicator light on the lamp is green but your mobile
device is offline, you need to connect your mobile device to Wi-Fi
in order to operate the lamp. If the indicator light is green but the
lamp is not displayed in the Devices list, you need to follow Step
□
1and□
2 to add the lamp.
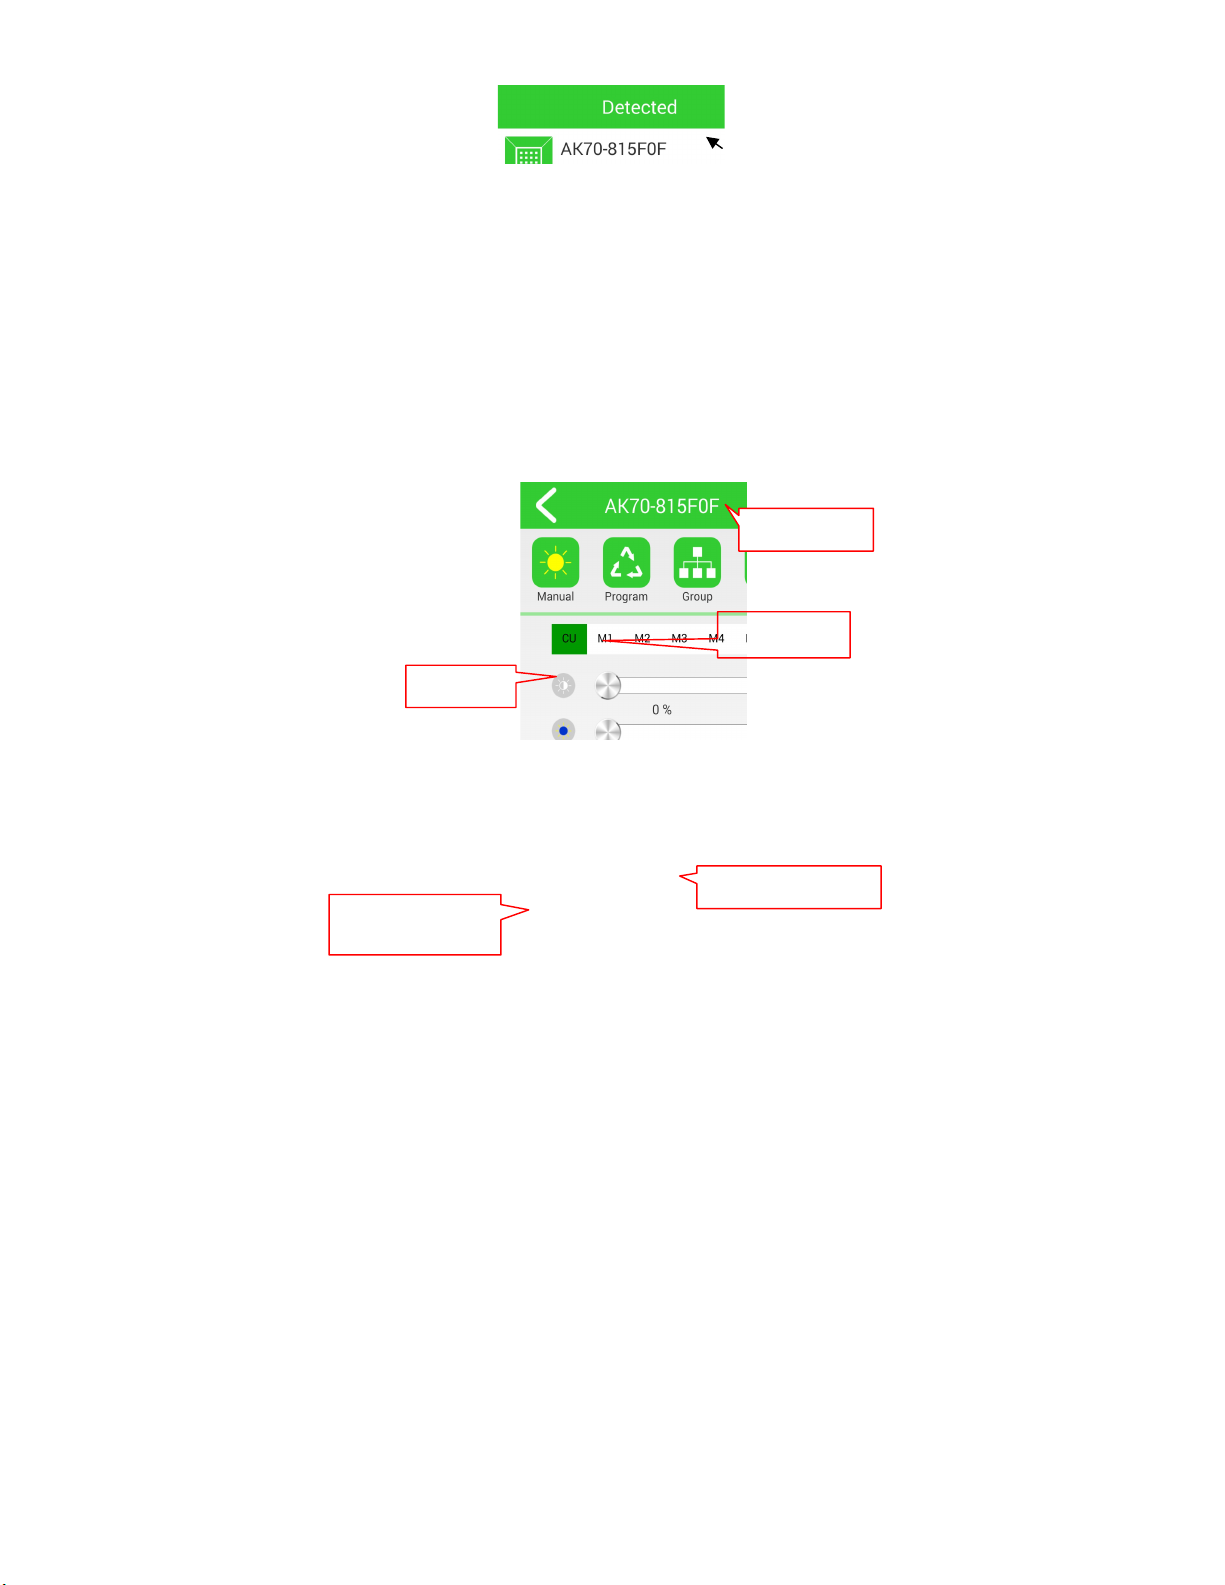
□
1Slide the screen to the right and click "Detected" on the left
menu bar.
□
2 Click "+" to add the device to the "Devices".
Note: If the devices cannot be added through the above 2 steps,
reset the Wi-Fi of lamp by pressing the button on the lamp body
for several seconds until the indicator light turns red. Then repeat
Steps □
1 and □
2.
10. Manual
Click or drag the progress bar to adjust the brightness of each LED
color. The brightness will be updated after you release the progress
bar. Sometimes you may need to repeat 2-3 times due to network
lag.
On-Off button
Progress bar
LED color

M: One progress bar is corresponding to one LED group.
There are 5 preset modes of different LED color combination. The
minimum brightness under each mode is 33%.
M1 - M5 interface
M1: White is dominated.
M2: White is dominated, and Blue is weaker with slight Red,
Green and Purple supplemented.
M3: White and Blue are equal with Red, Green and Purple
supplemented.
M4: Blue is dominated, and White is weaker with slight Red,
Green and Purple supplemented.
M5: Blue is dominated.

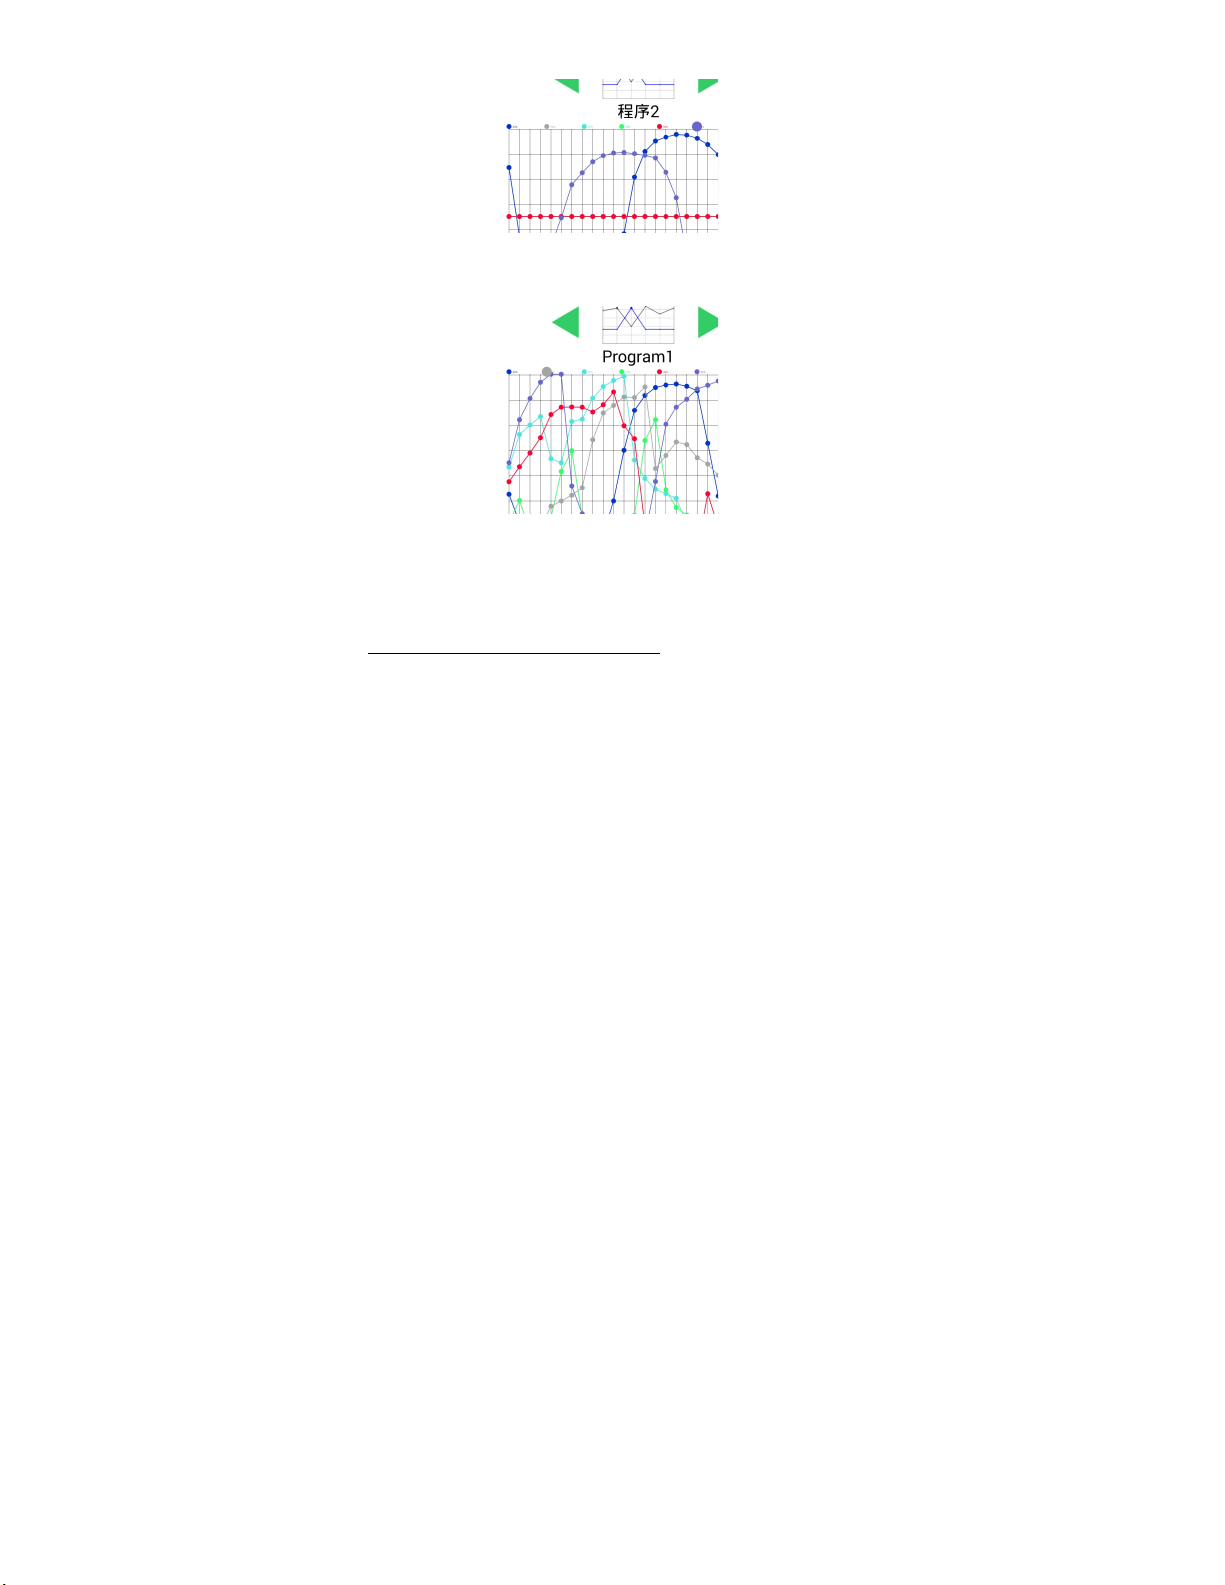
11. Program
You can set the program for 24 hours. The APP can save up to 8
programs. Each program can control 8 lamps maximum.
Click Program . Click ○
+ to the setting interface.
Android: Drag the bolder point (operating point) on the blue
straight line to set the brightness of Blue for 24 hours. Click on the
line in the middle (not the one that has been set) to move the
operating point to the next line. Repeat until you finish all the LED
color settings.
(Note: Only the line with operating point can be programmed.
You can simply move the operating point by clicking on the line
you want to program.)
IOS: Drag the operating point on the white straight line to set the
program. Six lines are overlapped. You can find the lines
underneath by moving the previous lines. Each line has one
operating point.
Android System Program Setting Illustration

i. Before setting
ii. During setting
A: Set the blue line by dragging the operating point;
B: Click the middle line
C: Transfer the operating point to the purple line
A
B
C
Line on which the operating point is located
Operating point
Overlapping
of six lines
D: Set the purple line. Repeat the above steps.
iii. After setting
Click "Save" and "Run" orderly upon completion of setting to start
the program.
IOS System Program Setting Illustration
D

i. Before setting
ii. During setting
Each line has the operating point. Drag the operating point of each
line to perform setting.
Six overlapping lines
Operating point
iii. After setting
Click "Save" and "Run" upon completion of setting to start the
program.
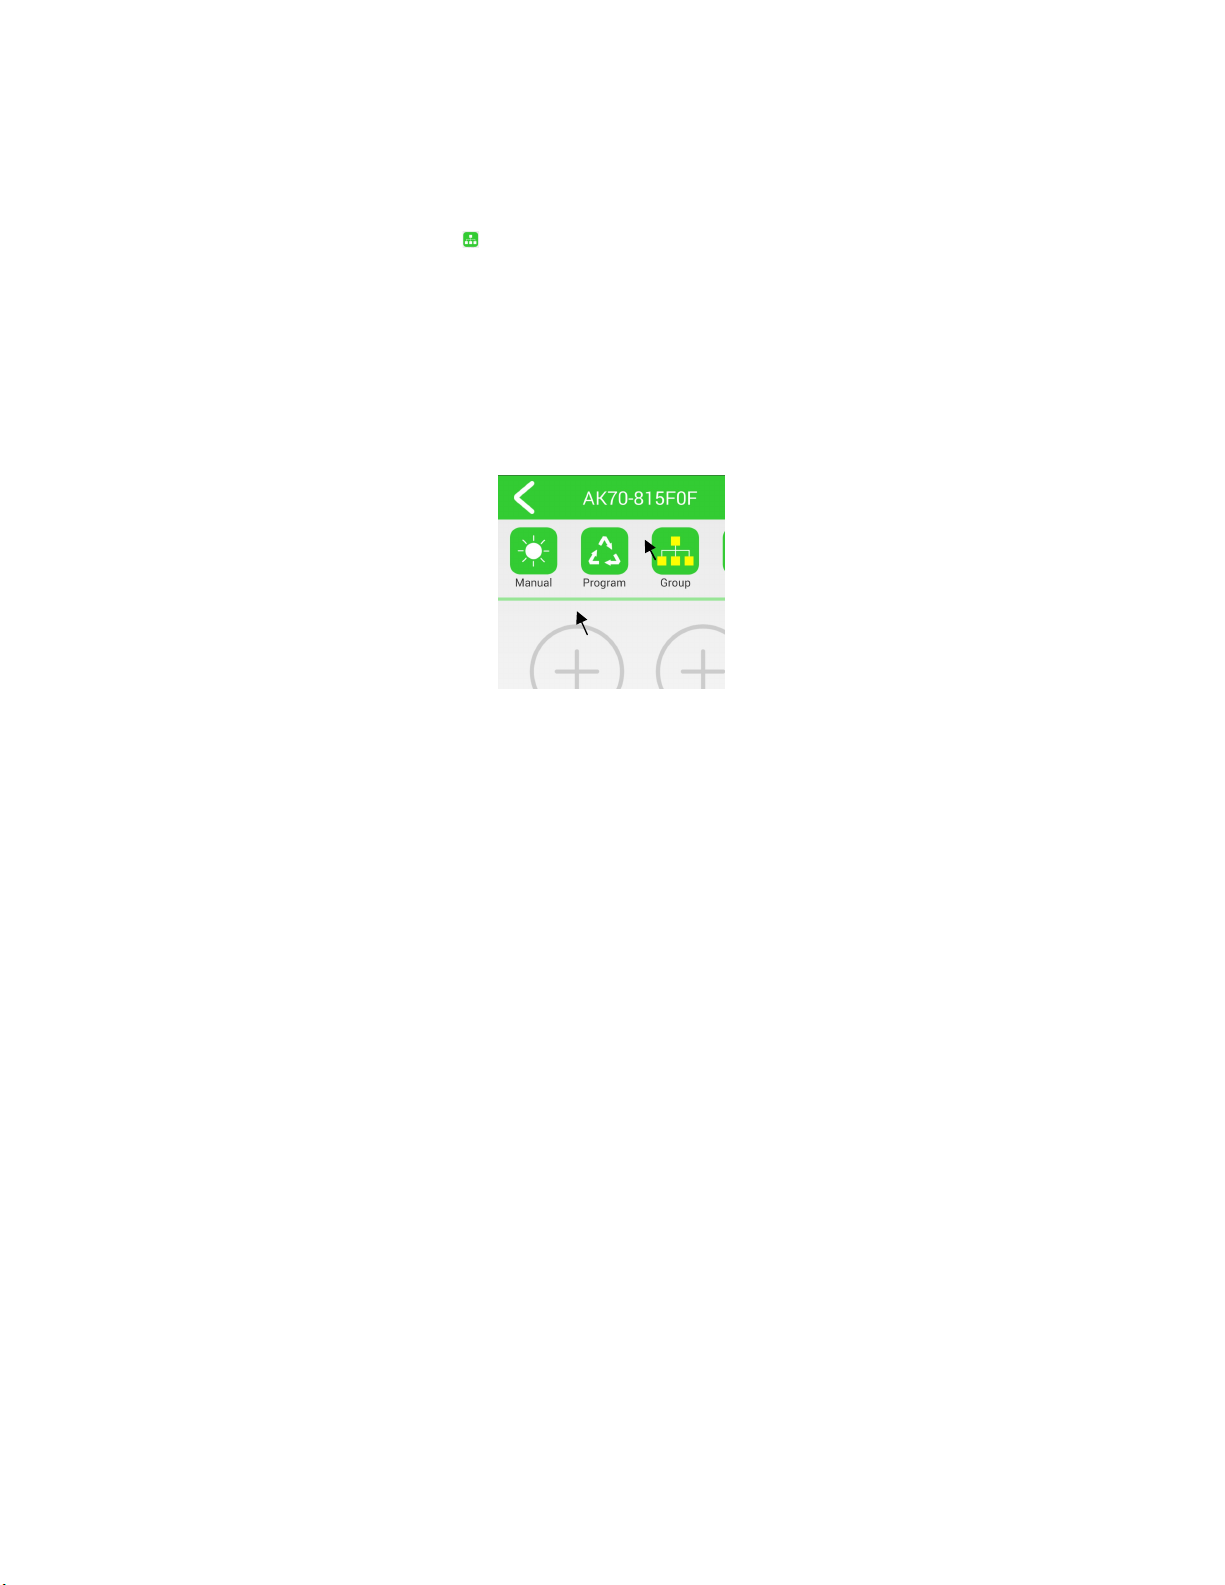
12. Group
Click Group and click ○
+ to enter into the group interface.
Select the devices required and click OK to group multiple
lamps into one group. The group can controls up to 8 lamps.
The group follows the same setting of the main lamp. By adjusting
the brightness and setting the program of the main lamp, the whole
group will follow the same program.
Before Group
1
2

During Group
After Group
Cancel Group
Under the Group page, click either main lamp or slate lamp to go
Slate lamp
Main lamp
Cancel
OK
One Click – Selected
Double Click
–
Cancel

to the Select Device page. Unselect the lamp you want to remove
from the group. Click OK to save.
13. Setting
Edit Names: You can edit the name of your lamp devices to
facilitate user management. Input the name and click Save.
14. Delete device:
Android: Go to Devices Page, press the device name for seconds
until the dialog box props out; click Confirm to delete the device.
Table of contents
Other Jecod Aquarium manuals

Popular Aquarium manuals by other brands

BLAU aquaristic
BLAU aquaristic Nano Lumina 9 RGB+W BLACK manual

Red Sea
Red Sea MAX 250 quick start guide

Dennerle
Dennerle Boden-Fluter manual

Pacific Sun
Pacific Sun IBR 150 user manual

Cobalt Aquatics
Cobalt Aquatics E-X-T 26000 Instructions and warranty

Aquadistri
Aquadistri BlueMarine Reef 125 instruction manual


