manuals.online logo
Brands
  1. Home
  2. •
  3. Brands
  4. •
  5. Jenn-Air
  6. •
  7. Ice Maker
  8. •
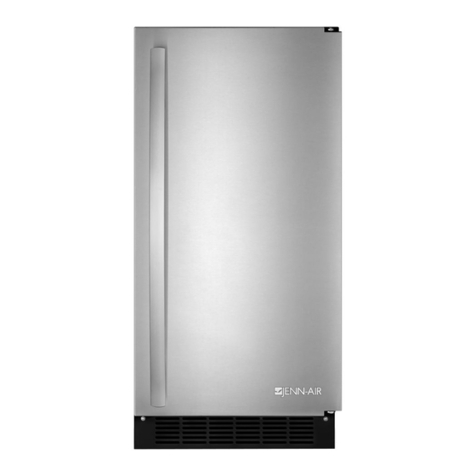
  9. Jenn-Air A912 User manual

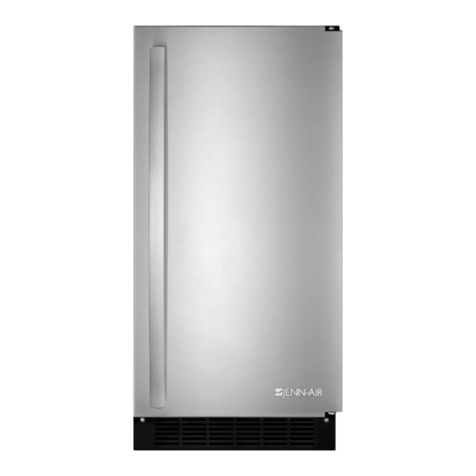
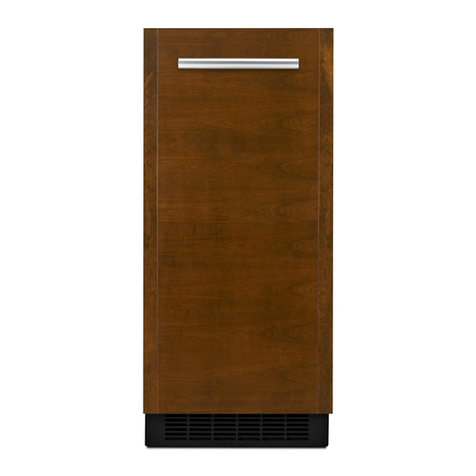
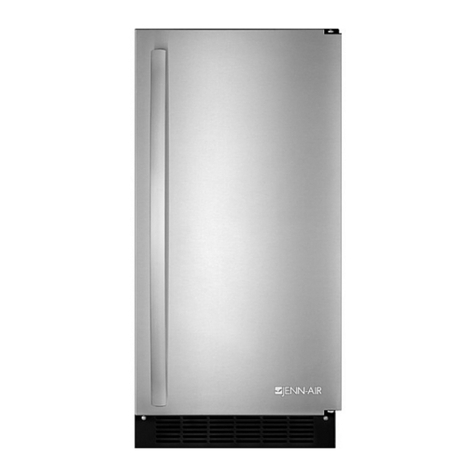
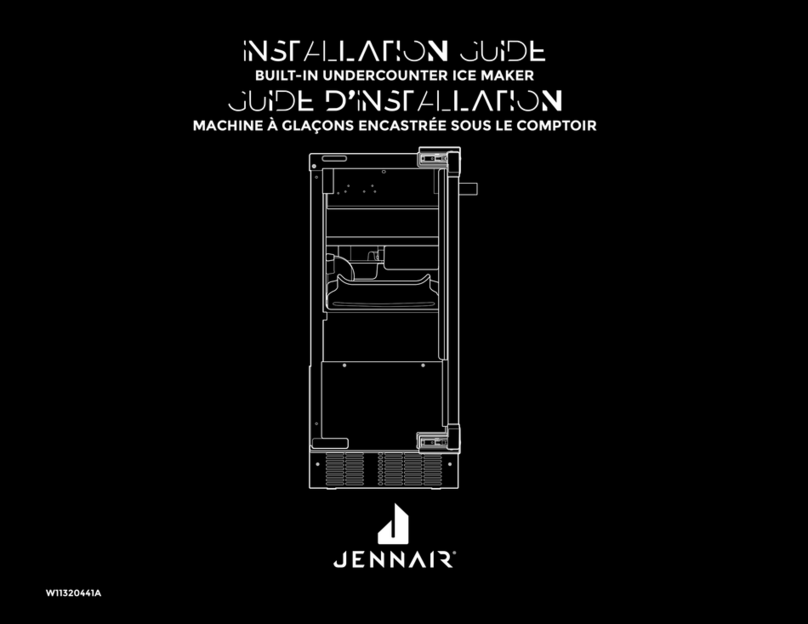
Jenn-Air A912 User manual

ICE MAKER
OWNER'S
GUIDE
TABLE OF CONTENTS
Introduction ..............................................................................2
Safety .......................................................................................3
Installation ............................................................................4-9
Operation ................................................................................10
Care and Cleaning .......................................................11-12
Before Calling for Service .........................................13-18
Warranty ..................................................................................20
Guide du Proprietaire ........................................................21
Guia del Propietario ...........................................................41
_JENN-AIR _,oo7621
Operation
IIOOFC IIEL
_ F
Setting The Controls (seepage 13)
1. To start the normal ice making cycle, select ON.
2. To stop ice maker operation, select OFE
NOTE: The CLEAN setting is used whenever solutions
are circulated through the ice maker for cleaning. See
the Care and Cleaning section (page 11).
IMPORTANT: If the water supply to the ice maker is
turned off, be sure to set the ice maker control to OFE
The ice maker will keep producing ice until the ice
maker's bin is full and will restart automatically when
ice needs to be replenished in the bin.
Due to variables in installation and use, individual
results may vary. Room and water supply
temperatures affect the output of ice. Ice will also melt
away, especially at the start of an empty bin, but this
will slow down as ice accumulates.
NOTE: When using the ice maker for the first time,
discard at least the first two harvests of ice cubes.
How Your Icemaker Works
Your ice maker is unique in forming ice. It uses
fractional freezing to form a slab of ice that is clear and
has less mineral content than the water it is produced
from. This is accomplished
by running water over the
cold evaporator plate
which gradually freezes
the water to produce the
ice slab. Mineral deposits
are left in the reservoir.
\
When the ice slab reaches
the correct thickness
determined by the
temperature of the
evaporator plate, the
electronic control switches
to the harvest cycle to
harvest the ice slab.
During the harvest cycle,
the ice slab falls from the
evaporator to the ice grid
cutter. Here, the ice slab is
cut into 3/4"squares by the
grid cutter's low voltage
heated wires. During the harvest cycle, the drain valve
will remain open for 45 seconds to drain the reservoir
of remaining deposits. After that, the water valve will
open for 2 minutes providing 2 quarts of water to the
reservoir for the next ice production cycle.
10
Care and Cleanin
Both the ice making system and the condenser need to
be cleaned regularly.
Cleaning the ice Maker
System
Some impurities and minerals will remain and build-up
in the ice maker and stick to the ice maker's parts over
time. This build-up must be removed for proper ice
production, ice quality, and ice maker life. Your ice
maker is equipped with a cleaning mode that will help
in cleaning out these impurities.
Clean the ice and water system at least annually to
remove buildup. Frequency of cleaning depends on
water hardness. With very hard water (>14 gpg),
cleaning may be required as frequently as every
6 months.
To clean the ice maker:
Swtchthe eectorswtchtothe!cO
OFF position (see page 13). F N
2_
3_
Wait approximately 10 minutes for the ice to fall
into the storage bin. Remove all ice from the
storage bin.
Remove the drain plug at the bottom of the
reservoir to drain any remaining water and then
reinstall.
4_ Unscrew and remove interior stainless steel front
cover panel to gain access to the reservoir.
5. Determine the amount of ice maker cleaner
needed, based on 3 quarts
of water (refer to the cleaner
manufacturer's directions).
Pour this amount of ice
maker cleaner into the
reservoir of the ice maker. Reservoir Drain
Plug
NOTE: "ice Maker Cleaner Appliance" by Vapco
Products, a Division of Garman Co., Inc. is
recommended. It is available from
www.vapcoproducts.com (1-800-466-5150) or
many refrigeration supply and hardware stores.
.
7.
.
.
Replace front cover panel and close door.
Switch selector switch on the grill of the machine
to the CLEAN position. Three quarts of water will
automatically be added to ice maker cleaner.
The total cleaning time will end in approximately
49 minutes. The cleaning cycle will automatically
rinse the evaporator plate and also drain the
cleaning solution and rinse water.
After the cleaning cycle has ended, remove the
front cover panel again and check that build up
has been removed. The evaporator plate should be
clean, shiny, and smooth to the touch. If not and
build up is still visible, repeat the cleaning cycle
above. If build up is removed, continue below.
10. Disconnect power to the ice maker.
11. Remove the distributor tube, hose clamp, hose and
its rubber ends.
12.
13.
14.
Thoroughly clean the inside of the distributor tube
and the spray holes. You can use the same
cleaning solution as before and an old tooth brush
to reach the inside of the distributor tube, rinse
thoroughly.
Reinstall the rubber end, hose, and hose clamp to
the distributor and then reinstall the distributor
tube to the evaporator with the spray holes pointed
to the bottom of the evaporator plate. Reinstall the
front cover panel.
Clean the ice maker's interior, ice scoop, interior
door panel, and door gasket with mild detergent
and water. Using two tablespoons of baking soda
in one quart of warm water while cleaning will help
remove odors. Rinse with fresh water. DO NOT
USE ANY ABRASIVE CLEANING PRODUCTS.
Your ice maker is now clean and may be put back into
operation by reconnecting the power and switching the
selector switch to the ON position.
NOTE: Discard the first harvest of ice cubes produced
after the clean cycle has been run. 11
41007621 JA Ice Maker ENG 4/28/03 2:18 PM Page 12 +
Care and Cleaning, co.=.
Condenser
For best performance, brush or vacuum lint and dirt
from the condenser at least once a year. Unscrew the
grille on the bottom front of the cabinet to access the
condenser.
ice Maker Cleaning Chart
Painted metal surfaces:
Cabinet, doors Detergent and water
Mild liquid sprays
Light cleaning: mild
detergent and water
Moderate soil: Bon Ami*
Discoloration: Cameo
Stainless Steel Cleaner*
Stainless steel doors
[certain models)
Dry with a clean, soft cloth.
DO NOT wipe the ice maker with a soiled
dishwashing cloth or wet towel. These may leave
residue that can scratch and weaken the paint. Do
not use scouring pads, powdered cleansers, bleach
or cleaners containing bleach. These products can
scratch and erode the paint finish.
DO NOT wax plastic or vinyl parts.
Use a soft cloth or sponge.
Always wipe with the grain of the stainless steel.
DO NOT use chlorine bleach or any cleaning product
that contains chlorine bleach.
After cleaning, rinse and dry.
To restore luster and remove streaks follow with
Stainless Steel Magic Spray* (Jenn-Air model A912,
Part No. 20000008).
o
Door gasket Baking soda and water
Detergent and water
Detergent and water
Baking soda and water
Interior and door liner
Use 1-2 tablespoons baking soda per quart of
water. Be sure to wring out excess water from
sponge or cloth when cleaning around controls,
lights or electrical parts.
See above for baking soda solution.
DO NOT use abrasive cleaners, concentrated
detergents, bleaches, cleaning waxes, solvents or
polish cleaners to clean the ice maker interior.
* Brand names are the trademarks of the respective manufacturer.
12
+
41007621 JA Ice Maker ENG 4/28/03 2:18 PM Page 13 +
Before Calli for Service
Things to Remember
1. Allow your ice maker to run for at least 48 hours to
accumulate ice in ice maker's bin.
2. The ice maker will cycle often between ice
production and ice harvest cycles.
3. Your ice maker will automatically shut down when
the ice bin is full.
4. Disconnect _ower to the ice maker before working
on it.
5. Keep your ,ce maker clean for proper ice quality,
production, and unit life.
6. If ice maker is to be left unattended for a month or
longer, turn off its water supply, switch the control
to OFF and disconnect the power supply. Remove
any ice that remains in the bin.
Make sure that distributor
tubing is not in the path
of the ice slab.
Distributor Evaporator
Ice Scoo
Front Cover
Panel
Phillips
Grid
ON/OFF/CLEAN
Selector Switch
Reservoir Evaporator
Distributor
7
Circulation
Pump
stat _... Reservoir
Drain
__. Plug
1
Front View Side View
13
+
41007621 JA Ice Maker ENG 4/28/03 2:18 PM Page 14 +
Before Calling for Service, co.,
Check the following items:
1. Make sure the ice maker is plugged into outlet.
2. Check the outlet for power. Test outlet with a lamp
to make certain outlet has power.
3. Make sure the ice maker's selector switch is in the
ON position (see page 13).
4. Make sure that there is cold water supplied to the
ice maker.
5. Make sure drain plug on bottom of reservoir is
inserted.
6. Make certain unit is level from front to back and
side to side.
7. Make certain that the drain line to the ice maker is
not restricted or kinked.
If you are not able to correct the problem, contact your
dealer or the manufacturer. Be sure to have the model
number and the serial number handy before you call.
The model and the serial number are located on the
data plate inside on the lower front of the ice maker
cabinet.
Ice maker does The ice maker is unplugged. Plug in the ice maker.
not operate. Breaker is tripped or fuse is blown. Reset the breaker or replace fuse.
Ice machine selector switch is in Set the rocker switch on the grille of the ice
the OFF position, machine to the ON position.
Water supply is turned off. Turn on water supply to the ice maker.
Ice maker operates The ice maker has just been started Ice produced when the unit is initially started
but does not produce and it has been less than 6 hours, will melt off in the bin. In 6 hours there can be
any ice. a few cubes in the bin. This is normal
operation.
Typical ice production cycle can Check the unit in 24 hours for ice
take up to 1'/2hours. Initial startup accumulation in the bin.
cycles can be longer.
The selector switch is in the OFF or Set the rocker switch on the grille of the ice
CLEAN position, machine to the ON position.
No water in the reservoir. Make sure that the reservoir drain plug is
installed. Check the water line to make sure it
is on and that there are no restrictions or
kinks. Check all filters to make sure they are
not restricted or plugged.
Distributor tube is restricted. See Cleaning the Ice Maker System (page 11).
Build up of deposits on evaporator See Cleaning the Ice Maker System (page 11).
plate.
Condenser fan air flow is restricted. Make certain the grille in the front of the unit
is free and open for proper air circulation.
Check and clean the condenser coil by
removing the grille in the front of the unit.
Clean the condenser with a vacuum and brush
attachment.
14
+
41007621 JA Ice Maker ENG 4/28/03 2:18 PM Page 15 +
Ice maker operates Room and/or water temperature is Move the ice maker to an area where ambient
hut does not produce too warm. temperature is below 80° E The ice maker
any ice, cont. should not be placed next to a heat source such
Leaking drain valve.
Inadequate drain system.
Grid cutter is unplugged.
Low ice consumption.
Not enough water in reservoir.
Distributor tube is restricted.
Build up of deposits on evaporator
plate.
Inadequate drain system.
Leaking drain valve.
Room temperature is too warm.
Ice cubes are too
small [less than
'/2" thick).
as an oven. Check for cold water connection.
See Cleaning the Ice Maker System (page 11).
This will also dissolve and flush out foreign
material in the drain valve which may be causing
it to leak.
Restriction in drain lines will cause ice in the
bin to melt. If using a gravity drain, make
certain there are no kinks or restrictions in the
drain lines. If using a drain pump, check the
inlet screen, discharge line, and vent line for
any buildup or restrictions.
Remove the front cover panel and plug the
grid cutter into the receptacle on the side of
the liner.
Ice is slowly melting on the ice bin and will
affect the size of the ice cube. This is normal
operation. When the ice bin needs to be
replenished, cubes will return to regular size.
Make sure that the reservoir drain plug is
installed properly. Check the water line to the
ice maker to make sure there are no
restrictions or kinks. Check all filters to make
sure they are not restricted or plugged.
See Cleaning the Ice Maker System (page 11).
Restriction in drain lines will cause ice in the
bin to melt to a thinner cube. If using a gravity
drain, make certain there are no kinks or
restrictions in the drain lines. If using a drain
pump, check the inlet screen, discharge line,
and vent line for any build or restrictions.
See Cleaning the Ice Maker System (page 11).
This will also dissolve and flush out foreign
material in the drain valve which may be
causing it to leak.
Move to an area where temperature is below
80° E
15
+
41007621 JA Ice Maker ENG 4/28/03 2:18 PM Page 16 +
Before Calling for Service, co.,
Ice cubes are too big Ice slab not releasing. See Cleaning the Ice Maker System (page 11].
(greater than 3/4"thick).
Condenser fan air flow is restricted. Make certain the grille in the front of the unit is
free and open for proper air circulation. Check
and clean the condenser coil by removing the
grille in the front of the unit. Clean the condenser
with a vacuum and brush attachment.
Room temperature is too warm. Move to an area where temperature is below 80° E
Hollow ice slab. Distributor tube is restricted. See Cleaning the Ice Maker System (page 11).
Build up of deposits on evaporator See Cleaning the Ice Maker System (page 11).
plate.
Low water level in reservoir.
Softened water supply.
Room temperature is too cold.
Low water level in reservoir.
Ice is not clear.
Distributor tube is restricted.
Build up of deposits on evaporator
plate.
Inadequate drain system.
Condenser fan air flow is restricted.
Low ice production.
Unit is running, has
run over a 48 hour
period, and there is
little ice in bin.
Make sure that the reservoir drain plug is
installed properly. Check the water line to the
unit to make sure there are no restrictions or
kinks in the line. Check all filters to make sure
they are not restricted or plugged.
Make sure that the reservoir drain plug is
installed properly. Check the water line to the
ice maker to make sure there are no restrictions
or kinks in the line. Check all filters to make
sure they are not restricted or plugged.
Make certain that water line is not connected
to the water softener.
Move the ice maker to an area where room
temperature is above 55° F.
Make sure that the reservoir drain plug is
installed properly. Check the water line to the
ice maker to make sure there are no
restrictions or kinks. Check all filters to make
sure they are not restricted or plugged.
See Cleaning the Ice Maker System (page 11).
Restriction in drain lines will cause ice in the
bin to melt. If using a gravity drain, make
certain there are no kinks or restrictions in the
drain lines. If using a drain pump, check the
inlet screen, discharge line, and vent line for
any buildup or restrictions.
Make certain the grille in the front is free and
open for proper air circulation. Check and
clean the condenser coil by removing the grille
in the front. Clean the condenser with a
vacuum and brush attachment.
16
+
41007621 JA Ice Maker ENG 4/28/03 2:18 PM Page 17 +
Unit continues to run Ice bin is not full. The ice maker will automatically shut down
and produce ice. when ice reaches the thermostat.
Room temperature is too warm. Move the ice maker to an area where room
temperature is below 80° E
Ice maker is not level. Use a level to check the unit for level from
side to side and front to rear.
Grid cutter is not The selector switch is not in the ON Set the rocker switch on the grille of the ice
cutting the ice slab. position, machine to the ON position.
The grid cutter is not plugged into Remove the front cover panel and plug the
the receptacle, grid cutter into the receptacle on the side of
the liner.
Time to cut through the slab. It can take up to 35 minutes to cut through a
harvested ice slab. This is normal operation.
Ice cubes are sticking Ice consumption is low. Use the ice in the bin frequently. Ice will stick
together, together if left in insulated bin over long
periods of time.
Room temperature is too warm. Move the ice maker to an area where
temperature is below 80° E
Ice level is too high. The ice machine is not level. Use a level to check the ice maker for level
from side to side and front to rear.
Room temperature is too warm. Move the ice maker to an area where
temperature is below 80° E
Ice deflector is not in place or Check to see that the ice deflector is in place
secured properly, and secured below the grid cutter.
Bin level thermostat needs You can adjust the bin thermostat tube by
adjusted, simply pressing directly down on the tube 5"
from the front of the tube to get a desired bin
level.
Ice level is too low. The ice machine is not level. Use a level to check the unit for level from
side to side and front to rear.
Room temperature is too cold. Move the unit to an area where temperature is
above 55° E
The selector switch is not in the ON Set the rocker switch on the grille of the ice
position, machine to the ON position (see page 13).
17
+
41007621 JA Ice Maker ENG 4/28/03 2:18 PM Page 18 +
Before Calling for Service, co.,
Inadequate drain system. Restriction or improperly installed drain linesWater keeps backing
up into the ice bin
(gravity drain).
Foreign material in ice bin drain.
Water keeps backing Drain pump tubing kinked or
up into the ice bin restricted.
(drain pump).
Inlet screen to the drain pump is
restricted or blocked.
Drain pump and/or the ice machine
are not level.
The drain pump cycles Vent line to the drain pump is
on and off erratically, restricted or kinked.
Discharge line is restricted or
kinked.
The drain pump is not level.
will cause water to back up into the ice bin.
Make certain there are no kinks or restrictions
in the drain lines. If necessary, consult a
qualified plumber.
Foreign material is restricting or blocking the
ice bin drain located at the right rear corner of
the ice bin. The drain will need to be cleared.
Check inlet, discharge, and vent line tubing for
any kinks or restrictions and repair as
necessary.
Clean the inlet screen to the drain pump.
Check and level is necessary the drain pump
as well as the ice machine.
Check the vent line for any restrictions or
kinks and repair as necessary.
Check the discharge line and connection to
the desired drain for any restrictions or kinks
and repair as necessary.
The drain pump must be level. Check for level
on the top of the drain pump case and adjust
the tubing or use shims to level.
18
+

Other Jenn-Air Ice Maker manuals

Jenn-Air JIM158XWRB0 User manual

Jenn-Air

Jenn-Air JIM158XWRB0 User manual

Jenn-Air w10519943b User manual

Jenn-Air

Jenn-Air w10519943b User manual

Jenn-Air JIM1550ARB User manual

Jenn-Air

Jenn-Air JIM1550ARB User manual

Jenn-Air JIM1550ACX User manual

Jenn-Air

Jenn-Air JIM1550ACX User manual

Jenn-Air JIM158BCX3 User manual

Jenn-Air

Jenn-Air JIM158BCX3 User manual

Jenn-Air JUIFX15HX User manual

Jenn-Air

Jenn-Air JUIFX15HX User manual

Jenn-Air Ice Maker User manual

Jenn-Air

Jenn-Air Ice Maker User manual

Jenn-Air JENN-AIR ICE MAKER User manual

Jenn-Air

Jenn-Air JENN-AIR ICE MAKER User manual

Jenn-Air Ice Maker User manual

Jenn-Air

Jenn-Air Ice Maker User manual

Jenn-Air JIM1550ARW User manual

Jenn-Air

Jenn-Air JIM1550ARW User manual

Jenn-Air JIM158XBCX2 User manual

Jenn-Air

Jenn-Air JIM158XBCX2 User manual

Jenn-Air JUIFN15HX00 User manual

Jenn-Air

Jenn-Air JUIFN15HX00 User manual

Jenn-Air W11528111A User manual

Jenn-Air

Jenn-Air W11528111A User manual

Jenn-Air JIM158XXCX User manual

Jenn-Air

Jenn-Air JIM158XXCX User manual

Jenn-Air ICE MAKER Parts list manual

Jenn-Air

Jenn-Air ICE MAKER Parts list manual

Jenn-Air JIM158XXRS User manual

Jenn-Air

Jenn-Air JIM158XXRS User manual

Jenn-Air JENN-AIR ICE MAKER User manual

Jenn-Air

Jenn-Air JENN-AIR ICE MAKER User manual

Jenn-Air W10520236B User manual

Jenn-Air

Jenn-Air W10520236B User manual

Jenn-Air W10520236E User manual

Jenn-Air

Jenn-Air W10520236E User manual

Jenn-Air JUIFN15HX User manual

Jenn-Air

Jenn-Air JUIFN15HX User manual

Jenn-Air JENN-AIR ICE MAKER User manual

Jenn-Air

Jenn-Air JENN-AIR ICE MAKER User manual

Popular Ice Maker manuals by other brands

Scotsman TCL 180 Service manual

Scotsman

Scotsman TCL 180 Service manual

Kärcher IP 120 manual

Kärcher

Kärcher IP 120 manual

U-Line SS1095 Quick referenc guide

U-Line

U-Line SS1095 Quick referenc guide

Polar Refrigeration T316 instruction manual

Polar Refrigeration

Polar Refrigeration T316 instruction manual

Frigidaire EFIC237 use & care

Frigidaire

Frigidaire EFIC237 use & care

Monogram ZDI15 installation instructions

Monogram

Monogram ZDI15 installation instructions

U-Line Refrigerator/Ice-Maker Combos user manual

U-Line

U-Line Refrigerator/Ice-Maker Combos user manual

Follett Horizon Elite HMD710A Operation and service manual

Follett

Follett Horizon Elite HMD710A Operation and service manual

Hoshizaki KM-250BWB parts list

Hoshizaki

Hoshizaki KM-250BWB parts list

Scotsman NM1250 Service manual

Scotsman

Scotsman NM1250 Service manual

Manitowoc SN12 Replacement instructions

Manitowoc

Manitowoc SN12 Replacement instructions

HOMCOM 800-163V90 instruction manual

HOMCOM

HOMCOM 800-163V90 instruction manual

Manitowoc QM30 Series Installation and use guide

Manitowoc

Manitowoc QM30 Series Installation and use guide

Howe Rapid Freeze 1000-RLE-CO2DX Installation & service manual

Howe

Howe Rapid Freeze 1000-RLE-CO2DX Installation & service manual

Cornelius The Profile PR150 BC Operator's manual

Cornelius

Cornelius The Profile PR150 BC Operator's manual

icetro IM-0350-AC user manual

icetro

icetro IM-0350-AC user manual

Hoshizaki DCM-700BWA parts list

Hoshizaki

Hoshizaki DCM-700BWA parts list

COOL HEAD ICM Series instruction manual

COOL HEAD

COOL HEAD ICM Series instruction manual

manuals.online logo
manuals.online logoBrands
  • About & Mission
  • Contact us
  • Privacy Policy
  • Terms and Conditions

Copyright 2025 Manuals.Online. All Rights Reserved.