Jensen 5501011030 User manual

Machine : Woodchipper „Angeln“
Type : A521/A528 Di XL D-1403 E 80km/h
Machine Nr. :
5501011030
Date of building : 01/2001
Maasbüll
Tel.: 04634 / 9370-0
Fax: 04634 / 1025
E-mail:[email protected]
Jensen Service GmbH
D – 24975 Maasbüll
Operating instructions
List of spare parts

Before attempting any maintenance on the machines,
read the instruction and safety manuel thouroughly.
We are always striving to improve our product and we reserve the right
to bring about any changes and improvements which we consider to be
appropriate. An obligation to any previously delivered machines and
extended apparatus is ínvalid.
REFERENCE/INSTRUCTION:
This instruction manual also contains descriptions of the auxiliary
equipment which is not usually found in the extent of the series. In
accordance with the references in this service manual, the enforcement
of clients‘ wishes does not generally appear.
Jensen Service

Foreward
Dear Clients!
This service manual should make it easier to get to know the machine and its
construction and to make full use of all the facilities of the machine..
The instruction manual contains important references so that the machine and the
construction can be used safely, correctly and economically. Your attention will help
to avoid any danger, costs for repairs and will save time, increase reliability and
prolong the working life of the machine.
The instruction manual contains appropriate supplementary instructions for the
prevention of accidents and to correspond with the environmental protection
guidelines.
According to legal provisions, the work agreement and the service manual must
remain with the machine at all times, and must always be available for use. When
buying, renting or borrowing a machine these papers must always be handed over.
The instruction manual must be read and understood by every person who works
with the machine e.g.
- Servicing, preparation including, the repair of any damage caused through
work, rubbish removal, taking care of the maintanence.
- Upkeep (attendance, inspection, restoration) and / or
- Transportation
At the side of the instruction manual, on the application and on the insert there are
binding regulations concerning accident prevention and the recognised technical
rules for safety which must be complyed with.
We wish you much success with the use of our machine in your work.
Jensen Service.

Bedeutung der Piktogramme 3
Meaning of the pictograms
Signification des pictogrammes
Betekenis van de pictogrammen
Piktogramme Bedeutung Position
Pictogramm Meaning Place
Pictogramme / Pictogrammen Signification / Betekenis Positionnement / Positie
Di= Service - Center
Service - Center
Boite à outils
Gereedschapskoffer
Z= Trog über Steuerblock
Infeed chute above the control
box
Trèmie d’alimentation au
dessus de la boite de contrôle
Invoertrechter op de stuurblok
Di= Getriebekasten
Gearing box
Boite de direction
tandwielkas
Z= Getriebekasten
Gearing box
Boite de direction
tandwielkas
Di= Förderband
Conveyor belt
Bande entraínante
invoerband
Z= Förderband
Conveyor belt
Bande entraínante
invoerband
Di= bei Schutzabstützung
If protection support
Par support de protection
Indien er een steun is
Z= bei Schutzabstützung
If protection support
Par support de protection
Indien er een steun is
Di= Schneckenrohr
Worm tube
Tube á vis sans fin
Buis voor vijzel
Z= Schneckenrohr
Worm tube
Tube á vis sans fin
Buis voor vijzel
Vor Inbetriebnahme die Betriebs-
anleitung und Sicherheitshinweise lesen
und beachten.
Carefully read operator’s manual before
handling the machine. Observe
instructions and safety rules when
operating.
Lire le livret d’entretien et les conseils de
sécurité avant la mise en marche et en
tenir compte pendant le fonctionnement.
Alvorens met de machine te werken, de
gebruiksaanwijzing en de
veiligheidsvoorschriften lezen en in acht
nehmen.
Schutzvorrichtungen bei laufendem
Motor nicht öffnen oder entfernen.
Do not open or remove safety shilds
while engine is running.
Ne pas ouvrir ni déposer les garants
lorsque le moteur tourne.
Terwijl de motor draait de afschermingen
niet openen of afnemen
Schutzvorrichtung bei laufendem Motor
nicht öffnen oder entfernen.
Do not open or remove safety shilds
while engine is running.
Ne pas ouvrir ni déposer les garants
lorsque le moteur tourne.
Terwijl de motor draait de afschermingen
niet openen of afnemen.
Der Aufenthalt im Gefahrenbereich ist
nur bei eingelegter Sicherheitsstütze
zulässig.
Attach support before getting into
hazardous area.
Mettre en place le support avant de
pénétrer dans une zone de danger.
De steun plaatsen alvorens in de
gevarenzone te komen
Niemals in die sich drehende Schnecke
greifen.
Never reach into rotating auger.
Ne jamais intervenir sur la vis lorsqu’elle
est en rotation.
Nooit naar de vijzel reiken terwijl deze
draait

Bedeutung der Piktogramme 3
Meaning of the Pictograms
Signification des pictogrammes
Betekenis van de pictogrammen
Piktogramme Bedeutung Position
Pictogram Meaning Place
Pictogramme / Pictogrammen Signification / Betekenis Positionnement / Positie
Alle Maschinen je 1x
rechts u. links am Trog.
By every machine one piece right and left
from input.
Pour chaque machine un pictogramme
de chaque côté de l‘ ouverture.
Bij elke machine een pictogram zowel
links als rechts van de invoer
Di= Keilriemenschutz
V- belt protection
Protection de courroie
Riemafscherming
Z= Keilriemenschutz
V- belt protection
Protection de courroie
Riemafscherming
Di= Auswerferhaube
Ejector cap
Calotte de goulotte
Uitwerpbuis
Z= Auswerferhaube
Ejector cap
Calotte de goulotte
Uitwerpbuis
Di= Förderband
Conveyor band
Bande entrainante
Toevoerband
Z= Förderband
Conveyor band
Bande entrainante
Toevoerband
Di= klappbares Förderband
Lever conveyor band
Bande entrainante rabattable
Opklapbare invoerband
Z= klappbares Förderband
Lever conveyor band
Bande entrainante rabattable
Opklapbare invoerband
Gefahr durch sich drehende Maschinen-
teile.
Keep away from rotating machine parts.
Rester à l’ècarte de pièces.
Zich verwijderd houden van draaiende
machinedelen
Niemals in den Quetsch Gefahrenbereich
greifen, solange sich dort Teile bewegen
können.
Never put your hand into the crushing
danger area as long as parts may move.
Ne jamais intervenir dans une zone où il
y a risque d’écrasement tant que des
pièces sont en mouvement.
Nooit de gevarenzone naderen zolang de
delen draaien
Während des Betriebs Schutzvor-
richtungen nicht öffnen oder entfernen.
Do not open or remove safety shilds
while engine is running.
Ne pas ouvrir ni dèposer de garants
lorsque le moteur tourne.
De afschermingen niet openen of
verwijderen terwijl de motor draait.
Maschinenteile erst dann berühren, wenn
sie vollständig zum Stillstand gekommen
sind.
Wait until all machine components have
completely stopped before touching
them.
Attendre l’mmobilisation complète de
toutes les pièces de la machine avant d’y
toucher.
Wachten tot alle machinedelen volledig
stil staan alvorens ze aan te raken.
Ladefläche niemals bei eingeschaltetem
Antrieb und laufendem Motor betreten.
Do not step on loading platform if PTO is
connected to tractor and engine is
running.
Ne jamais s’engager sur la plate-forme de
chargement lorsque le moteur du
tracteur tourne avec prise de force
engagée.
Niet op het platform stappen als de
cardanas aan de tractor bevestigd is en
de motor draait

Bedeutung der Piktogramme 3
Meaning of the pictograms
Signification des pictogrammes
Betekenis van de pictogrammen
Piktogramme Bedeutung Position
Pictogram Meaning Place
Pictogramme / Pictogrammen Signification / Betekenis Positionnement / Positie
Di= Trog links
Left side from infeed chute
Côtè gauche du trèmie
Trechter links
Z= Trog links
Left side from infeed chute
Côtè gauche du trèmie
Trechter links
Schaltstellungen
Stop – Einzug - Rückwärts
Switch position
Stop – Input – backwarts
Positionnement du commutateur
Stop – Entrèe – marche arrière
Schakelingsposities
Stop – invoer - achteruit
Di= klappbares Förderband
Lever conveyor band
Bande entrainante rabattable
Opklapbare invoerband
Z= klappbare Förderband
Lever conveyor band
Bande entraînante rabattable
Opklapbare invoerband
Di= Trog rechts
Right side from infeed chute
Côté droit du trèmie
Trechter rechts
Z= Trog rechts
Right side from infeed chute
Côté droit du trèmie
Trechter rechts
Di= Service - Center
Service – Center
Boite à outils
Gereedschapskoffer
Z= Trog über Steuerblock
Control box
Boite de contrôle
Invoertrechter op de stuurblok
Di= Fahrgestell vorne
Chassis front
Avant du châssis
Chassis vooraan
Z= Fahrgestell vorne
Chassis front
Avant du châssis
Chassis vooraan
Gefahr durch fort schleudernde Teile bei
laufendem Motor – Sicherheitsabstand
halten.
Danger – flying objects; keep safe
distance from the machine as long as the
engine is running.
Attention à la projection de corps
étrangers. Rester à bonne distance de la
machine.
Gevaar – wegslingerende delen; als de
motor draait op veilige afstand blijven.
Vor Wartungs- und Reperaturarbeiten
Motor abstellen und Schlüssel abziehen.
Switch off engine and remove key before
performing maintenance or repair work.
Arrêter le moteur et retirer la clé de
contact avant toute opération d’entretien
ou de remise en état.
Motor stoppen en startleutel afnemen
alvorens onderhoudsof
herstellingswerken uit te voeren.
Nicht im Schwenkbereich der
Arbeitsgeräte aufhalten.
Keep away from clear of swinging area of
implements.
Rester à I’écart des gones de
basaufement de certaines pièces
Niet in het zwenkbereik van het werktuig
komen.
Maschine vor dem Abkoppeln oder
Abstellen mit Unterlegkeil vor
unbeabsichtigtem Wegrollen sichern.
Use sprag before machine is
uncoupled or parked.
Mettre en place une cale d’immobilisation
avant de décrocher ou de garer la
machine.
Alvorens de machine af te koppelen of te
parkeren, eerst de spleën plaatsen om
het wegrollen te vorkomen

Bedeutung der Piktogramme 3
Meaning of the pictograms
Signification des pictogrammes
Betekenis van de pictogrammen
Piktogramme Bedeutung Position
Pictogram Meaning Place
Pictogramme / Pictogrammen Signification / Betekenis Positionnement / Positie
Di=
Service - Center
Fahrgestelle in Radnähe
Service – Center
Chassis near to the wheel
Boite à outils
Châssis au niveau de la roue
Gereedschapskoffer
Chassis ter hoogte van de
wielen.
Z= Trog über Steuerblock
Fahrgestelle in Radnähe
Infeed chute above the
control box
Chassis next to the wheel
Trèmie d’alimentation au
dessus de la boite de contrôle
Châssis au niveau de la roue
Trechter op de stuurblok
Chassis ter hoogte van de
wielen.
Radmuttern und Radbolzen nach 50km,
alle anderen Muttern und Schrauben in
Inspektionsintervallen nachziehen.
After 50km tighter up nuts and bolts from
the wheel check all other nuts and bolts
in regular intervals.
Après 50km resserrer les ècrous et les
vis des roues. Tous les autres vis et
ècrous sont à vérifier à intervals
réguliers
Na 50 km de moeren en de schroeven
van de wielen aanspannen. Alle andere
moeren en schroeven regelmatig
controleren en desnoods aanpannen.
Di =
Fahrgestell vorne
Bei Einachs auch hinten
Chassis at the frontside
For one axle at the backside
Châssis à l’avant
Pour une axe aussi à l’arrière
Chassis vooraan
Voor 1 as ook achteraan
Z = Fahrgestell vorne
Bei Einachs auch hinten
Chassis at the frontside
For one axle at the backside
Châssis à l’avant
Pour une axe aussi à l’arrière
Chassis vooraan
Voor 1 as ook achteraan
Maschine vor dem Abkoppeln oder
Abstellen mit Stützrad oder Stützfuß vor
unbeabsichtigtem Kippen sichern.
Thanks to the jockey wheel or supporting
foot ensure the machine against tipping
over.
Assurer la machine avant le
dècrochement ou le placement grâce la
roue ou le pied support afin d‘ èviter
qu’elle ne bascule
Alvorens de machine af te koppelen of te
parkeren, het steunwiel of de steunvoet
plaatsen om te voorkommen dat de
machine kipt.
Di= Trog rechts
Right side from infeed chute
Côtè droit du trèmie
Trechter links
Z= Trog rechts
Right side from infeed chute
Côtè droit du trèmie
Trechter links
Schaltstellungen
Stop – Einzug - Rückwärts
Switch position
Stop – Input – backwarts
Positionnement du commutateur
Stop – Entrèe – marche arrière
Schakelingsposities
Stop – invoer - achteruit

GENERAL SAFETY AND ACCIDENT PREVENTION
INSTRUCTIONS
With variations in machines, some of these statements may be contradictory as
regards the servicing. In these cases it is advisable to follow the standard guidelines!
Basic rules:
Before anyone starts up the wood chipper study the safety rules for commerce
and operation!
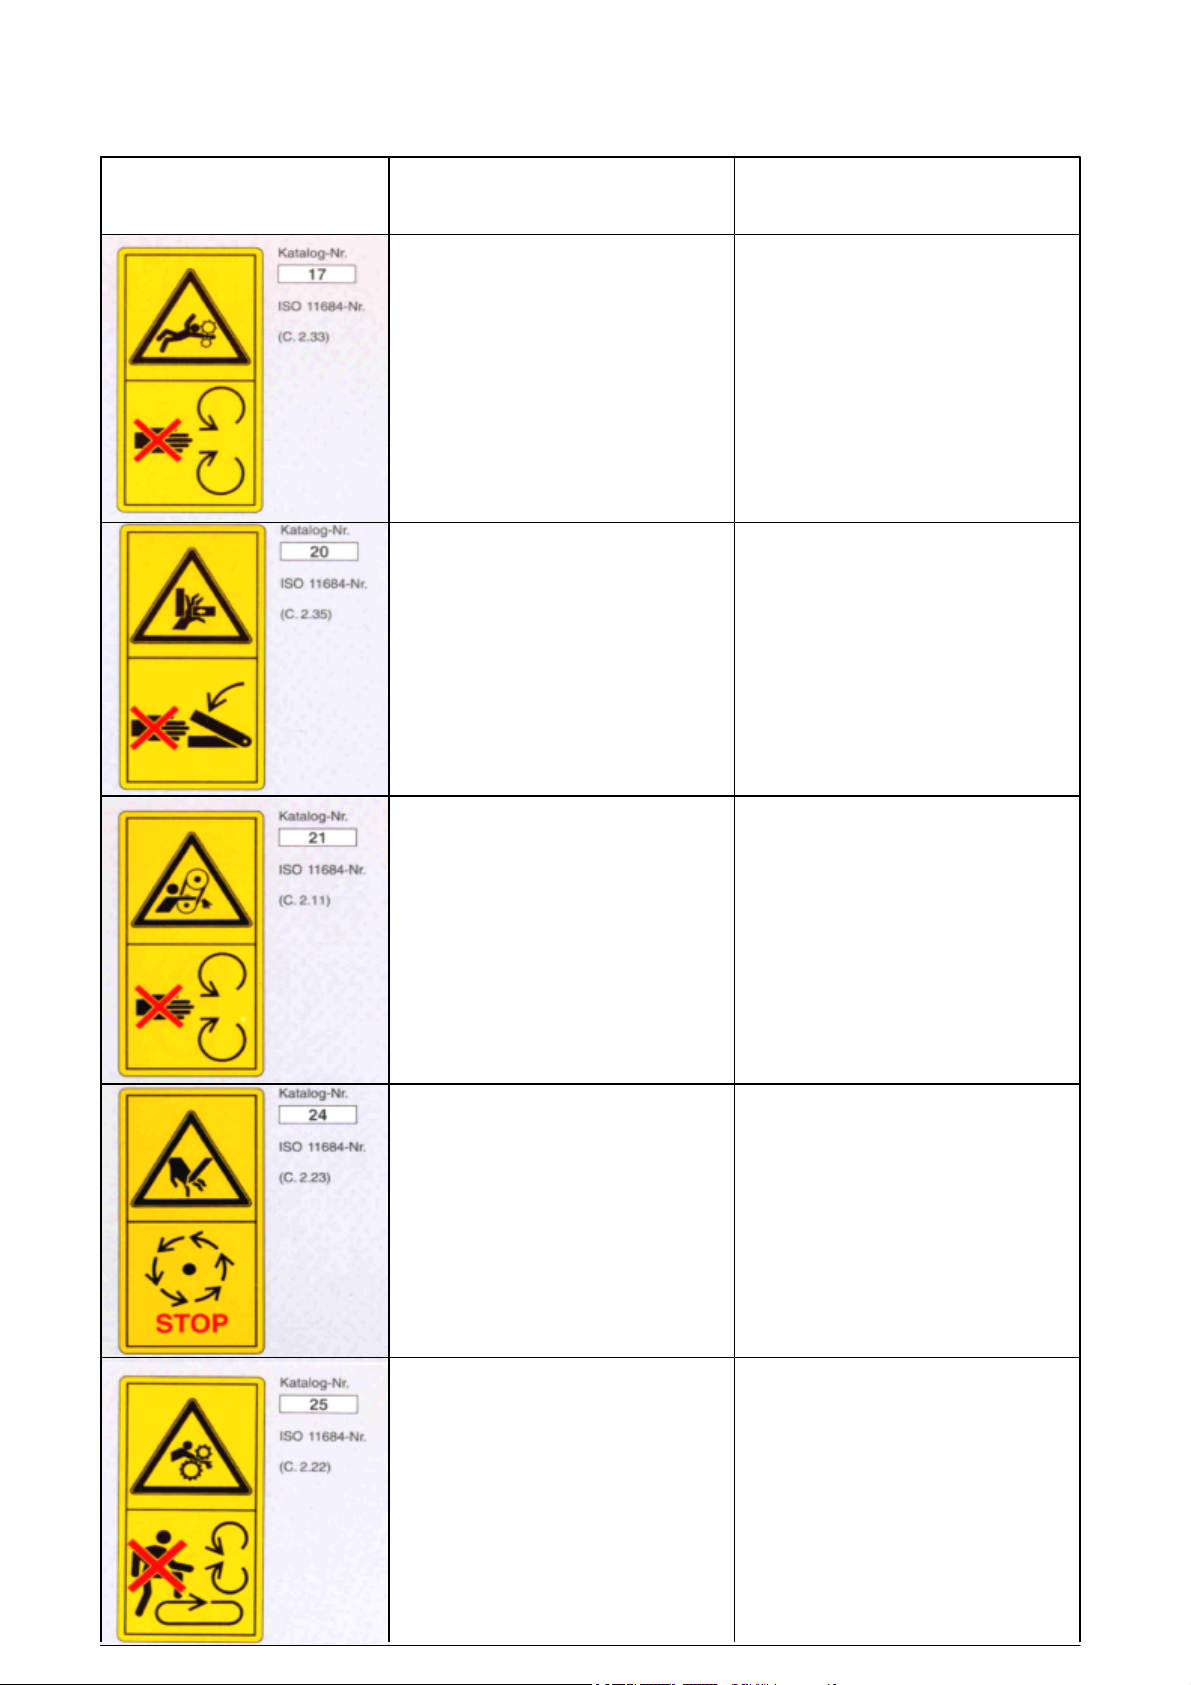
1. Pay attention to the references in this operations guide as they are general
legal safety and accident prevention instructions.
2. The minimum age for service personnel is 18 years, but for the purpose of
training, under supervision, 16 years.
3. Regarding the use of public transport routes heed the respective decisions of
the StVO. (lights, warnings etc.)
4. Ensure whilst using public transport routes the ejector does not damage the
views and that it is not projected into the roads!
5. Before commencing work check that everything is in good working order.
Ascertain that all safety equipment is also in order. It is too late when the
machine is working!
6. The user is responsible for the welfare of others!
7. Stay away from the dangerous area of the machines!
8. Before starting a machine leave any dangerous areas!
9. Machines are not to be operated in enclosed areas!
10. Employees clothing should be tight. Avoid loose clothing. Wear safe shoes,
protective eye, ear and head gear!
11. When leaving the machines ensure that they are unable to roll away and are
protected from unauthorised usage. (firm brakes activated, under-wedge in
place, power source switched off, ignition key removed.)
The Wood chipper as cultivation tool / supplement.
1. The operator alone is responsible for bringing in the machine and for its use in
traffic!
2. The chances of accidents occuring are significantly minimalised when the
wood chipper is coupled with the motor of another machine and when the
safety instructions are followed.
3. Before the construction and dismantling of the wood reducer by the three
steps outlined in the service instructions, bring the propulsion machine into
place, and ensure that it is switched off before any raising or lowering of the
machine is carried out!
4. Do not stay between the PTO and the tractor when the machine is running!
5. No one is allowed to halt the propulsion machine, the traction engine or
equipment, unless it is to stop the vehicle rolling away due to the parking brake
and/or the under-wedge being not properly in place.
6. Only put the pieces of the machine where they belong!
7. It is the function of the workers to control the breaking systems.
8. Pay attention to the maximum permissible support load of the adherent clutch!
9. Take care with the difference betw een the markings of the hydraulic functions
of the propulsion machine and the wood chipper because if these are not
correctly placed, failures in the service of the machines will be exposed.( e.g.
forwards/backwards, raise/lower) – danger of accidents!

10. On transport routes take precautionary safety measures to ensure that
revolving pieces of equipment do not dangerously alter the area!
11. Ensure that construction equipment/personnel are standing in a safe place!
Additional weights
1. In the construction of the Wood chipper, back and front propulsion is always
sufficient for the load at the front and back respectively. Respect the rear axis
– the ability to steer must remain – heed the information in the manufacture’s
instructions!
2. Relieve the front/back respectively. Pay attention to the rear axis when
additional weight is added to the rear of the propulsion machine. Only carry
what the brakes will allow!
3. Weights must always adhere to the prescribed fixed moderate regulations!
4. Take care when choosing the front or back of the machine for additional
weights, that the permissible load on the axis does not exceed the total weight
allowed!
5. Ensure that the tyre pressure is sufficient for the load carried!
The wood chipper with propulsion (Internal combustion engine)
1. When starting up the machine with the starting button, depress only for the
specified amount of time otherwise the coil will overheat. Then leave the
starting button to cool down!
2. Caution is demanded when in the vicinity of fuel as there is an increased risk
of fire. Never replenish fuel when near unguarded flames, ignition sparks or
hot pieces of metal. When refulling do not smoke!
3. Prior to refulling stop and remove ignition keys. Do not refuel in enclosed
spaces. Do not spill fuel (make use of any help)!
4. Do not put the motor on high rotation speeds!
5. To avoid fire hazards, keep the machines clean!
Starting instructions
1. Starting fluid is unsuitable in the electrical set-up!
2. The starting fluid is both flammable and explosive!
3. Throw away used, empty pressure cans to avoid them being carried by gusts
of air into sparks and flames.
4. Take note when activating the starting cables – first the positive pole and then
the negative! When disconnecting, reverse the sequence.
P.T.O. Shaft
1. Only apply authorised Cardan shafts!
2. Construction and dismantling of the Cardan shafts only to be done when the
motor of the propulsion engine is fully stopped.
3. Pay attention to the correct fitting and security of the Cardan shaft!
4. Safety preparations for the Cardan shaft and the PTO must be uniformly
started and must be found in good condition!
5. Protect the Cardan shaft by securing the chains to protect against the machine
rolling away!
6. Take note regarding the Cardan shaft that it is required that the reeds are
covered during transport and whilst in the working position!

7. Pay attention to the sliding clutch in the Cardan shaft and ensure that it is fully
covered by the safety feature (machine and tractor) The covering of the safety
features must be at least 50mm in total!
8. Before turning on the PTO make sure that its high rotation speed power of the
propulsion machine is equal to the permissible rotation speed of the Wood
chipper!
9. Before turning on the PTO take care that no one is in close enough proximity
of the machine to get hurt!
10. When working with the PTO allow no one to stay in the turning area of the
PTO shaft or the Cardan shaft!
11. After switching off the PTO it can continue to ro tate. During this time do not
step too close to the machine. Only resume work when it is totally still!
12. When turning the machine, ensure that the cardan shaft is suspended in the
preparatory position!
13. If there are any blockages in the Cardan Shaft remove them immediately
before you recommence work!
Working with the Wood Chipper
1. Study the safety measures for the smooth operation of all the functions!
2. When in use, the Wood chipper must be on a flat and firm area!
3. Materials in the entrance, the cords and rollers for example, cannot be made
to be fully safe because of their functions; therefore, during the running of
these moving parts it is necessary to have enough safety precautions!
Respect the other parts as well as they may also be not completely safe!
4. Never leave the Wood chipper unattended when in use!
5. Only operate the machine in good light and good visibility!
6. Do not place hands in the funnel – rotating pieces!
7. If someone climbs too far into the machine, the control bar sh ould be pulled to
stop the machine immediately.
8. The machine must only be operated when the chimney is fixed!
9. Put in the waste reeds and litter so that it is not facing anyone and no one is in
danger of being hurt by flying chopped-up pieces of wood!
10. Only deposit the wood into safe places!
11. Do not exceed the allowed wood thickness!
12. Only remove the surplus pieces etc.. with help and when the machine is
switched off (wood pieces and similar)!
Tilting Container
1. Before commencing any maintenance work lower the container, turn down the
water pressure and ensure that the machine is not able to start up by accident!
2. It is only possible to raise the containers when the machine is coupled with
something else otherwise there is a danger of it falling over!
3. To go beneath the raised container is prohibited in accordance with safety
guidelines!
4. When emptying the containers no one is permitted to remain in the work area.
Never walk under elevated loads!
5. When emptying the machine full of wood, it should be on stable ground so that
it is not able to fall over!
6. There is a danger of the elevated containers tipping over!
7. When the containers are raised, beware of hanging wires etc!

8. After the process of tipping the container lower it co mpletely. When it is
elevated, do not leave it unsupervised!
9. You must drive only when the containers are lowered!
Conditioning, attendance and repairs
1. When carrying out repairs the machine must not be in motion. Check the
breaks and the under wedge and remove the keys to the machine!
2. After turning off the propulsion, the wood reducer can continue to rotate.
During this time do not go too near to the machine. Only when it is totally still
can work on it begin!
3. Replacement parts must at least be equivalent to the manufacturers’!
4. When working under the raised cover of the machine, take care that there is
enough support!
5. When handling sharp objects e.g. chopping knives ensure that the correct
protective clothing is worn (gloves, shoes etc.)!
6. When sharpening knives protective glasses must be worn!
7. Only remove the cap of the knife when the sharpener is not moving!
8. In the event of the cap of the knife falling off, the chimney on that side will
shake and stop!
9. Only attempt the laying and removal of the V-belt when there is no movement!
10. Safety features must be fitted according to the regulations!
11. Safety preparations such as welding, sharpening, drilling etc. are permitted to
be carried out only by specialists when working on the frame, axle, pully
mechanisms and safety devises. This work may only be carried out in an
autherised garage!
Waiting for the motor.
1. No one must wait in front of the running motor!
2. When working with a primarily battery powered motor (negative pol e) squeeze
and then pull back the sparkplug!
3. Under high pressure, high pressure fluids will appear (e.g. from the fuel
injection nozzle.) This liquid can cause significant damage to the skin. Seek
medical advise immediately if contact with the skin is made as there is a
danger of infection!
4. Take care with the quality of oil and power and ensure that they are kept only
in approved containers!
5. Take care when pouring hot oil as there is a danger of being burnt!
6. Take care when removing the cool-l id. The cooling fluid is kept under
pressure so there is a danger of being burned!
7. The oil, power, cooling fluid, batteries and filters should be stored separately!
Electrical construction.
1. When working on the electrical construction disconnect the minus pole of the
battery!
2. When disconnecting the battery make certain that the minus terminal is
disconnected first and then the plus terminal! When reconnecting reverse the
sequence!
3. Take care with the gas from the batteries as it is explosive!
4. Never take open flames or sparks near the batteries!
5. When recharging the batteries remove all plastic coverings so that the
accumulation of explosive gases is avoided!

6. Take care when moving with battery fluids as they are corrosive!
7. Use only th e prescribed fuses. If any stronger than these are used then the
electrical structure will be destroyed resulting in the risk of fire!
8. Always administer the plus terminal with a covering. If all are turned off at
once there is a risk of explosion!
Hydraulic construction.
1. Stop the permitted opperations pressure!
2. The hydraulic structure is kept under high pressure!
3. Under the high pressure it is possible that some of the high pressure fluids
may escape (hydraulic oil). This is able to penetrate the skin and can cause
serious injuries. In this instance, seek immediate medical attention as there is
a risk of infection!
4. In the attempt to minimise the risk of accidents, ensure that there is qualified
help close to hand!
5. Before working on the hydraulic system turn the pressure off and lower the
apparatus. Ensure that no subsidence is allowed to take place!
6. When connecting the hydraulic cylinders and motors, the hydraulic pipes must
have first been turned off!
7. When changing the connectio ns ensure that they are reconnected correctly.
There is a danger of accidents if they are not (e.g.Forward and backward
motions and raising and lowering can be dangerous if confused)
8. The hydraulic pipes should be regularly maintained and checked. They should
be changed at least every five years to allow for damage and age! The
replacement parts should be in accordance with the manufacturers’
requirements!
Wheels, tyres.
1. When working under and on the elevated wood chipper, there must be nobody
else around the apparatus. The wood chipper must be secure and unable to
roll away (achieved with breaks and the piece of wood underneath)!
2. Only those with enough knowledge and understanding must be permitted to fit
the tyres!
3. If the tyres are inflated too much there is a risk of them exploding!
4. The wheel nuts must be tightened after three working hours!
5. Regularly check the air pressure!

General work safety references.
The wood chipper is built to the very highest standards of engineering and is totally
reliable. Despite this however, this product can also be dangerous when it is not
operated according to the instructions.
Every person who handles the fitting, works on, and tests the wood chipper, must
have read and understood the entire instruction manual. Trouble with and damage to
the wood chipper
due to a lack of knowledge on the part of the operator is not covered by the
insurance guarantee.
The wood chipper is intended exclusively for the reducing of bushes and logs, if the
service instructions do not specify any other materials. The maximum diameter of
the wood must be taken from the instruction manual. For any resulting damage the
manufactures can accept no responsibiliy. The risk lies solely with the user.
When a machine is purchased, the user must follow the refernces for use, fittings,
safety measures etc.
If any changes in the machine are desired, the owner must first check with the
manufactuer. I Failure to do this, and the subsequent malfunction of the machine,
will cause the warantee to be inaffective.
With regard to all work, whether fitting, maintenance, adjustments and servicing, it is
only to be carried out by authorised and informed members of staff.
The page marked ‘General safety and accident prevention instructions’ should be
read carefully. The safety rules for working with the machine are given by the Trade
Association.
General attendance and inspection references.
There are attendance and installation references in the service instructions and also
an insert from us which describe supply pieces (e.g. motors, clutches) for you to take
note of. Basically the following attendance and inspection work must be carried out:
§Pay attention to the instructions and maintenance directions of the hydraulic
movements.
§Check all of the screw joints after 5 hours of use and if necessary change them.
§The greasing of the circular track should be controlled regularly and if necessary
re-lubricated ( only when the machine is moving). Letting the machine run dry is to
be avoided.
§A check of the wood chipper should be made after 50 working hours and then
every 100 hours thereafter, or every half a year whichever is the sooner.
§The wood chipper’s moving parts (e.g. internal combustion engine, electric motor)
must have small checks made and be cleaned – especially the escape vent for the
air so that the cooling system is guaranteed to work - when working in dusty
surroundings or where strong gusts of dust are present during work. The motor, the
motor pieces, and the interior space of the motor must be cleaned regularly.
The motor inspections and the motor attendance should only be carried out after
reading the instruction manual.

1
The Jensen Woodchipper is designed for reducing shrubs, bushes, branches,
orchard and vineyard prunings etc., of unlimited length. The machine is for mounting
an a tractor 3- point linkage and may also be supplied on a single or twin axle
chassis for trailed use. Engine driven versions are also available.
All safety features are in accordance with the regulations of various trade
associations, and checked by the GTA.
Engine driven machines
Follow engine manufacturers instructions as regards starting the engine, correct
fuelling procedure, service and maintenance etc. Engines are covered by
manufacturer’s warranty. For service refer to your local appointed service agent.
Tractor mounted machines
Take care that the PTO shaft to your tractor is the correct length, and that the plastic
PTO guard is in good condition.
Before use
Ensure that each operator is familiar with all these instructions before starting work
with the wood chipper.
Take note of the maximum thickness of wood permitted for your particular model and
do not attempt to force larger material into the machine.
Check that the cutting disc cover is securely fastened, and that all bolts and nuts on
safety covers are tightened.
Check that the knife holder bolts are tight, and check after 1 hour’s work with new or
re-sharpened knives.
Before the first use, lubricate the feed roller bearings, and repeat according to the
instructions.
Ensure that the machine is securely coupled to the tractor, and that the PTO shaft is
the correct length.
Check that the cutting disc rotates in the correct direction with your tractor.
Position the discharge chute to throw chips in the required direction.
Important safety precautions
-During operation, the safety guards must always be in position. Make sure they
are tightly secured.
-Never leave the machine running whilst unattended.
-Never allow the machine to run with the guards removed.
-Always ensure that the disc has come to a complete standstill before opening the
disc cover.
-Check tightness of the knife holder bolts frequently, especially after re-sharpened
knives have been fitted.
-Do not put hands or feet into the feed hopper in any circumstances.
-Do not stand on any part of the machine whilst it is working.
-Do not attempt to force material into the hopper – if necessary cut awkward
shaped branches with a bill-hook and try again.
-If the feed rollers block – use the control lever to reverse the direction; any
material jammed in the rollers will then be forced out very quickly.
-Do not attempt any other procedures until the machine has come to a complete
stop, and the tractor / engine has been switched off.

2
Suitable clothing
Always wear - Safety helmet with face visor
-Ear defenders
-Thick gloves (Avoiding tight fitting gloves)
-Overalls
Avoid - Loose clothing
-Ties
-Anoraks with loose cords
Starting the machine
Always start with the feed rollers disengaged (‚stop‘ position).
Start the tractor, and engage the PTO, building up to 540rpm gradually.
When the tractor is running at 540rpm, engage the feed rollers by pulling lever to
‚forward‘ position.
Feed brushwood into the machine with the thick end of the branch first.
Adjust the discharge chute if necessary.
If the speed of the chipping disc should drop under load, disengage the feed rollers
(push to ‚stop‘) momentarily until full operating speed is restored, then resume
chipping.
Routine maintenance
-Check all nuts and bolts for tightness.
-Check vee belt tension regularly and adjust as necessary.
-Check the condition of knives regularly. Performance of the machine is quickly
affected if the knives are blunt or damaged.
-Take great care when removing knives from the machine, as the weight of the
flywheel can create enough movement to cause injury by trapping fingers even
when the tractor is turned off.
-The drawing shows correct dimensions for sharpening and repositioning knives.
When the knives are too thin due to repeated sharpening, shims are available to
enable the correct setting to be achieved.
-Ensure that the knife holder screws are tightened correctly. Check again after 1
hour’s work.
-The chipper has a tapered reversible counter knife (see diagram) with two cutting
edges. A worn cutting edge may be rebuilt using hard-facing welding rods, and
regrinding (see separate insructions).
-When replacing knives or counter knife, ensure that all surfaces behind the knife
are clean and free from dirt or wood chips.
-Check all hydraulic screwings after 5 hour’s work.
Hydraulic feed rollers – attention changed positions
When operating, always hold the lever in ‚stop‘ position for 1 second when moving
from ‚forward‘ to ‚reverse‘
Lever positions as follows:
Reverse – Pull lever towards operator
Forward – Centre position
Stop – Push lever towards machine

3
Chipping length
With hydraulic valve only – approx 20mm
With hydraulic capacitor regulator [A3.3 machine] – variable between 5mm – 20mm
(larger chip sizc on special request).
With regulator fitted, =hip 'ength can be continously regulated by turning the valve
screw. (".utting iength can also be affected by the temperature of the hyciraulic fluid
so that it will be necessary to re-adjust 5urinq vork.
Start - up of the hydraulic system
Open the regulator or valve to the maximum position, but do not feed material into
the machiiie. In order to expel air from the system, run without load for 10/15
minutes, changing the valve/regulator position frequently (as if altering chip length).
Indications of air in the system are: foam in the oil reservoir (intermittent operation or
irregular motor speed), noise in the hydraulic system.
After setting up in this way, the system will work under pressure. Check the oil level,
and top up up if necessary.
Repeat this procedure after each oil change.
Note: Required oil viscosity is 30/50 cSt at 40'C.
Reservoir capacity:
18 litres for the A518
20 litres for the A521/A528
23 litres for the A328/A325
23 litres for the A425
60 litres for the A231
64 litres for the A141
64 litres for the A10
Oil type: HLP ISC following DIN 51525
Service procedure
– The filter element should be changed after 20hrs work from new, and thereafter
each 500 hours.
– A complete oil change is necessary after 1000 hours work.
– Check the oil level regularly.
-Take great care to avoid contamination of the hydraulic system with dirt and dust
when changing oil, filters, or affecting repairs.
– The hydraulic system is adjusted to 170 bars safety pressure, and protected by a
lead seal. Do not interfere with this!
– The working pressure is about 120 bars, depending on the type of material fed into
the chipper.
Note:
For chippers where the feed rollers are powered by tractor hydraulics, the following
oil flow rate is required:
A141 / A231 = 50 Litres / minute
A425 / A328 / A325 = 35 Litres / minute
A521 / A528 / A518 = 20 Litres / minute
Greasing insructions
Wood chipper Jensen
– Lubricate spur gear teeth Aral 'SINIT III'
– Lubricate UJ's and feed roller bearings with Shell 'RETINAX A'
Note:
- Both rotor shaft bearings are grease filled for life (in normal working conditions) with

4
Chipping length
- Both rotor shaft bearings are grease filled for life (in normal working conditions) with
Lithium grease including anti corrosive and anti penetration properties (Class 3).
These bearings must not be re-greased or their working life will be significantly
reduced.
For detailed greasing instructions and intervals, please refer to the extra sheet
'Greasing instructions' coming with every machine.
Operating instructions
Start of the machine = for tractor pivot shafts at 540 rpm clockwise rotation.
Start machine at disengaged feeding and at slow pivot rotation.
Disengage feeding: Push disengaging lever in direction knives – disc (position
„AUS“)
Engage feeding: Pull disengaging lever in opposite direction (position „EIN“)
Recommended instructions during operation
Branch wood to be fed always with heavier end towards retraction rollers.
Should rotation of knives – disc drop during operation, push the disengaging lever,
wait until disc reaches full operating rotation again, then activate feeding again.
Check all screws and nuts for tightening.
V- belts
Check suspense regularly and re-tighten, if necessary.
Knives and counter – knife
Always keep a sharp edge in order to achieve an easy cut. The edges should always
be placed as close as possible towards the edge of the counter – knife.
Re – check knives regularly.
Knives, which due to re – sharpening get too narrow apart from the counter – knife
have to be compensated by respective spacers to adjust sketch.
Attention: Even knives – discs moved by hand –in case of knives exchange- have,
due to their weight, sufficient force to result in squeeze injuries. Please watch at re –
grinding knives the respective drawing.

Knife grinding overview with wear limit

5
Knives and counter – knife
Observe to re – thighten screws by using the safety discs. The machine is equipped
with a simply exchangeable and reversable counter – knife in tapered execution. It
has two sharp edges. Used cutting edges may be re – welded by electrodes of 250 –
300 kg consistency and re – grinded for usable sharp edges. (Hardness approx. 60
HRC). Avoid from dirt when re – mounting the counter – knife, clean the surfaces
from dirt and chips.
Power requirements
Depending from material to be chopped at minimum 9 HP (6,6 KW)
Chipping lenth
Only hydraulic valve = approx. 20mm
Hydraulic capacity regulator = 5 up to 20mm (larger pieces on request).
Attention: Use only spare parts origine JENSEN. No warranty in case of using other
products. In case of spare part order always mention the number of this machine.
Technical Specifications for woodchippers
Maximum wood diameter: (depending on wood and engine)
A141 = 24cm A231 = 22cm
A328 = 16cm A325 = 16cm
A425 = 15cm A521 = 12cm
A518 = 10 cm A528 = 15cm
On heavy feed please watch the rpm of the chipper – disk!
In case the rpm drops you should diengage the hydraulic feed rollers and do not
engage again before the machine is back to the full rpm.
Necessary power: with 2 knife and mixed bushwork you need about 6.6 KW.
The power you really need depends on the sorting and the kind of the wood, the
speed of feed and the number of knifes in your machine.
Chipping – length: Using hydraulic feed rollers you can adjust the length between 0
and 5cm with the regulator (special order).
Caution! Knife – screws and all screw on the transportation – axle should be
controlled regularly and tightened following the table:
Forces for bolts and nuts class 8.8:
Size Nm kpm
M20 410 41
M16 210 21
M12 86 8,6
M10 49 4.9
M8 25 2,5
M6 10 1
¾“ 340 34

6
dB(A) – ratings for different machine types
Type of
machine
dB(A) at measuring point
Last Leerlauf
A 141 Di 105 88
A 141 Z 105 92
A 231 Di 108 90
A 231 Z 106 81
A 328 Di 107 92
A 328 Z 104 80
A 328 ZUX 103 81
A 325 Di 107 92
A 325 Z 104 80
A 325 ZUX 103 81
A 425 Di 107 92
A 425 Z 104 92
A 521 / A528 Di 108 84
A 521 / A528 Z 108 88
A 518 Di 106 95
A 518 Z 103 88
Measurements taken at Maasbüll factory october 1990 in accordance with
professional associations.
Measuring point „M“ shown below.
Different noise levels of environment at measurements!
This manual suits for next models
2
Table of contents
Other Jensen Chipper manuals

Jensen
Jensen Angeln User manual

Jensen
Jensen A 518 Di User manual

Jensen
Jensen A540 Di D-1703 EDR 80km/h User manual

Jensen
Jensen A430 Di User manual

Jensen
Jensen A041 ZKX User manual

Jensen
Jensen A240 ZKX User manual

Jensen
Jensen A530 User manual

Jensen
Jensen A540 DiXL V-2203 User manual

Jensen
Jensen A521 Di User manual

Jensen
Jensen A141 XL ZX User manual