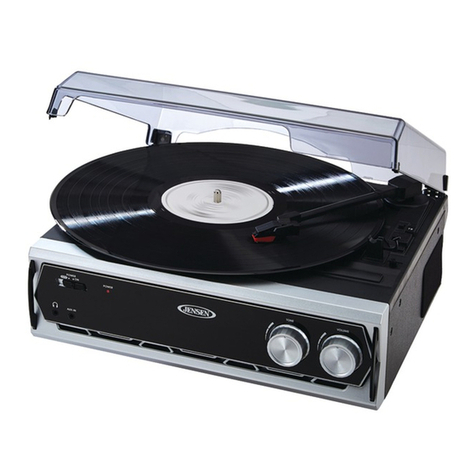
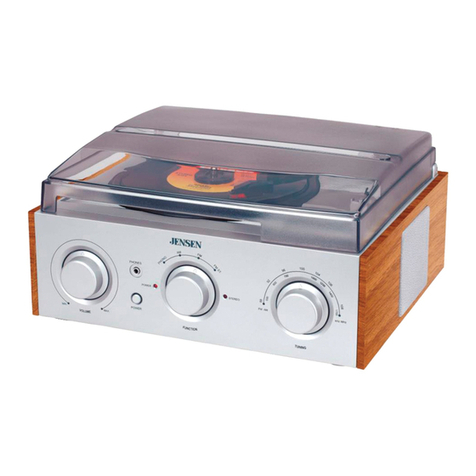
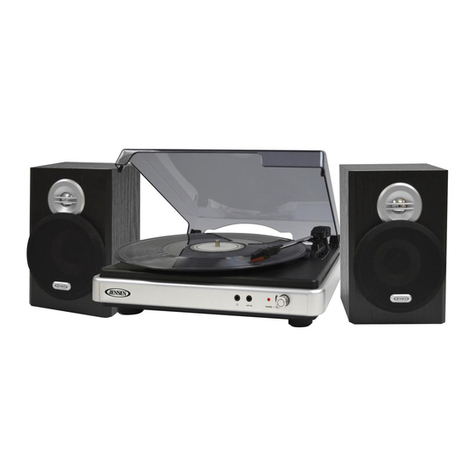
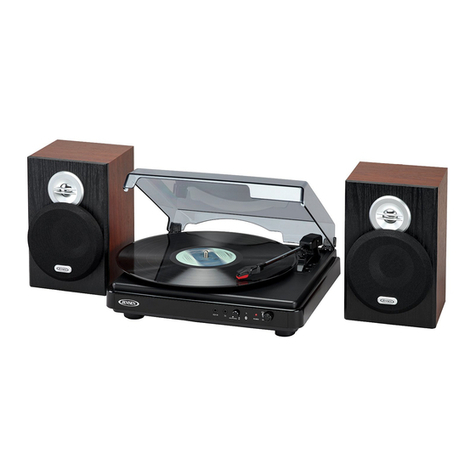
Jensen JTA-215 User manual

®
JTA-215
AM/FM STEREO TURNTABLE
USER MANUAL
PLEASE READ THIS OPERATING MANUAL COMPLETELY BEFORE OPERATING
THIS UNIT AND RETAIN THIS BOOKLET FOR FUTURE REFERENCE.

1
DEAR JENSEN® CUSTOMER
Selecting fine audio equipment such as the unit you've just purchased is only the start of
your musical enjoyment. Now it's time to consider how you can maximize the fun and
excitement your equipment offers. This manufacturer and the Electronic Industries
Association's Consumer Electronics Group want you to get the most out of your
equipment by playing it at a safe level. One that lets the sound come through loud and
clear without annoying blaring or distortion and, most importantly, without affecting your
sensitive hearing.
Sound can be deceiving. Over time your hearing "comfort level" adapts to higher volumes
of sound. So what sounds "normal" can actually be loud and harmful to your hearing.
Guard against this by setting your equipment at a safe level BEFORE your hearing
adapts.
To establish a safe level:
•Start your volume control at a low setting.
•Slowly increase the sound until you can hear it comfortably and clearly, and without
distortion.
Once you have established a comfortable sound level:
•Set the dial and leave it there.
Taking a minute to do this now will help to prevent hearing damage or loss in the future.
After all, we want you listening for a lifetime.
We Want You Listening For a Lifetime
Used wisely, your new sound equipment will provide a lifetime of fun and enjoyment.
Since hearing damage from loud noise is often undetectable until it is too late, this
manufacturer and the Electronic Industries Association's Consumer Electronics Group
recommend you avoid prolonged exposure to excessive noise.
Customer's Record:
The serial number of this product is found on its back cover. You should note the serial
number of this unit in the space provided as a permanent record of your purchase to aid in
identification in the event of theft of loss.
Model Number: JTA-215 Serial Number: ____________________

2
WARNING
TO PREVENT FIRE OR SHOCK HAZARD, DO NOT USE THIS PLUG WITH AN EXTENSION
CORD, RECEPTACLE OR OTHER OUTLET UNLESS THE BLADES CAN BE FULLY INSERTED
TO PREVENT BLADE EXPOSURE. TO REDUCE THE RISK OF FIRE OR SHOCK HAZARD, DO
NOT EXPOSE THIS APPLIANCE TO RAIN OR MOISTURE.
IMPORTANT SAFETY INSTRUCTIONS
1. Read these instructions
2. Keep these instructions
3. Heed all warnings.
4. Follow all instructions.
5. Do not use this apparatus near water.
6. Clean only with dry cloth.
7. Do not block any ventilation openings. Install in accordance with these instructions.
8. Do not install near any heat sources such as radiators, heat registers, stoves, or other
apparatus (including amplifiers) that produce heat.
9. Protect the power cord from being walked on or pinched particularly at plugs,
convenience receptacles, and the point where they exit from the apparatus.
10. Only use attachments / accessories specified by the manufacturer.
11. Unplug this apparatus during lightning storms or when unused for long periods of time.
12. Refer all servicing to qualified service personnel. Servicing is required when the
apparatus has been damaged in any way, such as power-supply cord or plug is
damaged, liquid has been spilled or objects have fallen into the apparatus, the apparatus
has been exposed to rain or moisture, does not operate normally, or has been dropped.
13. This appliance shall not be exposed to dripping or splashing water and that no object
filled with liquids such as vases shall be placed on the apparatus.
14. Do not overload wall outlet. Use only power source as indicated.
15. Main plug is used as disconnect device and it should remain readily operable during
intended use. In order to disconnect the apparatus from the mains completely, the mains
plug should be disconnected form the mains socket outlet completely.
16. Do not attempt to dismantle, open or repair this product yourself. If a fault occurs, seek
advice from your local qualified service technician or contact the distributor via the
telephone number at the back of this instruction manual.
3
PRECAUTION FORE USE
•UNPACK ALL PARTS AND REMOVE PROTECTIVE MATERIAL.
•DO NOT CONNECT THE UNIT TO THE MAINS BEFORE CHECKING THE MAINS
VOLTAGE AND ALL OTHER CONNECTIONS HAVE BEEN MADE.
•DO NOT COVER ANY VENTS AND MAKE SURE THAT THERE IS A SPACE OF
SEVERAL CENTIMETERS AROUND THE UNIT FOR VENTILATION.
IMPORTANT NOTES
Avoid installing the unit in locations described below:
•Places exposed to direct sunlight or close to heat radiating appliances such as electric
heaters.
•Places subject to constant vibration.
•Dusty, humid or moist places.
PROTECT YOUR FURNITURE!!
This model is equipped with non-skid rubber 'feet' to prevent the product from moving when
you operate the controls. These 'feet' are made from non-migrating rubber material specially
formulated to avoid leaving any marks or stains on your furniture. However certain types of
oil based furniture polishes, wood preservatives, or cleaning sprays may cause the rubber
'feet' to soften, and leave marks or a rubber residue on the furniture. To prevent any damage
to your furniture we strongly recommend that you purchase small self-adhesive felt pads,
available at hardware stores and home improvement centers everywhere, and apply these
pads to the bottom of the rubber 'feet' before you place the product on fine wooden furniture.

4
1) Dust Cover
2) Left Speaker
3) Dial Pointer
4) 3.5mm Headphone Jack
5) Power Indicator
6) Power/Function Selector
(OFF-PHONO-TUNER)
7) Band Selector (AM-FM-FM ST)
8) Right Speaker
9) Rotary Volume Control
10)Tuning Control
11)FM Stereo Led Indicator
12)45 RPM Adaptor
13)33/45/78 RPM Speed Selector
14)Tone Arm Clamp
15)Line Out Socket
16)FM Antenna
17)Auto Stop Switch
18)AC Cord
CAUTION:
This unit should not be adjusted or repaired by anyone except qualified service personnel.
LOCATION OF CONTROLS

5
This unit is designed to operate on normal 240V~ 50Hz AC power only. Do not attempt to
operate the unit on any other power source. You could cause damage to the unit.
TOP COVER ASSEMBLY
1. Push the metal bracket to rear side.
2. Connect the metal bracket to the top cover.
3. Connect the hinge of the top cover to the main unit.
FM ANTENNA
Untie and fully extend the FM Antenna wire for best reception.
AC POWER CONNECTION
Connect the power cord to an AC 240V ~ 50Hz power source.
Switch the POWER/FUNCTION SELECTOR to the “PHONO” or “TUNER” position. The
POWER Indicator will light indicating that the power supply is normal. Now your system is
ready to play the music.
Remarks:
In case of malfunction due to electrostatic discharge (ESD), reset the unit by disconnecting
and reconnecting the AC CORD to reset and to resume normal operation.
1. Set the POWER/FUNCTION Selector to the TUNER position. The Power Indicator will light.
2. Slide the Band Selector to select AM, FM or FM Stereo mode.
3. Turn the TUNING CONTRL to the desired radio station.
4. When tuned to a FM Stereo broadcast, the FM ST. Indicator will light up if the FM Stereo mode
is selected. In weak signal areas, the FM Stereo signal may not be strong enough and can
cause excessive background noise. In this case, set the Band Selector to the FM position.
5. Adjust the volume to your desired level by turning the VOLUME CONTROL.
6. To turn off the radio, slide the POWER/FUNCTION Selector to “OFF”. The Power Indicator
will go off.
GETTING STARTED
LISTENING TO RADIO
POWER SOURCE

6
HINTS FOR BEST RECEPTION
AM: The unit has built-in AM antenna, to obtain the best reception, you may have to move or
slightly rotate the main unit.
FM: The receiver has a wire antenna located at the rear cabinet. This wire should be totally
unraveled and extended for best reception.
PLAYING PHONO RECORDS
1. Raise the Turntable dust cover.
2. Remove the stylus protector and release the Tone Arm
Clamp.
3. Slide the POWER/FUNCTION Selector to select the
PHONO mode.
4. Place a record on the platter, over the central spindle.
5. Set the Speed Selector Switch to 33, 45 or 78 rpm according to the record you are playing.
Place the 45 RPM adaptor over the central spindle when playing 45 rpm records.
6. Move the Tone Arm to the beginning of the record or to the start of a particular track. Gently
lower the Tone Arm onto the record to start playing. Adjust the Volume as desired.
7. The Turntable will stop automatically when the record finishes.
8. To stop the record before it ends, lift and replace the Tone Arm carefully onto the Tone Arm
Clamp.
AUTO-STOP SWITCH OPERATION
As in some kinds of records, the Auto-Stop area extends beyond the unit setting. As a result
the turntable will stop before the last track finishes. In this case, set the AUTO-STOP Switch
to the “OFF” position, then the turntable will run to the end of the record but will not stop
automatically. To stop the turntable either turn the unit off by setting the POWER/FUNCTION
Selector to the OFF position or setting the AUTO-STOP Switch to the “ON” position. After
stopping the turntable, lift and replace the Tone Arm carefully onto the Tone Arm Clamp.
IMPORTANT:
Moving or jarring the Turntable without securing the Tone Arm Clamp could result in damage
to the Tone Arm.
Cartridge
Stylusassembly

7
Inserting the plug of your headphones into the Headphone jack will enable you to listen in
private. When using headphones, the speakers will be disconnected.
READ THIS IMPORTANT INFORMATION BEFORE USING YOUR HEADPHONES
1. Avoid extended play at very high volume as it may impair your hearing.
2. If you experience ringing in your ears, reduce the volume or shut off your unit.
3. Keep the volume at a reasonable level even if your headset is an open-air type designed
to allow you to hear outside sounds. Please note that excessively high volume may still
block outside sounds.
You can connect the JTA-215 to an external Hi-Fi system by connecting the LINE OUT
Socket (15) on the back of JTA-215 to the AUX IN Socket of your Hi-Fi system with RCA
cables (Not included).
Remark: The sound from the JTA-215 built-in speakers will not be disabled when using the
LINE OUT socket. Once you connect the unit to an external Hi-Fi system, turn the volume of
JTA-215 to minimum if you prefer to only hear the sound through your Hi-Fi system.
1. Avoid operating your unit under direct sunlight or in hot, humid or dusty places.
2. Keep your unit away from heating appliances and sources of electrical noise such as
fluorescent lamps or motors.
3. Unplug the unit from the electrical power outlet immediately in case of malfunction.
CLEANING THE UNIT
zAlways disconnect your unit from the AC power source before cleaning.
zThe finish on the unit may be cleaned with a dust cloth and cared for as other furniture,
Use caution when cleaning and wiping the plastic parts.
zIf the cabinet becomes dusty wipe it with a soft dry dust cloth. Do not use any wax or
polish sprays on the cabinet.
zIf the front panel becomes dirty or smudged with fingerprints it may be cleaned with a
soft cloth slightly dampened with a mild soap and water solution. Never use abrasive
cloths or polishes as these will damage the finish of your unit.
CAUTION:
Never allow any water or other liquids to get inside the unit while cleaning.
LINE OUT OPERATION
CARE AND MAINTENANCE
USING HEADPHONES (NOT INCLUDED)

8
Should you experience difficulties in the use of this player please refer to the following chart or call
1800 686 079 for Product Service and Support.
PROBLEM POSSIBLE CAUSE REMEDY
•The unit is disconnected from the AC
outlet
•Connect to an outlet.
The unit will not
play
•The AC outlet has no power •Try the unit on another outlet
Unit is ON but
there is low or
no volume
•The volume Control has been turned
all the way down
•Turn the Volume control to a higher
output
Noise or sound
distorted on AM
or FM broadcast
Station not tuned properly for AM or
FM.
FM: The FM wire antenna is not fully
extended.
AM: The bar antenna is not positioned
correctly
Retune the AM or FM broadcast
station.
FM: Fully extend and reposition the
FM wire antenna.
AM: Reposition the unit until the best
reception is obtained.
FM ST does not
appear in the
display
You have tuned to a mono station or
the station is too weak
Select another FM station or extend or
rotate the wire antenna for best
reception.
AM or FM no
sound
Unit not at TUNER mode.
Volume at minimum
Slide function selector to select AM or
FM.
Increase Volume
SERVICE
All necessary care is taken at the point of manufacture to ensure this unit will perform to
Jensen’s high quality standards. However if this unit becomes faulty within the warranty
period please return it to the point of purchase with your proof of purchase for a
replacement.
Distributed in Australia by:
K2 Sales Pty Ltd
PO Box 21
Balaclava, Vic
Australia 3183
Telephone 1800 686 079
Printed in China
TROUBLESHOOTING GUIDE
Table of contents
Other Jensen Turntable manuals

Jensen
Jensen JTA-470 User manual

Jensen
Jensen JTA-990 User manual

Jensen
Jensen JTA-475 User manual

Jensen
Jensen JTA-300 User manual

Jensen
Jensen JTA-222 User manual

Jensen
Jensen JTA-380 User manual

Jensen
Jensen JTA-245 User manual

Jensen
Jensen JTA-220 User manual

Jensen
Jensen JTA-232 User manual

Jensen
Jensen JTA-325BTW User manual

Jensen
Jensen JDVD1500 User manual

Jensen
Jensen JTA-230R User manual

Jensen
Jensen JTA-410 User manual

Jensen
Jensen JMC-1250 User manual

Jensen
Jensen JTA-222 User manual

Jensen
Jensen JTA-575 User manual

Jensen
Jensen JTA-230 User manual

Jensen
Jensen JTA-450 User manual

Jensen
Jensen JTA-325 User manual

Jensen
Jensen JTA-220A User manual