Installation guide for Air:Link 59300
Internet Setup
This guide will help you setup your Internet connection. The setup should take around 5 minutes.
- Check that you have a wired or wireless network card installed and activated in your PC.
- Connect the poweradapter to the PWR port and the ADSL modem / cablemodem to the WAN port of
the router.
- If you use wired network you need to connect a network cable from the network card in your PC to
one of the 4 LAN ports in the router.
- Check the front of the router that the LED's are lit correctly :
- PWR should be on to indicate the router is switched on and is powered correctly.
- WLAN should be on to indicate the WLAN is enabled, and will flash when there is wireless traffic.
- LNK/ACT on WAN should be on to indicate the modem is connected correctly to the WAN port, and
will flash when there is traffic. The 10/100M LED will show if the connection use 10 or 100Mbps.
- LNK/ACT on LAN 1-4 should be on when a network device (i.e. a PC) is connected to the named
port, and will flash when there is traffic. The 10/100M LED will show if the connection use 10 or
100Mbps.
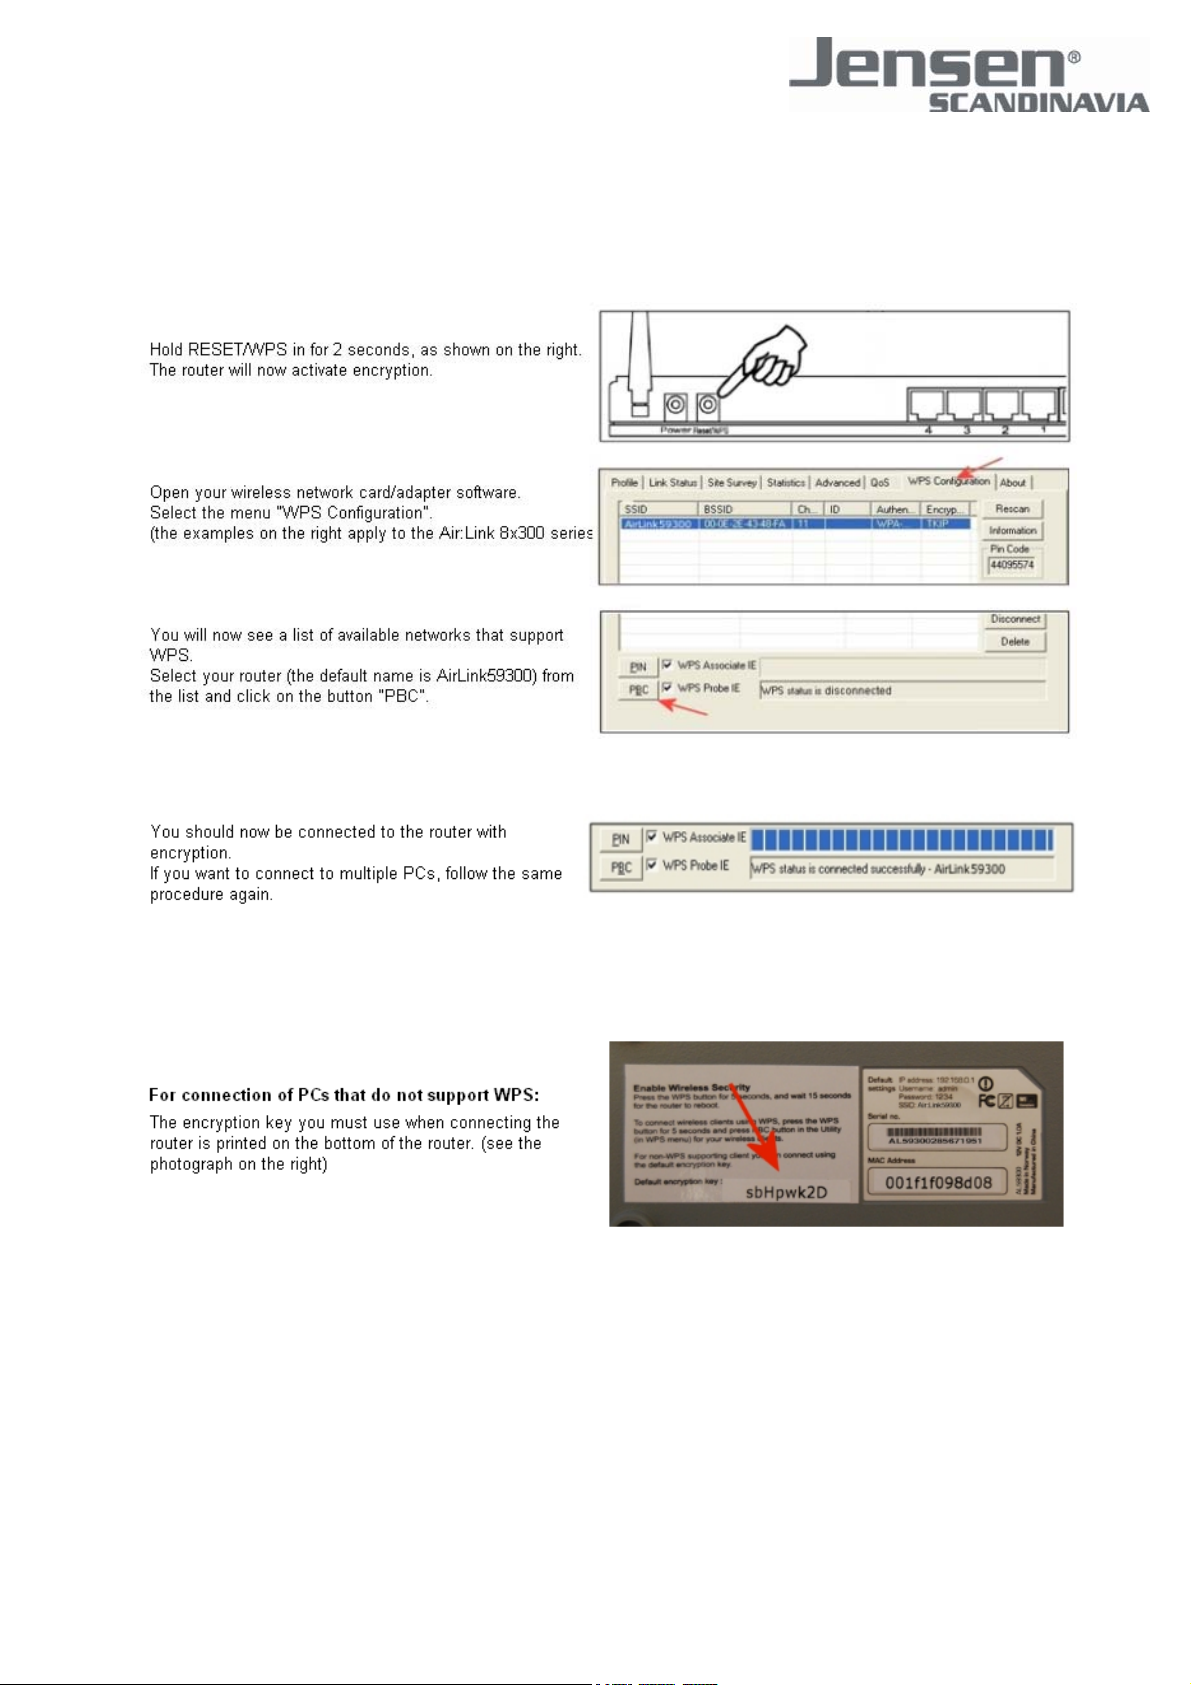
When using a wireless network card/adapter you must now connect to the wireless network in the
router. How this is done may vary depending on what type of wireless network card/adapter and
Windows version you use.
Below you can find a list of different connections to make it easy to connect to the router. If you have a
different wireless network card/adapter or Windows version you must see the user manual for your
card/adapter for details on how to connect to a wireless network. The name of the network you must
connect to is AirLink59300.
Windows Vista
- Connect using Jensen Air:Link 80300, 83300 or 85300
- Connect using a built-in wireless card and using Windows WLAN Utility
Windows XP
- Connect using Jensen Air:Link 80300, 83300 or 85300
- Connect using a built-in wireless card and using Windows WLAN Utility (Servicepack 1)
- Connect using a built-in wireless card and using Windows WLAN Utility (Servicepack 2)
Windows 2000
- Connect using Jensen Air:Link 80300, 83300 or 85300
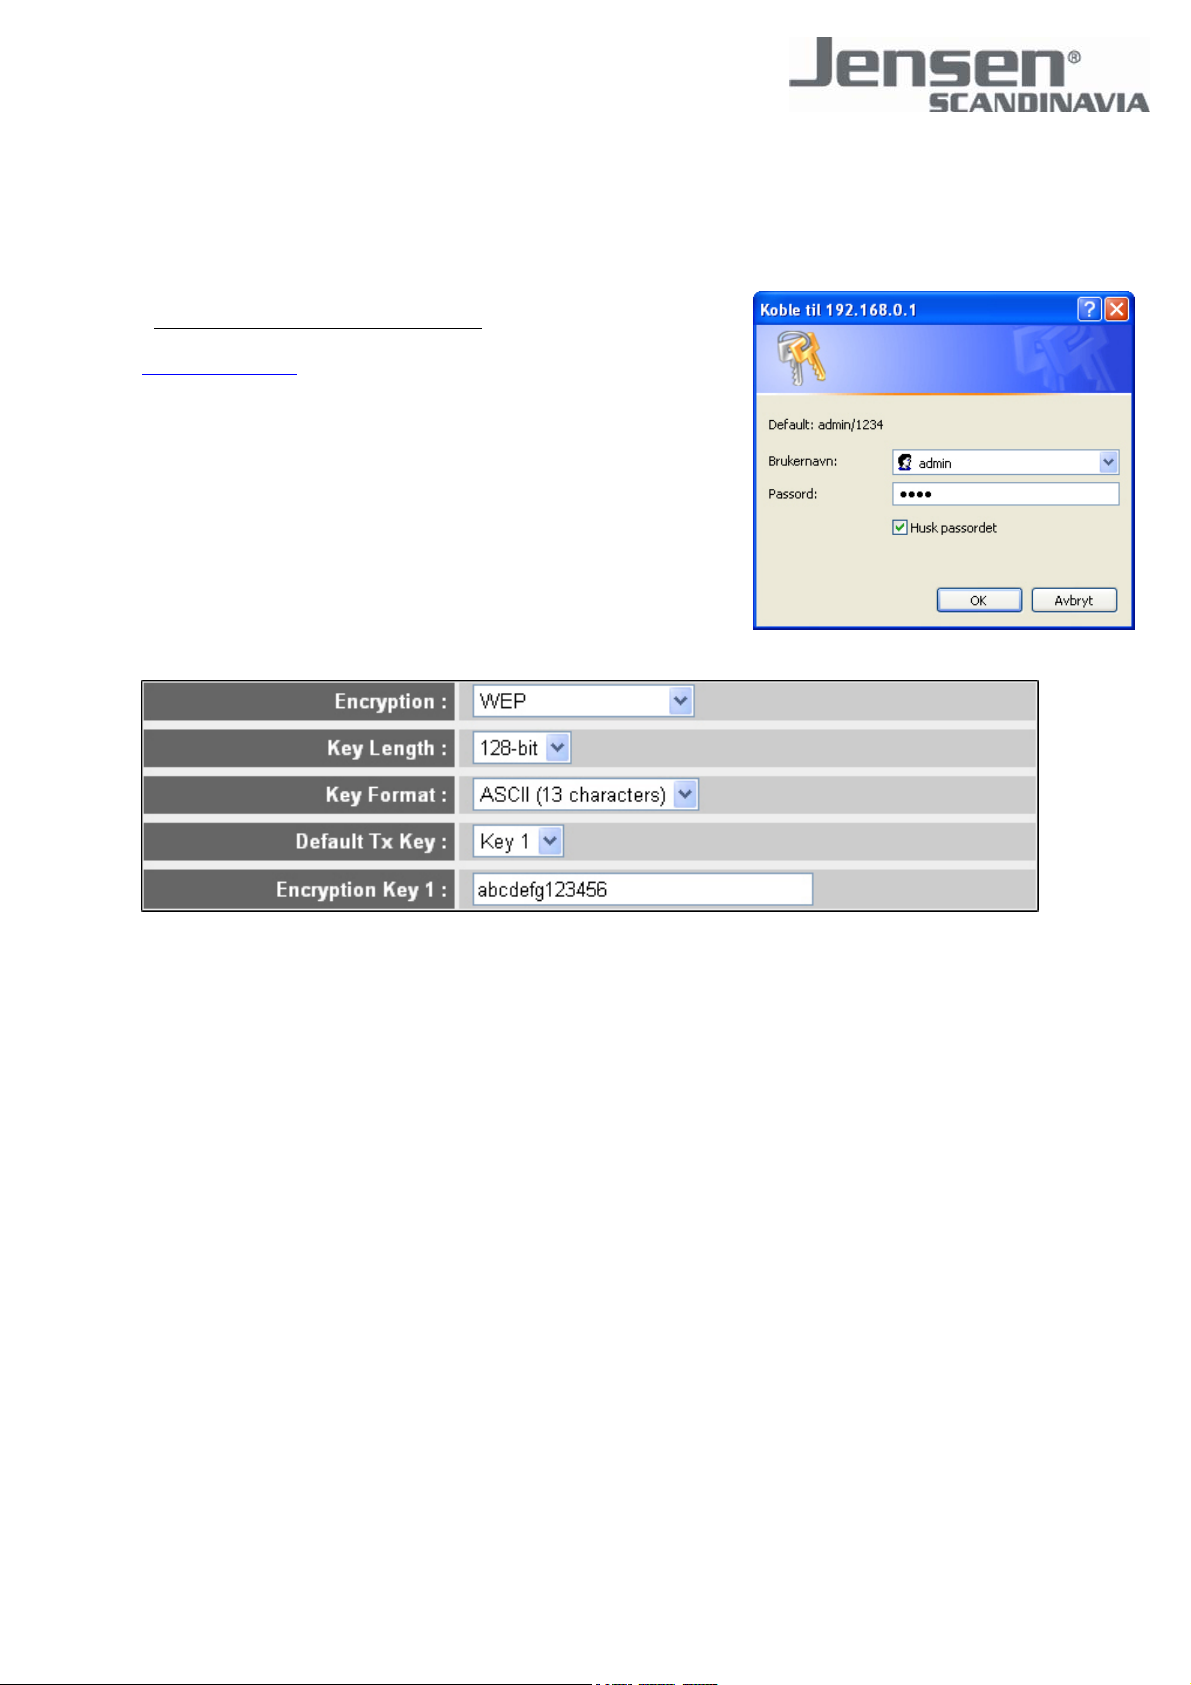
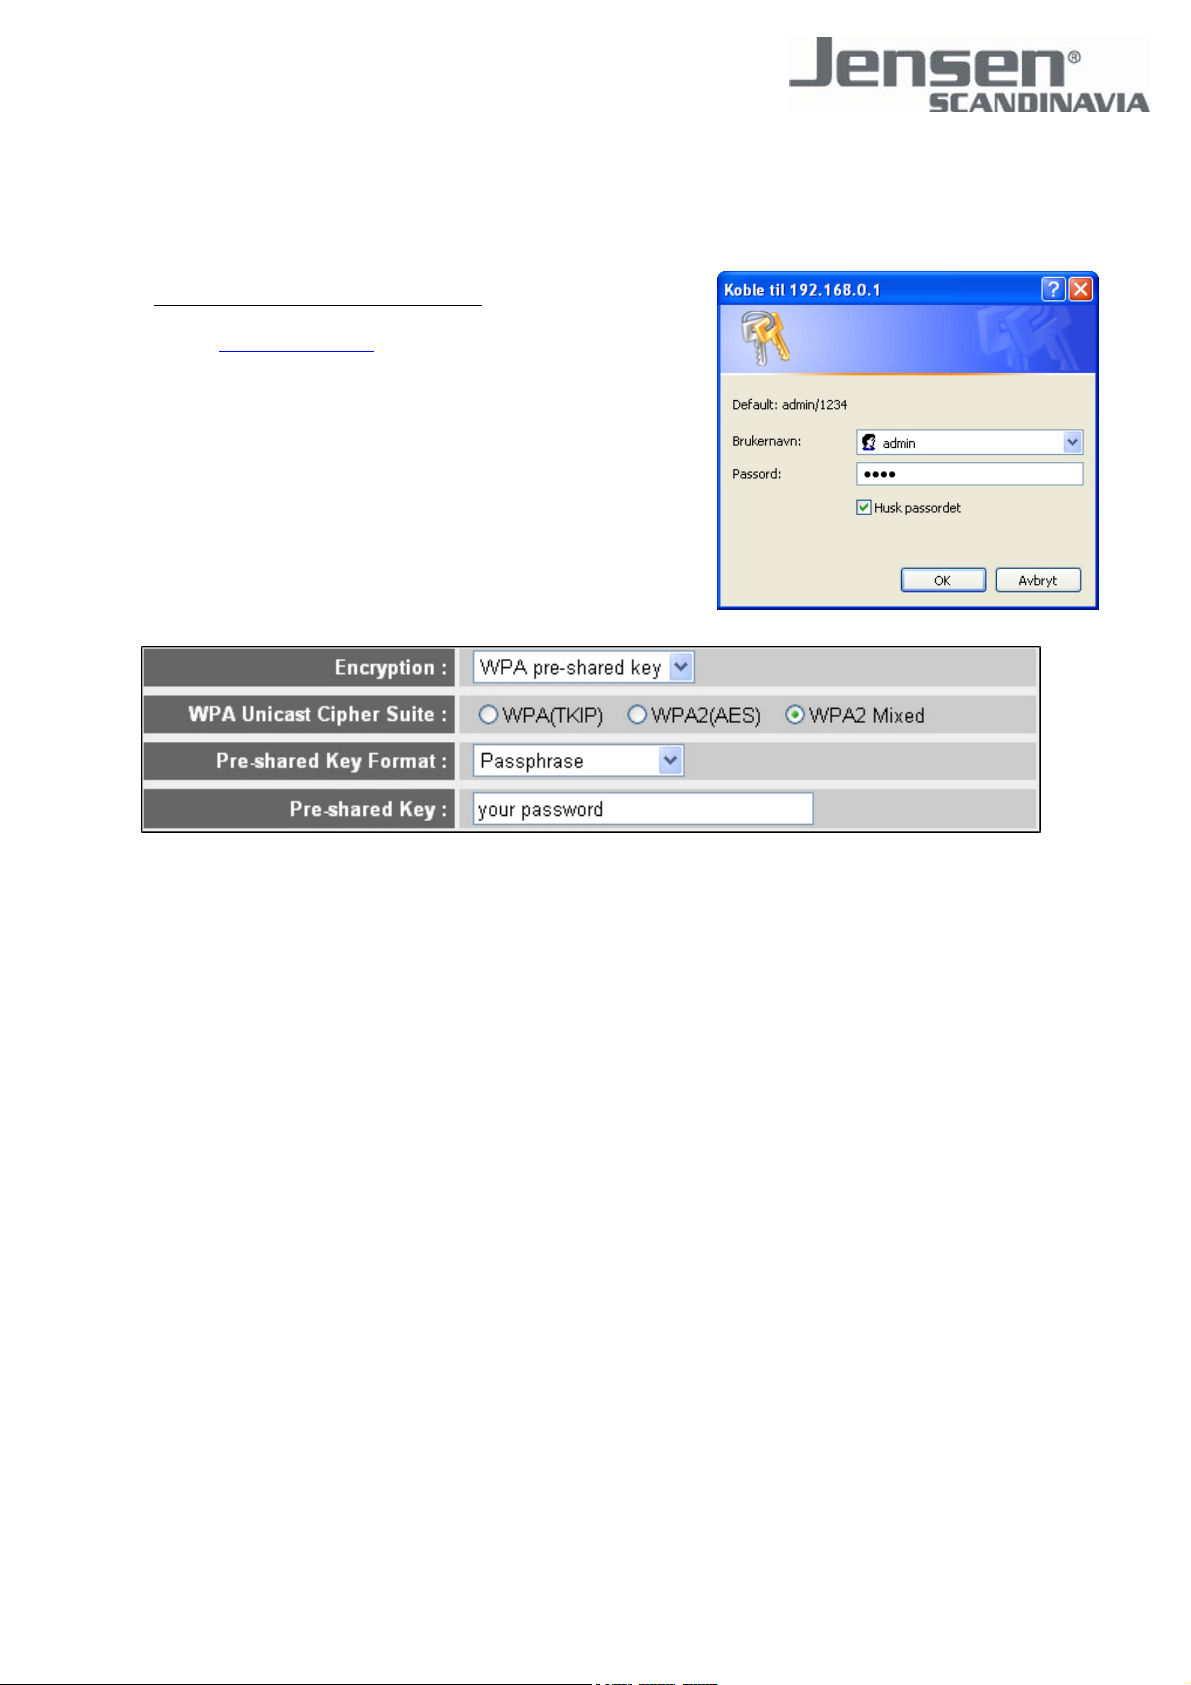
When you have connected your PC with wired or wireless network
card/adapter you can access the routers built-in menu to configure
the Internet setup.
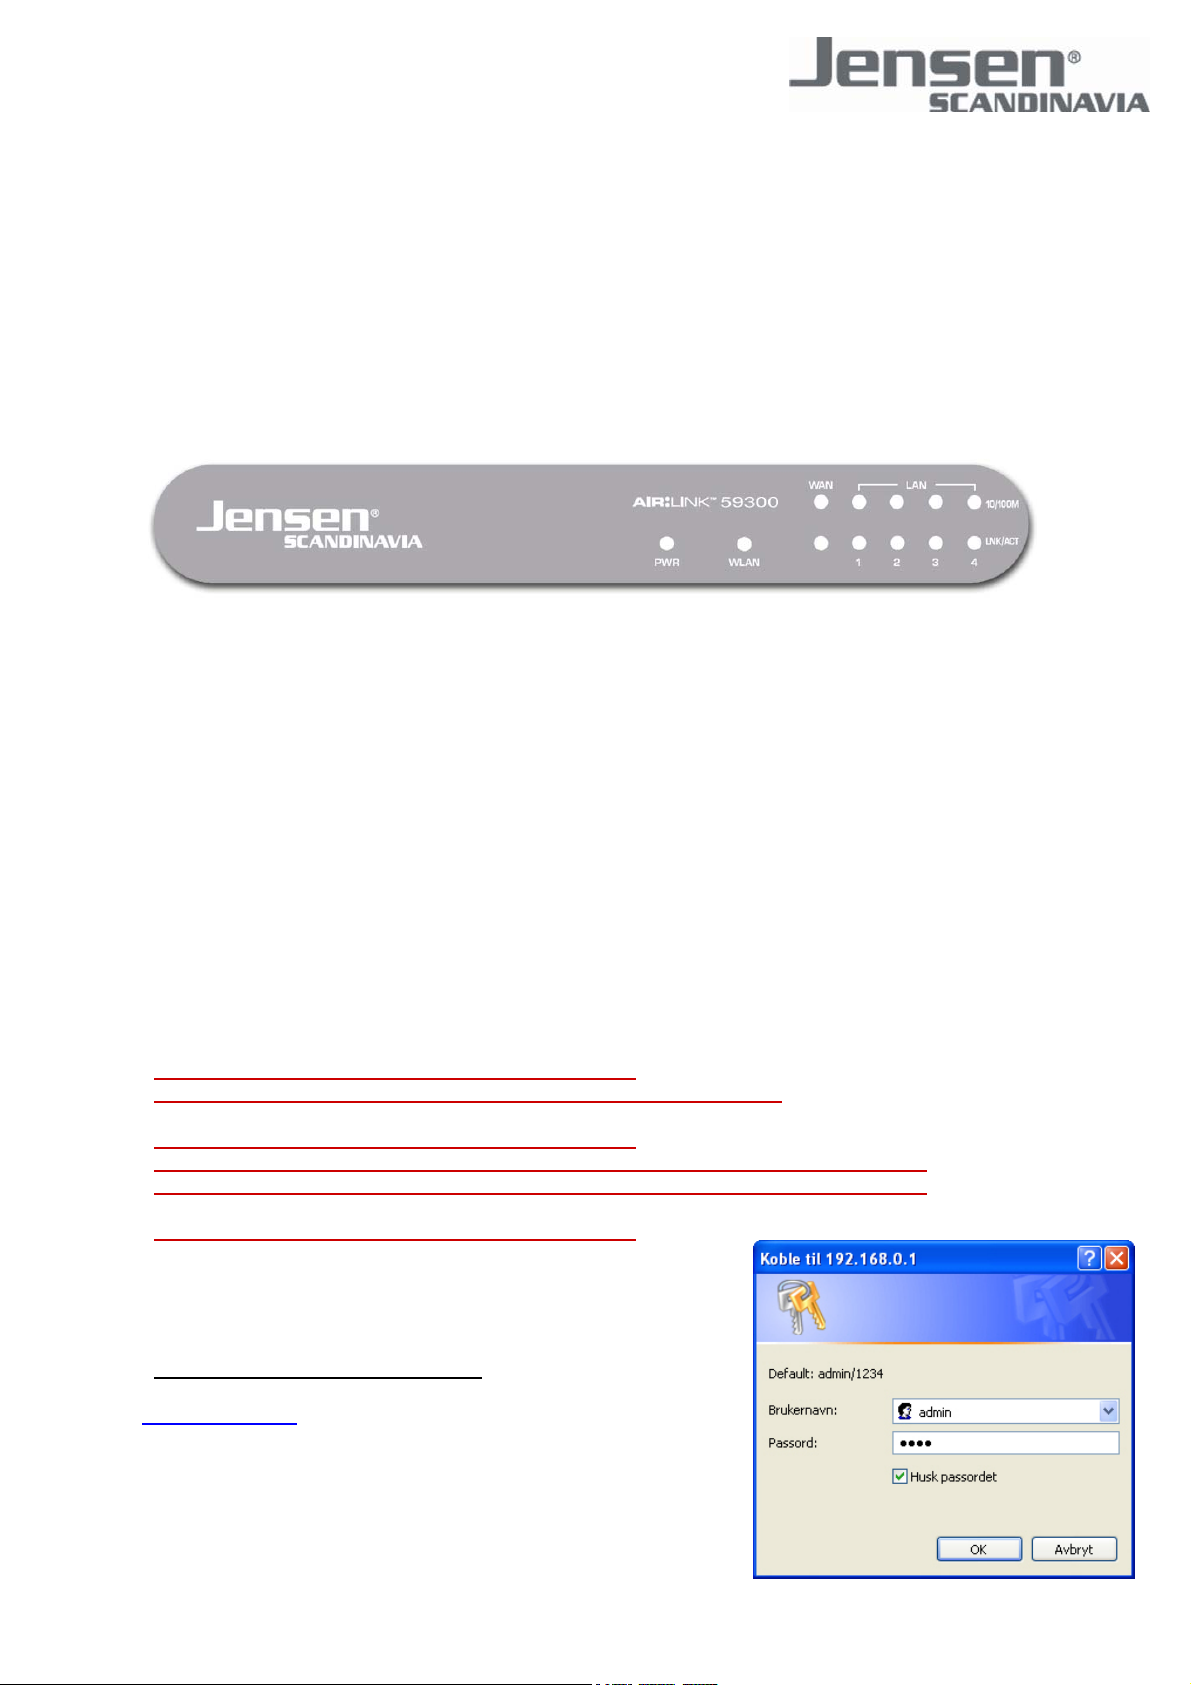
- Click here to login to the router menu, or open your default
Internet browser (normally Internet Explorer), type in the address
http://192.168.0.1 in the address field and press Enter on the
keyboard to start the login. You should see a login box like in the
picture to the right.
- Type in "admin" as username and "1234" as password and click
OK to login to the router menu.