JETI model MVario EX User manual

MVario EX
-1-
The MVario System measures the atmospherical pressure and calculates with the obtained data the altitude
above sea level, the rate of climb as well as the rate of descent and records extreme values of these data. The
changes of rates of climb and descent are signalled and if preadjusted limits are exceeded, alerts are calling for
attention. Informations of the sensor are transmitted via the Duplex System to the user.
The Duplex System takes advantage of the 2,4GHz band for communication and is not only transmitting
model control data to the model, but is also receiving data from the model back to the transmitter. The telemetric
data gained during operation are shown as actual measured values in real time on the LCD screen of the
JETIBOX.
Technical Parameter
MVario
Dimensions
20x11x5
Weight with cables
6g
Measuring accuracy of absolute/relative altitude
±9m/±3m
Measurement range
300÷1100hPa
Operating temperature
-10÷85°C
Supply voltage
3,5 ÷ 8,4V
Current consumption
6mA
The sensor renders possible to adjust an acoustic signal for the climb rate/descent rate or for exceeding of a
preadjusted limit value. The acoustic signal consists of 4 different kinds (steps) for climbing and the same amount
of steps for descending. The step width can be adjusted by the user. The climb signal consists of short
interrupted tones, the descent signal of long interrupted tones.
Design of the MVario Sensor:
The MVario is a sensitive barometric sensor. Any pressure change results in a change of altidude above sea
level, of climb rate a. s. o. The sensor should be solely influenced by static atmospheric pressure, not by any
airflow through the model. Therefore placement of the sensor in the model should be considered carefully. Place
the sensor in the model in a horizontal position (the MVario name sticker on top) in a position where only static
atmospheric pressure can have an effect.
MVARIO Sensor Menu:
Besides other competencies of the JETIBOX terminal it handles also duties like parameter adjustments and data
readout. After connection to the MVario sensor an introduction screen appears showing in the first line the
identification of the sensor and the realive altitude above sea level. In the second line you see the indicator and the
value of the Vario (climb rate/descent rate in m per 1s). The indicator of the Vario consists of eight positions. The
number of filled positions forms the size of the Vario indication. The symbol „>“ stands for one step of climb. The
Symbol „<“stands for one step of descent. By long pushing down button R (right) a fast deletion of all measured
parameters can be triggered. Fast deletion is indicated in the first line of the display by an asterix „*“.
By pushing the JETIBOX button D (downward arrow) you will enter the MVario sensor menu.
MVARIO MENU: ACTUAL VAL –by pushing the button D (downward arrow) you will select the display of actual
measurement values
Rel/Abs Altitude - relative and absolute altitude above sea level. After switching on a comparison basis (zero
altitude) is created from the absolute altitude for the relative altidude. The relative altitude is the result of the
difference of the actual absolute altitude and the comparison basis (zero altitude).
Vario –indicates the actual rate of climb/rate of descent in meters per 1s.
Abs. Pressure –indicates the actual atmospherical pressure in hPa.
Temperature –indicates the actual temperature of the sensor.
MVARIO MENU: MIN/MAX - by pushing the button D (downward arrow) you select recording of extreme values
which occured during measurements.
Vario MIN/MAX –indicates the minimum descent rate and the maximum climb rate
Altitude MAX –indicates the achieved maximum relative altitude
Temp MIN/MAX –indicates the minimum and maximum temperature of the sensor
MVARIO MENU: SETTING - by pushing the button D (downward arrow) you will change to the basic setup of the
MVario sensor.
Erase data –manual deletion of extremes. By simultaneous pushing of the arrow buttons R and L (right and left) all
records of measured parameters (minimum and maximum) will be deleted.

MVario EX
-2-
Climb sens. –Set up of the sensor ascend sensitivity. If passing this threshold of ascend speed one segment of the
indicator in the sensor introduction display becomes filled up, and at the same time an acoustic signal reports that
the first stage of ascend speed has been achieved. For example: As long as this value will be set up to 0.5m all
segments of the indicator will become filled up, at the same time an acoustic signal will report achievement of the
last stage of 2m/s ascend velocity.
Descent sens. - Set up of the sensor descend sensitivity. If passing this threshold of descend speed one segment
of the indicator in the sensor introduction display becomes filled up, and at the same time an acoustic signal reports
that the first stage of descend speed has been achieved. For example: As long as this value will be set up to -2,0m
all segments of the indicator will become filled up, at the same time an acoustic signal will report achievement of
the last stage of -8m/s descend velocity.
Beep period –adjustment of the time between a group of tones of the Vario acoustic signals. The number of tones
corresponds with the change of climb rate/descent rate which has occured during the set time.
Trigger level –adjustment of the value of the input pulse length, after whose exceeding the extremes become
deleted and the acoustic signalling of the climb rate/descent rate starts. As long as the MVario input is not
connected to the receiver channel the acoustic signalling is switched on constantly and deleting of extremes does
not proceed automatically. (We recommend connection of the input to the receiver channel which is controlled from
the transmitter by a switch or by the throttle channel.)
Reverse –reversation adjustment of the input signal evaluation. (For instance, as long as the trigger level „Trigger
level“ is set to 1.50 ms and „Reverse“ to OFF). MVario evaluates an infringement if the input signal is longer than
1.50 ms and an automatic deletion of extremes occurs. Furthermore, extremes recording starts and acoustic
signalling of the Vario will be switched on. If the input signal lies below the trigger level, no recording of extremes
will occur and signalling is switched off.)
Alti. above sea –adjustment of the reference altitude above sea level for sensor calibration. For exact
measurements of the absolute altidude the known altitude above sea level must be set at a point, where the sensor
will be operating further on.
Beep Vario Alarm –adjustment of the Morse alphabet character which will represent infringement of the Vario alert
setting by an acoustical tone of the DUPLEX Tx transmitter module.
Beep Alti. Alarm –adjustment of the Morse alphabet character which will represent infringement of the altidude
alert setting by an acoustical tone of the DUPLEX Tx transmitter module
Vario beep –adjustment of one of 4 modes of the Vario acoustic signalling. „ON“ is the active signalling of climb
and descent flight. „ON – DESCENT“ is the active acoustic signalling for descent flight only. „ON – CLIMB“ is the
active acoustic signalling for climb flight only. In the „OFF“ mode the Vario acoustic signalling is switched off. These
adjustments do not affect the acoustical alert signalling which is always switched on. (If you want to be informed
about violation of one set alert only, signalling of the vario must be switched off. We do not recommend
simultaneous setting of alerts as well as signalling of the Vario.)
MVARIO MENU: ALARMS –by pushing the button D (downward arrow) you will change to the setup of particular
alerts. If an adjusted parameter becomes passed over, the LCD screen of the JETIBOX will show in the second line
of the introduction screen alternately the original data with the matching alert and the buzzer of the transmitter
module will emit the alert signal. The first tone is the revelation tone and the second one beeps the Morse code of
the chacter representing the corresponding alert. If the alert is in position OFF, the given alert is switched off.
Vario High Al. –adjustment of the signal representing high climb rate, if the value measured by the Vario exceeds
the set value, the alert will be activated.
Vario low Al. - adjustment of the signal representing high descent rate, if the value measured by the Vario exceeds
the set value, the alert will be activated.
Alti. High Al. - adjustment of the signal representing the relative altitude, if the value of the relative altitude exceeds
the set value, the alert will be activated
MVARIO MENU: SERVICE –by pressing button D (arrow down) you will change to depiction of the firmware
version and to renewal of the sensor default setting.
Factory Defaults –by simultaneous pressing of arrows R and L (right and left) the factory settings of the MVARIO
are loaded.
MVARIO v. xx.xx ID xxxxx:xxxxx –product marking with firmware version and series number (ID).
Connecting the MVario
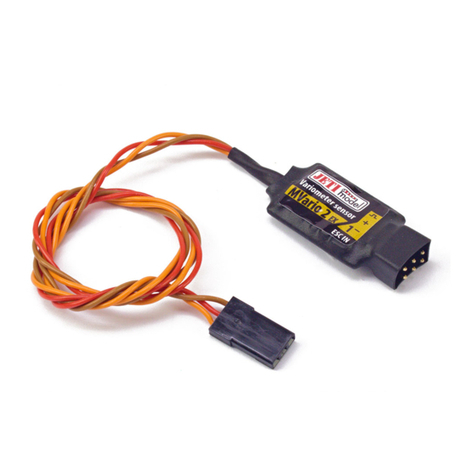
The MVario comprises an exit marked Ext. (black connector) and an input (red connector). Via the exit (black
connector) of the sensor informations are transmitted to the receiver or to the JETIBOX, and it serves as current
MVario EX
-3-
supply as well. Via the input (red connector) the acoustic signalling of the MVario can be activated/deactivated and
furthermore it is used for connecting up to a free receiver channel.
1. The triple-core cable with JR plug (black connector) can be plugged in directly into the JETIBOX (socket with
the marking Impulse, + - ). For current supply you have to use the second input of the JETIBOX with the marking (+
- ), please apply a voltage of 3,5-8,4V. When taking advantage of this type of connection you must be aware that
there exists no wireless data transfer and the measured data are directly shown on the LCD screen of the
JETIBOX. This connection type allows no alert signal generation and no acoustical signals of the Vario, because
the buzzer is a component of the transmitter module which is not connected in that case. Alert signals are shown
on the LCD-screen only.
2. Connect the triple-core cable of the MVario sensor with JR plug (black connector) to the back side of the
DUPLEX receiver (to the socket marked Ext.). Connect the input of the MVario with JR plug (red connector) to a
free receiver channel. The MVario module gets its current supply via the receiver. In order to adjust parameters of
the MVario connect the JETIBOX to the transmitter module and switch on receiver and transmitter.
3. Connect the triple-core cable of the MVario sensor with JR plug (black connector) to one of the EXPANDER
inputs. Connect the input of the MVario with JR plug (red connector) to a free receiver channel. The expander
renders connection of several telemetry sensors to one receiver possible. In such a case gets the MVario sensor its
current supply via the expander and the expander via the receiver.
Firmware Update
The equipment firmware may be updated by a PC via the converter unit JETI USB Adapter. In the USB Adapter
instructions you will find a description of the installation procedure of the USB Adapter controller as well as the
update program.
Warranty:
For this product we grant a warranty of 24 months from the day of purchase under the assumption that it has
been operated in conformity with these instructions at recommended voltages and that it has not been damaged
mechanically. Warranty and post warranty service is provided by the manufacturer.
We wish you sucessful flying with the products of: JETI model s.r.o. Příbor, www.jetimodel.cz

MVario EX
-4-
Menu of the MVARIA Sensor as shown by the LCD Screen of the JETIBOX:
Table of contents
Other JETI model Accessories manuals

JETI model
JETI model MBar EX User manual

JETI model
JETI model MULi6s EX Installation and operation manual

JETI model
JETI model MVario2 User manual

JETI model
JETI model MT125 User manual

JETI model
JETI model MSPEED User manual

JETI model
JETI model MUI EX User manual

JETI model
JETI model MULi6s EX User manual
Popular Accessories manuals by other brands

Anker
Anker PowerCore+ 19000 PD Welcome guide

Mantracourt
Mantracourt BroadWeigh Original instructions

Aircraft
Aircraft AITHRE SHIELD EX Series manual

BRK electronic
BRK electronic RM3 user manual

S+S Regeltechnik
S+S Regeltechnik AERASGARD RFTM-LQ-CO2 Operating Instructions, Mounting & Installation

novotechnik
novotechnik LWH Series user manual