JGR TLS5 User manual

TLS5 Tunable Laser Source
User Manual
All information contained herein is believed to be accurate and is subject to
change without notice. No responsibility is assumed for its use.
© JGR Optics Inc, 2015.


TLS5 User Manual
TLS5-UM-00001 Rev 002
iii
TABLE OF CONTENTS
COMPLIANCE ............................................................................................................1
FDA-CDRH COMPLIANCE .....................................................................................................1
CSA /IEC COMPLIANCE........................................................................................................1
COMPLIANCE .........................................................................................................................1
GENERAL INFORMATION ......................................................................................2
TLS TUNABLE LASER SOURCE OVERVIEW ..............................................................................2
OUTPUT PORT.......................................................................................................................3
KEY FEATURES ......................................................................................................................3
APPLICATIONS.......................................................................................................................3
ACCESSORIES........................................................................................................................3
SAFETY INFORMATION ..........................................................................................4
SAFETY MARKINGS ON THE UNIT ...........................................................................................4
CLASSIFICATION....................................................................................................................5
LASER SPECIFICATIONS .........................................................................................................5
IMPORTANT SAFETY INFORMATION ........................................................................................5
Laser Hazards
...........................................................................................................5
Electrical Shock Hazards
.........................................................................................6
GETTING STARTED ..................................................................................................7
INITIAL INSPECTION..............................................................................................................7
OPERATIONAL REQUIREMENTS...............................................................................................8
PRODUCT OVERVIEW.............................................................................................................9
Front Panel and Key Description
............................................................................9
Rear Panel
.................................................................................................................9
OPERATION .............................................................................................................11
POWERING UP THE TUNABLE LASER SOURCE........................................................................11
MANUAL TUNING.................................................................................................................11
SWEEP MODE......................................................................................................................12
USER MENU OPERATION......................................................................................................13
Accessing the User Menu
......................................................................................13
User Menu Options
................................................................................................13
MESSAGES AND SYMBOLS ....................................................................................................14
CALIBRATION ......................................................................................................................14
Calibration Period
...................................................................................................15
PROGRAMMING GUIDE........................................................................................16
SETTING UP FOR RS-232, USB OR GPIB COMMUNICATION .................................................16
Accessing the “User Menu” mode
........................................................................16
Programming over GPIB
.......................................................................................16
Programming Over RS-232
...................................................................................16
Programming Over USB
........................................................................................17
MAINTENANCE AND TROUBLESHOOTING ......................................................18
MAINTENANCE.....................................................................................................................18

TLS5 User Manual
TLS5-UM-00001 Rev 002
iv
Cleaning the Unit
................................................................................................... 18
Cleaning the Connector Ends
.............................................................................. 18
Cleaning Jumper Connectors
............................................................................... 19
TROUBLESHOOTING ............................................................................................................ 20
Connector Issues
................................................................................................... 20
Other potential Issues
.......................................................................................... 20
STORAGE AND SHIPPING ...................................................................................22
RETURNING INSTRUMENTS TO JGR OPTICS......................................................................... 22
CONTACT INFORMATION ..................................................................................................... 23
SPECIFICATIONS ..................................................................................................24
REMOTE CONTROL COMMANDS ........................................................................25
COMMAND SYNTAX AND STYLE............................................................................................ 25
Program Message Formats
.................................................................................. 25
Terminating a Program Message
........................................................................ 25
Command Header Variations
............................................................................... 25
Specifying the Command Path
............................................................................ 26
Default Commands
................................................................................................ 26
Implemented Status Structures
.......................................................................... 27
QUEUES ............................................................................................................................. 29
Input Queue
........................................................................................................... 29
Output Queue
........................................................................................................ 30
Error Queue
............................................................................................................ 30
DESCRIPTION OF ERROR NUMBERS ..................................................................................... 30
IEEE 488.2 COMMON COMMANDS AND THE SCPI COMMAND TREE..................................... 32
IEEE 488.2 Common Commands
........................................................................ 32
SCPI Command Tree
............................................................................................. 33
DESCRIPTION OF INDIVIDUAL COMMANDS ........................................................................... 35
IEEE-488.2 Common Commands
........................................................................ 35
SCPI Commands
.................................................................................................... 39

TLS5 User Manual
TLS5-UM-00001 Rev 002
1
1
COMPLIANCE
FDA-CDRH Compliance
Under the US Food and Drug Administration (FDA) Center for Devices and
Radiological Health (CDRH), the unit complies with the Code of Federal
Regulations (CFR), Title 21, Subchapter J, which pertains to laser safety and
labeling. See the link below for more information.
•http://www.accessdata.fda.gov/scripts/cdrh/cfdocs/cfcfr/CFRSearch.cfm?CF
RPartFrom=1000&CFRPartTo=1050
CSA / IEC Compliance
The unit complies with certain standards of the Canadian Standards Association
(CSA) and the International Electrotechnical Commission (IEC).
The unit falls in the Installation Category (Overvoltage Category) II under IEC 664.
IEC 664 relates to impulse voltage levels and insulation coordination. The
particular category is defined as: local level, appliances, portable equipment, etc,
with smaller transient overvoltages than Installation Category (Overvoltage
Category) III.
The unit falls in the Pollution Degree 2 category under IEC 1010-1 and CAN/CSA-
C22.2 No. 1010.1. The IEC standard on Safety Requirements for Electrical
Equipment for Measurement, Control, and Laboratory Use relates to insulation
coordination. The CSA standard is on Safety Requirements for Electrical
Equipment for Measurement Control, and Laboratory Use, Part I: General
Requirements. The Pollution Degree 2 category is defined as follows: “Normally
only non-conductive pollution occurs. Occasionally, however, a temporary
conductivity caused by condensation must be expected.”
Compliance
Electronic test equipment is subject to the EMC Directive in the European
Union. The EN61326 standard prescribes both emission and immunity
requirements for laboratory, measurement, and control equipment. This unit
has undergone extensive testing according to the European Union Directive and
Standards.

TLS5 User Manual
TLS5-UM-00001 Rev 002
2
2
GENERAL INFORMATION
TLS5 Tunable Laser Source Overview
The TLS5 is a Tunable Laser Source that offers an ultra-wide continuous
wavelength range of 1260 to 1650 nm, all in one bench-top chassis.
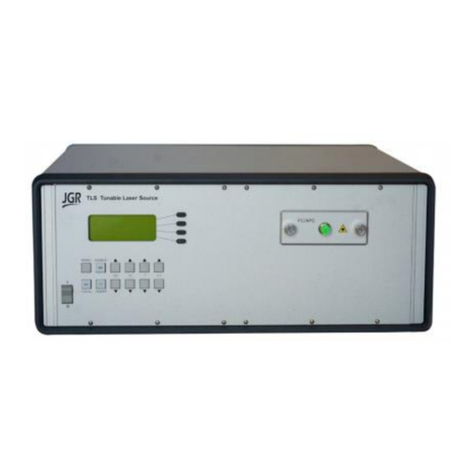
Figure 1: TLS5 Tunable Laser Source
The TLS5 enables customers to span the entire CWDM spectral range at a
relatively low cost, enabling affordable testing of CWDM as well as broadband
optical components. To accomplish such wide wavelength coverage, the TLS5
uses several optical amplifiers and an external cavity. The output wavelength of
each amplifier is aligned within the cavity to achieve seamless and continuous
wavelength coverage at the unit’s output.
The output spectrum features low coherence length, an accuracy of 0.2nm,
stability of 0.1nm, and high repeatability of better than 0.1nm. The source also
offers a very good side mode suppression ratio of over 60dB. The tuning speed
of the TLS5 is over 100nm/s allowing users to access their desired wavelength
quickly and efficiently.
The TLS5 offers a user friendly LED display that can be controlled manually with
the use of the front panel buttons, but also offers the possibility of remote
control through GPIB and RS232.

TLS5 User Manual
TLS5-UM-00001 Rev 002
3
Output Port
The output port of the TLS5 tunable laser source is equipped with an ultra-low
backreflection APC connector.
Key Features
•Ultra wide 1260 nm to 1650 nm continuous wavelength coverage
•Tuning resolution of 0.1 nm
•Side mode suppression ratio of 60 dB at 0.1 nm resolution bandwidth
•Tuning speed of over 100 nm / second
•RS-232 serial and IEEE 488 GPIB parallel interfaces
Applications
•CWDM and PON component testing
•General lab instrument
Accessories
•AC power cord
•User Manual
•NIST traceable Calibration Certificate
Extreme care must be taken to avoid damaging the connector when
plugging and unplugging output jumper. Connection must be kept
clean and should be inspected before every mating. Please refer to
the Cleaning Connectors section on page 19 for more information.

TLS5 User Manual
TLS5-UM-00001 Rev 002
4
3
SAFETY INFORMATION
To avoid situations that could result in serious injuries or death, always observe
the following precautions.
The safety instructions must be observed whenever the unit is operated,
serviced, or repaired. Failure to comply with any of these instructions or with
any precaution or warning contained in the User Manual is in direct violation of
the standards of design, manufacturing, and intended use of the unit. JGR
Optics assumes no liability for the customer’s failure to comply with any of
these safety requirements.
Safety Markings on the Unit
The following symbols and messages can be marked on the unit (see Table 1
below). Observe all safety instructions that are associated with a symbol.
Table 1: Safety Symbols
Laser radiation may be present. Refer to the User Manual for
instructions on handling and operating the unit safely. Avoid
looking into any ports near which this symbol appears.
Frame or chassis terminal for electrical grounding within the
unit.
Protective conductor terminal for electrical grounding to the
earth.
WARNING
Procedure can result in serious injury or loss of life if not
carried out in proper compliance with all safety instructions.
Ensure that all conditions necessary for safe handling and
operation are met before proceeding.
CAUTION
Procedure can result in serious damage to or destruction of the
unit if not carried out in compliance with all instructions for
proper use. Ensure that all conditions necessary for safe
handling and operation are met before proceeding.

TLS5 User Manual
TLS5-UM-00001 Rev 002
5
Classification
The TLS5 Tunable Laser Source consists of an exposed metal chassis that is
connected directly to earth via a power cord and, therefore, is classified as a
Class 1 instrument.
Laser Specifications
The laser contained in the TLS source is Class 1M laser as specified under the
laser classification of the US Food and Drug Administration (FDA) Center for
Devices and Radiological Health (CDRH). Laser specifications are provided in
Table 2 below.
Table 2: Specifications
Parameter
Specification
Wavelength
1260 to 1650 nm
Class
1M
Fiber Type
9/125 µm
Panda PM fiber
Minimum Output
Power
-5 dBm
Maximum Output
Power
+5 dBm
Important Safety Information
Laser Hazards
Warning
Never look into the end of an optical cable connected to an
optical output device that is operating. Laser radiation is
invisible, and direct exposure can severely injure the human
eye.

TLS5 User Manual
TLS5-UM-00001 Rev 002
6
Electrical Shock Hazards
Warning
•Some of the circuits are powered whenever the unit is
connected to the AC power source (line power). To ensure
that all circuits are powered off, disconnect the power cord
from either the power inlet on the unit’s rear panel or from
the AC line-power source (receptacle). The power cord
must always be accessible from one of these points. If the
unit is installed in a cabinet, the operator must be able to
disconnect the unit from the line power by the system’s
line-power switch.
•Use only the type of power cord supplied with the unit. If
you need to replace a lost or damaged cord, make sure to
replace with a power cord of the same type.
•Connect the power cord only to a power outlet equipped
with a protective earth contact. Never connect to an
extension cord or any receptacle that is not equipped with
this feature.
•If using a voltage-reducing autotransformer to power the
unit, ensure that the common terminal connects to the
earthed pole of the power source.
•Do not interrupt the protective earth grounding. Such
action can lead to a potential shock hazard that can result in
serious personal injury. Do not operate the unit if an
interruption to the protective grounding is suspected.
•Do not operate the unit when its cover or panels have been
removed.
•To prevent potential fire or shock hazard, do not expose the
unit to any source of excessive moisture.
•Do not use the unit outdoor.
•Operating the unit in the presence of flammable gases or
fumes is extremely hazardous.
•If the equipment is used in a manner not specified by the
manufacturer, the protection provided by the equipment
may be impaired. Only technicians authorized by JGR
Optics should carry out the repairs. In addition to voiding
the warranty, opening the unit (even when unplugged) can
expose you to potential shock hazards.
•Some of the unit’s capacitors can be charged even when the
unit is not connected to the power source.
•Do not perform any operating or maintenance procedure
that is not described in the User Manual.

TLS5 User Manual
TLS5-UM-00001 Rev 002
7
4
GETTING STARTED
Caution
To avoid injury or death, always observe the precautions listed
in “SAFETY INFORMATION” section on page 4.
This manual contains complete operating instructions for safe and effective
operation of the TLS5 Tunable Laser Source. It is recommended that users of
the TLS5 familiarize themselves with contents of this manual before using the
instrument.
The inspection report and a description of any customer-requested information
may be found in the calibration document envelope included with the
instrument.
Initial Inspection
Inspect the package and contents for signs of damage.
Ensure all contents are included:
•TLS5 Tunable Laser Source
•1 AC power cord
•User Manual
•NIST traceable Calibration Certificate
Read the User Manual thoroughly, and become familiar with all safety
symbols and instructions to ensure that the unit is operated and maintained
safely.
Warning
To avoid electrical shock, do not initialize or operate the unit if it
bears any sign of damage. Ensure that the unit and any devices
or cords connected to it are properly grounded.

TLS5 User Manual
TLS5-UM-00001 Rev 002
8
Ensure the unit is operational:
•Connect the unit to a power source using the provided power cord
•Set the power switch to ON to initialize the TLS Tunable Laser Source, and
observe the power-up sequence:
•Model number and firmware version of the meter are displayed
•The message “Initializing” is displayed as the light source stabilizes
•WL = xxxx.x nm and LASER OFF messages are then displayed
•Set the power switch to OFF and disconnect the source.
Keep the packaging.
Immediately notify JGR Optics and, if necessary, the carrier if the content of
the shipment is incomplete, if the unit or any of its components are
damaged or defective, or if the unit does not pass the initial inspection.
Operational Requirements
In order for the unit to meet the warranted specifications, the operating
environment must meet the following conditions for altitude, temperature,
humidity, and voltage.
Table 3: Environmental Requirements
Parameter
Specification
Altitude
Up to 2000 m
Temperature
Range of 0 to 40 °C
Humidity
Up to 95% RH (0 to 40 °C)
Voltage
Main supply voltage fluctuations must not
exceed ±10% of the nominal voltage

TLS5 User Manual
TLS5-UM-00001 Rev 002
9
Product Overview
Front Panel and Key Description
A front view of the TLS5 Tunable Laser Source is shown on Figure 2 and a
detailed description of keys and LEDs is provided in Table 5 on next page.
Figure 2: Front of Laser Source
Rear Panel
The back of the laser source is shown in Figure 3 and the rear-panel features are
described in Table 4.
Figure 3: Back of the Laser Source
TLS Tunable Laser Source
I
O
MENU
LOCAL
ENABLE
SWEEP
100 10 10.1
FC A/ PC
WARNING: DISCONNECT POWER CORD BEFORE REPLACING FUSE. FOR
CONTINUED FIRE PROTECTION USE SPECIFIED LINE FUSE ONLY. TOAVOID ELECTRICAL
SHOCK, THE POWER CORD PROTECTIVE GROUNDING CONDUCTOR MUST BE
CONNECTED TO GROUND. DO NOT REMOVE COVERS. NO OPERATOR SERVICEABLE
PARTS INSIDE. REFER SERVICING TO TRAINED PERSONNEL.
THIS DEVICE COMPLIES WITH DHHS RULES, 21CFR SUBCHAPTER J, APPLICABLE AT
DATE OF MANUFACTURE. THIS DEVICE COMPLIES WITH PART 15 OF THE FCC RULES.
OPERATION IS SUBJECT TO THE FOLLOWING TWO CONDITIONS:
1. THIS DEVICE MAY NOT CAUSE HARMFUL INTERFERENCE, AND
2. THIS DEVICE MUSTACCEPT ANY INTERFERENCE RECEIVED, INCLUDING
INTERFERENCE THAT MAY CAUSE UNDESIRED OPERATION.
~LINE
100-240 VAC
50-60 Hz
40-80 VA
FUSE: T1A/250V
RS232C IEEE 488 (GPIB)
Trigger In
Trigger Out

TLS5 User Manual
TLS5-UM-00001 Rev 002
10
Table 4: Rear Panel Components
Component
Function
RS-232C
RS-232C serial interface port
IEEE 488 (GPIB)
GPIB (IEEE 488.1) interface port
~LINE
Power Input (also contains the user-replaceable fuse)
TRIG IN
BNC connector used to receive a TTL trigger signal from an
external device to make the TLS Tunable laser source to
move one (1) wavelength step.
TRIG OUT
BNC connector used to send a TTL trigger function to an
external devide to indicate that the TLS tunable laser source
has stabilized on the required wavelength. Always enabled.
Table 5: Operating Keys and Status LEDs
Key/LED
Description
I/O
ON / OFF Power switch.
MENU
Press to access the Menu or to come back one level up in
the Menu
ENABLE
Press and hold to turn laser ON or OFF. When turning ON
the laser, 3 hyphens will appear in a sequence to the right
of the LASER ON message to indicate that the laser is now
active.
LOCAL
Press once to exit the Sweep mode
SWEEP
Press once to access the first page of the sweep mode
allowing configuration of start wavelength, stop
wavelength and step and also stard the sweep mode.
Press a second time to toggle to the second page to
configure the Delay, Trigger In and Ramp settings.
100, 10, 1, 0.1
Use the up and down arrows to manually tune the laser
wavelength by steps of 100 nm, 10 nm, 1 nm or 0.1 nm
depending on which set of arrow is used.

TLS5 User Manual
TLS5-UM-00001 Rev 002
11
5
OPERATION
Before using the TLS Laser Source, make sure to allow a warm-up time of at
least 30 minutes for laser stabilization.
Powering Up the Tunable Laser Source
To power up the laser source:
1. Connect the meter to an AC power source using the power cord
provided. If the meter has been running, ensure that the meter is
powered off and restarted.
2. Set the power switch to I (ON), and wait for the “Initialization”
process to finish.
3. Press the ENABLE button to turn-on the laser. Note that pushing
the ENABLE button a second time will allow turning-off the laser
without powering down the TLS completely.
Manual Tuning
The TLS Laser Source can be manually tuned to any wavelength within the
operation range by using the set of “arrow” keys on the front panel indicated on
figure 4 below.
Figure 4: Tuning keys on TLS front panel
TLS Tunable Laser Source
I
O
MENU
LOCAL
ENABLE
SWEEP
100 10 10.1
FC A/ PC

TLS5 User Manual
TLS5-UM-00001 Rev 002
12
For example, to change the TLS laser source wavelength from 1308.0 nm to
1550.1 nm, follow these steps:
•Press the 100 up key twice to go from 1308.xx to 1508.xx
•Press the 10 up key five times to go from 1508.xx to 1558.xx
•Press the 1 down key 8 times to go from 1558.xx to 1550.xx
•Press the 0.1 up key once to go to 1550.1
Sweep Mode
TLS Tunable Laser Source can also be configured to continuously sweep the
entire wavelength range or a specific user-defined wavelength range. Press the
Sweep button once to access the first page of the Sweep mode configuration
menu.
Using the four (4) soft keys on the right of the display, it is possible to Begin the
sweep or define the start and stop wavelengths as well as the tuning step. For
example, pressing the START key allows modification of the START wavelength
by using the Up and Down arrow keys below the display in a similar way as
described in the Manual Tuning section above.
Once all is set properly, then pressing the BEGIN SWEEP key will start the sweep
sequence which will automatically stop once the STOP wavelength is reached.
Pressing the SWEEP key a second time, will toggle to the second page of the
SWEEP menu where the Delay, Trigger and Ramp functions can be enabled and
configured.
The DELAY, in milliseconds, programmed from this page, will be added between
wavelength steps no matter if the Trigger In detailed below has been enabled or
not.
TLS Tunable Laser Source
I
O
MENU
LOCAL
ENABLE
SWEEP
100 10 10.1
FC A/ PC

TLS5 User Manual
TLS5-UM-00001 Rev 002
13
There are two (2) BNC connectors at the back of the unit used to send and
receive trigger signals to synchronize the TLS Tunable Laser Source with an
external device like a power meter. The Trigger In function can be enabled by
pressing the TRGIN softkey in the menu. When enabled, the TLS will advance
one (1) wavelength step.
The Trigger Out is always enabled and a 5 Vdc TTL, 10 μs wide pulse will be sent
on this output after each step.
The RAMP function can be enabled to make the source accelerate (ramp) and
decelerate when possible whiletraversing each wavelength step.
User Menu Operation
Accessing the User Menu
To access the User Menu, press the MENU key on the front panel.
User Menu Options
The first menu level reached by pressing the MENU key once shows two (2)
selections: Remote Options and Option Menu. Only the first slection can be
used by users. The Option menu is for internal use only. User Menu Remote
Options are shown In Table 6. They can be accessed by using the soft keys on
the right of the display.
To come back to the previous menu level, simply press MENU again.
Table 6: User Menu Remote Options
Option
Selection
Note
JGR Command Sets
None
The TLS only supports JGR commands
RS232 Transmission
Rate
300-34800
baud
Choose a transmission rate between
300 and 38400 Baud by using the Up
and Down 0.1 arrow keys.
GPIB Address
01-30
Select GPIB address between 01 and 30
by using the Up and Down 0.1 arrow
keys.

TLS5 User Manual
TLS5-UM-00001 Rev 002
14
Messages and Symbols
The messages/symbols displayed by the TLS Tunable Laser Source are shown in
Table 7.
Table 7: TLS Tunable Laser Source Display Messages and Symbols
Display
Description
TLS VER X.XX
Displayed momentarily during the power-up sequence
and indicates the firmware version
INITIALIZING
Displayed momentarily during the power-up sequence
as the initial internal reference measurements are
made
WL= xxx.x nm
Indicates the wavelength on which TLS is currently
tuned
LASER OFF
Laser is currently turned OFF
LASER ON ---
Tunable laser is ON and transmitting at indicated
wavelength
SWEEPING …
Laser is currently sweeping over the user defined
wavelength range
BEGIN SWEEP
START: xxxx.x nm
STOP : yyyy.y nm
STEP : zzzz.z nm
First Sweep mode menu showing the Start and Stop
wavelength as well as the sweep increment. Refer to
Sweep Mode section on page 12 for more
information.
BEGIN SWEEP
DELAY: xxx.x ms
TRGIN: OFF
RAMP: ON
Second Sweep mode menu showing the Trigger and
Ramp controls. Refer to Sweep Mode section on page
12 for more information.
Calibration
Caution
Devices with malfunctioning lasers must be returned to the
manufacturer for repair.
Calibration should be performed by a qualified Calibration Laboratory.
Wavelength accuracy of the TLS Tunable Laser Source are factory-set and must
be periodically adjusted to maintain performance.

TLS5 User Manual
TLS5-UM-00001 Rev 002
15
Calibration Period
JGR Optics recommends a 2 year calibration period for the TLS Tunable Laser
Source.

TLS5 User Manual
TLS5-UM-00001 Rev 002
16
6
PROGRAMMING GUIDE
Setting up for RS-232, USB or GPIB communication
The TLS Tunable Laser Source may be remotely controlled via GPIB (IEEE-488)
and RS-232 interface. The GPIB interface of the meter conforms to the
ANSI/IEEE standards 488.1-1987 and 488.2-1987. The RS232C interface
conforms to ANSI/IEEE standard 488.2-1987 where applicable.
The common command set conforms to ANSI/IEEE 488.2 standard syntax. All
other commands conform to the Standard Commands for Programmable
Instruments (SCPI) command language, version 1999.0.
Accessing the “User Menu” mode
In order to establish communication between the computer and the meter, the
RS-232 bus or the GPIB bus must be configured properly. The different options
for the communication are contained in the User Menu. Refer to the “USER
MENU OPERATION” section on page 13 for further details.
Programming over GPIB
The TLS supports the IEEE-488.1(1978) interface standard. It also supports the
mandated common commands of IEEE-488.2(1987) standard. Before
attempting to communicate with the TLS via the GPIB interface, the device
address must be set. The address is set by accessing the User Menu function
from the front panel. Use the Up and Down 0.1 arrow keys to set the address to
the required value.
Programming Over RS-232
In order to establish a serial communication between a computer and the TLS,
the computer’s COM port must be configured as described in Table 8.
To connect the TLS to the computer, a standard 9 pins straight RS-232 cable is
required. Only three pins, Txd, Rxd and GND are needed.
Table of contents
Other JGR Measuring Instrument manuals