018
010
010
472
472
472
01C
222
472
472
222
222
222
018
018
018
018
473
222
222
472
01C
2
Are
you
experiencing
problems?
Please contact the Jifeline team: T +31 (0)85 - 486 37 27 | E [email protected]STEP 2
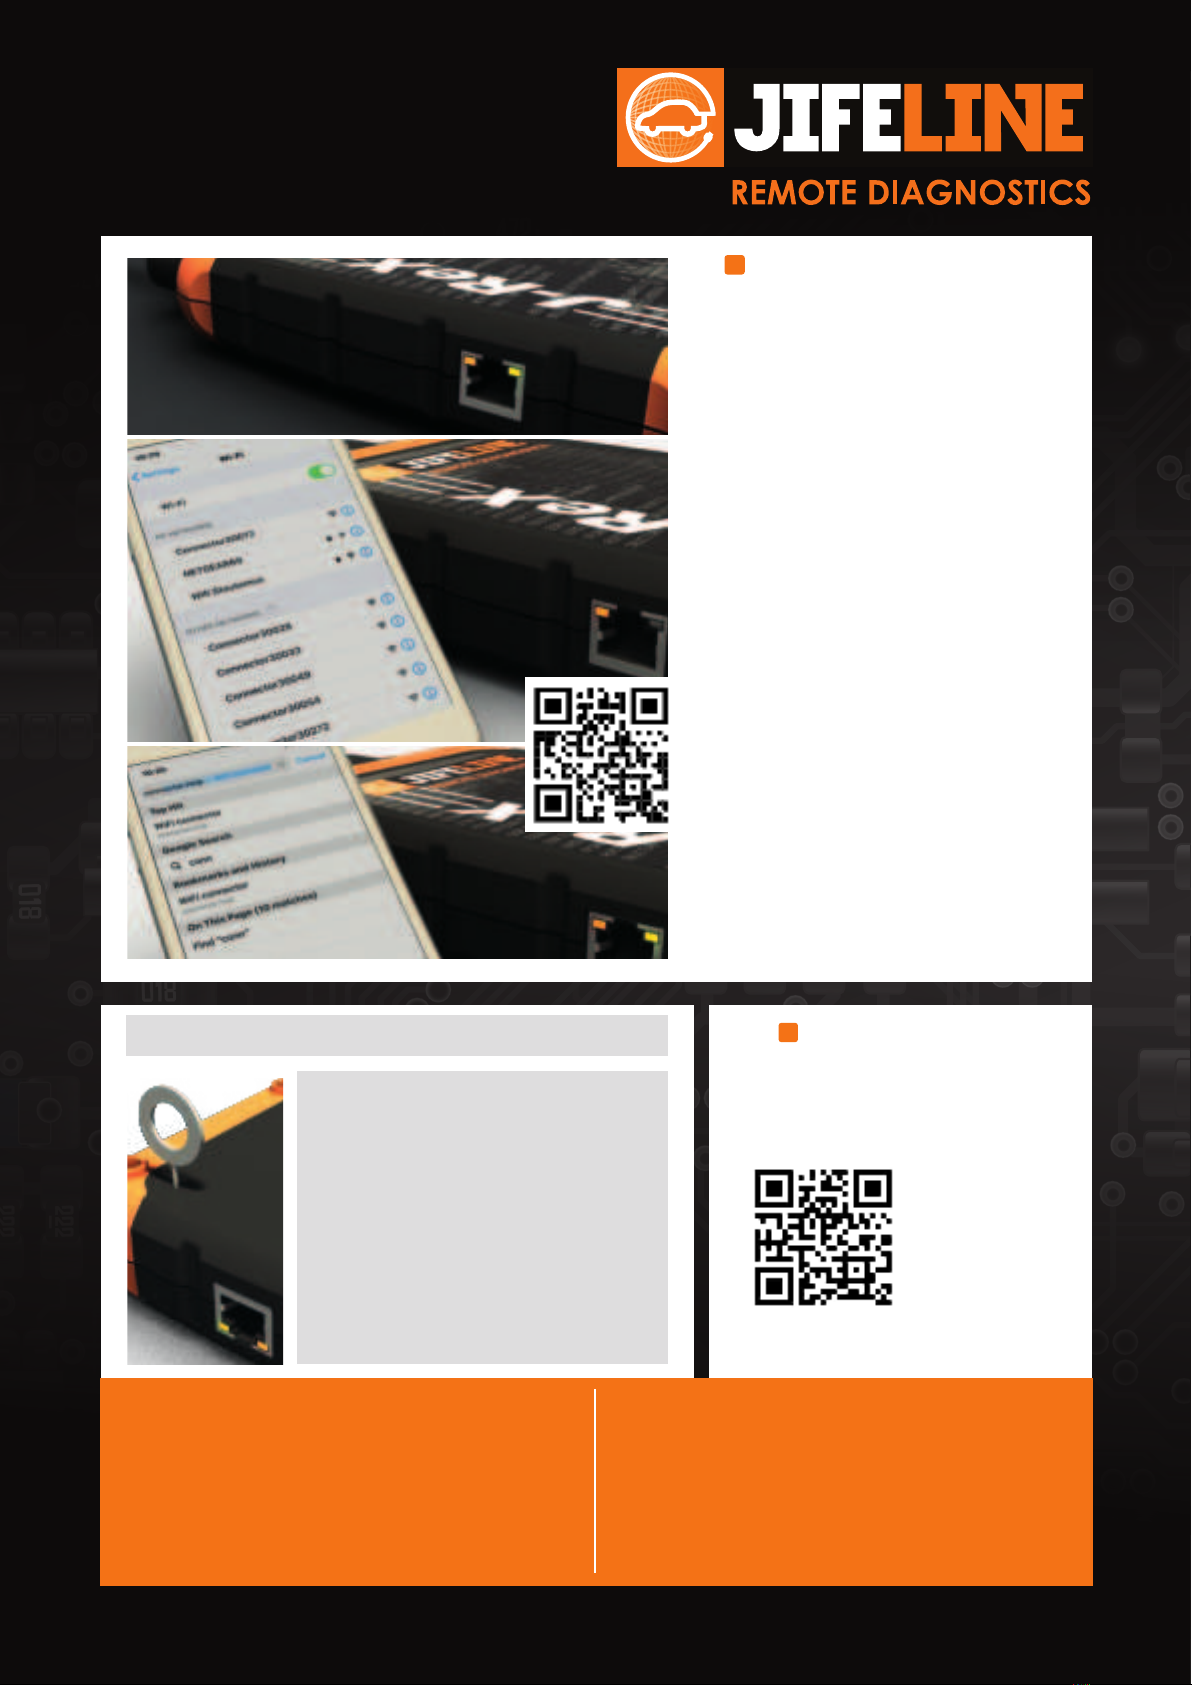
Connecting the J-ReX to your WiFi network:
a. Connect the 16-pin OBD connector of the J-ReX to
the OBD port of the vehicle. About 60 seconds after
connecting, the orange led, top left of the ethernet
connection led, will be on constantly.Almost at the
same time, the green led, at the top right of the
ethernet connection led, will start ashing slowly.
The J-ReX can now be connected to a WiFi network.
It is preferable to go through these steps with your
smartphone: you only have to do this once.
b. Turn off mobile data in the settings. Go to “available
networks” in your WiFi settings and select the
J-ReX. The J-ReX has the network name “connector
3xxxx” (“3xxxx” is the number of the J-ReX, you
can nd it on the back of the J-ReX).
Ignore notications about the WiFi connection
beinglostordisconnected.Thisiscorrectbecause
youareconnectingtotheJ-ReX.
c. Go to: connector.help via the browser or scan
the QR code. Select the WiFi network to which
you want to connect the J-ReX (this can also be a
hotspot on another device).
d. Enter the password of the chosen network to
connect the J-ReX with. If the connection is lost,
try again to choose and connect to a WiFi network.
e. Wait approximately 60 seconds for both the green
and orange leds to light constantly. The J-ReX is
then connected to the Jifeline server. If not, reset
the J-ReX (see bottom left).
a.
b.
d.
c.
e.
STEP 3
Prepare for use.
• Go to jifeline.obd.help via the browser of
your PC / laptop, tablet, or smartphone
or scan the QR code and ll in the login
details you received by email.
• You can now make a choice for the service
you want to perform.
To connect the J-ReX to another network, or to reset the J-ReX:
If you plan to use the J-ReX on the road
or in another location or are experiencing
connection issues:
• Connect the 16-pin OBD connector of the
J-ReX to the OBD port of a vehicle.
• Use the supplied reset pin or a paper clip
and press the reset switch for at least 2
seconds and release it.
• From here, go back to step 2b.
Federal Communications Commission (FCC) Information
This device complies with Part 15 of the FCC Rules. Operation is subject to the
following two conditions:
(1) this device may not cause harmful interference, and
(2) this device must accept any interference received, including interference that
may cause undesired operation.No changes shall be made to the equipment
without the manufacturer’s permission as this may void the user’s authority to
operate the equipment.
This device complies with FCC radiation exposure limits set forth for an uncontrolled
environment. This device must be installed and operated with a minimum distance
of 20 cm between the radiator and your body.
ISED Canada (ISEDC) information
This device contains licence-exempt transmitter(s)/receiver(s) that comply with
Innovation, Science and Economic Development Canada’s licence-exempt RSS(s).
Operation is subject to the following two conditions:
(1) This device may not cause interference.
(2) This device must accept any interference, including interference that may cause
undesired operation of the device.
IMPORTANT NOTE:
ISED Radiation Exposure Statement:
This equipment complies with ISED RSS-102 radiation exposure limits set forth for
an uncontrolled environment. This equipment should be installed and operated with
minimum separation distance of 20cm between the device and all persons.


