manuals.online logo
Brands
  1. Home
  2. •
  3. Brands
  4. •
  5. Launch
  6. •
  7. Diagnostic Equipment
  8. •
  9. Launch CR-HD Pro User manual

Launch CR-HD Pro User manual

Product Profile
Accessory Checklist
Preparation & Connection
Start Diagnostics
EN
Quick Start Guide
Diagnostic Cable
To connect the CR-HD
PRO to vehicle’s OBD2
diagnostic socket.
OBD-6 Adaptor Cable
Standard 6-pin Deutsch
adaptor for most heavy-
duty vehicles. Covers
1995 to present Class 4-
8 heavy-duty OEM.
OBD-9 Adaptor Cable
9-pin Deutsch adaptor
for use with vehicles
covering 1998 to present
Class 4-8 heavy-duty
OEM.
Data Cable
Connects the CR-HD
PRO to PC to make
update.
DB15 Connector
Display Screen
DTC LED
SCAN Button*
DTC Retrieval Button*
Selection Buttons
NO DTC LED
Data I/O Port
BACK Button
Battery Voltage Button*
OK Button
( )Connects the diagnostic cable.
( )Indicates the test results.
(
are found.)
Illuminates RED when DTCs
( )Quick access to Auto Scan.
( )Quick access to DTC Lookup.
(
are found.)
Illuminates GREEN if no DTCs
( )Connects to PC for update via data cable.
( )Returns to the previous screen.
( )Quick access to check battery voltage.
(
menu list.)
Confirms an selection or action from a
*Note:The buttons marked with *
indicate the function hot keys.
*Note: All pictures herein are only for reference purpose and this Quick Start Guide is subject to change
without written notice.
1. Preparation
1) Switch the ignition on.
2) The vehicle battery voltage should be 11-14V or 18V-30V.
3) Throttle should be in a closed position.
2.Locate vehicle’s DLC
The DLC(Data Link Connector) is typically a connector where diagnostic code readers interface
with the vehicle’s on-board computer. For heavy-duty vehicles, it is generally located in driver’s
cab. If the DLC cannot be found, refer to the vehicle’s Repair Manual for the exact location.
3.Connection
Select the desired diagnostic connector according to the vehicle DLC type and then follow the
steps below to proceed:
1.For vehicles equipped with an OBD II management system, plug one end of the diagnostic
cable into the vehicle’s DLC, and the other end into the DB15 connector of the tool and tighten
the captive screws.
2.For vehicles not equipped with an OBD II management system, do the following:
1). Select the corresponding non-16pin adaptor cable.
2). Plug the non-16pin end of the adaptor cable into the DLC socket, and the other end to the
diagnostic cable.
3). Plug the other end of the diagnostic cable into the DB15 connector of the tool and tighten
the captive screws.
2.Auto Scan
This function allows you to scan the HD-
OBD or EOBD II.
Select "Manual Scan"Follow on-screen
prompts to proceed
Select vehicle Select software
version
1.Manual Diagnosis
For new users, please follow the operation chart
shown below to get familiar with and start using
this tool.
In this mode, you have to diagnose a vehicle by
performing the menu-driven command manually.
CR-HD PRO features two kinds of diagnostic approaches: Auto scan and Manual diagnosis.
Statement: LAUNCH owns the complete
intellectual property rights for the software
used by this product. For any reverse
engineering or cracking actions against the
software, LAUNCH will block the use of this
product and reserve the right to pursue their
legal liabilities.
3. Function Modules 4. Update
Main Function
Diagnose Battery Lookup
Help
Setup Info
Lookup
Please input DTC:
The 1st range: P, C, B, U
The 2nd range: 0, 1, 2, 3
The others from 0 to F
Press [ ] or [ ] to change input, press [ ] or
[ ] to select position, then press [OK] to confirm.
P0000
OK
The icons in black at the bottom of the
screen indicate the available actions,
which can be done by pressing the
corresponding buttons on the tool.
Reads the battery voltage to check
the status of the battery.
*Note: This function can be accessed
directly by pressing the button on
the tool.
Provides access to libraries of OBD and
OBD II DTC definitions.
*Note: This function can be accessed
directly by pressing the button on the
tool.
Battery Voltage
Main Diagnostic Features
DTC Lookup
Diagnose: Configures this tool to operate as a
diagnostic tool.
Battery: Reads the vehicle’ battery voltage.
Lookup: Retrieves the desired Diagnostic
Trouble Code (DTC) from the DTC library.
Help: Lets you have a general knowledge of the
OBD II, HD OBD and I/M Readiness.
Setup: Makes the system setting of the tool.
Info: Includes the tool information, including
software & hardware version, and Serial Number
etc.
Read DTC:
Clear DTC:
Data Stream:
Displays the detailed information of
DTC records retrieved from the vehicle’s control
system.
After reading the DTCs from the
vehicle and certain repairs have been made, use
this function to erase the codes from the vehicle.
Before performing this function, please be sure the
vehicle’s ignition key is in the ON position with the
engine off.
Lets you view and capture
(record) real-time Live Data. It can also be used
to guide vehicle repair.
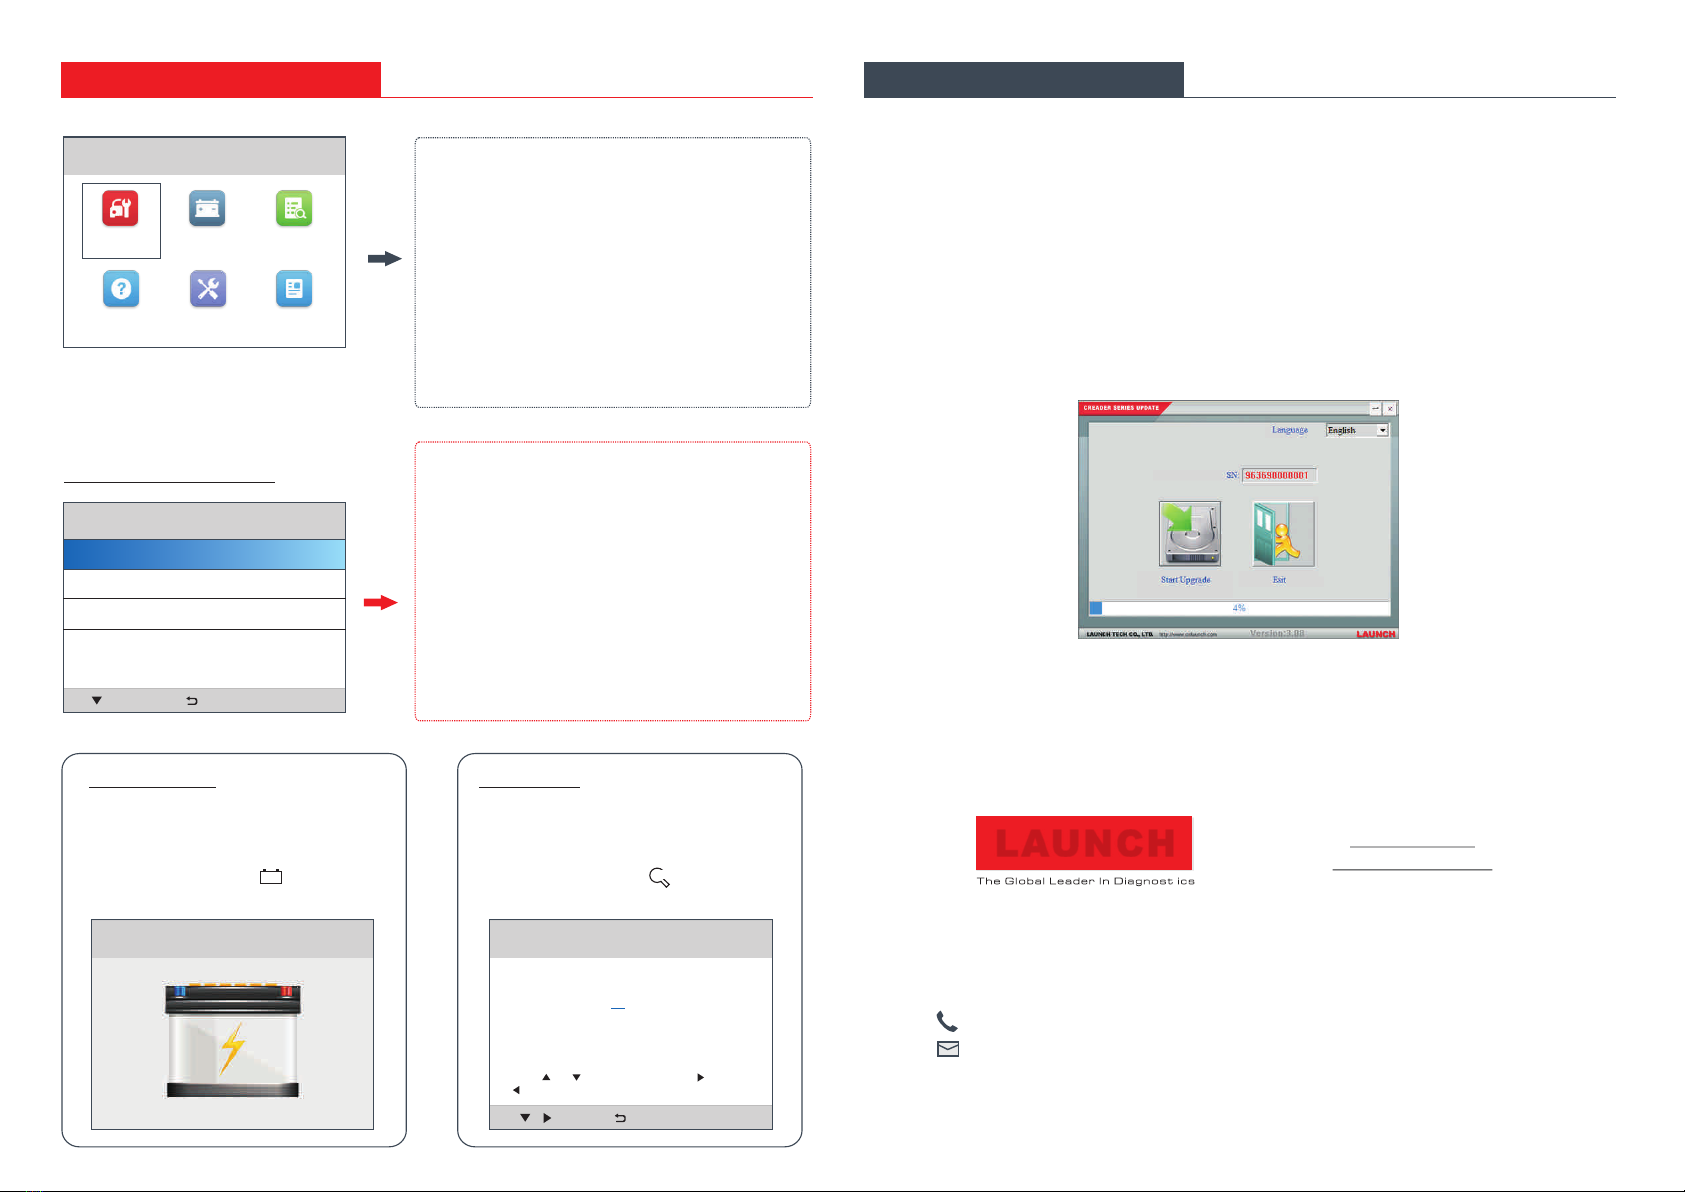
The tool can be updated via data cable.
*Note: Make sure the PC has an Internet connection.
1. Go to // / and download the update tool to the computer.
2. Decompress and install it on your computer(compatible with Windows XP, Windows 7, Windows
8 & Windows 10).
3. After installation, connect one end of the data cable to the USB port of PC, and the other end to
the tool.
*Note: If the tool is properly connected to the PC, the NO DTC LED illuminates green, and the DTC LED
goes out. Otherwise, the red LED illuminates and the green LED lights off.
4. Launch the update tool on your PC, the system starts reading the tool. Once it obtains the tool
information, it will directly navigate to the update center.
5. Click [Start Upgrade] to start updating.
6. Once update is complete, a “Upgrade success” message box will pop up and the tool will jump
to the main function screen.
7. The update process is complete, your tool is now ready for use.
*Note: To enjoy more and functions, you are suggested to check for updates on a frequent basis
and keep synchronized with the latest available software.
http:mycar.x431.com
capabilities
ENG: 12.0V ON
Battery
DTC
-+
Engine
OK
Read DTC
Clear DTC
Data Stream
Thanks for choosing LAUNCH!
If you have any questions or comments on the operation of the unit, please contact
LAUNCH Customer Service Center:
Phone: +86 755 8455 7891
Email: overseas.service@cnlaunch.com
LAUNCH www.x431.com
www.cnlaunch.com
*WARNING: This device complies with Part 15 of the FCC Rules. Operation is subject to the
following two conditions: (1) this device may not cause harmful interference, and (2) this device
must accept any interference received, including that may cause undesired operation.interference

Other Launch Diagnostic Equipment manuals

Launch CRP229 User manual

Launch

Launch CRP229 User manual

Launch X-431 V+ User manual

Launch

Launch X-431 V+ User manual

Launch X-431 PADII User manual

Launch

Launch X-431 PADII User manual

Launch CReader 6011 User manual

Launch

Launch CReader 6011 User manual

Launch Creader Professional 909E User manual

Launch

Launch Creader Professional 909E User manual

Launch Creader Professional 233 User manual

Launch

Launch Creader Professional 233 User manual

Launch X-431 PRO GT User manual

Launch

Launch X-431 PRO GT User manual

Launch X-431 Torque HD User manual

Launch

Launch X-431 Torque HD User manual

Launch CR529 User manual

Launch

Launch CR529 User manual

Launch X-431 PADII User manual

Launch

Launch X-431 PADII User manual

Launch X-431 PRO3 User manual

Launch

Launch X-431 PRO3 User manual

Launch Creader Professional 123E User manual

Launch

Launch Creader Professional 123E User manual

Launch X-431 PROS V4.0 User manual

Launch

Launch X-431 PROS V4.0 User manual

Launch X-431 HD Module User manual

Launch

Launch X-431 HD Module User manual

Launch Creader 629 User manual

Launch

Launch Creader 629 User manual

Launch CReader V User manual

Launch

Launch CReader V User manual

Launch X-431 Diagun Installation guide

Launch

Launch X-431 Diagun Installation guide

Launch X-431 PADII User manual

Launch

Launch X-431 PADII User manual

Launch iCarScan User manual

Launch

Launch iCarScan User manual

Launch SmartLink C Dongle User manual

Launch

Launch SmartLink C Dongle User manual

Launch J2534 User manual

Launch

Launch J2534 User manual

Launch X-431 PAD V ELITE User manual

Launch

Launch X-431 PAD V ELITE User manual

Launch X-431 PROS V4.0 User manual

Launch

Launch X-431 PROS V4.0 User manual

Launch Creader Professional 123X User manual

Launch

Launch Creader Professional 123X User manual

Popular Diagnostic Equipment manuals by other brands

Snap-On Zeus Getting started pack

Snap-On

Snap-On Zeus Getting started pack

Snap-On P1000 user manual

Snap-On

Snap-On P1000 user manual

HEINE K180 instructions

HEINE

HEINE K180 instructions

VOLTCRAFT 10 35 46 operating instructions

VOLTCRAFT

VOLTCRAFT 10 35 46 operating instructions

Xtool IP819 user manual

Xtool

Xtool IP819 user manual

Nemesis PoCOM user manual

Nemesis

Nemesis PoCOM user manual

Autel MaxiIM KM100E manual

Autel

Autel MaxiIM KM100E manual

Neurosoft Neuro-MEP Technical manual

Neurosoft

Neurosoft Neuro-MEP Technical manual

natus Bio-logic NavPRO ONE quick start guide

natus

natus Bio-logic NavPRO ONE quick start guide

Hella Gutmann mega macs 42 SE operating instructions

Hella Gutmann

Hella Gutmann mega macs 42 SE operating instructions

VOLTCRAFT VC-OBD-9610 operating instructions

VOLTCRAFT

VOLTCRAFT VC-OBD-9610 operating instructions

ADC Diagnostix ADSTATION Assembly instructions

ADC

ADC Diagnostix ADSTATION Assembly instructions

Carecar C68 user manual

Carecar

Carecar C68 user manual

Xtool PS701 Pro quick guide

Xtool

Xtool PS701 Pro quick guide

Rothenberger ROCAM 3 Multimedia Instructions for use

Rothenberger

Rothenberger ROCAM 3 Multimedia Instructions for use

Autel MaxiDAS DS708 manual

Autel

Autel MaxiDAS DS708 manual

GF Signet 3-0250 manual

GF

GF Signet 3-0250 manual

Bosch MTS 6520 VCI Original instructions

Bosch

Bosch MTS 6520 VCI Original instructions

manuals.online logo
manuals.online logoBrands
  • About & Mission
  • Contact us
  • Privacy Policy
  • Terms and Conditions

Copyright 2025 Manuals.Online. All Rights Reserved.