
Page 8 • JL Audio, Inc., 2017 Continued on Next Page
STEP 40
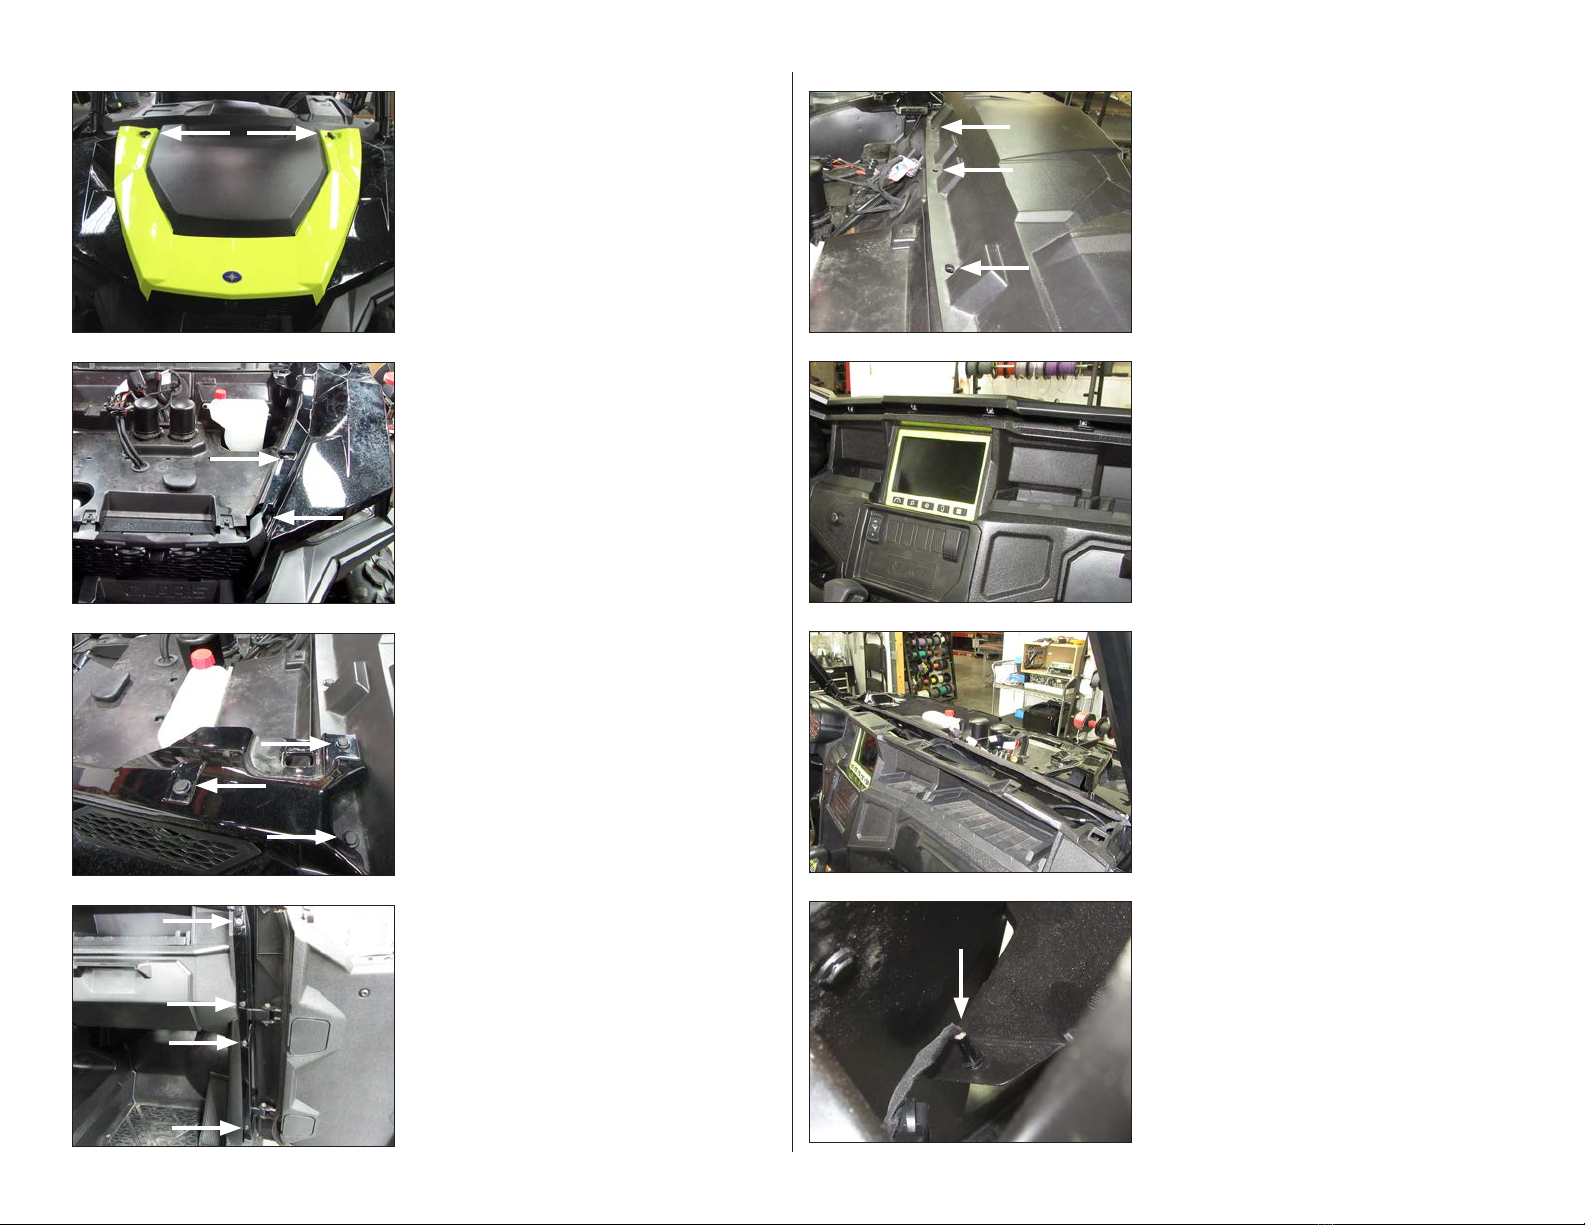
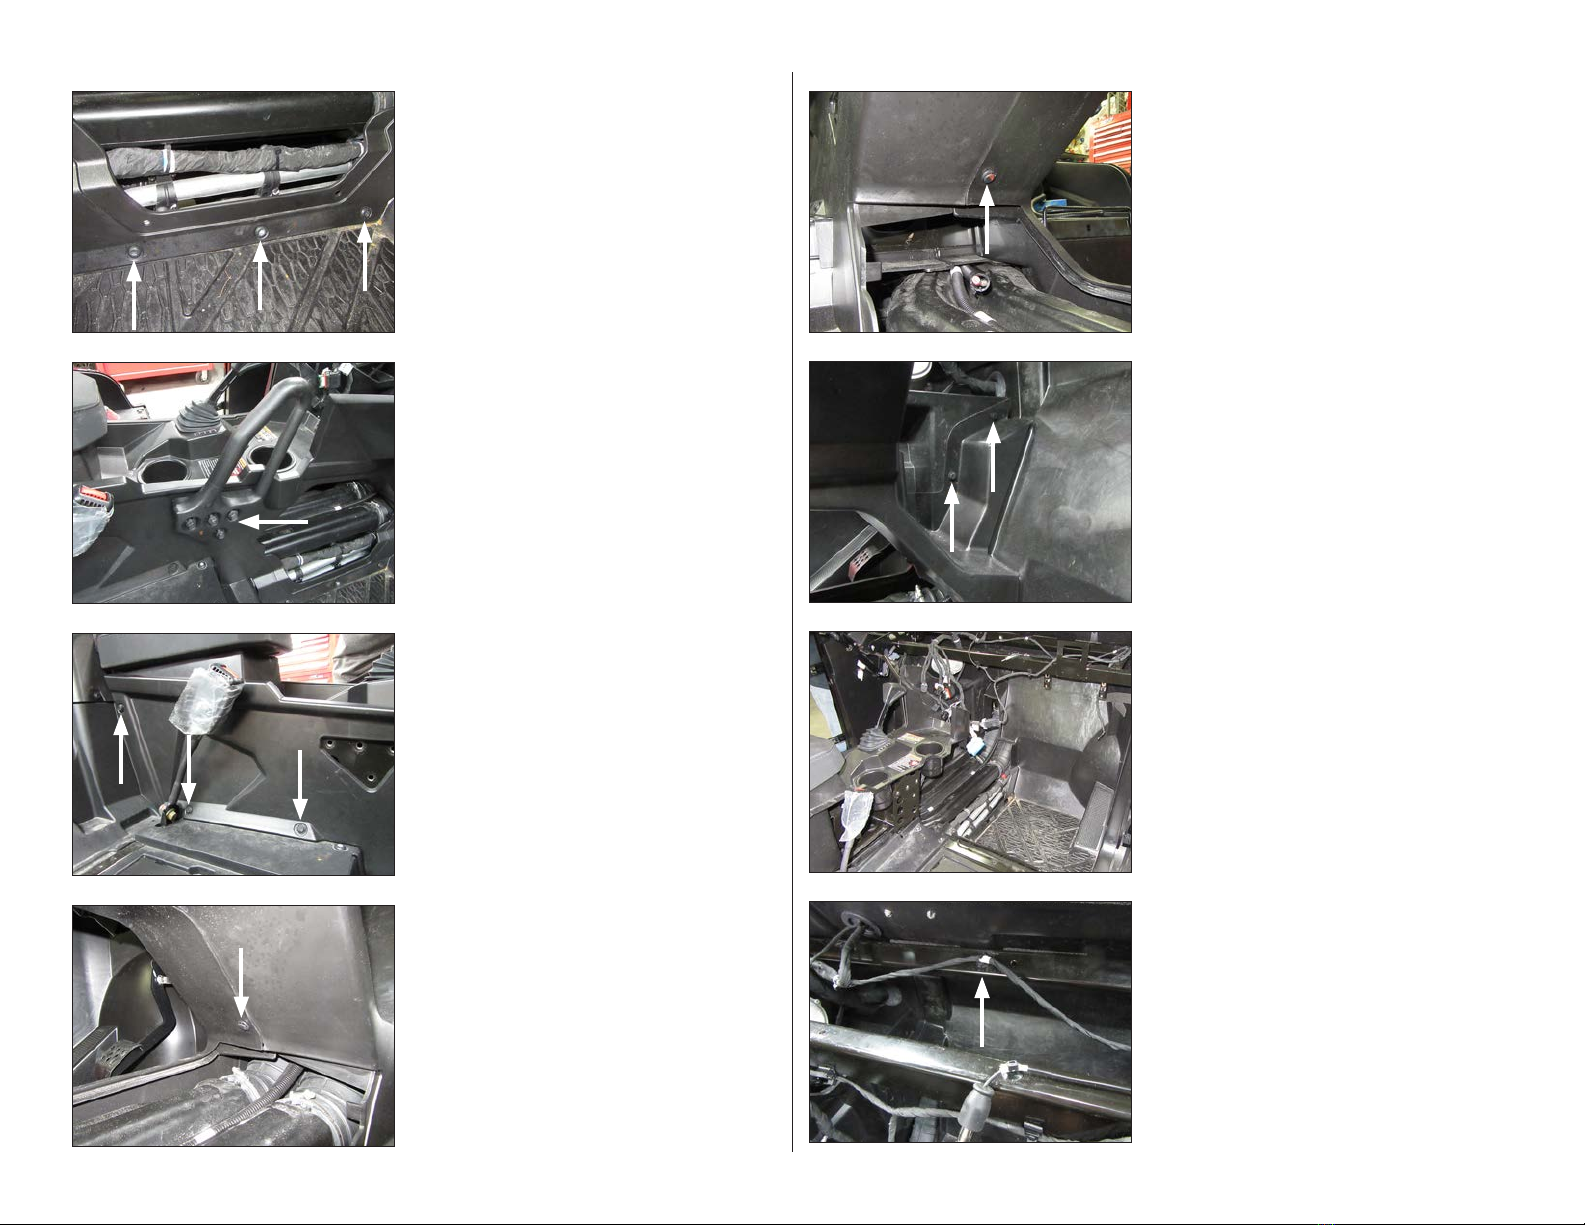
Reinstall the passenger side of the center
console, access panel, and handle.
STEP 39
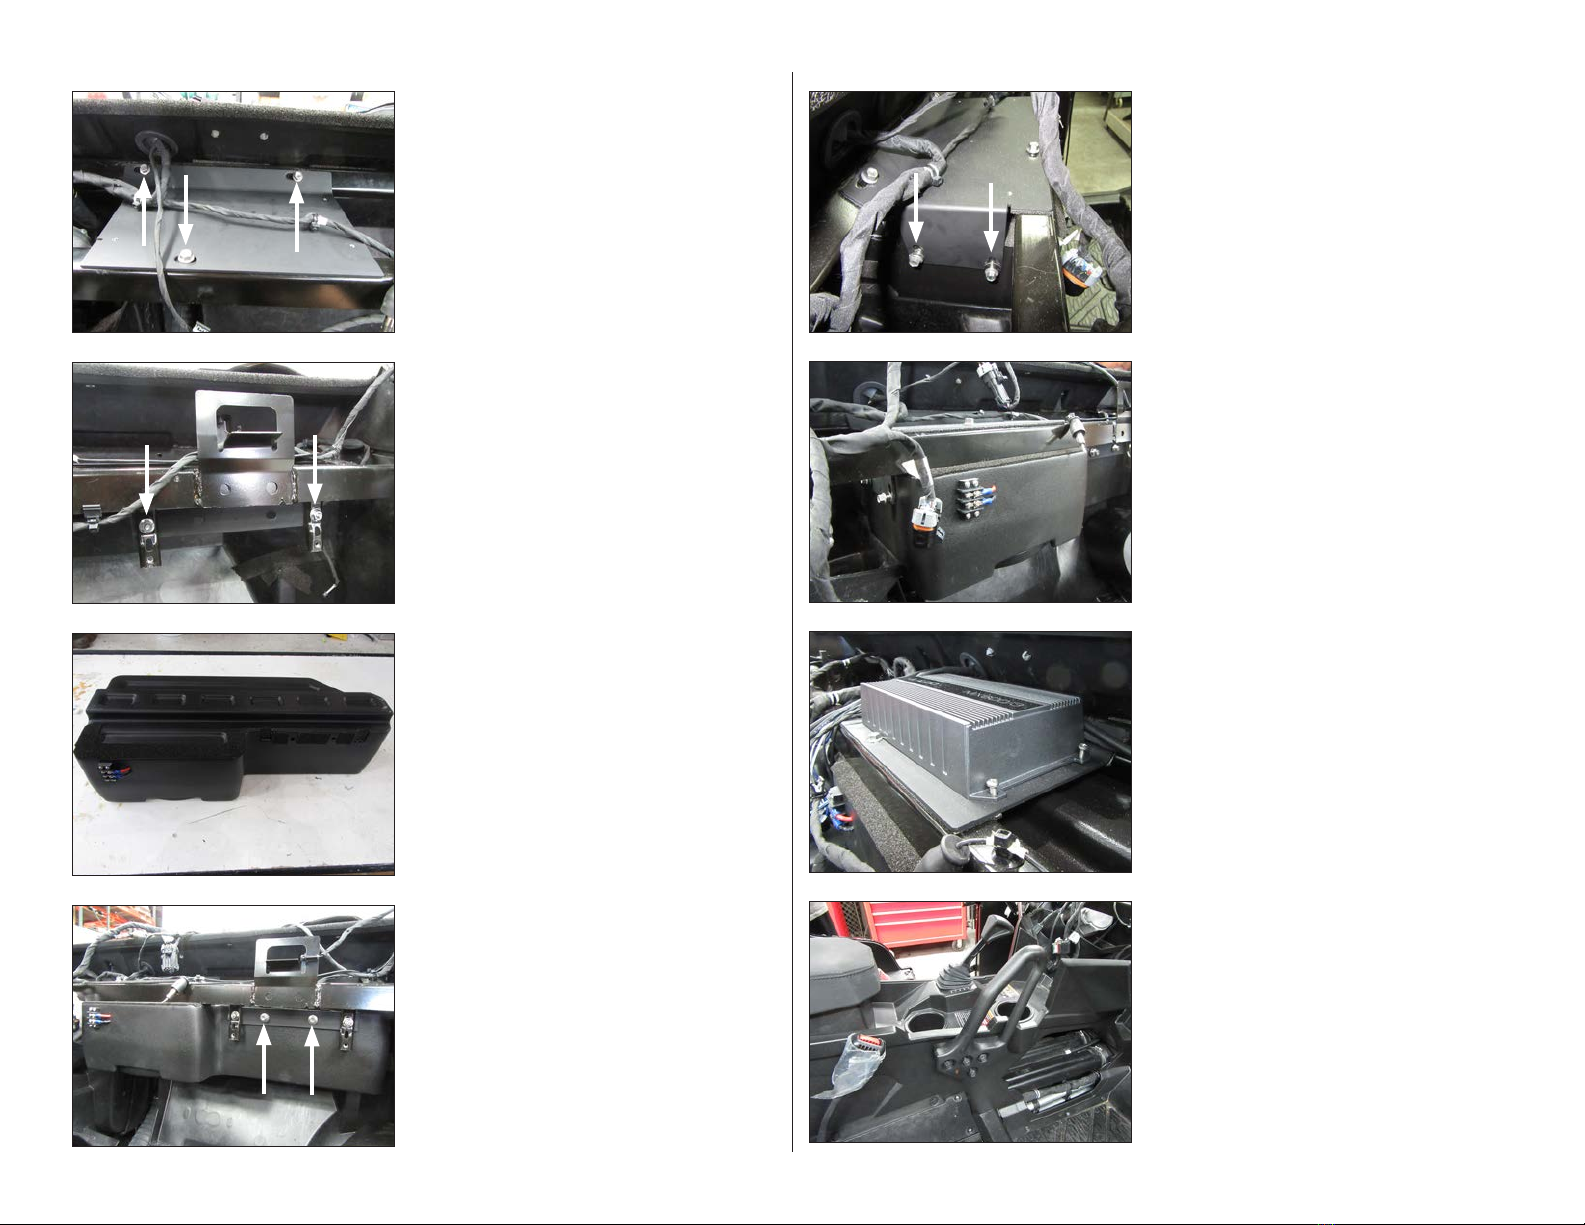
If a JL Audio MX-series amplifier is being
installed, it can be mounted to the threaded
holes in the Top Bracket using #8 - 32 x 1/4”
machine screws (not included).
STEP 38
Fully tighten the two 1/4 - 20 x 1” Serrated
Flange Head Bolts installed in Step 36, then
fully tighten the three 1/4 - 20 x 1” Serrated
Flange Head Bolts installed in Step 33 and the
two M6 - 1 x 20mm Hex Head Bolts installed in
Step 34.
Connect speaker cable to the barrier strip on
the front of the enclosure, and route the cable
as necessary.
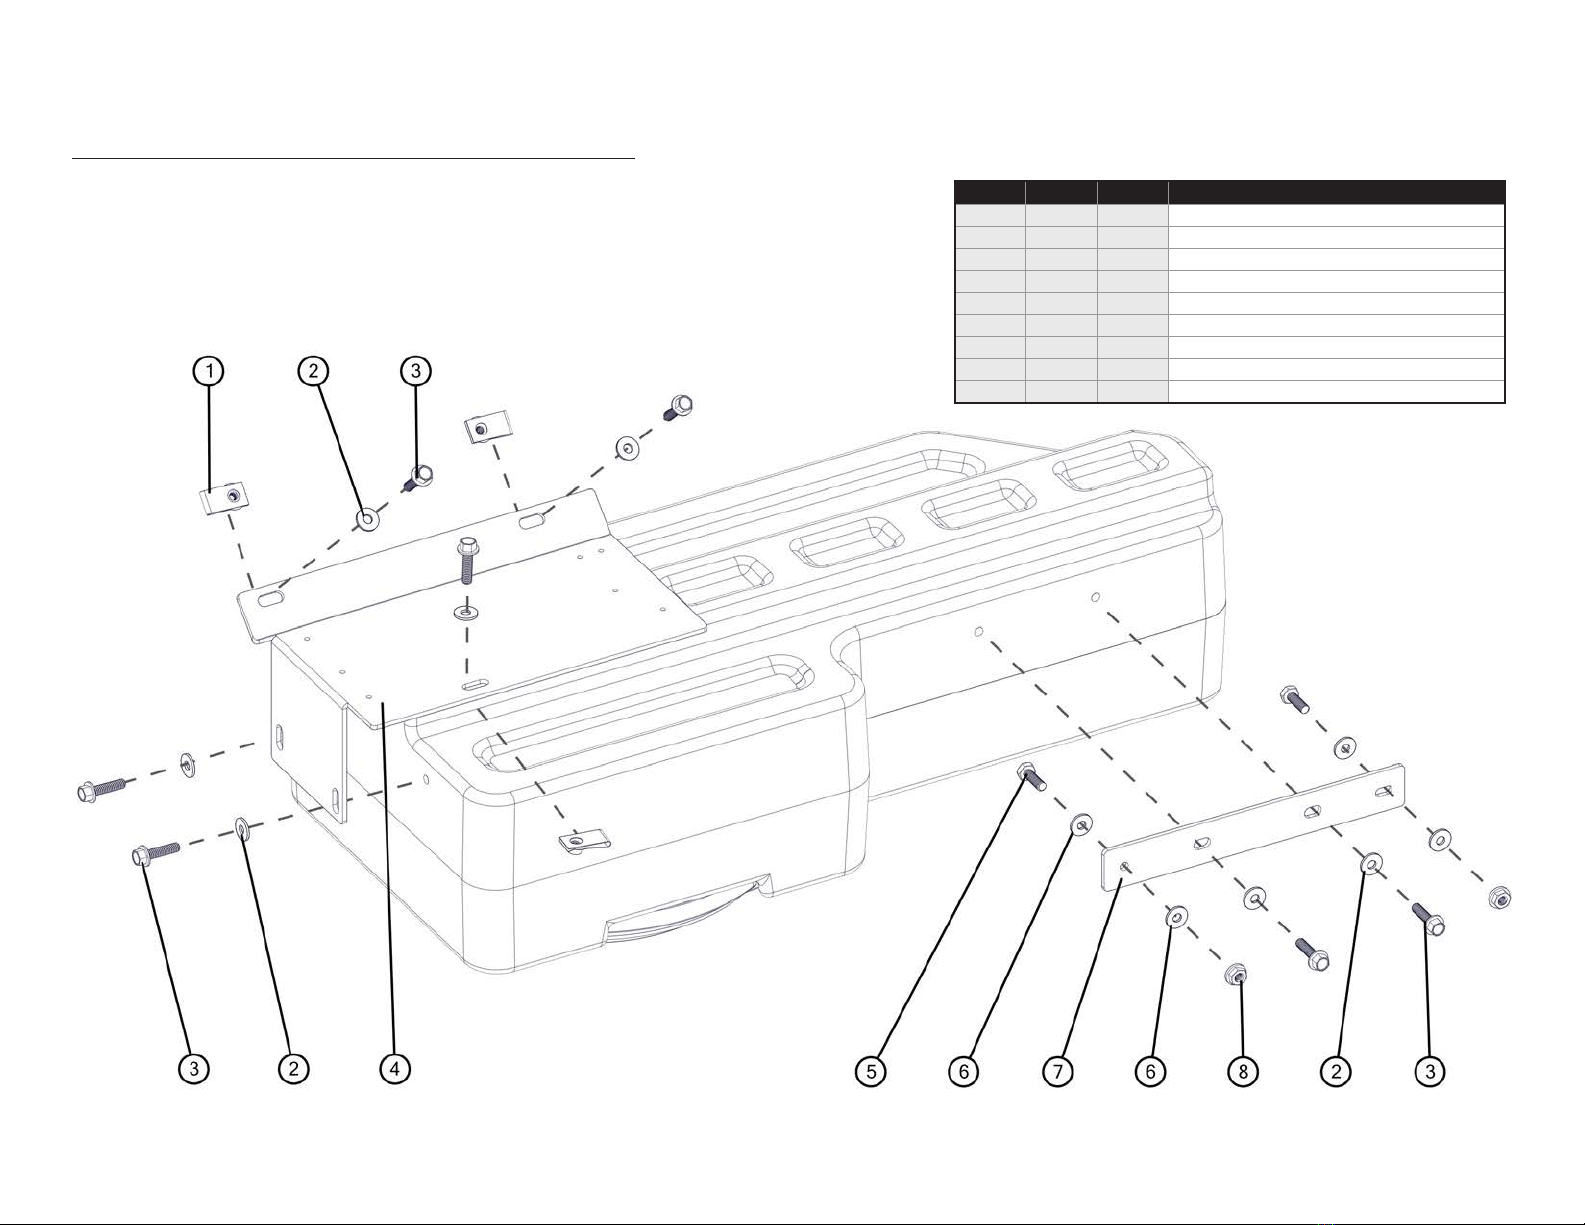
STEP 37
Slide a 1/4” Flat Washer over each of two 1/4
- 20 x 1” Serrated Flange Head Bolts. Pass an
assembly through each of the slots in the Top
Bracket, into the threaded inserts, and fully
tighten.
STEP 36
Lift the Stealthbox® into position, aligning the
slots in the Front Bracket with the threaded
inserts in the enclosure.
Slide a 1/4” Flat Washer over each of two 1/4
- 20 x 1” Serrated Flange Head Bolts. Pass an
assembly through each of the slots in the Front
Bracket, into the threaded inserts, and hand
tighten.
STEP 35
Attach Foam Tape to the enclosure, as shown.
STEP 34
Position the Front Bracket behind the frame,
as shown, aligning the outer holes in the Front
Bracket with slots in the frame.
Slide an M6 Flat Washer over each of two M6
- 1 x 20mm Hex Head Bolts. Pass an assembly
through the hole in the Front Bracket and slots
in the frame. Slide an M6 Flat Washer and M6
Serrated Flange Locknut over each M6 - 1 x
20mm Hex Head Bolt, and hand tighten.
STEP 33
Position the Top Bracket over the upper dash
frame, as shown, aligning the slots in the Top
Bracket with the holes in the dash frame.
Slide a 1/4” Flat Washer over each of three 1/4
- 20 x 1” Serrated Flange Head Bolts. Pass an
assembly through each of the slots in the Top
Bracket and holes in the dash frame. Thread
a 1/4 - 20 U-Nut onto each of the 1/4 - 20 x 1”
Serrated Flange Head Bolts, and hand tighten.
SB-POL-GNRL/10TW3 INSTR_SKU# 011501


 user manual")


