9
Pre-set Program
1. Ensure the display is “===” which
indicates the iWalk is in “standby mode”.
2. Press the mode button.
3. Press the speed +/- button to view the
pre-established programs. Select a
program (P1 to P6).
4. Once you have selected the program,
you can choose a time setting by
pressing the "Mode" button. To set a
different time setting, press + or – until
your desired time is displayed.
5. Press the On/Off button to operate the
program according to your chosen mode
and time setting.
6. Each program is divided into 20 sections
of time equally in which you will notice
different speeds.
7. Set up your iWalk to a pre-set program
(see diagram on the next page).
8. An audible alert lasting 3 seconds will
indicate the speed change.
9. You can view the speed, time, distance
and calories burned on the screen by
pressing MODE until the LED light comes
on the desired option. If you choose
the EXPLORER option the display will
change between speed, time, distance
and calories burned, changing every 5
seconds.
10. To stop your iWalk, remove the magnetic
safety key. This will slowly bring your
iWalk to a stop and the display will
indicate with a flash that you have come
to a halt.
11. Turn off the iWalk with the ON/OFF
button.
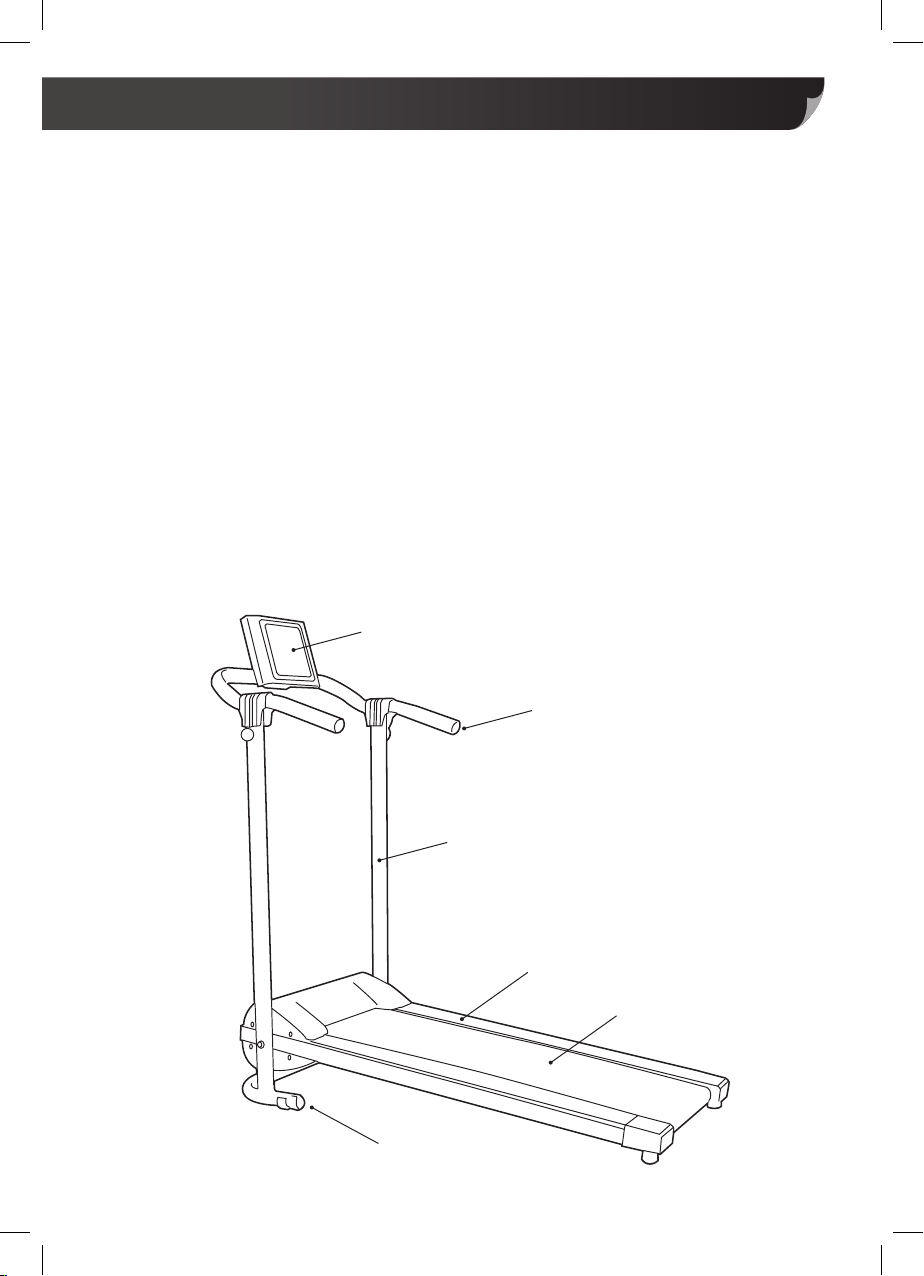
Using your iWalk™ The Family Treadmill
Manual Program
1. Turn on the treadmill.
2. Get on the treadmill and “===” should be
displayed on the control panel, indicating
“standby mode.”
3. Press the on/off button and the iWalk will
begin working after 3 seconds.
4. To change the speed, press +/-. The
speed will increase or decrease in small
increments by 0.1.