5. PRODUCT DESCRIPTION
PURPOSE
zThe high pressure cleaner is designed to clean vehicles, machines, buildings, facades, etc.
in the private sector.
AREAS OF APPLICATION
zNever use the machine in potentially explosive areas under any circumstances!
zThe operating temperature must be between 0 and +40℃.
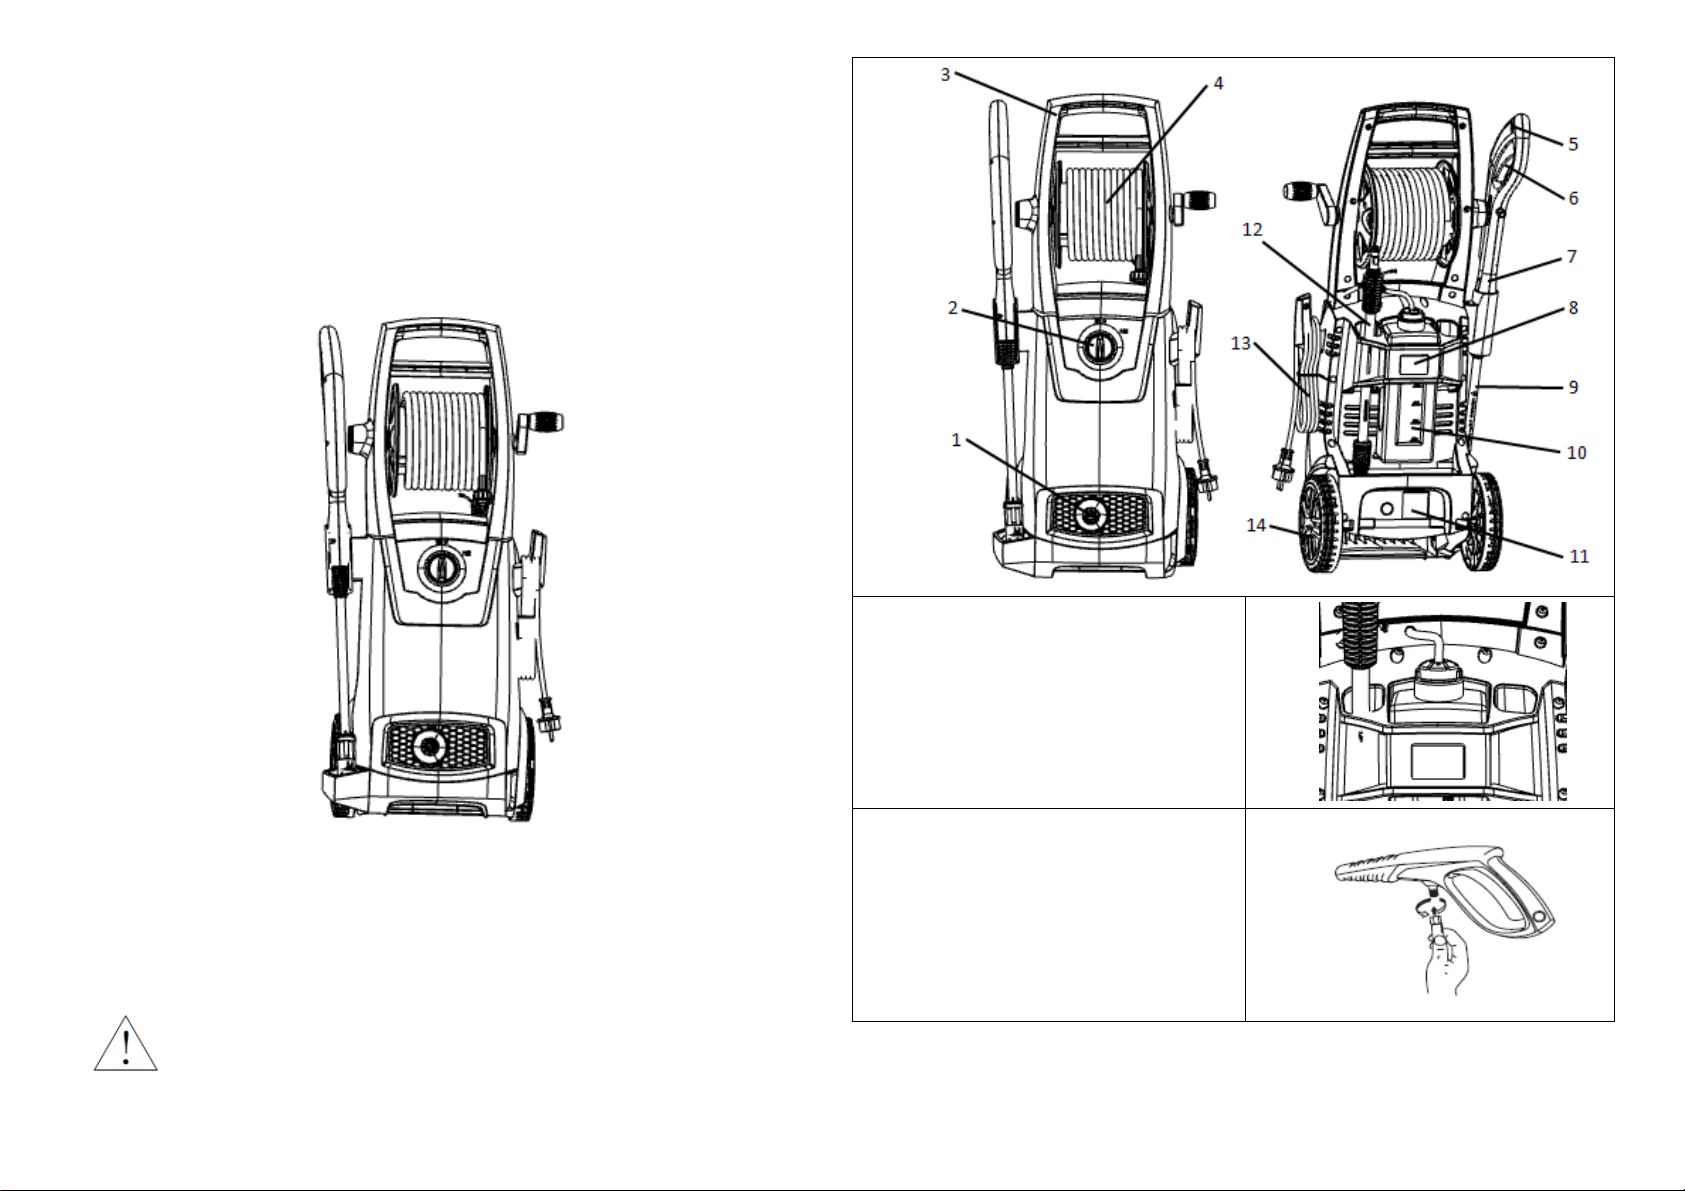
zThe machine consists of an assembly with a pump, which is encased in a shock absorbing
housing. For an optimal working position the machine comes with a lance and a non-slip
handle grip, whose shape and configuration comply with the applicable regulations.
zDo not cover or modify the lance or the spray nozzles in any way.
zThe high pressure cleaner is designed to be used with cold or lukewarm water(max. 60℃);
higher temperatures can damage the pump.
zDo not use water that is dirty, gritty or contains any chemical products, as these could
impair operation and shorten the life of the machine.
zAccessories can be used to carry out work with foam cleaners, sand spraying.
6. ASSEMBLY
zPosition the washer as NEAR as possible to the water supply.
zConnect the PVC tube to the detergent connection (FIG.3).
zThe washer must be used standing on a secure, stable, positioned as shown. FIG.2.
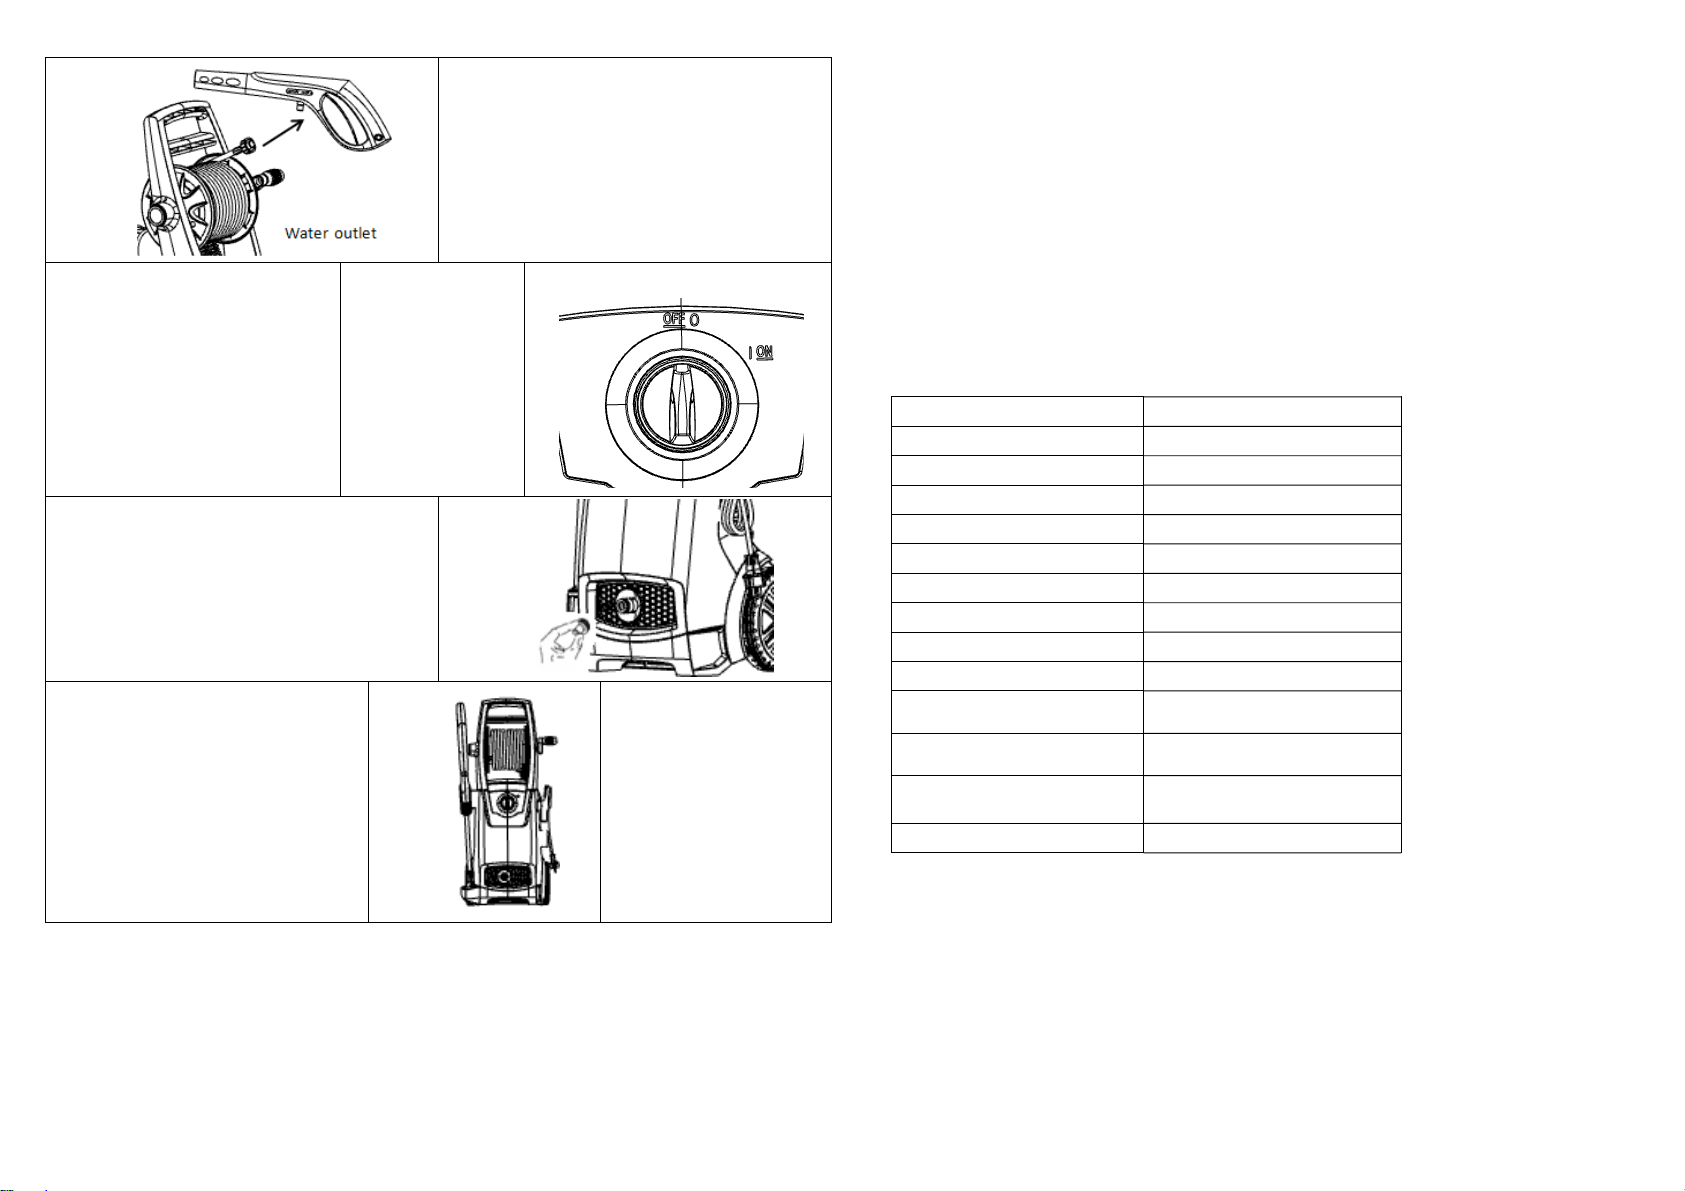
zFit the lance into the gun and rotating it until the two parts are completely locked FIG. 4.
zConnect the gun to the high pressure hose FIG.5.
zConnect the high pressure hose to the water outlet on the washer FIG.6.
zConnect the water supply hose to female coupler FIG.7,and then connect to the water inlet
of the washer. The supply hose must have an internal diameter of at least 13mm (1/2 in.)
and must be reinforced. The water supply must be at least equal to the washer delivery
capacity.
zNOTE: This machine is not suitable for connection to the potable water main
(FIG. 15).
WARNING
The intake water temperature must not exceed 40℃. The water supply must not exceed 0.7 MPa.
CAUTION
The washer must only be used with clean water; use of unfiltered water of corrosive
chemicals will damage the washer.
zPush the motor switch to “OFF” position (FIG. 10).
zCheck that the electrical supply voltage and frequency (Volt/Hz) corresponds to those
specified on the washer rating plate. If the power supply if correct, you may now plug in the
washer.
7. OPERATION
zTurn on the water supply tap fully.
zRelease the safety lock (FIG.8)and (FIG.9), then press the trigger for a few seconds
to allow air to escape and to discharge residual pressure in the hose.
zKeeping the trigger pressed, push the switch to start the motor( FIG.10).
zWhen re-starting the motor, always keep the trigger pressed.
NOTE:
THE MOTOR ONLY RUNS WHEN THE TRIGGER IS OPERATED.
CORRECT USE OF STANDARD ACCESSORIES
zThe washer is equipped with the adjustable nozzle.
zJet adjustment from pencil to fan (FIG. 11).
WARNING: DO NOT ADJUST THE NOZZLE WHILE THE TRIGGER IS SQUEEZED.
RECOMMENDED CLEANING PROCEDURE
zDissolve dirt by applying detergent with the fan jet to the dry surface. On vertical surfaces,
work from the bottom upwards. Leave the detergent to act for 1 to 2 minutes, but do not
allow drying out.Apply the high from the surface, working from the bottom upwards.
zAvoid allowing the rinsing water to run on to unwanted surfaces.
STORAGE (FIG.12 – FIG. 14)
zSwitch off the washer.
zTurn off the water supply tap.
zAfter use, the detergent residuals should be removed from the tank.
zDischarge residual pressure by pressing the trigger until no more water comes out of the
lance nozzle.
zEngage the gun safety lock.
zRemove the plug from the socket.
zOperate the washer with non-corrosive/ non-toxic antifreeze before storing for the winter.
WARNING:BEFORE REUSING, COMPLETELY FLUSH THE UNIT OUT WITH PLAIN
WATER. ANTI-FREEZE CAN DAMAGE PAINTWORK SO YOU MUST ENSURE THERE IS
NO ANTI-FREEZE LEFT IN THE SYSTEM BEFORE USING IT AGAIN.
8. MAINTENANCE
CAUTION
Before working on the washer, disconnect the lug from the power supply socket.
zTo ensure optimal performance, check and clean the suction and detergent filters after
every 50 hours of operation FIG. 12.
zClean the nozzle with the tool provided. Remove the lance from the gun; remove any dirt
from the nozzle hole (FIG. 13) and rinse.