manuals.online logo
Brands
  1. Home
  2. •
  3. Brands
  4. •
  5. Johnson Controls
  6. •
  7. Inverter
  8. •
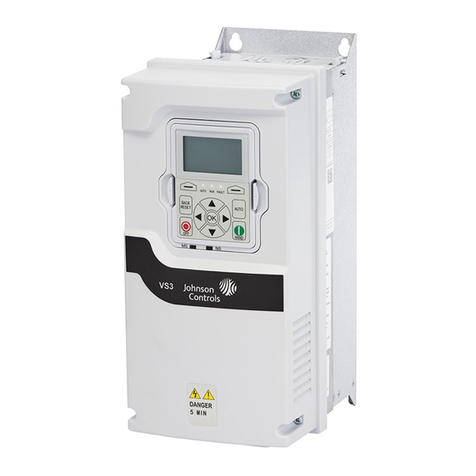
  9. Johnson Controls YORK PYT Series Operating and installation instructions

Johnson Controls YORK PYT Series Operating and installation instructions

Service
Information How to Drain, Flush, Fill and Vent PYT Model and
HYP Model Drive Coolant Loops
File In/With: –
Equipment
Affected:
YZ, YMC2, YK, YD and YKEP Chillers
SI0270
Product Technical Support
GENERAL
This service information letter provides detailed steps required to drain, flush, fill and vent the cooling loop for the
PYT and HYP families of variable speed drives. Please note there are multiple sections in this document that may
appear to be very similar but contain different instructions depending on the model drive. Sections are defined by
drive size and/or model number. All steps are to be followed completely to insure the concentrations are correct and
to prevent the introduction of air into the system.
Items Required
• Rubber gloves - purchase locally
• 5 gallon bucket to contain uids drained from the drive - purchase locally
• Inhibitor, see appropriate Table for coolant/inhibitor/distilled water quantities based on drive model
• JCI Inhibitor, 5 gallon container (P/N 013 04128 000), see appropriate Table for quantities based on drive
• JCI Inhibitor, 1 gallon container (P/N 013 04129 000), see appropriate Table for quantities based on drive
model
• De-mineralized water, 1 gallon container (P/N 013 04143 000), or 1 gallon distilled water purchased locally,
see appropriate Table for quantities based on drive model
Work on this equipment should only be done by properly trained personnel who are qualied to work on this
type of equipment. Failure to comply with this requirement could expose the worker, the equipment and the building
and its inhabitants to the risk of injury or property damage.
The instructions on this service information letter are written assuming the individual who will perform this work
is a fully trained HVAC & R journeyman or equivalent, certied in refrigerant handling and recovery techniques, and
knowledgeable with regard to electrical lock out/tag out procedures. The individual performing this work should be
aware of and comply with all Johnson Controls, national, state and local safety and environmental regulations while
carrying out this work. Before attempting to work on any equipment, the individual should be thoroughly familiar
with the equipment by reading and understanding the associated service literature applicable to the equipment. If
you do not have this literature, you may obtain it by contacting a Johnson Controls Service Ofce.
Should there be any question concerning any aspect of the tasks outlined in this bulletin, please consult a
Johnson Controls Service Ofce prior to attempting the work. Please be aware that this information may be time
sensitive and that Johnson Controls reserves the right to revise this information at any time. Be certain you are
working with the latest information.
219
REV
Supersedes SI0270 (818)
SI0270 (219)
2 JOHNSON CONTROLS
EXTERNAL PIPING COMPONENTS FOR ALL PYT MODEL DRIVES
LD28554
PYT 0330/0420 with Filter
LD28556
PYT 0780 with Filter
LD28555
PYT 0330/0420 without Filter
LD28557
PYT 0780 without Filter
SI0270 (219)
3JOHNSON CONTROLS
LD28552
PYT 1020 with Filter
LD28550
PYT 1280 with Filter
LD28553
PYT 1020 without Filter
LD28551
PYT 1280 without Filter
SI0270 (219)
4 JOHNSON CONTROLS
FLUSHING PROCESS FOR PYT MODEL DRIVES
System flushing is a process that is intended to drain as much of the coolant or shipping fluid as possible and dilute
this fluid in preparation for operating the drive. It is also intended to be used during annual drive servicing. The
dilution process is intended to weaken the original liquid strength to minimize any adverse effects. All fluids drained
from the drive should be collected and disposed of in accordance with local policy and regulations.
TABLE 1 - PYT DRIVE COOLANT/WATER/INHIBITOR QUANTITIES
DRIVE
MODEL
SERVICE
MANUAL
COOLANT
CAPACITY
IN GALLON
RECOMMENDED
DISTILLED
H2O AMOUNT
RECOMMENDED
INHIBITOR
AMOUNT
PYT0330 161.01-M3 2.5 8 3
PYT0420 161.01-M3 3 9 3
PYT0780 161.01-M3 3 9 3
PYT1020 161.01-M3 3.5 11 4
PYT1280 161.01-M3 5.75 18 6
SUPPORTING DOCUMENTS
• MSDS sheets for the Inhibitor – included with shipment
• Required: Appropriate Drive service manuals for 115VAC powering of the OptiView panel while the drive is
de-energized (see appropriate Table for literature form number based on the drive model).
STEP 1: Draining The System (All PYT Model Drives)
The drive water-to-water heat exchanger will be the primary location for draining the coolant loop. Please see previ-
ous diagrams for the Garden Hose Thread (GHT) locations on each drive model. All fluids drained from the drive
should be collected and disposed of in accordance with local policy and regulations.
1. De-energize and lockout the drive using all applicable policies and appropriate drive service literature.
2. Remove coolant reservoir cap.
3. Attach the drain hose to the GHT faucet valve on the bottom of the shell and tube heat exchanger.
4. Place the other end of the hose in a suitable container for disposal of the trapped liquid.
5. Open the heat exchanger valve to allow coolant to drain. Once coolant stops owing close the valve.
6. System is now drained.
STEP 2: Flushing Process (All PYT Model Drives)
All fluids drained from the drive should be collected and disposed of in accordance with local policy and regula-
tions.
1. Verify the unit is de-energized and lockout the 3 phase power supply to the drive using all applicable policies
and the appropriate section of the service literature (Form 161.01-M3).
2. Make the necessary electrical connections to the drive to allow operation of the coolant pumps with low volt-
age using the 115VAC procedure found in Form 161.01-M3. Do not energize the drive at this point.
3. Remove coolant reservoir cap.
4. Using distilled water, slowly ll the coolant loop at the coolant reservoir until the distilled water is 2” below
the top of the coolant reservoir.
SI0270 (219)
5JOHNSON CONTROLS
5. Energize the drive with the 115VAC that was connected in step 2.
6. Start pumps by removing the J2 connector on the VSD Logic Board 031 03620 001.
7. Allow pumps to run for 10 minutes.
8. Disable the pumps by re-installing the J2 connector on the VSD Logic Board 031 03620 001.
9. Attach the drain hose to the GHT faucet valve on the bottom of the shell and tube heat exchanger.
10. Place the other end of hose in a suitable container for disposal of the trapped liquid.
11. Open the heat exchanger valve to allow coolant to drain. Once coolant stops owing close the valve.
12. Repeat steps 4 – 11 until three (3) complete ush cycles are completed.
STEP 3: Fill Procedure (All PYT Model Drives)
WARNING: Coolants may foam up when cycled through the system or when the pumps are shut
off and the coolants tend to rise. Do not ll reservoir to top while unit is running or it may overow
when pumps are shut off. If foaming is evident while lling with the inhibited solution, repeat the
FLUSHING PROCESS (ALL PYT MODEL DRIVES) and repeat as needed until no foaming is
present. Refer to previous diagrams for GHT locations on each drive size.
1. Conrm that the heat exchanger drain valve is closed.
2. Remove the cap from the coolant reservoir.
3. Fill the coolant loop at the coolant reservoir. Pour the inhibitor or distilled water into the reservoir slowly to
minimize the foaming that may take place when lling with coolant.
4. Apply power to the chiller.
5. Start pumps by removing the J2 connector on the VSD Logic Board 031 03620 001.
6. Allow pumps to run for 15 seconds.
7. Disable the pumps by re-installing the J2 connector on the VSD Logic Board 031 03620 001.
8. Check the ll pipe and add more inhibitor if needed to bring the level back to the within 2 inches from the top.
9. Start pumps by removing the J2 connector on the VSD Logic Board 031 03620 001.
10. Allow pumps to run for 5 minutes.
11. Disable the pumps by re-installing the J2 connector on the VSD Logic Board 031 03620 001.
12. Insure the drain valve is closed and remove the drain hose.
13. Remove the temporary 115VAC power wiring.
14. Remove all lockout devices.
15. The drive is ready for operation.
SI0270 (219)
6 JOHNSON CONTROLS
EXTERNAL PIPING COMPONENTS FOR ALL HYP MODEL DRIVES
LD27414
744 A VSD External Piping 774 A VSD External Piping
490 A MOD A VSD External Piping 490 A MOD B VSD External Piping
490 A MOD A VSD External Piping 730 A VSD External Piping
SI0270 (219)
7JOHNSON CONTROLS
LD27415
490 A Non ACM VSD Shaffner Input and Output Inductors
490 A ACM VSD CTM Input and Output Inductors
1278/1300 A VSD External Piping
SI0270 (219)
8 JOHNSON CONTROLS
LD27416
730A VSD Shaffner Input and Output Inductors
612 A VSD CTM Input and Output Inductors
SI0270 (219)
9JOHNSON CONTROLS
LD27417
1278/1300 A CTM Output Inductor
744 A VSD Output Inductor 774 A VSD CTM Output Inductor
SI0270 (219)
10 JOHNSON CONTROLS
FLUSHING PROCESS FOR HYP MODEL DRIVES
System flushing is a process that is intended to drain as much of the coolant or shipping fluid as possible and dilute
this fluid in preparation for operating the drive. It is also intended to be used during annual drive servicing. The
dilution process is intended to weaken the original liquid strength to minimize any adverse effects. All fluids drained
from the drive should be collected and disposed of in accordance with local policy and regulations.
TABLE 2 - HYP DRIVE COOLANT/WATER/INHIBITOR QUANTITIES
DRIVE
MODEL
SERVICE
MANUAL
COOLANT
CAPACITY
IN GALLON
RECOMMENDED
DISTILLED
H2O AMOUNT
RECOMMENDED
INHIBITOR
AMOUNT
HYP0490 160.84-M3 5 15 5
HYP0612 160.84-M3 5 15 5
HYP0730 160.84-M3 6 18 6
HYP0744 160.78-M3 6 18 6
HYP0774 160.84-M3 6 18 6
HYP1100 160.00-M10 9 27 9
HYP1278 160.84-M3 9 27 9
HYP1300 160.00-M10 9 27 9
SUPPORTING DOCUMENTS
• MSDS sheets for the Inhibitor – included with shipment
• Required: Appropriate drive service manuals for 115VAC powering of the OptiView panel while the drive is
de-energized (see appropriate Table for literature form number based on the drive model).
STEP 1: Draining The System (HYP0490, HYP0744, HYP0774 Model Drives with Air-cooled Input
Inductors)
The following drain procedure applies ONLY to HYP0744, HYP0490 Mod A Drives and HYP0774 model
drives with air-cooled input inductors. See page 11 for all other HYP model drives.
If two hoses are available, the heat exchanger and the output inductor can be drained at the same time. Please see
previous diagrams for GHT locations on each drive.
1. De-energize and lockout the drive using all applicable policies and appropriate drive service literature.
2. Remove coolant reservoir cap.
3. Attach the drain hose to the GHT faucet valve on the bottom of the shell and tube heat exchanger.
4. Place the other end of the hose in a suitable container for disposal of the trapped liquid.
5. Open the heat exchanger valve to allow coolant to drain. Once coolant stops owing close the valve.
6. Attach the drain hose to the top tting of the output inductor inside the drive cabinet.
7. Place the other end of the hose in a suitable container for disposal of the trapped liquid.
8. Open the top valve of the output inductor to allow coolant to drain. Once coolant stops owing, close the valve
and remove drain hose.
9. Attach the drain hose to the bottom tting of the output inductor inside the drive cabinet.
10. Place the other end of the hose in a suitable container for disposal of the trapped liquid.
11. Open the bottom valve of the output inductor to allow coolant to drain.
12. Install coolant reservoir cap to prevent air from leaking out.
SI0270 (219)
11JOHNSON CONTROLS
13. With hoses connected to the tube and shell heat exchanger and the inductor, place the other end of the hose in a
suitable container for disposal of the trapped liquid and apply 5 PSI compressed air or nitrogen in the top tting
on the output inductor to blow residual liquid out of the output inductor and heat exchanger.
WARNING: Do NOT exceed the 5 PSI rating. Damage to the cooling system my result.
Once coolant stops owing turn off the air supply, close the valve, and remove drain hoses.
14. Close all valves and replace all caps.
15. System is now drained.
Draining the System (HYP0490 Mod B, HYP0612, HYP0730, HYP1100, HYP1278 and HYP1300
Model Drives)
The following drain procedure applies ONLY to HYP0490 Mod B, HYP0612, HYP0730, HYP1100 and
HYP1278/HYP1300 model drives.
If at least 3 hoses are available, the heat exchanger and the input/output inductors can be drained at the same time. If
multiple hoses are not available, this procedure will need to be repeated as necessary to drain all of the components.
Please see previous diagrams for GHT locations on each drive model.
1. De-energize and lockout the drive using all applicable policies and appropriate drive service literature.
2. Remove coolant reservoir cap.
3. Attach the drain hose to the GHT faucet valve on the bottom of the shell and tube heat exchanger.
4. Place the other end of the hose in a suitable container for disposal of the trapped liquid.
5. Open the heat exchanger valve to allow coolant to drain. Once coolant stops owing close the valve.
6. Attach the drain hose to the top tting of the output inductor inside the drive cabinet.
7. Attach the drain hose to the top tting of the input inductor inside the drive cabinet.
8. Place the other end of the hoses in a suitable container for disposal of the trapped liquid.
9. Open the top valve of the input and output inductors to allow coolant to drain. Once coolant stops owing close
both valves, and remove drain hoses.
10. Attach the drain hose to the bottom tting of the output inductor inside the drive cabinet.
11. Attach drain hose to the bottom tting of the input inductor inside the drive cabinet.
12. Place the other end of the hoses in a suitable container for disposal of the trapped liquid.
13. Open the bottom valves of the input and output inductors to allow coolant to drain.
14. Install the coolant reservoir cap to prevent too much air from leaking out.
15. With hoses connected to the tube and shell heat exchanger and the inductors, place the other end of the hoses
in a suitable container for disposal of the trapped liquid and apply 5 PSI compressed air or nitrogen in the top
tting on the output inductor to blow residual liquid out of the input and output inductor and heat exchanger.
WARNING: Do NOT exceed the 5 PSI rating. Damage to the cooling system my result.
Once coolant stops owing turn off the air supply, close the valve, and remove drain hoses.
16. Close all valves and replace all caps.
17. System is now drained.
SI0270 (219)
12 JOHNSON CONTROLS
STEP 2: Flushing Process (All HYP Model Drives)
1. De-energize and lockout the 3 phase power supply to the Drive using all applicable policies and the appropriate
section of the service literature 160.78-M3 or 160.84-M3.
2. Make the necessary electrical connections to the drive to allow operation of the coolant pumps with low volt-
age using the 115VAC procedure found in Form 160.78-M3 or Form 160.84-M3. Do not energize the drive at
this point.
3. Remove coolant reservoir cap.
4. Attach drain hose to GHT faucet valve on the bottom of the shell and tube heat exchanger.
5. Place the other end of hose in a suitable container for disposal of the trapped liquid.
6. Attach drain hose to the top GHT tting on the output inductor.
7. Place the other end of hose in a suitable container for disposal of the trapped liquid.
8. Conrm that the heat exchanger drain valve and both of the output inductor drain valves are closed.
9. Connect a low volume pump to the bottom GHT tting on the output inductor.
10. Open the valve for the bottom tting on the output inductor.
11. Use the low volume pump to ll the coolant loop.
12. Slowly ll the cooling system until coolant is within 2 inches from the top of the coolant reservoir.
13. HYP0744 only
a. Insure the internal supply manifold valve(s) are open.
14. Close the valve for the bottom tting on the output inductor.
15. Apply power to the chiller.
16. Start pumps using the OptiView panel.
a. Press: Home > VSD > VSD Details > Manual Cooling > Enable.
17. Allow pumps to run for only 15 seconds.
18. Disable the pumps.
a. Press: Home > VSD > VSD Details > Manual Cooling > Disable.
19. Check the ll pipe and add more inhibitor if needed to bring the level back to the within 1 inch from the top.
20. Start pumps using the OptiView panel.
a. Press: Home > VSD > VSD Details > Manual Cooling > Enable.
21. Allow pumps to run for 5 minutes.
22. Disable the pumps.
a. Press: Home > VSD > VSD Details > Manual Cooling > Disable.
23. Open the heat exchanger valve to allow the distilled water to drain.
24. When the distilled water stops owing close the valve.
25. Open the heat exchanger valve and the output inductor top tting valve to allow the distilled water to drain.
26. Once the distilled water stops owing close the valve.
27. Repeat steps 10 – 27 so that 3 complete ush cycles are completed.
SI0270 (219)
13JOHNSON CONTROLS
STEP 3: Fill Procedure
The following fill procedure applies ONLY to HYP0744 model drive only. See page 14 for the fill procedure
for all other HYP model drives.
WARNING: Coolants may foam up when cycled through the system or when the pumps are shut
off and the coolants tend to rise. Do not ll reservoir to top while unit is running or it may overow
when pumps are shut off. If foaming is evident while lling with the inhibited solution, repeat the
FLUSHING PROCESS (ALL HYP MODEL DRIVES) and repeat as needed until no foaming is
present. Refer to previous diagrams for GHT locations on each drive size.
1. Conrm the heat exchanger drain valve and both of the output inductor drain valves are closed.
2. Open the supply manifold valve(s).
3. Remove the cap from the coolant reservoir.
4. Connect a low volume pump to the bottom tting on the output inductor.
5. Use the low volume pump to ll the coolant loop. Open the valve for the bottom tting on the output inductor.
6. Slowly ll the cooling system until coolant is within 2 inches from the top of the coolant reservoir.
7. Close the valve for the bottom tting on the output inductor, and remove the low volume pump.
8. Apply 115VAC power to the chiller.
9. Start pumps using the OptiView panel.
b. Press: Home > VSD > VSD Details > Manual Cooling > Enable.
10. Allow pumps to run for only 15 seconds.
11. Disable the pumps.
a. Press: Home > VSD > VSD Details > Manual Cooling > Disable.
12. Check the ll pipe and add more inhibitor if needed to bring the level back to the within 1 inch from the top.
13. Start the pumps and run for 5 minutes.
14. Disable the pumps and check the ll pipe. Add more inhibitor if needed to bring the level back to within 1 inch
from the top.
15. Repeat steps # 9 thru # 14 as needed until there no drop in the reservoir level greater than 2” detected during
operation of the pumps.
16. Remove the temporary 115VAC power wiring.
17. Remove all lockout devices.
18. The drive is ready for operation.
SI0270 (219)
14 JOHNSON CONTROLS
The following fill procedure applies ONLY to HYP0490, HYP0612, HYP0774, HYP1100 and HYP1278/
HYP1300 model drives.
WARNING: Coolants may foam up when cycled through the system or when the pumps are shut
off and the coolants tend to rise. Do not ll reservoir to top while unit is running or it may overow
when pumps are shut off. If foaming is evident while lling with the inhibited solution, repeat the
FLUSHING PROCESS (ALL HYP MODEL DRIVES) and repeat as needed until no foaming is
present. Refer to previous diagrams for GHT locations on each drive size.
1. Conrm that the heat exchanger drain valve and both of the output inductor drain valves are closed.
2. Remove the cap from the coolant reservoir.
3. Fill the coolant loop at the coolant reservoir. Pour the Inhibitor or distilled water into the reservoir slowly to
minimize the foaming that may take place when lling with Inhibitor.
4. Apply power to the chiller.
5. Start pumps using the OptiView panel.
a. Press: Home > VSD > VSD Details > Manual Cooling > Enable.
6. Allow pumps to run for 15 seconds.
7. Disable the pumps.
a. Press: Home > VSD > VSD Details > Manual Cooling > Disable.
8. Check the ll pipe and add more inhibitor if needed to bring the level back to the within 1 inch from the top.
9. Start the pumps and run for 5 minutes.
10. Disable the pumps and check the ll pipe. Add more distilled water or inhibitor if needed to bring the level
back to within 1 inch from the top.
11. Repeat steps # 5 thru # 10 as needed until there no drop in the reservoir level greater than 2” detected during
operation of the pumps.
12. Remove the temporary 115VAC power wiring.
13. Remove all lockout devices.
14. The drive is ready for operation.

This manual suits for next models

14

Other Johnson Controls Inverter manuals

Johnson Controls York YH9FXC12BAH-FX User manual

Johnson Controls

Johnson Controls York YH9FXC12BAH-FX User manual

Johnson Controls VS3-005-4-UL1-0 User manual

Johnson Controls

Johnson Controls VS3-005-4-UL1-0 User manual

Johnson Controls VS3 Series Instructions for use

Johnson Controls

Johnson Controls VS3 Series Instructions for use

Johnson Controls York YHFJXH028BAR FX Series User manual

Johnson Controls

Johnson Controls York YHFJXH028BAR FX Series User manual

Johnson Controls VSD Series User manual

Johnson Controls

Johnson Controls VSD Series User manual

Johnson Controls JHKF09ZEEBXFORX User manual

Johnson Controls

Johnson Controls JHKF09ZEEBXFORX User manual

Popular Inverter manuals by other brands

MPP Solar PIP8048MAX user manual

MPP Solar

MPP Solar PIP8048MAX user manual

SunSynk LIFELYNK X SM3.6kWLL user manual

SunSynk

SunSynk LIFELYNK X SM3.6kWLL user manual

Tigo TSI-6K3DTSI-10K3D quick start guide

Tigo

Tigo TSI-6K3DTSI-10K3D quick start guide

CPS SCH Series Installation and operation manual

CPS

CPS SCH Series Installation and operation manual

Hoymiles HM-1000 user manual

Hoymiles

Hoymiles HM-1000 user manual

INVT BPD0K7TN Operation manual

INVT

INVT BPD0K7TN Operation manual

Parker LCMS-5000 Installation, operation and maintenance manual

Parker

Parker LCMS-5000 Installation, operation and maintenance manual

BGH GMV6 Technical Sales Guide

BGH

BGH GMV6 Technical Sales Guide

Deif ASC 150 Solar Operator's manual

Deif

Deif ASC 150 Solar Operator's manual

Voltronic Power Axpert MKS-4000 Service manual

Voltronic Power

Voltronic Power Axpert MKS-4000 Service manual

Tripp Lite PowerVerter APSX3024SW owner's manual

Tripp Lite

Tripp Lite PowerVerter APSX3024SW owner's manual

Nastec VASCO Solar 212 operating manual

Nastec

Nastec VASCO Solar 212 operating manual

IVT DSW Series instruction manual

IVT

IVT DSW Series instruction manual

SolaX Power X1-Retro Fit user manual

SolaX Power

SolaX Power X1-Retro Fit user manual

Inovance MD500 Series user manual

Inovance

Inovance MD500 Series user manual

Stanley PC1000S instruction manual

Stanley

Stanley PC1000S instruction manual

Circutor SVGm-4WF-030M-400 instruction manual

Circutor

Circutor SVGm-4WF-030M-400 instruction manual

Ingersoll-Rand 4TXM6518A1 Installer manual

Ingersoll-Rand

Ingersoll-Rand 4TXM6518A1 Installer manual

manuals.online logo
manuals.online logoBrands
  • About & Mission
  • Contact us
  • Privacy Policy
  • Terms and Conditions

Copyright 2025 Manuals.Online. All Rights Reserved.