AquaTTM Standard Electric marine toilet- Instruction Manual
English
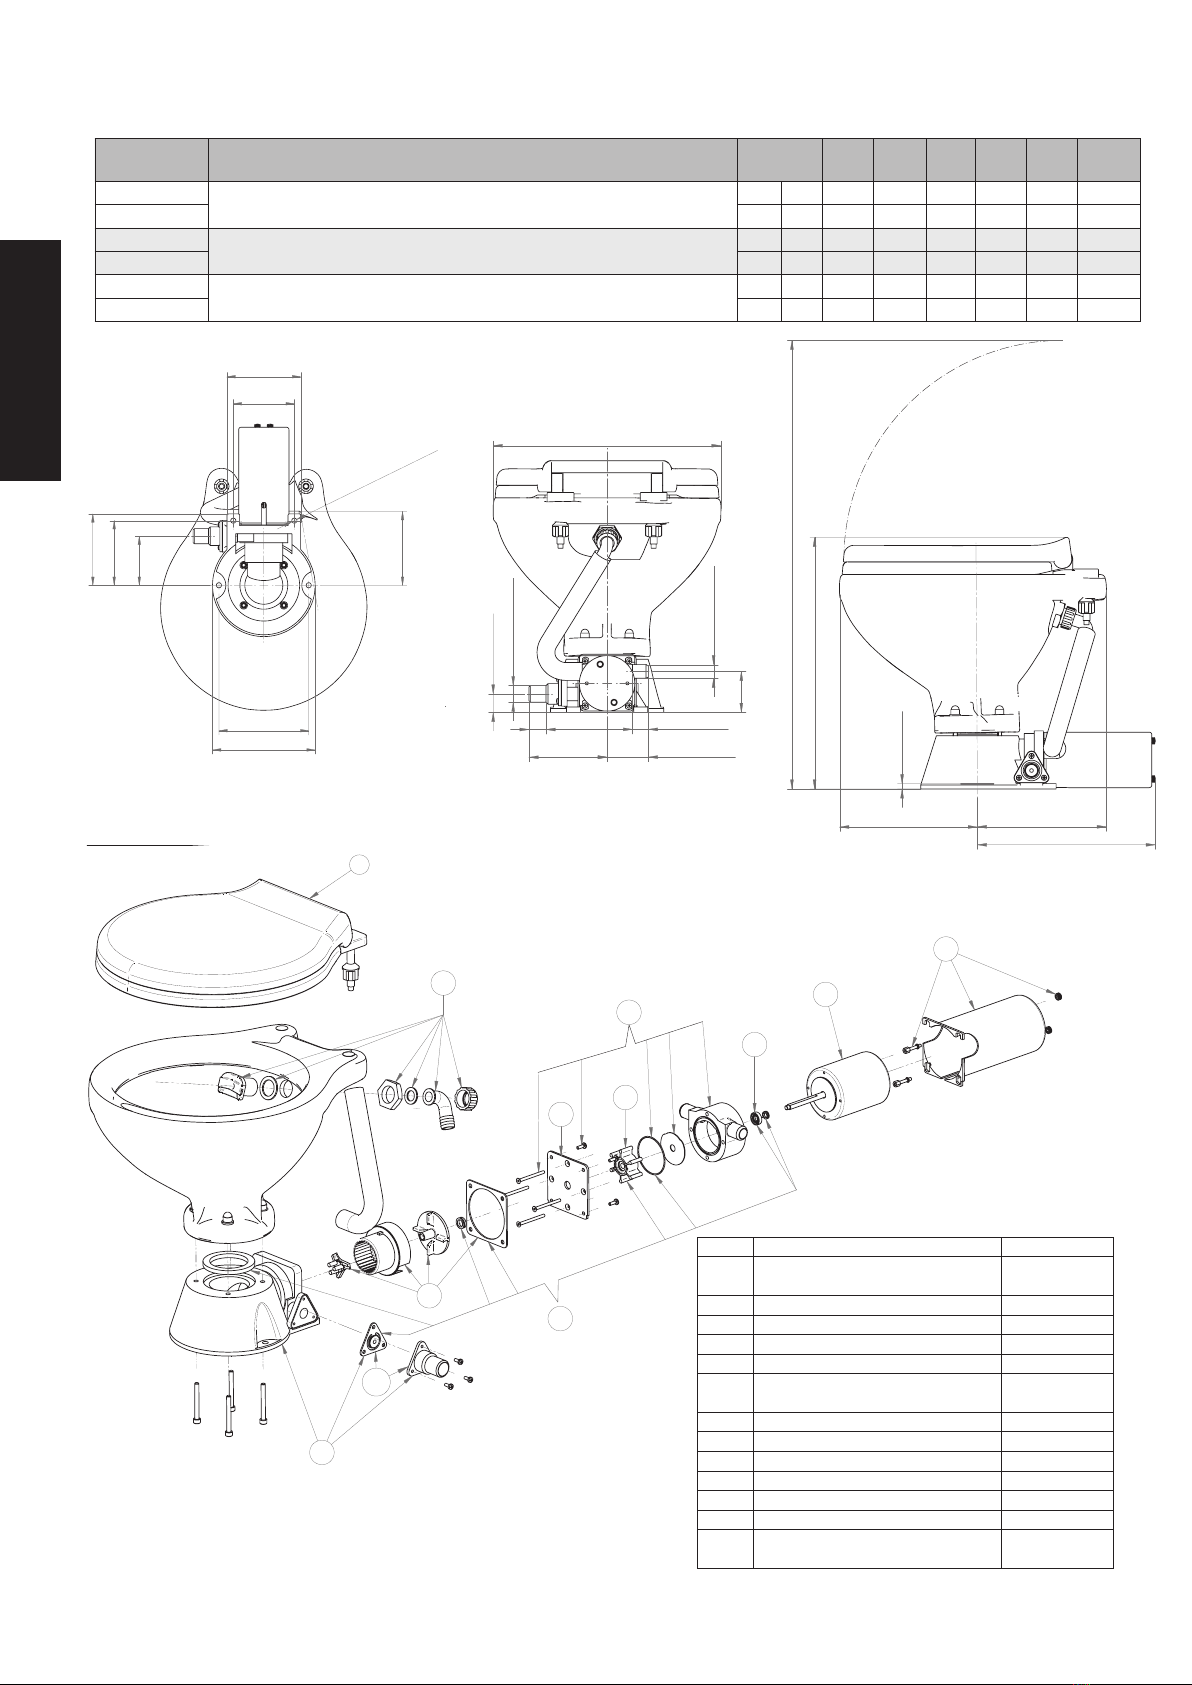
Mounting
Before starting the assembly, read the complete mounting instruction first.
You need:
• Stainless steel bolts: 4 pcs, 8mm (5/16") diameter of length to suit the
thickness of the mounting surface.
• Stainless steel nuts: 4 pcs preferably self-locking. If you do not use
self-locking nuts you need to add locking compound on the
screws-/ nuts.
• Stainless steel washers: 4 pcs.
• Drill: Diameter 9mm.
• Silicone sealant, white.
If you do not use self-locking nuts, you will need some nutlocking
compound
1. Put the toilet in the selected position. Using the holes in the base as a
guide, mark the positions for the 4 bolt holes on the mounting surface.
Remove the toilet and drill 4 vertical holes, with a diameter of 9mm,
through the mounting surface.
2. Apply the white silicone sealant to the outer rim of the bottom base.
3. Put the toilets on its place and tighten the fastenings securely. If you
are not using self-locking nuts, use nutlocking compound.
4. Use the sealant around the base, towards the floor.
Operating instructions
The toilet is one of the most used pieces of equipment on your boat.
Correct operation of the toilet is essential for the safety and comfort of your
crew and craft.
Using the toilet
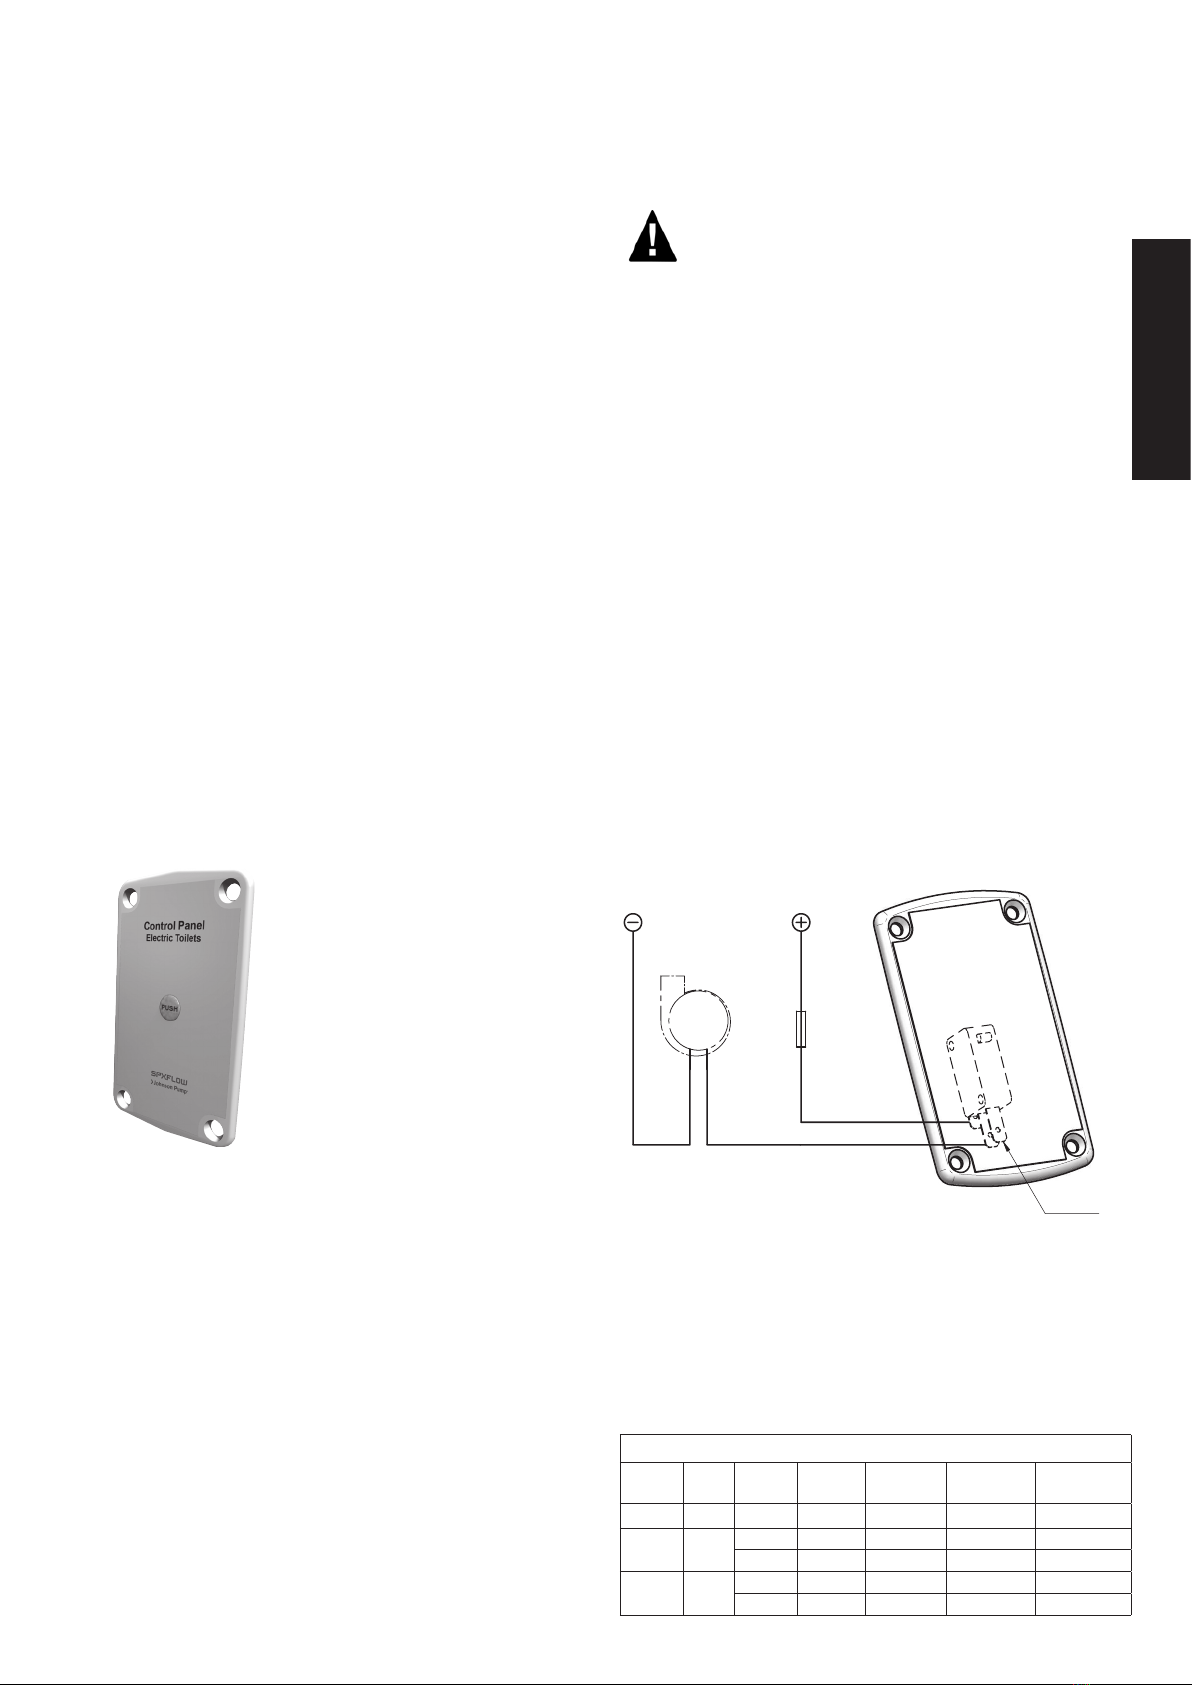
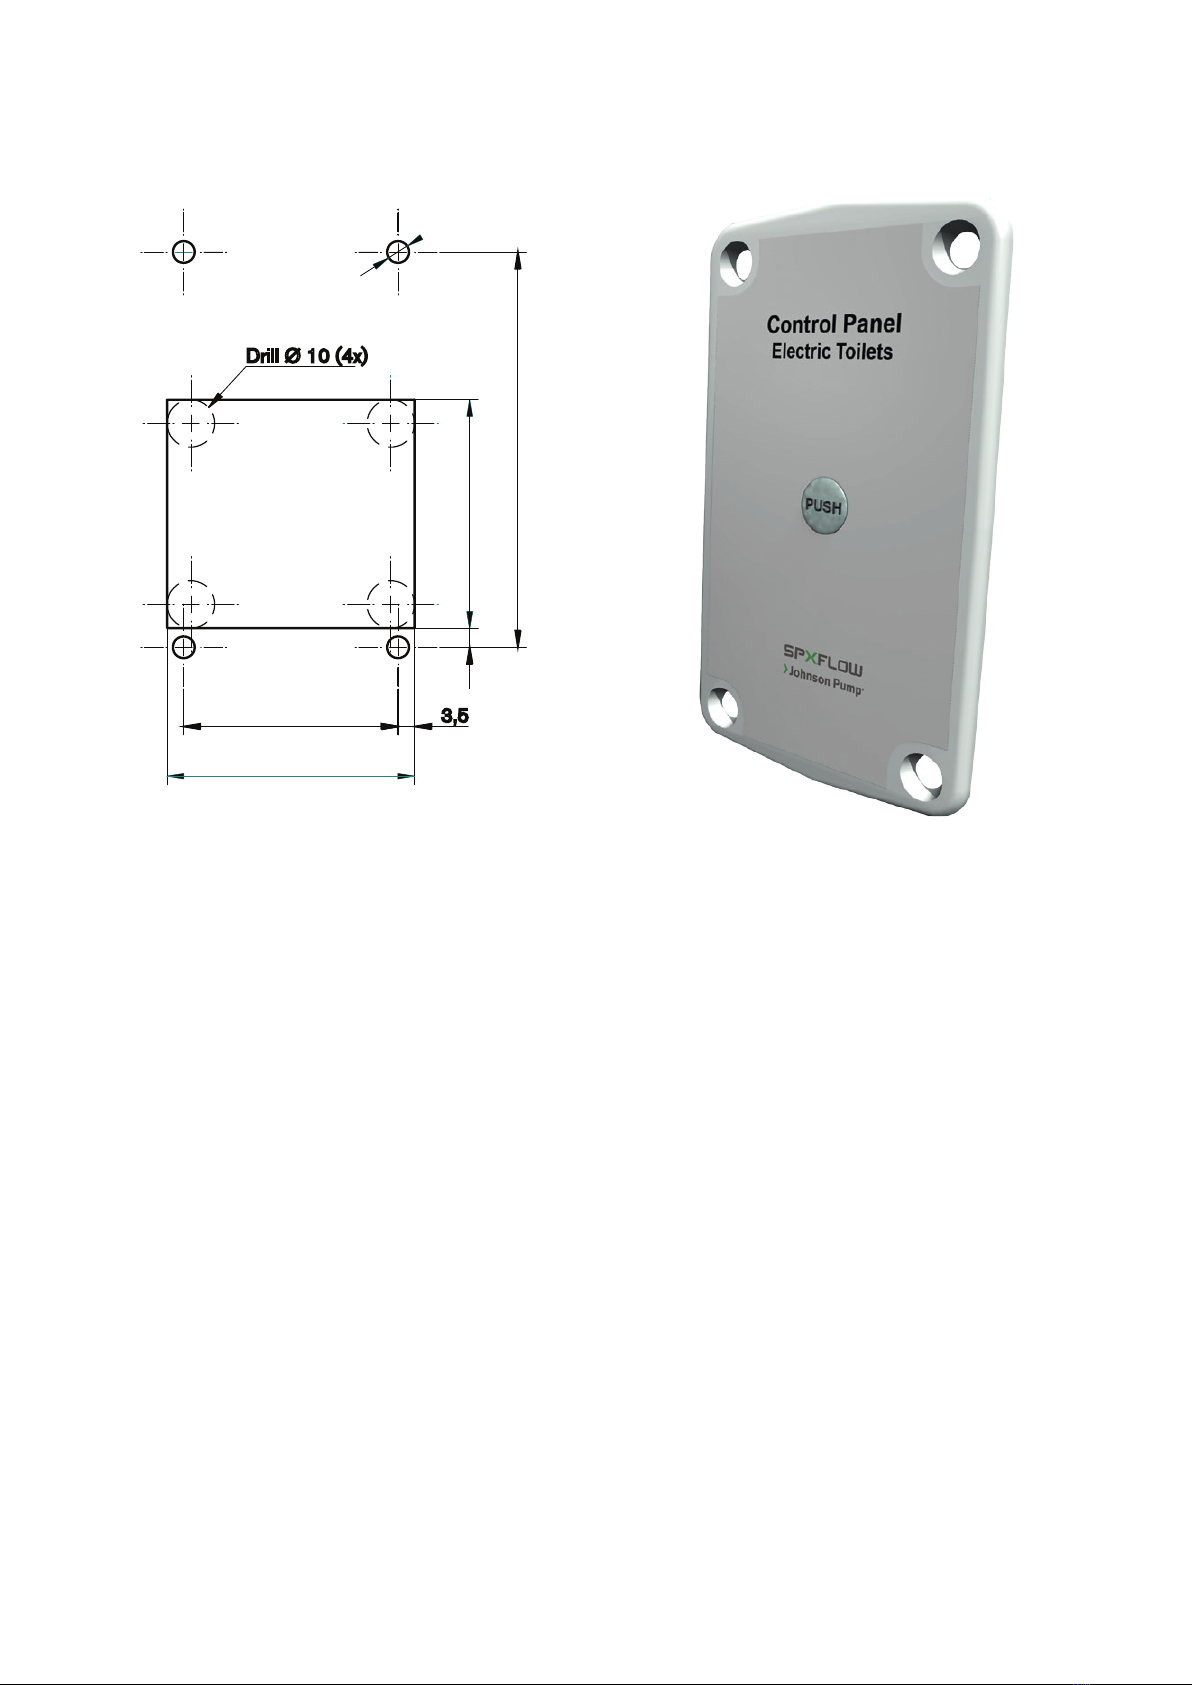
Control panel
The panel controls the rinse and the discharge, by one button.
• Button 1: One function, discharge and rinse.
Normal Use
1. Ensure that the inlet and outlet valves are open
2. Push the button switch to operate flush until the bowl is thoroughly
rinsed and the discharge pump has ejected the water from the base
of the bowl.
• If the toilet has not been used for a while, and the bowl is dry, it’s
recommended to operate the pumps for a few seconds so the bowl
gets wet. This is for preventing the toilet paper to become compact at
the bottom of the bowl.
• The toilet can macerate organic waste and toilet paper, but it can not
destroy rugs, sanitary nappies or hard and solid objects from different
nature
• If the pump does not discharge and the bowl begins to fill, partially
close the toilet intake valve until the bowl is completely empty.
Operate than for a few seconds with both valves open, so that the
toilet and the whole discharge system may be completely emptied out.
• After each operation, close both inlet and discharge valves.
• To drain for winterization, close the inlet valve and operate for a few
seconds until water is completely empty.
After use:
• Shut both seacocks
NOTE: Do not put any of the following into the toilet: Sanitary
Towels, Wet Strength Tissues, Cotton Wool, Cigarettes, Matches,
Chewing Gum or any solid objects, Petrol, Diesel, Oil, Solvents of
any kind or water more than hand warm.
A rule of thumb: Do not put anything in the toilet unless it has
passed through your body, except for toilet paper.
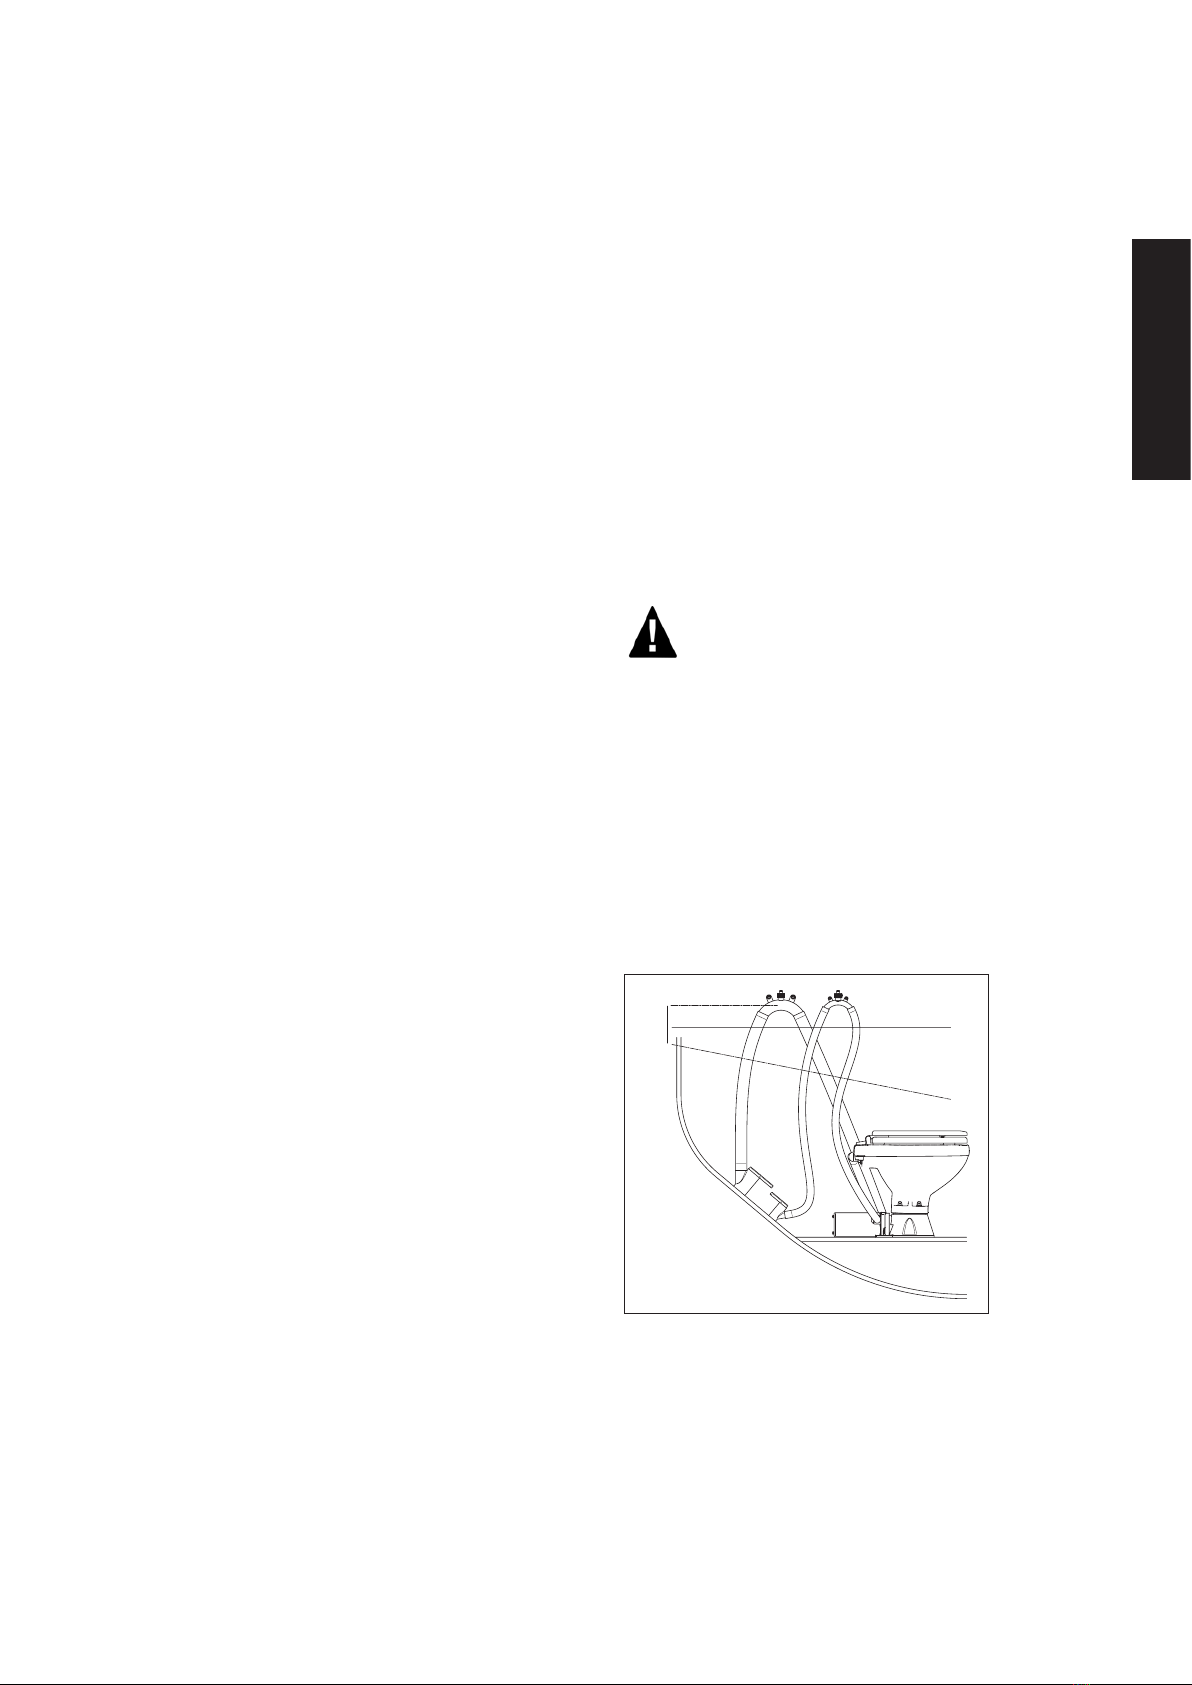
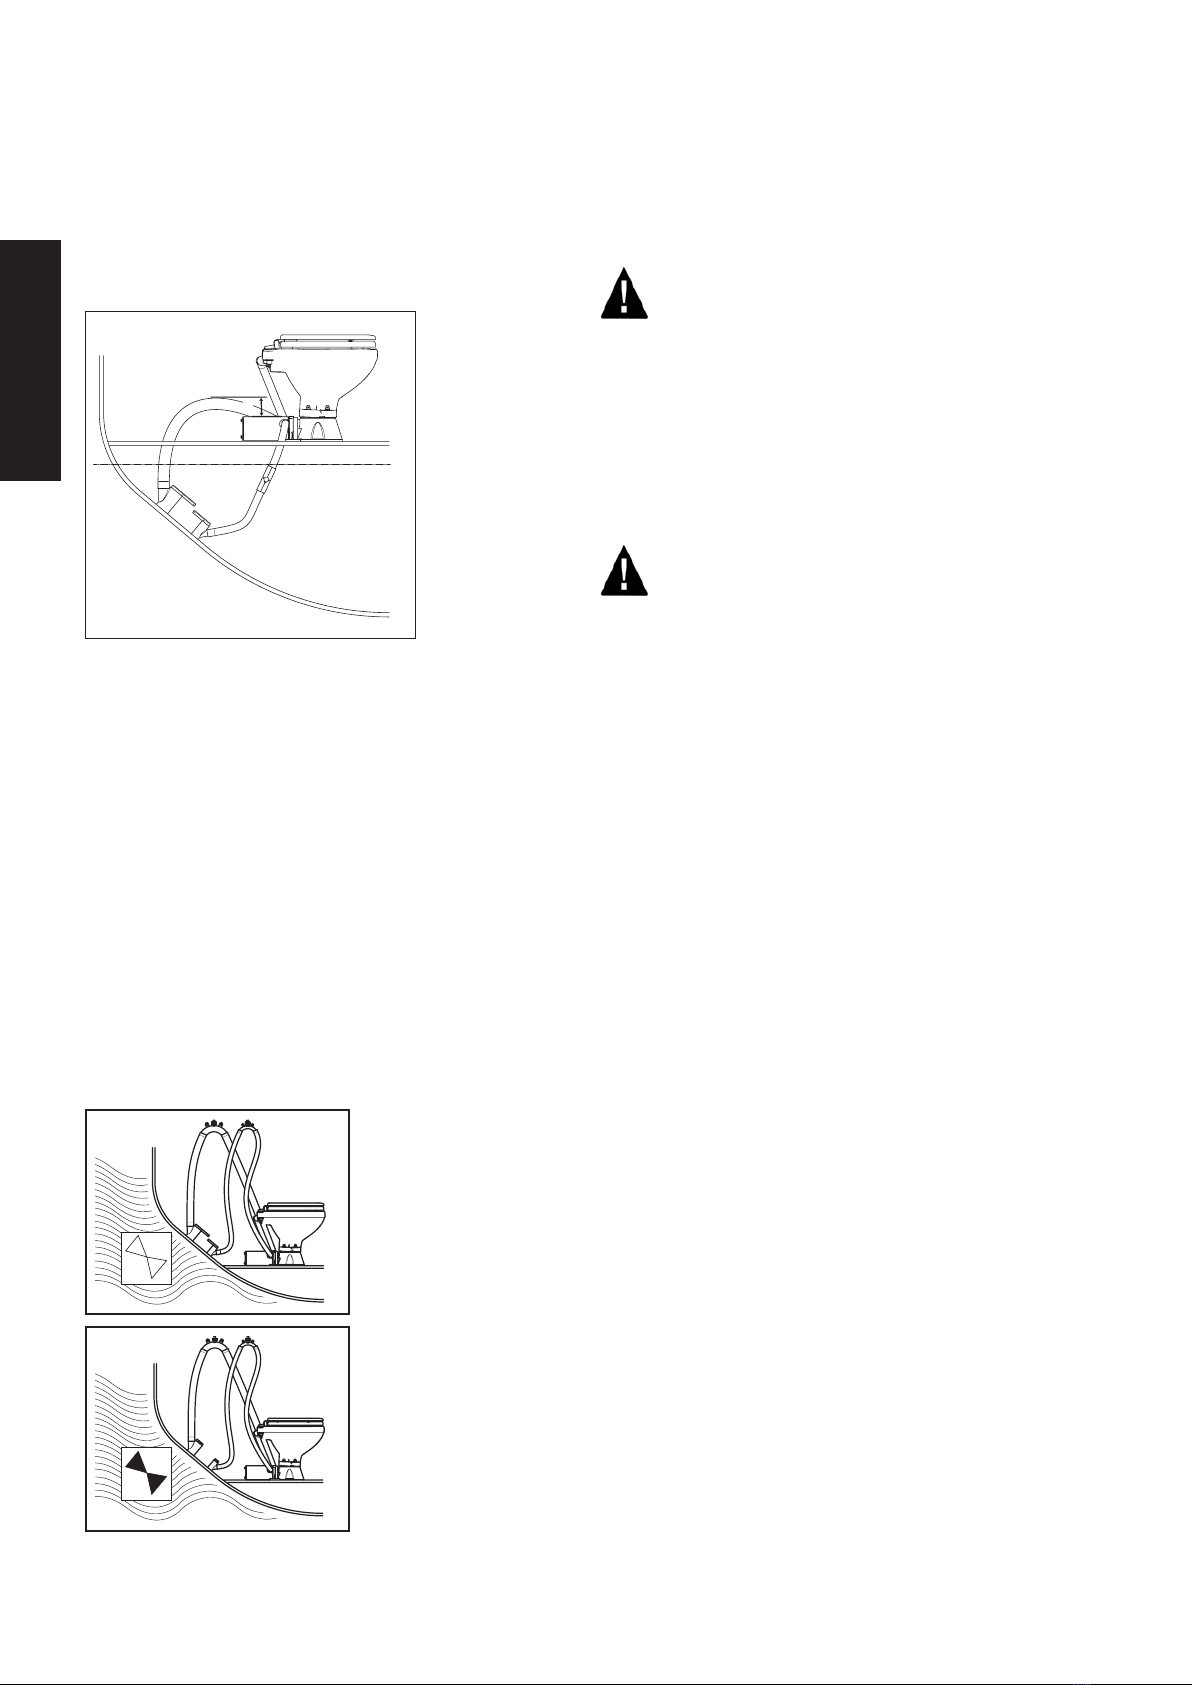
Hazard Risk:
ACCIDENTAL DAMAGE. If the toilet is connected to ANY through-hull
fittings that are below the waterline at any time, and if the toilet or pipework
is damaged, water may flood in, causing the craft to sink, which may result
in loss of life. Therefore, after every usage; both seacocks (or secondary
valves) MUST be shut. Whenever your craft is unattended, even if only for a
very short period of time, both seacocks (even if secondary valves are fitted)
MUST be shut. Ensure that ALL users understand how to operate the toilet
system cor¬rectly and safely, including seacocks and secondary valves.
Take special care to instruct children, the elderly and visitors ABSOLUTELY
SHUT SEACOCKS!
Cleaning
A regular flushing with clean (sea)-water represents one of the most
effective methods to keep the toilet clean and good smelling.
• To clean the bowl, use any liquid or cream ceramic cleaner
• To clean the rest of the toilet, including the seat and lid, use a non-
abrasive liquid cleaner Polish with a dry cloth only.
• To disinfect the toilet, use a liquid disinfectant diluted in accordance
with the manufacturer’s instructions. It is possible to apply it to all
parts of the toilet using a sponge or soft brush as necessary.
• After applying any cleaning or disinfecting agent, always flush well.
DO NOT ALLOW THESE AGENTS TO STAND IN THE SYSTEM
Electric Connections
Connect the wires from the pump as follows:
Red
Red
Discharge/Rinse pump
Red
Black
Fuse
Panel Red (upper wire on switch) to positive (+) battery via one fuse
Panel Red (lower wire on switch) to toilet pump red
Toilet pump Black to battery negative (-)
To install the switch panel, use the template or dimensions from the
template. Also, drill four appropriate sized holes for the fasteners selected
to secure the switch panel to its mounting surface. Use the enclosed
template, see page 27.
Wire size per feet and meter of run
Voltage Fuse
size
0’-10’ 10’-15’ 15’-25’ 25’-40’ 40’-60’
0m-3m 3m-4,6m 4,6m-7,6m 7,6m-12,2m 12,2m-18,3m
12V 25A #14 #14 #12 #10 #8
2,5 mm22,5 mm24 mm26 mm210 mm2
24V 20A #14 #14 #14 #14 #12
2,5 mm22,5 mm22,5 mm22,5 mm24 mm2
9
Original instructions