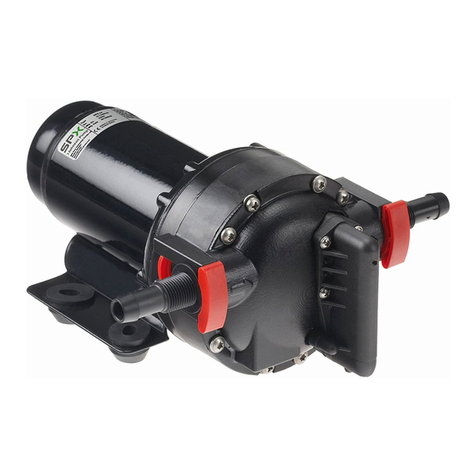
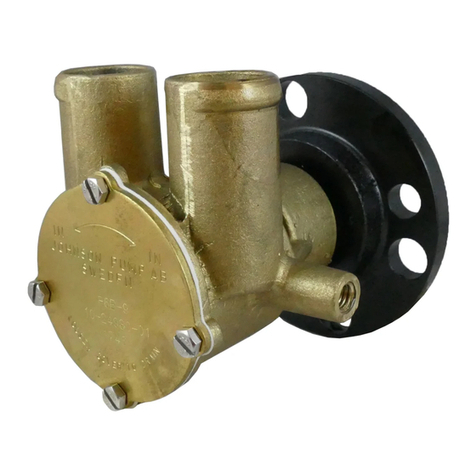
manuals.online logo
Brands
  1. Home
  2. •
  3. Brands
  4. •
  5. Johnson Pumps
  6. •
  7. Water Pump
  8. •
  9. Johnson Pumps SPX FLOW Pro L1600 Series User manual

Johnson Pumps SPX FLOW Pro L1600 Series User manual

L1600 ProSeries Livewell/Baitwell Pump
12 or 24V Model
Installation Instructions
Important: Read before attempting Installation
The L1600 Livewell/Baitwell Pump has been designed for pumping water in a marine
environment. The pump is not to be used for pumping any other liquids other than
water/seawater. Pumping other liquids can result in personal damage/injury and/or
property damage.
Security
The Livewell/Baitwell pumps are designed to simply install into any valve fitting with 1”
NPT Male threads.
The pump may not be used for other liquids than water/sea water
Always install the pump according to the wiring instructions
Always use the fuse required per pump label.
The wire connections must be sealed with a marine sealant
Insulation or cable sheathings must be placed above the highest water level
Do not run dry for extended periods
Installation:
Please follow the installation instructions carefully to ensure maximum efficiency in your
Livewell/Baitwell pump operation.
1) Pump should be installed below the water line to ensure a flooded suction to the
pump.
2) Install a 1” seacock below the waterline in your boat. Warning: Failure to install a
seacock may subject your vessel to flooding.
3) Install a thru hull pickup with a filter grate to reduce or eliminate debris from
entering the seacock and ultimately your Livewell/Baitwell pump.
4) Install your seacock and Livewell/Baitwell pump using pipe tape sealant such as
Teflon tape on all threaded connections.
5) Attach Teflon tape or pipe tape sealant to a 1” NPT nipple that will screw on to
your Livewell/Baitwell pump on one side and the other side to your 1” seacock.
The Livewell/Baitwell pump is equipped with 1 1/8” or 1 ¼” Barbed ports. The port
threads into the discharge area of the pump. Make sure to apply thread sealant to the port
threads. Tighten port until port is bottomed out with pump body. If the
Livewell/Baitwell pump is to be mounted in a horizontal position, make sure the
discharge is pointing in an upward position to allow air to vent.
1) Fasten your reinforced hose from the pump port to the LiveWell/Baitwell tank.
Avoid sharp bends or loops. Support the hose if necessary. Note: In order to prevent
air locks it is important that the hose is not to be allowed to dip below the pump
outlet. The hose should be constantly rising.
1) Connect the brown wire to the positive (+) terminal of the battery, and the black
wire to the negative (-) terminal of the battery.
2) Important: All electrical wiring must be clamped with the connections well above
water level. Do not remove the insulation more than necessary. All wiring
connections should be sealed with a marine sealant to avoid oxidation.
Pump Operation:
1) Open your seacock to let in water and allow the pump to be flooded.
2) **Important** Make sure that when water has entered the pump that there are NO
Leaks coming from the intake or discharge of the pump. It is critical to check and
make sure there is no water leaking from any part of the pump during installation
and operation of the pump.
3) Turn your Livewell/Baitwell pump “On”
4) Your tank should fill up until water comes out of the overflow pipe
5) The pump will continuously exchange water as long as it is on.
6) Turn off pump when you are done fishing and are ready to drain your tank.
7) Close the seacock when pump/system is not being used. Never leave your boat for
extended periods of time without closing the seacock.
Optional Washdown Port
Your Livewell/Baitwell pump also has a port to be used for attaching a washdown pump.
Remove the ½ NPT plug from Livewell/Baitwell pump side port and attach your
washdown pump. Make sure to use sealant. Make sure that seacock is open before
turning on your washdown pump to ensure supply of water to washdown pump. Close
seacock valve after you are done with using your washdown pump.
CE Logo
When this product carried a CE mark, it conforms with the following standards:
ISO 8846: 1990/electrical Devices – Protection Against Ignition of Surrounding
Flammable Gases
Warranty Information
Johnson Pumps of America of 5885 11th Street, Rockford, Illinois 61109 warrants to the original consumer
purchaser that this product will be free from defects in material and workmanship, providing that the case is not opened or
the pump otherwise abused for a period of three (3) years from the date originally purchased.
The exclusive remedy of the consumer purchaser in the event the product does not meet this express Limited Warranty is
to return the pump to Johnson Pump at the above address, freight prepaid with your sales receipt. IMPORTANT: FOR
THIS WARRANTY TO BE EFFECTIVE, JOHNSON PUMP MUST BE SUPPLIED WITH THE ORIGINAL PURCHASE
DATE OF THE PRODUCT. THE ACCEPTANCE BY JOHNSON PUMP OF ANY PRODUCT RETURNED SHALL NOT BE
DEEMED AN ADMISSION THAT SUCH PRODUCT IS DEFECTIVE OR IN VIOLATION OF ANY WARRANTY. THE
COMPANY RESERVES THE RIGHT TO REPAIR OR REPLACE THE PRODUCT.
NO REPRESENTATIVE OR OTHER PERSON IS AUTHORIZED TO ASSUME FOR JOHNSON PUMP ANY
ADDITIONAL LIABILITY IN CONNECTION WITH THE SALE OF ITS PRODUCTS OR TO ALTER THIS WARRANTY IN
ANY WAY.
IN NO EVENT WILL JOHNSON PUMPS OF AMERICA BE LIABLE FOR MORE THAN THE SALES PRICE OF THE
PRODUCT. UNDER NO CIRCUMSTANCES WILL JOHNSON BE LIABLE FOR ANY LOST PROFITS, INCIDENTAL OR
CONSEQUENTIAL COSTS, EXPENSES, OR DAMAGES. THE LIMITATION ON LIABILITY FOR LOST PROFITS,
INCIDENTAL OR CONSEQUENTIAL COST EXPENSES OR DAMAGES SHALL SURVIVE ANY FAILURE OF
ESSENTIAL PURPOSE OF THIS LIMITED WARRANTY. Some states do not allow the exclusive or limitation of incidental
or consequential damages, so the above limitation may not apply to you.
NO EXPRESS OR LIMITED WARRANTY, INCLUDING WARRANTY OF MERCHANTABILITY AND FITNESS SHALL
EXTEND FOR ANY PERIOD OF TIME GREATER THAN THREE YEARS FROM THE DATE OF ORIGINAL PURCHASE
OF THIS PRODUCT. Some states do not allow limitation on how long an implied warranty lasts so the above limitation
may not apply to you. CAUTION - Warranty void if seal on product is broken, if any electric cord is
cut back more than 3 inches, if electric splices become submerged, or if product is installed
contrary to instructions or warnings.
Johnson Pumps of America An SPX Brand
5885 11th Street
Rockford, Illinois 60133
Fax (847) 874-8011
spxflow.com

Other Johnson Pumps Water Pump manuals

Johnson Pumps AQUA JET WPS 2.9 User manual

Johnson Pumps

Johnson Pumps AQUA JET WPS 2.9 User manual

Johnson Pumps F6B-9 User manual

Johnson Pumps

Johnson Pumps F6B-9 User manual

Johnson Pumps Viking Power 32 User manual

Johnson Pumps

Johnson Pumps Viking Power 32 User manual

Johnson Pumps SPXFLOW Cartridge Combo 500  GPH-12V User manual

Johnson Pumps

Johnson Pumps SPXFLOW Cartridge Combo 500 GPH-12V User manual

Popular Water Pump manuals by other brands

MYERS DS33P1 owner's manual

MYERS

MYERS DS33P1 owner's manual

Stübbe SHM Series Original operating manual

Stübbe

Stübbe SHM Series Original operating manual

Weir SPM TWS600S operation instruction

Weir

Weir SPM TWS600S operation instruction

Pentair OMNIA Series manual

Pentair

Pentair OMNIA Series manual

MBH SP-7 Instruction, Installation, Operation and Maintenance Manual

MBH

MBH SP-7 Instruction, Installation, Operation and Maintenance Manual

sauermann Si-10 quick start guide

sauermann

sauermann Si-10 quick start guide

DAB FX Series Instruction for installation and maintenance

DAB

DAB FX Series Instruction for installation and maintenance

Sicce Voyager HP Series instruction manual

Sicce

Sicce Voyager HP Series instruction manual

Power-flo PFG3022 Installation, service & parts manual

Power-flo

Power-flo PFG3022 Installation, service & parts manual

Ingersoll-Rand PD20R-X-XCX Series Operator's manual

Ingersoll-Rand

Ingersoll-Rand PD20R-X-XCX Series Operator's manual

JAVAC JAV-1069-A2L Safety instructions & operation manual

JAVAC

JAVAC JAV-1069-A2L Safety instructions & operation manual

Enerpac SFP Series operating manual

Enerpac

Enerpac SFP Series operating manual

salmson LIFTSON L Installation and starting instructions

salmson

salmson LIFTSON L Installation and starting instructions

Salamander Pumps RP55PS Installation and warranty guide

Salamander Pumps

Salamander Pumps RP55PS Installation and warranty guide

Becker KDT 3.80 operating instructions

Becker

Becker KDT 3.80 operating instructions

stur SF15 Series manual

stur

stur SF15 Series manual

Bijur Delimon FZ-A operating instructions

Bijur Delimon

Bijur Delimon FZ-A operating instructions

Pentair S50HTPC1 Installation, Operation & Parts Manual

Pentair

Pentair S50HTPC1 Installation, Operation & Parts Manual

manuals.online logo
manuals.online logoBrands
  • About & Mission
  • Contact us
  • Privacy Policy
  • Terms and Conditions

Copyright 2025 Manuals.Online. All Rights Reserved.