OWNER'S MANUAL
MK
MK
10 11
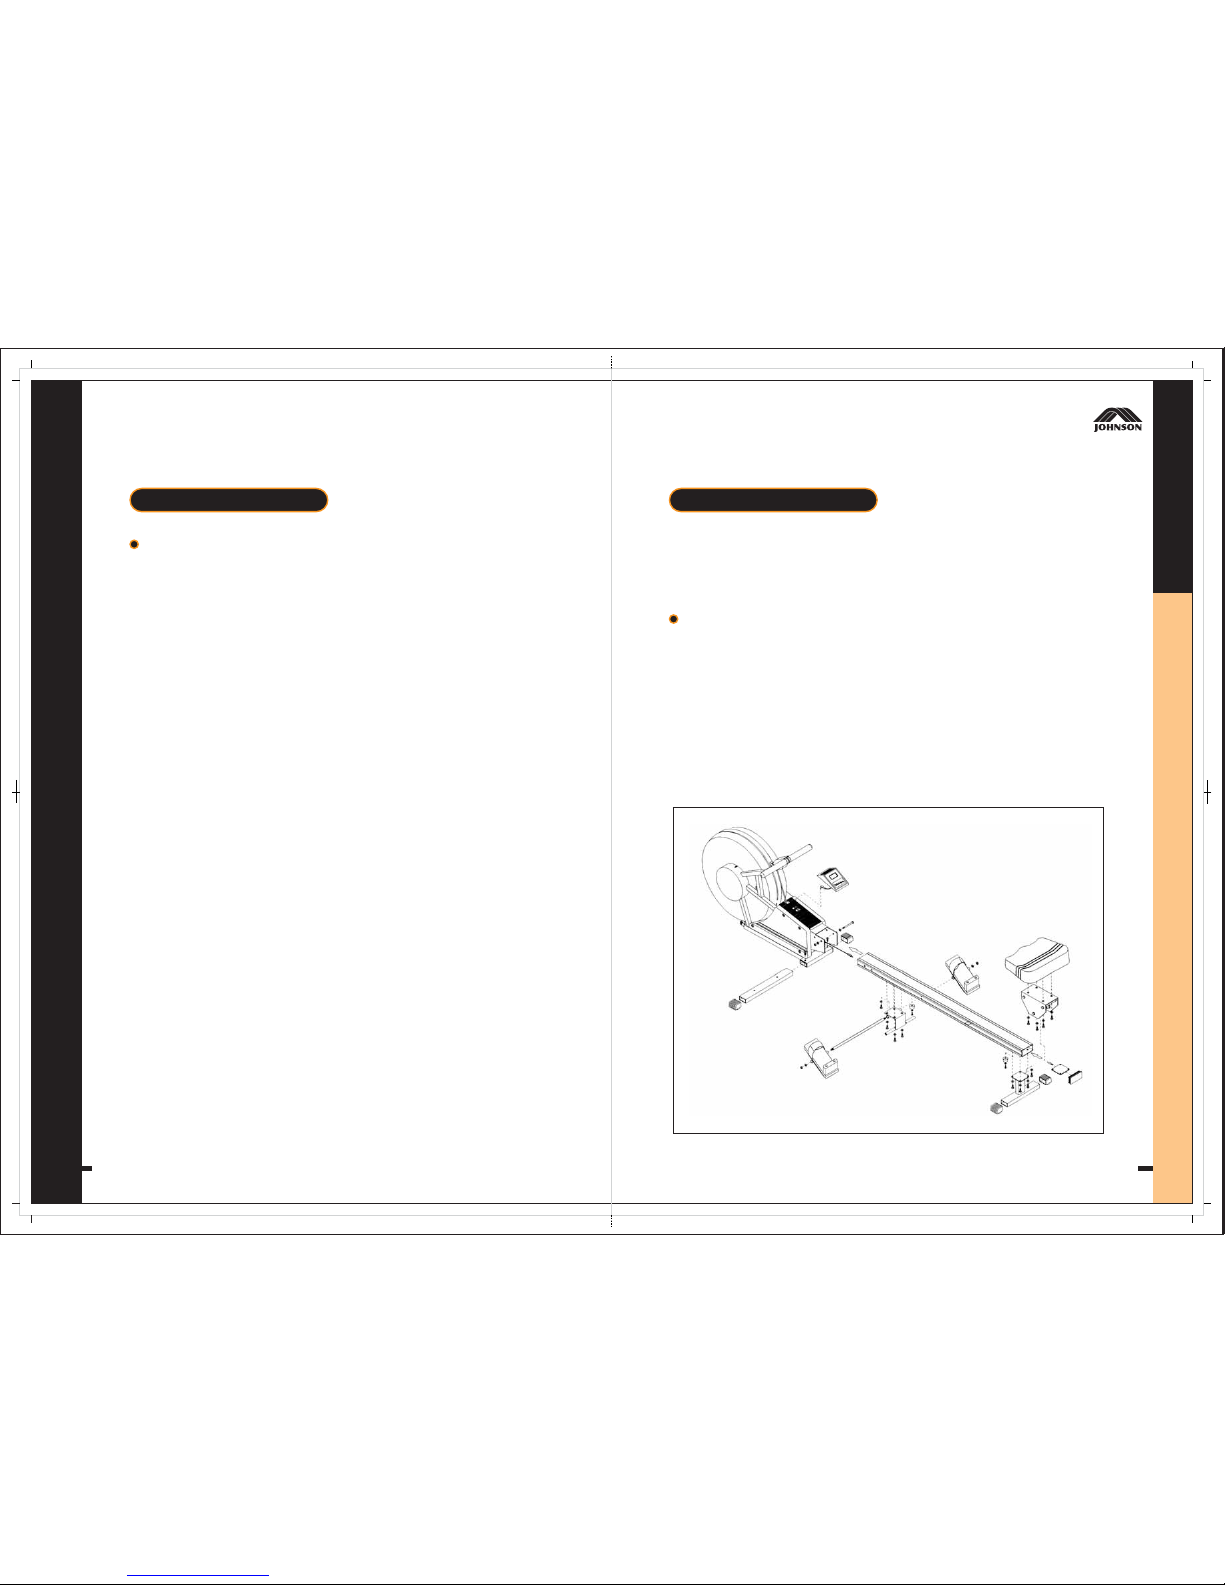
ROWER
FUNCTIONS, SPECIFICATION & OPERATIONS:
Feature: 1.
2.
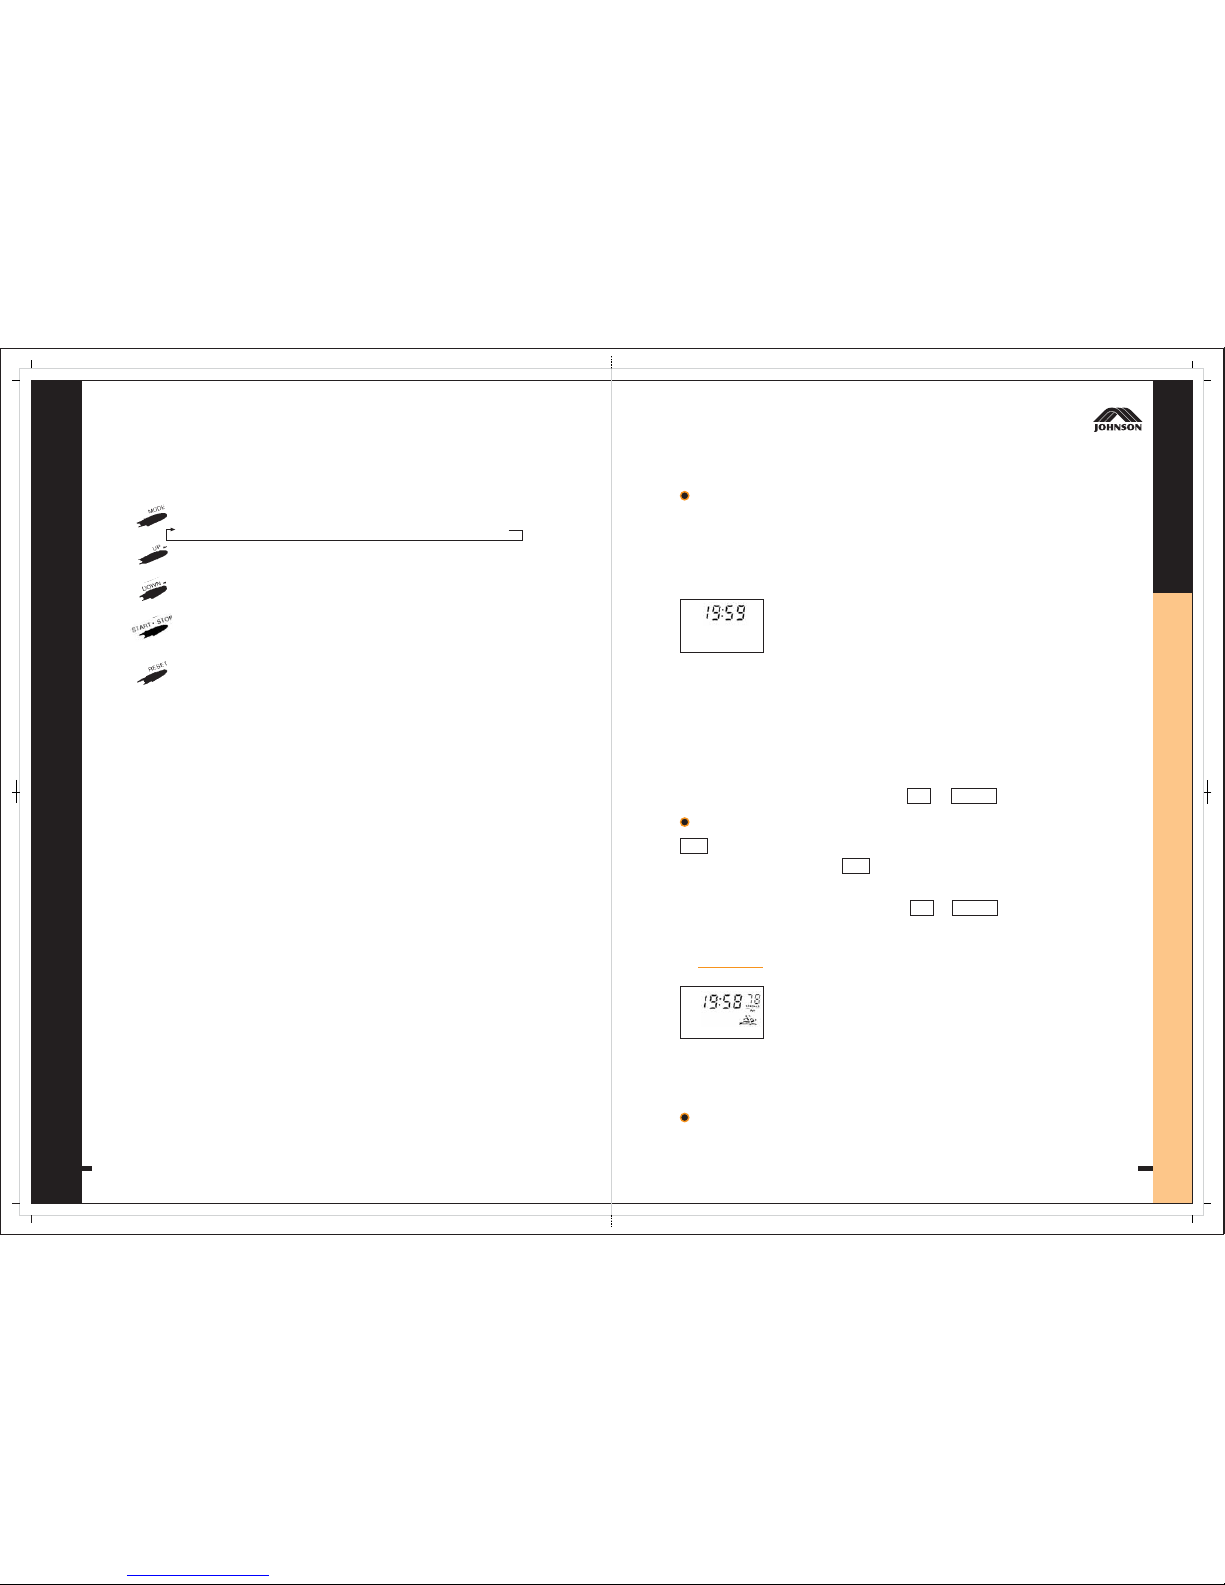
★TIME
Occupies a designed space of LCD to display steadily.
Counts up from zero or can be set to count down.
Spec: 1.
2.
Count-up: 00:00-59:59, then go on timing from zero.
Count-down: 1:00-59:00: To be set in minute
increment, counts by one second. Counts back to
zero with 12-second sound signal, push any key to
stop beeping.
Operation: 1.
2.
3.
Prees MODE key to line up with 'TM' symbol flashing.
Count-up: Push START/STOP button to start timing
up.
Count-down: Depress START/STOP button to start
timing from desired value after the given value was
set by pressing UP or DOWN key.
SET sign have to appear upon the upper left of LCD whenever any value
of functions will be set. The SET sign is controlled by START/STOP button
(TIMER function is ceased also).
To get the desired value faster just push UP or DOWN key a little longer.
Only TIMER function can be actived continuously at power-off state.
NOTE
Feature:
★STORKES
MIN
Electronically calculates and displays the strokes
per minute in accordance with one rowing action.
Spec:The min. display is 6 and max. is 99 per minute.
Operation:The value will be varied whenever you exercise,
but TIMER function have to be simultaneously
performing.
The 'E' charactor will automatically show up if the value exceeds max 99
per minute.
NOTE
TM
▼
TM
▼
1.Open the battery cover at the back side of computer.
2.Insert two pieces of battery (1.5V of "AA" or UM-3) into the battery case inside.
3.Removing the batteries will erase all functional values (including TOTAL function).
Battery information:
1.The power will be automatically turned on when if
(1) Push any button of computer; (2) Start using your rowing machine.
2.The power will also be automatically shut off when if
(1) Stop using your machine; (2) Timer functions is not working;
(3) No button ix depressed; for 256 seconds.
Auto Power On/Off:
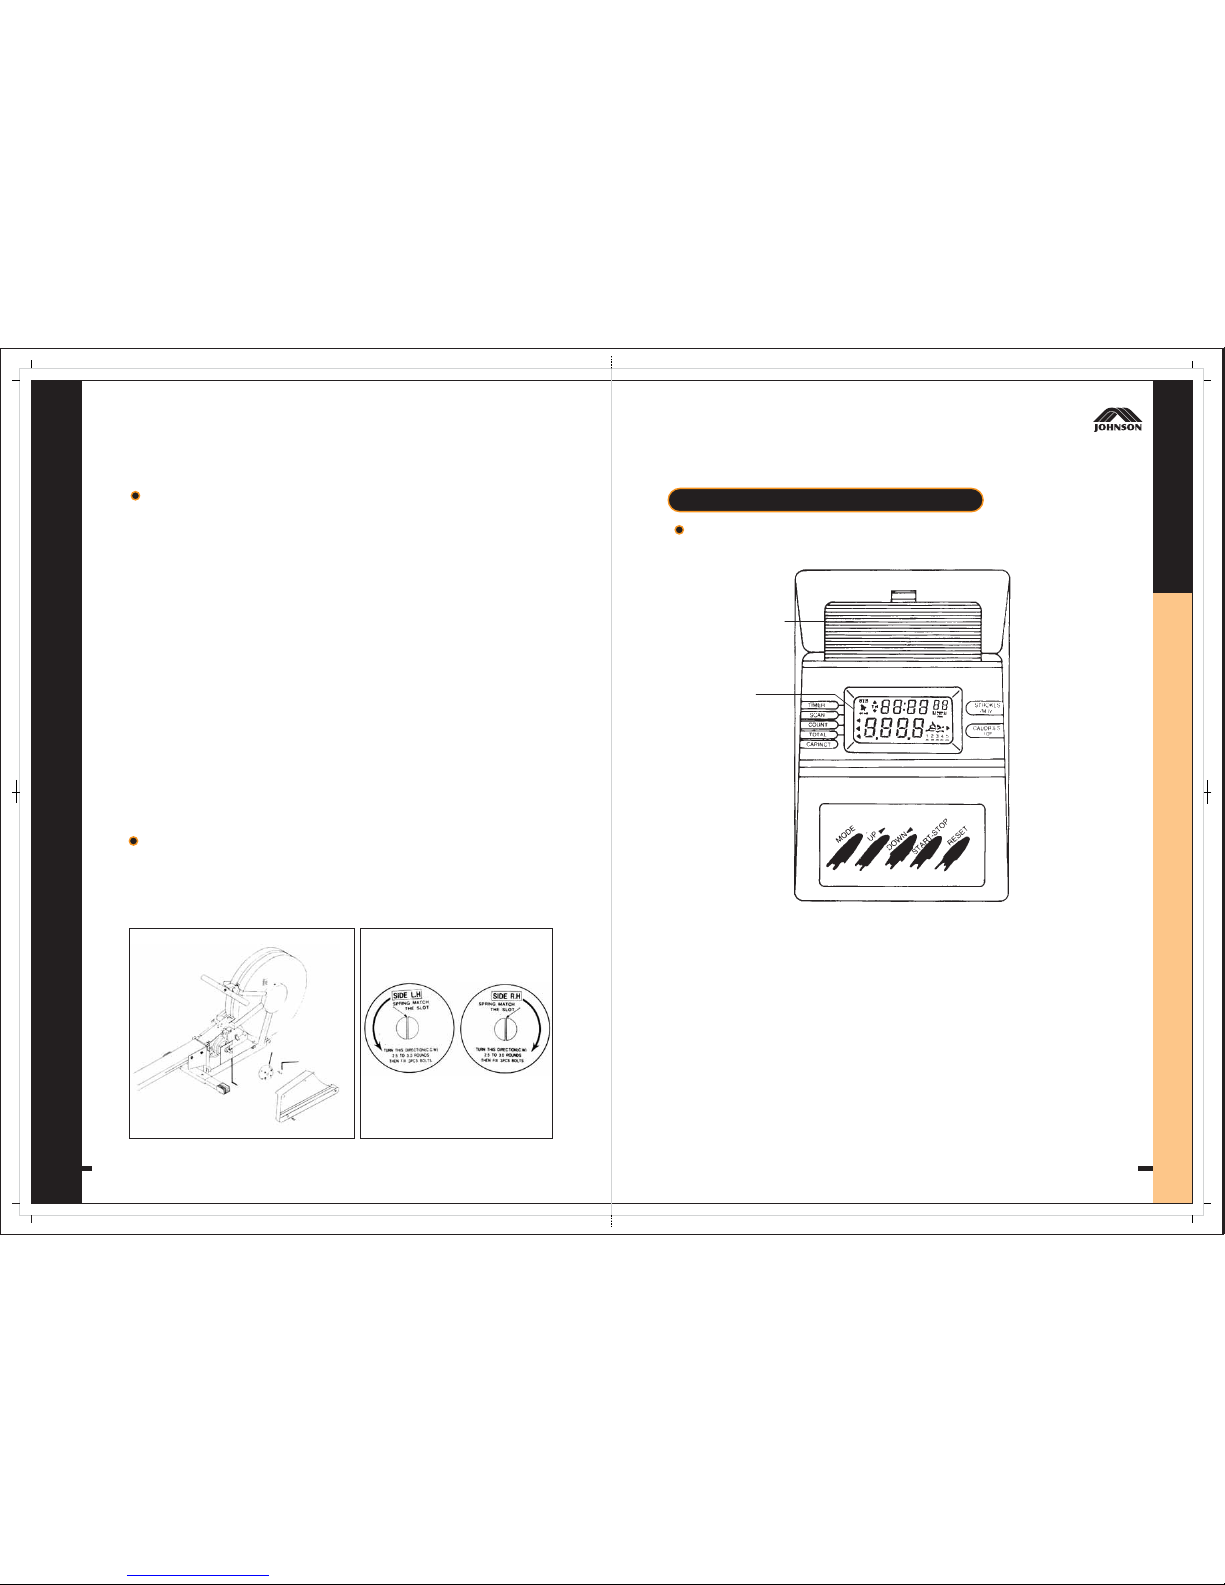
Set-up button.
(Used for TIMER, COUNT, TEMPO, and CLORIES functions.)
Set-down button.
(Used for TIMER, COUNT, and TEMPO functions.)
To start or stop the functions of TIMER, COUNT, TOTAL, TEMPO, and
CALORIES.
(If the ' ' appear on the upper-left of LCD display, all functions are ceased.)
To reset the values of TIMER, COUNT, TEMPO or CALORIE to zero.
Buttons:
Functions selection button.
(TIMER)→(SCAN)→COUNT→TOTAL→TEMPO→CALORIE