manuals.online logo
Brands
  1. Home
  2. •
  3. Brands
  4. •
  5. Jon-Don
  6. •
  7. Scrubber
  8. •
  9. Jon-Don PE500 Operating instructions

Jon-Don PE500 Operating instructions

Prospector PE500
INFORMATION
&
OPERATING
INSTRUCTIONS
READ AND UNDERSTAND THESE INSTRUCTIONS
BEFORE OPERATING THE MACHINE
Priority
Manufacturing
Prospector PE500 120V
Pump 50 -500 psi, piston pump with pressure unloader
Vacuum Dual 2 stage 145” lift 97 CFM
Heater 1750 watt
Solution Tank Capacity 15 Gal
Recovery Tank Capacity 15 Gal
Vacuum Shut-off Ball Float
Dimensions 36-3/4” H
23-1/2” W
32” L
Weight 103 lbs
Warranty See Below
Contents:
Machine Specifications 2 Care & Maintenance 4
Record Important Information 2 Views of Machine 5
Safety Information & Cautions 3 Set Up & Operating Instructions 6
Your New Machine 4 Warranty 7
System Features 4
Troubleshooting 8
Chemicals 4
Parts List 9
Tools & Accessories 4 Exploded View 10
Machine Specifications:
Machine and Purchase Specifications:
RECORD AND RETAIN THIS IMPORTANT INFORMATION
Prospector PE500
Serial Number:_____________________________
Purchase Date: _____________________________
Write purchase location and phone number below
_____________________________________________________________________________
___________________________________________________________
And don’t forget to register your purchase to activate your warranty
1
CRITICAL SAFETY INFORMATION & CAUTIONS
The acceptable use of this machine is for
commercial/professional cleaning, for example, in
hotels, schools, hospitals, and offices, rather than
for personal housekeeping.
NOTE: Read all instructions before using this
machine. Improper use or misuse of the machine
can result in personal injury or property damage.
To reduce the risk of personal injury or property
damage, follow these procedures:
•Connect to a properly grounded outlet only.
•Do not operate the machine in an explosive
environment.
•Do NOT use Solvents.
•Never add water over 120F/ 49C to the
solution tank.
•Do not pick up anything that is burning or
smoking, such as cigarette, matches or hot ashes,
or any health endangering dusts. Do not use to
pick up flammable or combustible liquids such as
gasoline or use in areas where they may be
present.
READ AND SAVE THESE INSTRUCTIONS
•To avoid electric shock, do not expose to rain or
snow and keep from extremes in temperature.
Store in a heated location. Use the machine
indoors. Do not use outdoors.
•Do not use this machine to dry vacuum before
wet cleaning.
•Do not use with damaged cord or plug. If the
machine is not working as it should, has been
dropped, damaged, left outdoors or flooded with
water, return it to a service center.
•Do not leave the machine unattended when it is
plugged in. Unplug the unit from the outlet when
not in use and before servicing.
•Use only as described in this manual. Use only
the manufacturers recommended attachments.
•Do not handle the plug, the cord, or the machine
with wet hands.
•Extension cords must be 12/3 and no longer than
50 feet. Replace the cord or plug immediately if
the ground prong becomes damaged.
•Do not put any object into opening. Do no use
with any opening blocked; keep free of dust, lint,
hair, and anything that may reduce air flow.
•Keep loose clothing, hair, fingers and all parts of
body away from openings and moving parts.
•Liquid ejected at the spray nozzle could be
dangerous as a result of its temperature,
pressure, or chemical content.
2
YOUR NEW MACHINE:
When you receive your new machine, examine
the packaging for signs of shipping damage.
Carefully unpack the machine and inspect it. If
you see evidence of damage to the container or
the contents, contact the freight carrier
immediately.
Additionally, ensure all parts and accessories are
present; if you notice anything missing, contact
your distributor without delay.
SYSTEM FEATURES:
HEAT: The Prospector PE500 has a built-in heater
for the solution. An ON/Off switch activates the
heater. If you prefer to clean without the added
effectiveness of heat, simply do not turn on the
heat switch.
VACUUM: The vacuum motors provides an
excellent ratio of water lift to air movement (see
specs, page2). Carpets should dry quickly if not
over-wetting while cleaning.
PUMP: The pump is a piston style, positive
displacement pump. It runs continuously when
turned on, but the use of the unloader valve
enables the operator to set the pressure to the
desired PSI, between 50 and 500.
CHEMICALS:
The use of powder chemicals is discouraged;
unless they are mixed very thoroughly and rinsed
out completely at the end of the job, powdered
cleaners could cause a build-up in the pump,
lines, heater and/or quick disconnect. Any
problem caused by a chemical build-up is not
covered by warranty.
If foaming occurs as you clean, use a defoamer,
either in the recovery tank or on the area being
cleaned, to prevent overflow which can cause
water damage to machine components.
The use of clear water in the machine is
recommended, within the application of
properly diluted cleaner as a pre-spray on the
area to be cleaned; however, you may mix
water and cleaning chemicals in a bucket --
according to directions on the chemical label --
and then pour into the solution tank. If you
chose to use chemicals in the machine, always
use a cleaner with a pH as close to neutral as
possible to avoid premature wear of the pump,
seals, and/or other components. Damage
caused by the use of strong chemicals is not
covered by the warranty.
TOOLS & ACCESSORIES:
Use only manufacturer’s recommended tools and
accessories. If the spray valve on your cleaning
tool begins to leak or if the spray tips get worn
and are no longer providing a nice even spray
pattern, order replacements from your
distributor.
CARE AND MAINTENANCE:
For continual peak operation, clean the internal
plumbing by rinsing with clear water at the end
of each job. About once a month, rinse the
machine with a commercial flushing compound
to break-up any mineral or chemical
accumulation that may have formed from the use
of hard water or chemicals.
The vacuum motors and the pump do not require
any scheduled maintenance; however, the
vacuum motor may require replacement brushes
after 750-1000 hours.
To help maintain a professional image; clean the
exterior of the machine with an all purpose
detergent, and protect it with automobile interior
polish. Lubricate the wheels, castors, and quick
disconnects with an all purpose, silicone spray.
3
Recovery
Tank Access
Recovery
Tank Drain
Hose
Recovery
Hose
connects
here
Solution
Tank
Fill Hole
VIEWS OF THE MACHINE:
FRONT VIEW
Connect
Solution Hose
Here
Vacuum 2
Switch
Vacuum 1
Switch
Heat/Pump
Switch
4
REAR VIEW
Latches
Power
Cord
Pigtails
Switches
Wand
Holder
Loading
Wheels
Pressure
Gauge Reads
Spraying
Pressure
Pressure
Adjustment
Knob
SET-UP AND OPERATION:
1. Before each use, inspect the machine, hoses,
and cleaning tool for cleanliness and
completeness, Ensure the spray nozzles on
the cleaning tool are tight and that the ball
float in the recovery tank is clean and
operational.
2. Close the clear, screw-on lid on the recovery
tank, and screw the cap onto the drain hose.
3. Fill the holding tank with clear water.
NOTE: the heater on this machine is designed to
provide nearly instant hot water for cleaning; if
you use warm water in the solution tank it would
increase heater proficiency. Never use water
above 120F or 49C in the solution tank.
4. Turn off all the switches. Plug the power cords
into properly grounded outlets. Do not
connect both cords to the same outlet.
5. Connect priming hose (included) to outlet QD
6. Turn the pump ON and let water flow through
priming hose until it is a clear flow, no air
bubbles visible.
7. Turn off pump switch, disconnect priming
hose. Connect solution and vacuum hose to
machine and tool
8. Turn the heat switch ON and wait two
minutes for the heater to reach operating
temperature.
NOTE: If you choose to add a detergent to the
solution tank, be sure to mix well, and always
follow the use & dilution instructions on the
chemical label. Use a chemical with a pH between
5 and 10 to reduce the likelihood of premature
wear to the pump and other seals.
9. Spray through your cleaning tool as you adjust
the pressure regulator knob, on the front of
the machine, to achieve the desired spraying
pressure.
9. Turn on the vacuum.
10. Begin cleaning, following industry accepted
practices.
NOTE: Use defoamer any time foaming occurs in
the recovery tank to prevent damage to the motor
or other components.
NOTE: Foam will not lift the ball float.
12. Monitor the water level in the solution tank.
Do not let the pump run dry.
13. When the solution tank gets low, turn off the
pump and vacuum, fill the solution tank,
empty and clean the recovery tank.
14. When finished with the job, remove any
unused solution from the solution tank, and
run a few gallons of clean water through the
system. Drain the recovery tank by opening
the drain hose over a drain or a bucket.
Release any residual pressure from the
cleaning tool before disconnecting the hoses
from the cleaning tool.
AUTO VACUUM SHUT OFF:
When the recovery tank is full, the ball float will
shut off the suction to prevent the machine from
overflowing. NOTE: The float may not work if
there is too much foam in the tank. Always use
defoamer to prevent overflow.
HEAT SYSTEM:
The heater holds a small amount of water, so to
maintain hot water for the entire cleaning job,
spray for short periods and then stop spraying
during a recovery stroke. Continuous spraying
will prevent the water from pausing long enough
in the heater to get hot.
5
TROUBLESHOOTING
ALWAYS UNPLUG THE MACHINE BEFORE
DISCONNECTING OR CONNECTING ANY WIRES OR
COMPONENTS
SYMPTOM POSSIBLE CAUSE
Low pressure Plugged or dirty inlet filter;
Pump is leaking
Pump valve(s) damaged;
Pressure regulator valve is worn and leaking water back into the holding tank
even while spraying from the tool;
No spray Solution tank is empty;
Quick couplings on solution line are not completely connected to machine or tool;
Spray tip(s) plugged;
Pump motor is not running
Plugged/dirty pump inlet filter;
Plugged or damaged solution hose or quick disconnect
Pump not
running
No power to pump -- no power to cord
AC to DC bridge rectifier is damaged;
On/off switch is bad;
Pump motor is getting power but won’t run – check motor brushes;
Low suction Recovery tank lid not sealed;
Dirty vacuum inlet screen;
Vac hose loose or cracked;
Vacuum gasket is damaged or compressed
No suction Recovery tank is full;
Vacuum is not running –bad switch or bad vacuum
Low heat Spraying too long;
No heat No power to heating element –thermal fuse is blown; the bimetallic switch is not
closing or heat on/off switch is bad;
Always use original equipment replacement parts.
Contact your distributor for additional information or to arrange for service.
7
Prospector PE500
Part List
120V
Item
No. Part No. QTY
Description Item
No. Part No. QTY Description
1 41-00536 1 Hose, Drain, With Cap and Chain 24 39-00004 2 Latch
2 41-00017 1 Hook & Loop Strap, Wand Holder 25 41-00001 1 Pressure Gauge for 500 PSI
3 39-00017 2 Wheel, 3” 26 41-09511 1 Plate, Gauge Mount
4 41-09507 1 Ball Float 27 50-00002 1 Pressure Regulator/Unloader
5 41-00004 1 Clear Lid w/Mounting Plate 28 41-00007 1 Quick Disconnect, Male
6 01-10595-004 1 Vacuum Tank, Prospector PE500 29 31-00002 2 Washer, High Temperature
7 41-00050 1 Hose Barb, for 1-½” Hose 30 39-00019 2 Caster
8 01-10597-004 1 Solution Tank, Prospector PE500 31 40-00007 2 Power Cord, 25 ft.
9 41-00011 1 Hose Barb/Elbow, 90° 31A 40-00008 2 Power Cord, Pigtail
10 52-00004 1 Lid, Solution Tank 32 52-00006 2 Wheel, 12”
11 40-00400 2 Switch, Vacuum Selector 33 41-00060 1 Axle
12 05-20002-
FP0200 1 Switch Plate 34 32-00002 2 Axle Cap
13 41-00069 1 Filter, Pump Inlet 35 42-00031 1 Heater, Complete
14 41-00512 1 Hose, ½” ID X 23.5”,Pump Inlet Hose 36 05-30004 1 Repair Kit, Heater
15 50-00003 1 Pump & Motor, 500 PSI, w/bearing 37 40-00800 2 Terminal Block
16 41-00700 1 Hose Clamp 38 41-00521 1 Hose, Heater to Outlet QD
17 41-00524 1 Hose, Pump to Unloader 39 41-00523 1 Hose, Unloader to Heater
18 41-00524 1 Hose, Pump to Pressure Gauge, 17” 40 01-10737-001 1 Base Compartment, Prospector PE500
19 41-00022 1 Quick Disconnect, Female 41 41-00512 1 Hose, ½” X 25”, From Unloader to Tank
20 52-00000 2 Vacuum Motor, 2-stage 42 01-10697-001 2 Manifold, Vacuum
21 41-01303 2 Gasket, Vacuum, 5” OD 43 39-00003 2 Strike Latch
22 41-00538 1 Hose, Gray Wire Reinforced, 2” X 18” 44 39-00003 2 Strike, For Latch
23 50-00153 1 Dual Cord Indicator 40-00401 1 Switch Pump & Heat
8
Prospector PE500 WARANTY
This limited warranty begins on the date of the customers purchase and is valid and
available to the original purchaser only.
10-YEAR LIMITED HOUSING WARRANTY
Manufacture warrants that all rotationally molded housing and tanks will be free from
manufacturing defects, defects in workmanship, and defects in material for Ten (10) years
from the date of original purchase, for the original purchaser only. This warranty does not
apply and is void if there is evidence of improper use, altered, abuse or
neglect. Replacement cost does not include the cost of parts, shipping or labor.
2-YEAR MAJOR COMPONENTS WARRANTY
Manufacturer warrants that, pumps, heaters and vacuum motors, are covered under a
two (2) year limited warranty from the date of original purchase. This warranty does not
apply and is void if the pump, vacuum motor, or heater has worn motor brushes, water
damage, freezing, chemical build-up, chemical damage, or evidence of abuse, neglect or
tampering. This warranty covers the cost of the replacement parts, shipping of the new
part and labor. Manufacturer will ship parts via normal ground delivery prior to the
return of the defective parts at normal charge to the Distributor. Extra charges for
expedited or air shipments will be bill to the Distributor. Manufacturer will credit the
Distributor for the replacement parts, if the defective parts are returned within 30 days
and are determined to be covered under warranty. This warranty does NOT cover the
cost of shipping the damaged parts back to Manufacturer for evaluation. If a
component is replaced, Manufacturer will offer a new 90-day limited warranty on the
new component.
90-DAY WEAR PARTS LIMITED WARRANTY
Manufacturer will replace all wear parts for 90 days from the date of original purchase of
new equipment. Wear parts are items which wear out as a result of usage or the passage
of time and are consumed despite attempts to maintain them, such as gaskets, wheels,
brass, cords, wires, electrical terminals, hoses, switches, thermostats, plastisol parts,
filters, bearings, brushes, solenoids, O-rings, bulbs, castors, or other parts deemed wear
items is manufactures sole discretion. This warranty covers the cost of replacement
parts, Labor and shipping
Proof of purchase required

Other manuals for PE500

2

Other Jon-Don Scrubber manuals

Jon-Don Prospector PE300 Guide

Jon-Don

Jon-Don Prospector PE300 Guide

Jon-Don PE150 User manual

Jon-Don

Jon-Don PE150 User manual

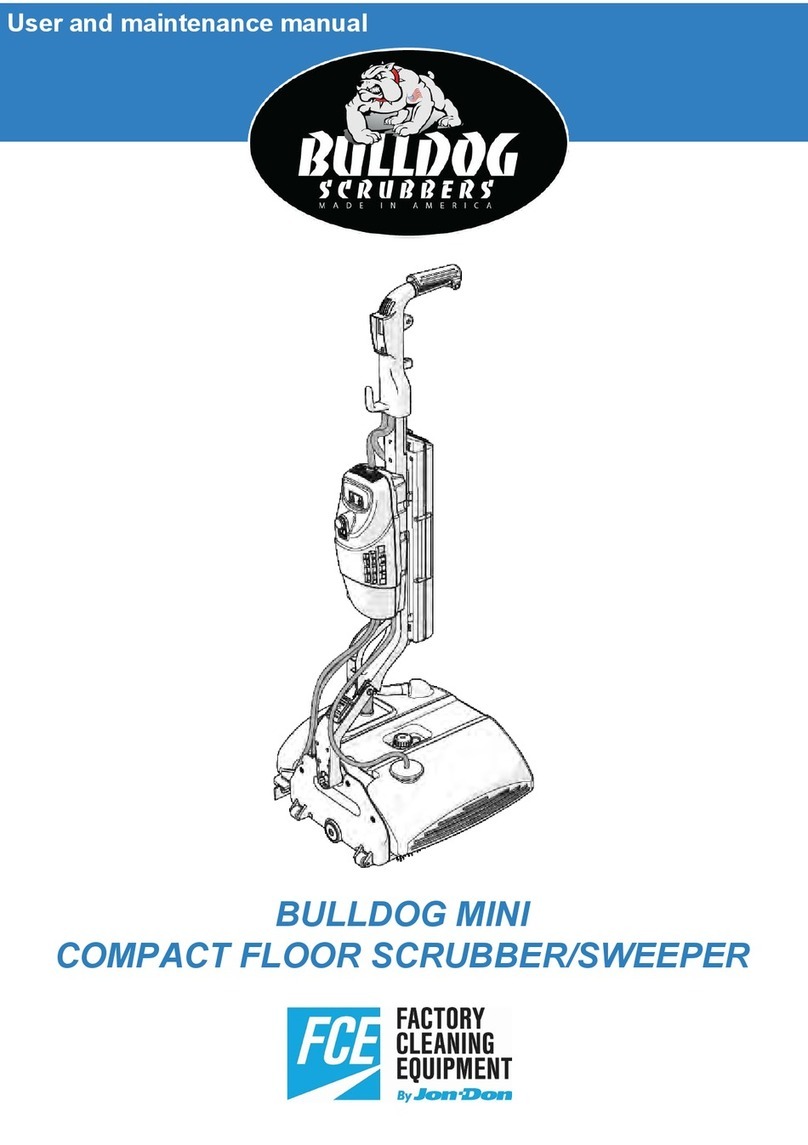
Jon-Don FCE BULLDOG MINI Operating instructions

Jon-Don

Jon-Don FCE BULLDOG MINI Operating instructions

Popular Scrubber manuals by other brands

HAKO Scrubmaster B8 instruction manual

HAKO

HAKO Scrubmaster B8 instruction manual

Numatic TT 6650S Owner's instructions

Numatic

Numatic TT 6650S Owner's instructions

Windsor TRIDENT COMPACT TCZOE operating instructions

Windsor

Windsor TRIDENT COMPACT TCZOE operating instructions

Nilfisk-Advance FLOORTEC R 670 B Instructions for use

Nilfisk-Advance

Nilfisk-Advance FLOORTEC R 670 B Instructions for use

XPower AP-1500 Series owner's manual

XPower

XPower AP-1500 Series owner's manual

Clean Logix BLX-200D user manual

Clean Logix

Clean Logix BLX-200D user manual

Concept2 PO2040 manual

Concept2

Concept2 PO2040 manual

Nilfisk-Advance ECOFLEX BR1100S Service manual

Nilfisk-Advance

Nilfisk-Advance ECOFLEX BR1100S Service manual

Tennant 5700 Instruction bulletin

Tennant

Tennant 5700 Instruction bulletin

CDA ECPK91 Installation, use and maintenance guide

CDA

CDA ECPK91 Installation, use and maintenance guide

Rocks STRONG GUARD 1.2 t OK-08.0141 user manual

Rocks

Rocks STRONG GUARD 1.2 t OK-08.0141 user manual

BETCO Stealth ASD26BT Operator and parts manual

BETCO

BETCO Stealth ASD26BT Operator and parts manual

Tennant T17 Series Service information manual

Tennant

Tennant T17 Series Service information manual

Advance acoustic BA 5321 Instructions for use

Advance acoustic

Advance acoustic BA 5321 Instructions for use

S&P EBB series quick start guide

S&P

S&P EBB series quick start guide

Ryobi P4400 user manual

Ryobi

Ryobi P4400 user manual

Hammerhead 650RS Service manual

Hammerhead

Hammerhead 650RS Service manual

Basic Equipment Floor Dragon Operators Manual & Parts Schematic

Basic Equipment

Basic Equipment Floor Dragon Operators Manual & Parts Schematic

manuals.online logo
manuals.online logoBrands
  • About & Mission
  • Contact us
  • Privacy Policy
  • Terms and Conditions

Copyright 2025 Manuals.Online. All Rights Reserved.