8
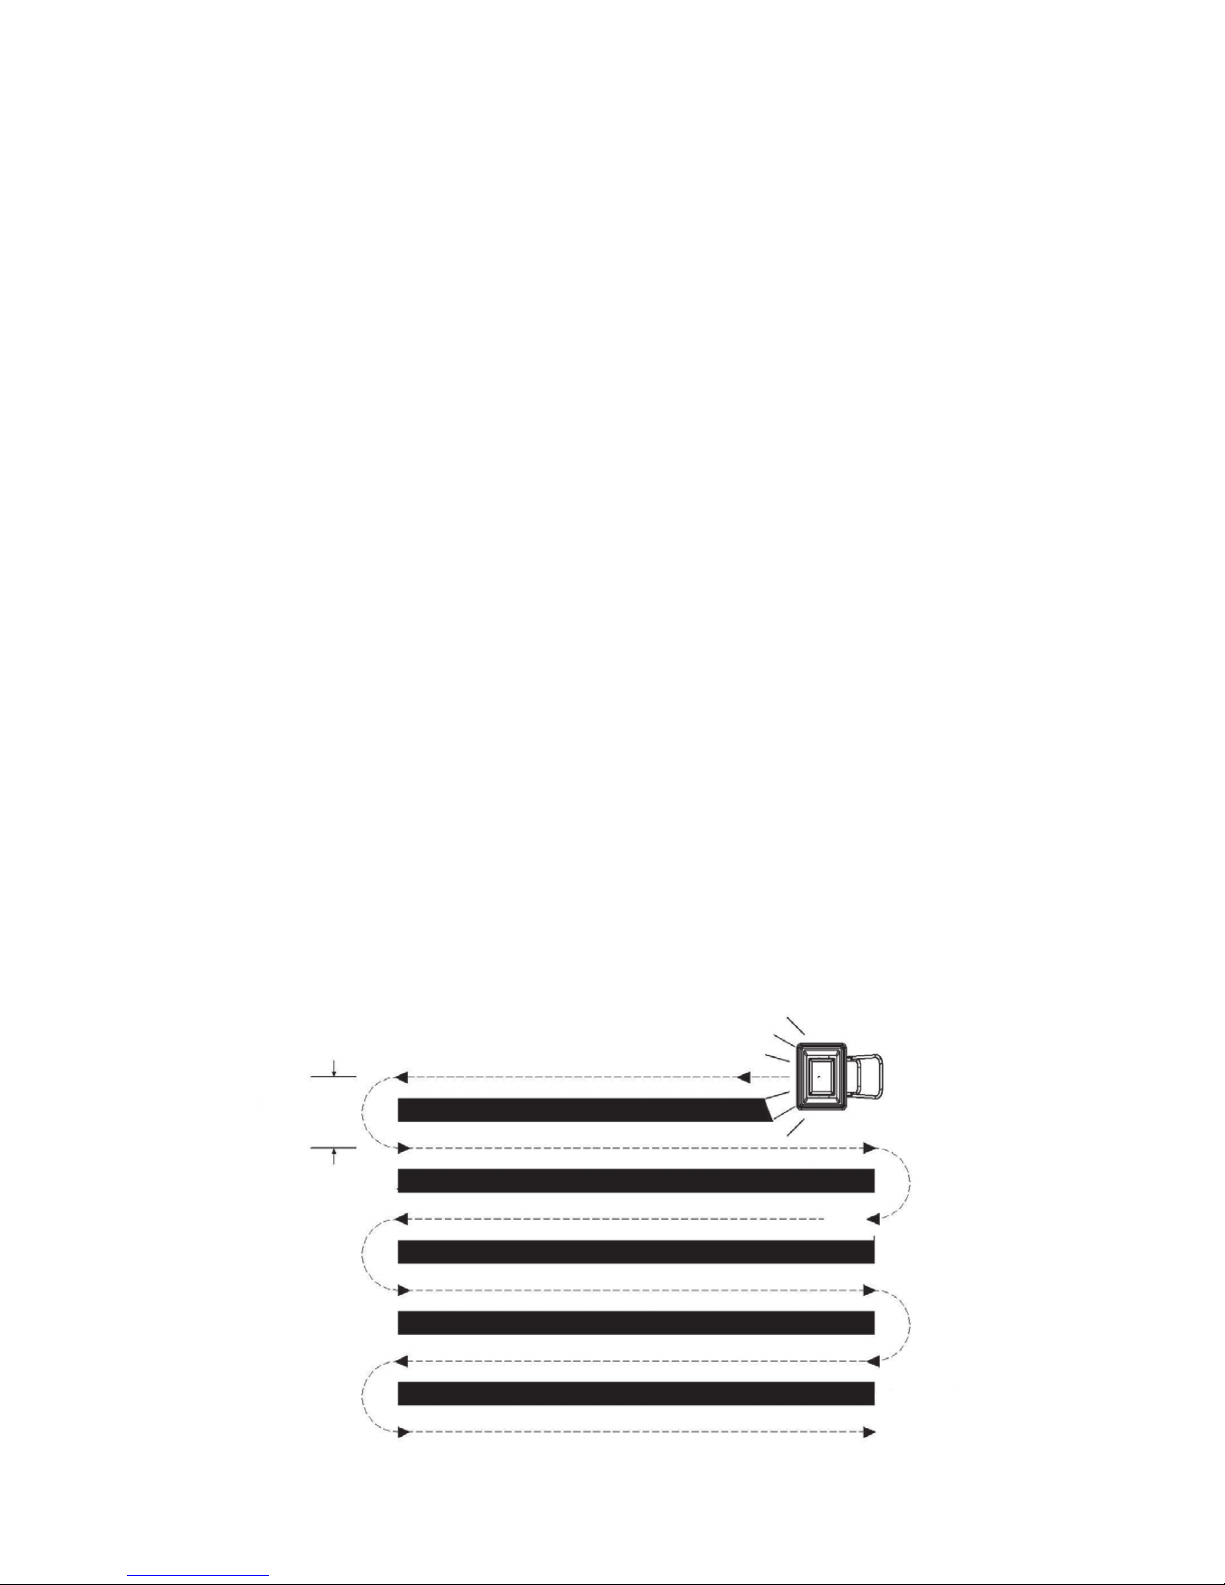
Spreading Instructions
CALCULATING AMOUNT OF MATERIAL NEEDED
To calculate the amount of fertilizer you will need to cover your lawn, divide the coverage amount
listed on the label by the weight of the fertilizer bag. For example a 10 lb. bag of fertilizer with
coverage of 10,000 square feet will distribute 1 lb. of fertilizer every 1,000 square feet at full rate or
1/2 lb. of fertilizer every 1,000 square feet at half rate. For pre-calculated rates see Chart A
(Example: 25 lb. bag with 15,000 sq. ft. coverage = 1.7 lb./1,000 sq. ft.). Use Chart B to find the
closest spreader setting for Fertilizer (Example: 1.7 lb./1000 sq. ft. = Spreader Setting of 5).
Use Chart C to find the closest spreader setting for Grass Seed.
Chart A - Square Foot Coverage per Bag*
Chart B - FERTILIZER Spreader Settings/Spread Widths Chart C - GRASS SEED
Spreader Settings
LBS. per 1,000 SQ. FT.
5 1.0 LB. 0.5 LB. 0.3 LB.
10 2.0 LB. 1.0 LB. 0.7 LB.
15 3.0 LB. 1.5 LB. 1.0 LB.
18 3.6 LB. 1.8 LB. 1.2 LB.
20 4.0 LB. 2.0 LB. 1.3 LB.
25 5.0 LB. 2.5 LB. 1.7 LB.
30 6.0 LB. 3.0 LB. 2.0 LB.
35 7.0 LB. 3.5 LB. 2.3 LB.
40 8.0 LB. 4.0 LB. 2.7 LB.
45 9.0 LB. 4.5 LB. 3.0 LB.
50 10.0 LB. 5.0 LB. 3.3 LB.
1 3 5-6 FT. 6-9 FT. 9-12 FT.
2 5 5-6 FT. 6-9 FT. 9-12 FT.
3 7 5-6 FT. 6-9 FT. 9-12 FT.
4 10 5-6 FT. 6-9 FT. 9-12 FT.
5 12 5-6 FT. 6-9 FT. 9-12 FT.
6 15 5-6 FT. 6-9 FT. 9-12 FT.
7 17 5-6 FT. 6-9 FT. 9-12 FT.
8 20 5-6 FT. 6-9 FT. 9-12 FT.
9 22 5-6 FT. 6-9 FT. 9-12 FT.
10 25 5-6 FT. 6-9 FT. 9-12 FT.
1 12
2 13
3 14
4 15
5 16
6 17
7 18
8 19
9 20
10 21
Weight of Bag 5,000 SQ. FT. 10,000 SQ. FT. 15,000 SQ. FT.
(LBS.) COVERAGE COVERAGE COVERAGE
LBS. SMALL MEDIUM LARGE
PER 1,000 SPREADER PARTICLE PARTICLE PARTICLE
SQ. FT. SETTING SPREAD SPREAD SPREAD
LBS.
PER 1,000 SPREADER
SQ. FT. SETTING
*These are only estimates actual amounts may vary.
THESE ARE APPROXIMATE SETTINGS AND ARE INTENDED AS A GUIDE ONLY.
NOTE: DO NOT SPREAD SALT. Spreading salt in this spreader may damage the mechanism and shorten the life of the machine.