Jump n Carry JNC325 User manual

Operator’s Manual
Model No. JNC325
12V Jump Starter and Power Supply
Failure to follow instructions may
cause damage or explosion,
always shield eyes. Read entire
instruction manual before use.
WARNING
WARNING: This product can expose you to chemicals, including Vinyl-Chloride,
Styrene and Acrylonitrile, which are known to the State of California to cause cancer.
For more information go to www.P65Warnings.ca.gov.

2
We have taken numerous measures in quality control and in our manufacturing
processes to ensure that your product arrives in top condition, and that it will perform
to your satisfaction. In the rare event that your product contains a damaged or missing
item, does not perform as specified, or requires warranty service, please call Technical
Service at (913) 310-1050. Save your purchase receipt, it is required for warranty
service.
This unit has a sealed lithium-based battery that should be kept at full charge.
Recharge when first received, immediately after each use, and every three months
if not used. Failure to perform maintenance charges may cause the battery life to be
reduced.
SAFETY SUMMARY – SAVE THESE INSTRUCTION
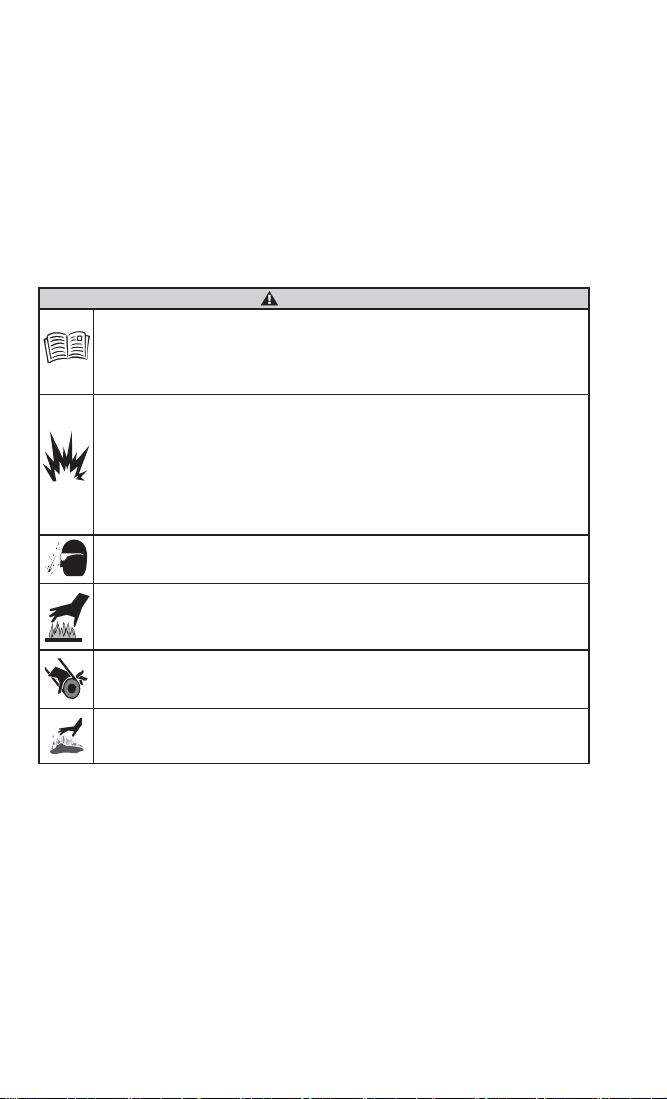
PERSONAL PRECAUTIONS
Someone should always be within range of your voice or close enough to come to your
aid when you work near a lead-acid battery.
Have plenty of fresh water and soap nearby in case battery acid contacts skin, clothing
or eyes. Protective eyewear should always be worn when working near
lead-acid batteries.
If battery acid contacts skin or clothing, wash immediately with soap and water. If acid
enters eye, immediately flood eye with running cold water for at least 10 minutes and
get medical attention immediately.
WARNING
Read these instructions completely before using the Jump Starter and save them for
future reference. Before using the Jump Starter to jump start a car, truck, boat or to power
any equipment, read these instructions and the instruction manual/safety information
provided by the car, truck, boat or equipment manufacturer. Following all manufacturers’
instructions and safety procedures will reduce the risk of accident.
Working around lead-acid batteries may be dangerous. Lead-acid batteries release
explosive gases during normal operation, charging and jump starting. Carefully read and
follow these instructions for safe use. Always follow the specific instructions in this manual
and on the Jump Starter each time you jump start using the Jump Starter.
All lead-acid batteries (car, truck and boat) produce hydrogen gas which may violently
explode in the presence of fire or sparks. Do not smoke, use matches or a cigarette
lighter while near batteries. Do not handle the battery while wearing vinyl clothing
because static electricity sparks are generated when vinyl clothing is rubbed. Review all
cautionary material on the Jump Starter and in the engine compartment.
Always wear eye protection, appropriate protective clothing and other safety equipment
when working near lead-acid batteries. Do not touch eyes while working on or around
lead-acid batteries.
When not using the unit to jump start, remove and properly store output cables. Leaving
clamps connected and improperly storing the unit may cause the clamps to come into
contact with each other or a common conductor, causing the battery to short and
generating high enough heat to ignite most materials.
Use extreme care while working within the engine compartment, because moving parts
may cause severe injury. Read and follow all safety instructions published in the vehicle's
Owner's Manual.
While the battery in the Jump Starter is a sealed unit with no free liquid acid, batteries
being jump started with the Jump Starter unit likely contain liquid acids which are
hazardous if spilled.
Failure to follow instructions may cause
damage or explosion, always shield eyes.

3
Be extra cautious to reduce risk of dropping a metal tool onto a battery. It might spark
or short circuit the battery or another electrical part that may cause explosion.
Remove personal metal items such as rings, bracelets, necklaces and watches when
working with a lead-acid battery. A lead-acid battery can produce a short-circuit current
high enough to weld a ring or the like to metal, causing a severe burn.
Use the Jump Starter for jump starting lead-acid batteries only. Do not use for charging
dry-cell batteries that are commonly used with home appliances. These batteries may
burst and cause injury to persons and damage to property.
NEVER charge or jump start a frozen battery.
To prevent arcing, NEVER allow clamps to touch together or to contact the same piece
of metal.
IMPORTANT SAFETY INSTRUCTIONS
DANGER: Never use an output cable/clamp assembly other than the one that was
included with your unit. The included cable/clamp assembly incorporates numerous
critical safety features. The use of another cable/clamp assembly could result in
personal injury and/or property damage.
Use of an attachment not recommended or sold by the manufacturer may result in a
risk of damage to the unit or injury to personnel.
When using the wall charger or power extension cord, pull on the plug and never on
the wire when disconnecting.
Do not recharge the Jump Starter with a damaged wall charger or power extension
cord. Replace them immediately.
WARNING: To reduce risk of fire or burns, do not disassemble, crush or puncture
internal battery, short external contacts, or dispose of in fire or water.
The Jump Starter may be used under any weather condition – rain, snow, hot or cold
temperatures.
Do not submerge in water.
Do not operate with flammables such as gasoline, etc.
If the Jump Starter receives a sharp blow or is otherwise damaged in any way, have
it checked by a qualified service person. If the Jump Starter is leaking battery acid, do
not ship it. Take it to the closest battery recycler in your area.
Do not disassemble the Jump Starter. Have it checked by a qualified service person.
The Jump Starter should never be left in a completely discharged state for any period
of time. Damage to the battery could be permanent, with poor performance as a result.
When not in use recharge every three (3) months.
Do not use a battery pack or appliance that is damaged or modified. Damaged or
modified batteries may exhibit unpredictable behavior resulting in fire, explosion or risk
of injury.
Under abusive conditions, liquid may be ejected from the battery; avoid contact. If
contact accidentally occurs, flush with water. If liquid contacts eyes, additionally seek
medical help. Liquid ejected from the battery may cause irritation or burns.

4
OPERATION AND MAINTENANCE
Jump Starter Operating and Safety Features
The Jump-N-Carry can serve as a vehicle jump starter when the included cable/clamps
are connected through the jump starting port. Only use the supplied safety cables with your
Jump-N-Carry.
The Jump-N-Carry incorporates a LED flashlight with multiple light patterns for use at
night or in an emergency.
The Jump-N-Carry is an ideal power supply for powering and/or recharging small
electronics connected through its USB power port. It can recharge multiple devices on
a single charge. The Jump-N-Carry can also supply DC power (15V nominal, 14.8V
actual) to power a variety of accessories and devices.
The
Jump-N-Carry
features a Status/Power button and LED lights to display the unit’s
state of charge.
The Jump-N-Carry features a variety of safety features, including reverse polarity
protection, backfeed protection, short circuit protection, over voltage protection and
under voltage protection.
Jump Starting Output
USB Ports
DC Out
Charging Port
(DC in)
Control Panel
Charging Status LEDs
Override Button
Power Button
Boost Status LED

5
UNIT STATUS AND RECHARGING PROCEDURES
Note: Upon initial purchase, your Jump Starter should be charged for a minimum of 6
hours. The Jump Starter should be charged every three months when not in use.
Unit Status Indication
Press the Status/Power Button on the front of the unit to power the battery status LEDs
and see the unit’s state of charge. The unit’s state of charge status is indicated by the
number of status LEDs lit: 1 LED - 25%; 2 LEDs – 50%; 3 LEDS – 75%; 4 LEDs – at
or near 100%.
– If the unit has below 75% state of charge, it should be charged soon.
– If the unit has below 50% state of charge, it should be charged immediately.
It is recommended that the unit be at or near 100% state of charge when using as a
jump starter. This will greatly improve your jump starting success.
Recharging Your Jump Starter
WARNING: Never use a charger other than the one that was included with your unit.
Using an incompatible charger could damage the internal battery, which could result in
property damage or injury.
WARNING: When charging the internal battery, work in a well ventilated area and do
not restrict ventilation in any way.
1. Connect the USB type C jack at the end of the included AC adapter cord to the
jump starter through the input port marked “USB-C IN.”
2. Connect the USB A end of the charging cord to the included AC adapter.
Connect the male end of the AC adapter to the AC outlet.
3. Using this method, the unit will be brought to full charge automatically without
overcharging.
Jump Starter Specifications
Battery Type: Lithium Ion
Battery Capacity: 14.8V/74Wh
Operting Temperature: -10˚F - 140˚F
Charging Temperature: 40˚F - 140˚F
Recharge Input: 5V/2A; 9V/2A (Quick Charge)
USB Output: 5V2.4A, 5V1.0A
Jump Starting Output: 14.8V/74Wh
DC Pin Output: 14.8V/10A
Power Indicator: LED Display
Safety Features: Built-in
Approvals: SGS (Conforms to UL2743)

6
OPERATING INSTRUCTIONS
Used as a USB Power Supply
Your jump starter can be used to power or recharge a wide variety of small electronic
devices.
1. Connect your device’s charging cable to the device.
2. Connect the USB end of the charging cable into the USB port on the jump starter.
3. Press the Status/Power Button on the front of the unit to activate USB charging.
Used as a DC Power Supply
Your unit can be used to power a variety of DC accessories using the included DC
Female Adapter. Please note that the typical output voltage of this port is 15VDC
(nominal, 14.8V actual), which is similar to the voltage seen from a vehicle’s power port
when the vehicle is running.
1. Connect the male plug from your DC powered device to the DC Female Adapter.
2. Connect the pin jack at the end of the DC Female Adapter cord to the output port
marked “15V10A Output”.
Used as a Flashlight
WARNING:
Avoid direct exposure of LED light to eyes. Do not shine into the eyes of
people or animals. Keep away from children.
To turn on the LED Flashlight, press the status / power button and hold for 3 seconds.
Successive pushes of the button will change the light pattern from solid to strobe to SOS
to off.
Used as a 12 Volt Jump Starter
Note: For optimum performance, do not store your Jump Starter below 50°F when using
as a jump starter. Never charge or jump start a frozen battery.
Note: When using as a jump starter, it is recommended that the unit be at or near 100%
state of charge as indicated on the unit’s display.
DANGER: Never use an output cable/clamp assembly other than the one that was
included with your unit. The use of another cable/clamp assembly could result in personal
injury and/or property damage.
1. Use in a well ventilated area.
2. Shield eyes. Always wear protective eyewear when working near batteries.
3. Review this instruction manual and the instruction/safety manual provided by the
manufacturer of the vehicle being jump started.
4. Connect output cables/clamps to the jump starter through the covered jump
starting port. Be sure that the cable connection is fully engaged and secure.

7
5. Turn ignition off before making any vehicle connections.
6. Clamp the positive (red +) clamp to the positive terminal on the vehicle
battery (for negative ground system), or an alternate vehicle starting point as
recommended by vehicle manufacturer.
7. Clamp the negative (black, –) clamp to the a vehicle ground (unpainted portion
of the chassis or non-moving metal engine part). Never connect to the fuel line,
fuel injector or carburetor as the engine ground.
Note: Many vehicles feature alternate starting points, away from the battery.
Always use the alternate starting points whenever available.
Note: Make sure the cables are not in the path of moving engine parts
(belts, fans, etc.).
8. Upon making a vehicle connection, the BOOST STATUS indicator LED will light
solid green, indicating a proper battery connection has been made.
8a. If the BOOST STATUS indicator LED lights solid red and sounds an audible
alarm after the vehicle connection has been made, this indicates a reverse
connection. Disconnect from vehicle immediately and correct the issue.
8b. If the BOOST STATUS indicator LED does not activate after the vehicle
connection has been made, this indicates that the vehicle’s battery is too low to
allow the unit to activate (<1.0V) or a potential shorted connection. Disconnect
from vehicle and determine the cause of the issue before proceeding.
Note: Before moving to the steps outlined below, please note that activating the
override feature removes all safety from the unit – it is critical that you check all
connections and verify that the only issue is a totally dead battery.
If you check that all connections are correct and that the problem is a totally
dead battery, you can override this safety feature by pressing and holding
the override button for over 3 seconds but less than 6 seconds. A successful
override is the BOOST STATUS indicator LED lighting solid green.
9. Start the vehicle (turn on the vehicle ignition).
Note: If the vehicle doesn’t start within 6 seconds, let the unit cool for 3 minutes
before attempting to start the vehicle again or you may damage the unit.
Note: During very cold conditions, the unit may not start on the first attempt. We
suggest attempting to start a second or third time, as the starting attempt will
warm the internal battery and improve your starting chances.
Note: Do not attempt to jump start after four attempts – either the unit does not
have sufficient power to start the vehicle or there is a more extensive problem
with the vehicle than simply a depleted battery.
10. When the vehicle is started, disconnect the negative (–) battery clamp from the
vehicle frame.Then, disconnect the positive (+) clamp.
11. Disconnect the cable/clamp set from the jump starter and properly store them
for the next use.

8
SERVICE, STORAGE AND TRANSPORTATION
If your unit receives a sharp blow or is damaged in another way, have it checked by
a qualified service person. Only identical OE replacement parts should be used in the
repair of the product. This will ensure that the safety of the product is maintained.
When storing the unit, disconnect output leads from unit and return all components to
zipper case for protection. Do not expose the product to fire or excessive temperatures
above 130˚C/265˚F, which may cause explosion or other harm.
Care should be taken in the transport of your jump starter to follow safe practices.
Always transport the unit in its storage case with output leads disconnected. Care
should be taken to avoid crushing or puncturing the unit or exposing it to fire or
temperatures above 130˚C/265˚F.
TROUBLESHOOTING
Problem: I charged the unit when the % charged display indicated that the unit’s
charge was low, but after several hours, there is no change in status.
Answer: Suspect a faulty charger.
Problem: While charging, the % charged display indicates full charge has been
reached. But, when the unit is remove from the charger and Status Button
pressed, the unit appears to not be charged.
Answer: Suspect a battery problem.
QUESTIONS & ANSWERS
Question: How many jump starts can a fully charged unit provide before needing to
be recharged?
Answer: 1 to 20. Factors impacting this answer are temperature, the general
condition of the vehicle being jump started, the engine type and size of
vehicles being jump started and more.
Question: Can the battery in the unit be replaced?
Answer: No, the battery connections inside the unit make it impossible to replace
the battery.
Question: What is the ideal in-use temperature for the jump starter?
Answer: Room temperature. It will also operate at low and high temperatures,
however its capacity could be reduced. For instance, high heat will
increase self-discharge of the unit’s battery.
Question: I have a regular 10 amp battery charger, can I use it to recharge the unit?
Answer: No, only the supplied AC adapter should be used.
Question: After jump starting, can I leave the unit hooked to the battery to recharge
the jump starter while the engine is running?
Answer: No. Attempting to recharge the jump starter by this method is not possible.

9
Safety circuitry inside the jump starter and its cables will prevent charging
current from coming back into the unit
Question: Is the jump starter goof proof?
Answer: No, jump starting instructions must be followed. Read and understand all
safety and operating instructions in this manual and those found in the
owner’s manual of any vehicle being jump started before using your jump
starter.
Question: How long should I charge the unit?
Answer: It should be charged for a minimum of 6 hours when new. When
recharging, the unit should be charged until full charge is indicated.
Question: How often should I charge the unit?
Answer: It should be charged whenever the battery status display indicates the
unit is low. Otherwise, it should be charged every 90 days.
DISPOSAL INSTRUCTIONS
Contains Lithium-based battery.
Must be recycled/disposed of properly.
The battery inside your jump starter is a lithium-based battery and
should be recycled or disposed of properly, as you would any electronic
device containing an advanced technology battery. It is your
responsibility to recycle or dispose of your jump starter in accordance
with your specific local, regional and national requirements.

10
WARRANTY
Clore Automotive warrants this product to be free from defects in material or
workmanship for a period of one year from the date of original end user purchase.
This warranty extends to each person who acquires lawful ownership within one year
of the original retail purchase, but is void if the product has been abused, altered,
misused or improperly packaged and damaged when returned for repair.
This warranty applies to the product only and does not apply to any accessory items
included with the product which are subject to wear from usage; the replacement or
repair of these items shall be at the expense of the owner.
THE TERMS OF THE CLORE AUTOMOTIVE LIMITED WARRANTY CONSTITUTE
THE BUYER’S SOLE AND EXCLUSIVE REMEDY. THE IMPLIED WARRANTIES OF
MERCHANTABILITY AND FITNESS FOR A PARTICULAR PURPOSE ARE LIMITED
IN DURATION TO THIS EXPRESS WARRANTY. AFTER 1 YEAR FROM DATE OF
PURCHASE, ALL RISK OF LOSS FOR WHATEVER REASON SHALL BE PUT UPON
THE PURCHASER.
CLORE AUTOMOTIVE SHALL NOT BE LIABLE FOR INCIDENTAL AND
CONSEQUENTIAL DAMAGES UNDER ANY CIRCUMSTANCES: CLORE
AUTOMOTIVE’S LIABILITY, IF ANY, SHALL NEVER EXCEED THE PURCHASE
PRICE OF THIS MACHINE REGARDLESS OF WHETHER LIABILITY IS
PREDICATED UPON BREACH OF WARRANTY (EXPRESS OR IMPLIED),
NEGLIGENCE, STRICT TORT OR ANY OTHER THEORY.
Some states do not permit the limitation of warranties or limitation of consequential or
incidental damages, so the above disclaimer and limitation may not apply to you. This
warranty gives you specific legal rights, and you may also have other rights which vary
from state to state.

11
FOR WARRANTY OR SERVICE:
If this product fails within the first 30 days after retail purchase due to a defect
in material or workmanship, return it to your place of purchase for an exchange.
From day 31 to day 365 after retail purchase, your product should be sent to Clore
Automotive at the address below for service. A valid, dated sales receipt is required
to obtain service under this warranty.
Jump Starter Repair
8600 NE Underground Drive, Pillar 248
Kansas City, MO 64161
800.328.2921
913.310.1050
For best service and to receive periodic product updates, follow the instructions below
to register your purchase:
please visit: www.cloreregistration.com
Click on the Jump-N-Carry logo. Complete the information in the web form and click
“submit.” It’s that easy!
For answers to questions concerning use, out-of-warranty service, or warranty/service
information on this or other Clore Automotive products, contact us at 800.328.2921
(913.310.1050).

12
Hemos tomado numerosas medidas en los procesos de fabricación y control de
calidad para asegurarnos de que el producto llegue a sus manos en condiciones
óptimas y que funcione a su entera satisfacción. En el caso eventual de que su
Jump Starter contenga un componente dañado, carezca de algún elemento, no
funcione según lo especificado o requiera una reparación con cobertura de garantía,
comuníquese con el Servicio técnico al (913) 310-1050. Guarde la factura de compra,
ya que se precisa para la reparación con cobertura de garantía.
Esta unidad contiene una batería a base de litio que debe permanecer cargada a su
máxima capacidad. Recárguela al adquirir la unidad, después de cada uso y una vez
cada tres meses cuando no lo use. Si no se realizan las cargas de mantenimiento, la
vida útil de la batería puede reducirse, enormemente.
RESUMEN DE SEGURIDAD
ADVERTENCIA
Lea todas estas instrucciones antes de usar la unidad Jump-N-Carry y guárdelas para
referencia futura. Antes de usar la unidad Jump-N-Carry para arrancar el motor de un auto,
camioneta o bote, o para alimentar cualquier equipo, lea estas instrucciones, el manual de
instrucciones y la información de seguridad que proporciona el fabricante del auto, remolque,
bote o equipo. Al seguir todas las instrucciones y procedimientos de seguridad del fabricante,
se reducirá el riesgo de accidentes.
Trabajar cerca de baterías de plomo-ácido puede ser peligroso. Las baterías de plomo-ácido
emanan gases explosivos durante la operación, la carga y el arranque de emergencia
normales. Lea con cuidado y siga estas instrucciones para un uso sin peligros. Siga siempre
las instrucciones específicas de este manual y las que se hallan en la unidad Jump-N-Carry
cada vez que vaya a arrancar un motor con su Jump-N-Carry.
Todas las baterías de plomo-ácido (autos, remolques y botes) producen gas de hidrógeno, que
puede explotar con violencia si hay chispas o fuego. No fume ni use fósforos o encendedores
mientras esté cerca de las baterías. No manipule la batería si está usando ropa de vinilo
porque, con la fricción, el vinilo produce chispas de corriente estática. Revise toda la
información de seguridad de la unidad Jump-N-Carry del compartimiento del motor.
Utilice siempre protección para los ojos, vestimenta adecuada y otros equipos de seguridad al
trabajar cerca de baterías de plomo-ácido. No se toque los ojos mientras trabaje con o cerca
de baterías de plomo-ácido.
Cuando no utilice la unidad de arranque auxiliar, quite y guarde los cables de salida
correctamente. Si se dejan conectadas las pinzas o se almacena la unidad de forma incorrecta
puede ocurrir que las pinzas entren en contacto unas con otras o con un conductor común y
ocasionar así un cortocircuito en la batería y calor suficientemente elevado como para
encender la mayoría de los materiales.
Tenga sumo cuidado al trabajar en el compartimiento del motor, ya que las partes móviles
puedes provocar lesiones graves. Lea y siga todas las instrucciones de seguridad que
contenga el manual del vehículo.
Si bien la batería de la unidad Jump-N-Carry está sellada y sin ácido líquido suelto, es
probable que las baterías que se van a arranque con la unidad Jump-N-Carry contengan
ácidos líquidos que son peligrosos si se derraman.
Manual del Usario

13
PRECAUCIONES PERSONALES
Cuando trabaje cerca de una batería de plomo-ácido, asegúrese de tener siempre
alguien al alcance de su voz o lo bastante cerca para acudir en su ayuda si fuese
necesario.
Debe tener a mano abundante agua limpia y jabón por si el ácido de la batería entra
en contacto con la piel, la ropa o los ojos. Al trabajar cerca de baterías de plomo-ácido
siempre hay que utilizar gafas de protección.
Si el ácido de la batería entra en contacto con la piel o la ropa, debe lavar la parte
afectada inmediatamente con agua y jabón. Si entra ácido en un ojo debe lavarlo
inmediatamente con abundante agua fría corriente durante al menos 10 minutos y
luego buscar atención médica de forma inmediata.
Tenga todo el cuidado posible para reducir el riesgo de que alguna herramienta
metálica caiga encima de una batería. Podría provocar chispas o un cortocircuito en la
batería u otra parte eléctrica susceptible de explosión.
Cuando trabaje con una batería de plomo-ácido debe quitarse los objetos personales
de metal como anillos, pulseras, collares y relojes. Una batería de plomo-ácido puede
provocar una corriente de cortocircuito lo suficientemente elevada como para soldar un
anillo u objeto similar al metal, causando una quemadura grave.
Use el Arrancador Auxiliar solo para asistir el arranque de baterías de plomo-ácido. No
lo utilice para cargar baterías secas o pilas como las que se usan habitualmente en los
electrodomésticos. Esas pilas pueden explotar y causar lesiones a personas y daños
materiales.
NUNCA cargue ni arranque una batería congelada.
Para evitar la formación de arcos eléctricos, NUNCA permita que las pinzas se toquen
o toquen la misma pieza de metal.
INSTRUCCIONES DE SEGURIDAD IMPORTANTES
PELIGRO: Nunca utilice un conjunto de cable/pinza de salida que no sea el incluido
con su unidad. El conjunto de cable/pinza incluido incorpora numerosas características
de seguridad esenciales. El uso de otro conjunto de cable/pinza podría causar lesiones
personales y/o daños materiales.
El uso de una fijación no recomendada o no vendida por el fabricante puede provocar
riesgos de daños a la unidad o lesiones personales.
Cuando utilice el cargador de pared o un cable alargador, tire siempre del enchufe,
nunca del cable, para desenchufarlo.
No recargue el Arrancador Auxiliar con un cargador de pared o un cable alargador
dañados. Reemplácelos inmediatamente.
ADVERTENCIA: Para reducir el riesgo de fuego o quemaduras, no desmonte,
aplaste ni perfore la batería interna o los contactos externos; tampoco debe tirarlos al
fuego ni al agua.

14
El Arrancador Auxiliar puede usarse en cualquier condición climática: lluvia, nieve,
temperaturas frías o calientes.
No sumergir en el agua.
No utilizar con productos inflamables como gasolina, etc.
Si el Arrancador Auxiliar recibe un golpe fuerte o se daña de cualquier otro modo,
llévelo a un profesional cualificado para que lo inspeccione. Si el Arrancador Auxiliar
tuviera una fuga de ácido de la batería, no lo envíe. Llévelo al punto de reciclaje de
baterías de su zona.
No desmonte el Arrancador Auxiliar. Llévelo a un profesional cualificado para que lo
inspeccione.
Nunca debe dejar que el Arrancador Auxiliar quede totalmente descargado. Los daños
a la batería podrían ser permanentes, empeorando su desempeño. Cuando no lo
utilice, debe recargar la batería cada tres (3) meses.
No utilice una batería ni un aparato dañados o modificados. Las baterías dañadas o
modificadas pueden comportarse de manera impredecible y provocar un incendio, una
explosión o riesgo de lesiones.
En condiciones abusivas, puede salir líquido de la batería; evite el contacto con
el mismo. En caso de entrar en contacto con el líquido, lave la parte afectada con
abundante agua. Si el líquido entra en contacto con los ojos, después de lavarlos con
agua busque atención médica. El líquido que sale de la batería puede causar irritación
o quemaduras.
OPERACIÓN Y MANTENIMIENTO
Características de Seguridad y Funcionamiento del Arrancador Auxiliar
El Jump-N-Carry puede servir como arrancador auxiliar de vehículo utilizando el conjunto
de cable y pinzas conectado a través del puerto de arranque auxiliar. Utilice solo los cables
de seguridad que se incluyen con el Jump-N-Carry.
El Jump-N-Carry lleva incorporada una luz LED que parpadea con varios patrones de luz,
para usar por la noche o en caso de emergencia.
El Jump-N-Carry es un suministro de electricidad ideal para alimentar y/o recargar
pequeños aparatos electrónicos que se conectan mediante el puerto de alimentación USB.
Puede recargar varios dispositivos a la vez. El Jump-N-Carry también puede suministrar
electricidad CC (12V nominal, 15V reales) para alimentar varios accesorios y dispositivos.
El Jump-N-Carry dispone de un botón de Estado/Encendido y luces de LED para indicar el
estado de carga de la unidad.
El Jump-N-Carry presenta varias características de seguridad, que incluyen protección
contra polaridad inversa, protección contra retroalimentación, protección contra
cortocircuitos, protección contra sobretensión y contra muy baja tensió

15
Especificaciones del Arrancador Auxiliar
Tipo de batería: Iones de litio
Capacidad batería: 14,8V/74Wh
Temperatura de funcionamiento: -23˚C - 60˚C (-10˚F - 140˚F)
Temperatura de recarga: 4,44˚C - 60˚C (40˚F - 140˚F)
Entrada de recarga: 5V2A; 9V2A
Salida USB: 5V2.4A; 5V1A
Salida Arranque Auxiliar: 14,8V/74Wh
Salida clavija CC: 14,8V/10A
Indicador de encendido: Pantalla LED
Características de seguridad: Incorporadas
Aprobaciones: SGS (cumplimiento del UL2743)
Salida de inicio de salto
Puertos USB
DC Salida
Puerto de Carga
(DC in)
Panel de control
LED de estado de carga
Botón de anulación
Botón de encendido
LED de estado de refuerzo

16
ESTADO DE LA UNIDAD Y PROCEDIMIENTOS DE RECARGA
Nota: Antes del primer uso debe cargar este Arrancador Auxiliar durante al menos 6
horas. Cuando no lo utilice, debe cargar el Arrancador Auxiliar cada tres meses.
Indicación del Estado de la Unidad
Pulse el botón de Estado/Encendido que hay en la parte delantera de la unidad para
encender las luces LED de estado de la batería y ver cuál es el nivel de carga de la
unidad, que viene indicado por el número de luces de LED encendidas: 1 LED - 25%; 2
LED – 50%; 3 LED – 75%; 4 LED – 100% o casi.
– Si el estado de carga de la unidad es inferior al 75%, eso significa que pronto habrá
que recargarla.
– Si el estado de carga de la unidad es inferior al 50%, eso significa que hay que
recargarla inmediatamente.
Se recomienda que la unidad esté al 100% o casi cuando la utilice como arrancador
auxiliar. Esto mejorará mucho la posibilidad de éxito del arranque.
Cómo recargar este Arrancador Auxiliar
ADVERTENCIA: Never use a charger other than the one that was included with your
unit. Using an incomNunca utilice un cargador que no sea el incluido con la unidad.
El uso de un cargador incompatible puede dañar la batería interna y provocar daños
materiales o lesiones.
ADVERTENCIA: Cuando cargue la batería interna, trabaje en una zona con buena
ventilación y no limite dicha ventilación de ningún modo.
1. Conecte el conector USB tipo C al final del cable del adaptador de CA incluido al
arrancador a través del puerto de entrada marcado “USB-C IN”.
2. Conecte el extremo USB A del cable de carga al adaptador de CA incluido
Conecte el extremo macho del adaptador de CA a la toma de CA.
3. Usando este método, la unidad se cargará automáticamente sin sobrecargarse.
INSTRUCCIONES DE FUNCIONAMIENTO
Uso como suministro eléctrico USB
1. Conecte el cable de recarga de su dispositivo al aparato.
2. Conecte el extremo USB del cable de recarga al puerto USB que hay en el
arrancador auxiliar.
3. Pulse el botón de Estado/Encendido que hay en la parte delantera de la unidad
para activar la recarga por USB.

17
Uso como suministro eléctrico de CC
Esta unidad se puede utilizar para alimentar varios accesorios que van con CC,
mediante el adaptador hembra de CC incluido. Recuerde que la tensión habitual de
salida de este puerto es de 15VCC (nominal, 14,8V reales), es decir, parecido al
voltaje que tiene un puerto de alimentación de un vehículo en marcha.
1. Conecte el enchufe macho de su dispositivo alimentado con CC al adaptador
hembra de CC.
2. Conecte la clavija que hay en el extremo del cable adaptador hembra CC al
puerto de salida que está marcado así: “15V10A Output”.
Uso como linterna
ADVERTENCIA:
Evite la exposición directa de los ojos a la luz LED. No dirija la luz
directamente a los ojos de personas ni animales. Mantenga el producto alejado de los
niños.
Para encender la linterna LED, presione el botón de estado / encendido y manténgalo
presionado durante 3 segundos. Al pulsar sucesivamente el botón, el patrón de luz
cambiará de sólida a estroboscópica, a SOS y a “apagada”.
Uso como Arrancador Auxiliar de 12 voltios
Nota: Para obtener el mejor desempeño cuando lo utilice como arrancador auxiliar,
no lo guarde en un lugar a menos de 10°C (50°F). Nunca recargue ni arranque una
batería que esté congelada.
Nota: Cuando utilice el aparato como arrancador auxiliar recomendamos que el estado
de carga de la unidad sea del 100% o casi, según las indicaciones en pantalla.
PELIGRO: No use nunca un conjunto de cable/pinza de salida que no sea el
incluido con su unidad. El uso de otro conjunto de cable/pinza puede provocar lesiones
personales y/o daños materiales.
1. Utilice el aparato en una zona bien ventilada.
2. Protéjase los ojos. Siempre utilice gafas protectoras cuando trabaje cerca de
baterías.
3. Consulte este manual de instrucciones y el manual de instrucciones/seguridad
proporcionado por el fabricante del vehículo que vaya a arrancar con este
dispositivo.
4. Conecte los cables/pinzas de salida al arrancador auxiliar mediante el puerto de
arranque tapado. Asegúrese de que la conexión del cable sea correcta y firme.
5. Apague el motor antes de realizar cualquier conexión en el vehículo.
6. Conecte la pinza positiva (roja +) al terminal positivo de la batería del vehículo
(para un sistema de puesta a tierra negativo), o a otro punto de arranque del
vehículo, según las recomendaciones del fabricante del mismo.
7. Conecte la pinza negativa (negra, –) a la puesta a tierra de un vehículo (parte

18
no pintada del chasis o parte fija de metal del motor). Nunca la conecte a la
línea de combustible, al inyector de combustible ni al carburador como puestas
a tierra del motor.
Nota: Muchos vehículos tienen otros puntos de arranque alejados de la
batería. Cuando estén disponibles, utilice siempre estos puntos de arranque
alternativos.
Nota: Asegúrese de que los cables no estén en el camino de las partes móviles
del motor (correas, ventiladores, etc.).
8. Una vez realizada la conexión del vehículo, la luz LED BOOST STATUS luego
quedará fija en verde sólido, lo que indica que se ha realizado una conexión
correcta de la batería.
8a. Si la luz LED BOOST STATUS en rojo sólido y suena una alarma audible
después de realizar la conexión, eso indica que se ha realizado una conexión
inversa. Debe desconectar el vehículo de inmediato y corregir el error.
8b. Si la luz LED BOOST STATUS no se activa después de que se haya realizado
la conexión, eso indica que la batería del vehículo está demasiado baja para
permitir que la unidad se active (<1,0V) o una posible conexión en cortocircuito.
Desconecte el vehículo y determine cuál es la causa del problema antes de
actuar.
Nota: Antes de proceder con los pasos que detallamos a continuación,
recuerde que al activar la función de “anular” se elimina toda la seguridad
de la unidad. Es fundamental que inspeccione todas las conexiones y que
compruebe que el único problema que hay es una batería totalmente muerta
Cuando haya comprobado que todas las conexiones son correctas y que
el problema es una batería totalmente muerta, puede anular la función de
seguridad pulsando y manteniendo pulsado el botón de anular durante más de
3 segundos y menos de 6 segundos. Si la anulación se realiza correctamente,
la luz LED BOOST STATUS para el arranque se ilumina fija en verde sólido.
9. Arranque del vehículo (encender el motor del vehículo).
Nota: Si el vehículo no arranca en 6 segundos, deje que la unidad se enfríe
durante 3 minutos antes de volver a intentar arrancar el vehículo. De lo
contrario puede dañar la unidad
Nota: En condiciones de mucho frío, es posible que la unidad no arranque al
primer intento. Recomendamos que lo intente una segunda y una tercera vez,
ya que la tentativa de arranque calentará la batería interna, aumentando la
probabilidad de conseguir realizar el arranque.
Nota: No lo siga intentando al cabo de cuatro intentos ya que, en ese caso,
o la unidad no tiene energía suficiente para el arranque del vehículo o bien el
vehículo tiene un problema más grave que simplemente una batería agotada.
10. Cuando el vehículo arranque, desconecte la pinza negativa (–) de la batería,
del bastidor del vehículo. A continuación, desconecte la pinza positiva (+).
11. Desconecte el conjunto de cable/pinza del arrancador auxiliar y guárdelos
adecuadamente hasta el próximo uso.

19
SERVICIO TÉCNICO, ALMACENAMIENTO Y TRANSPORTE
Si esta unidad recibe un golpe fuerte o se daña de otro modo, llévela a un profesional
técnico cualificado para que la inspeccione. Utilice únicamente piezas de recambio
EO idénticas para la reparación del producto. Eso garantizará que se conserve la
seguridad del producto.
Cuando guarde la unidad, desconecte los cables de salida de la misma y vuelva a
colocar todos los componentes en el estuche cerrado para su protección. No exponga
el producto al fuego ni a temperaturas excesivas por encima de los 130˚C/265˚F, ya
que podría provocar una explosión u otros daños.
Al transportar este arrancador auxiliar hay que tener cuidado de seguir unas prácticas
seguras. Transporte siempre la unidad en su estuche y con los cables de salida
desconectados. Hay que vigilar para evitar el aplastamiento o perforación de la unidad,
así como evitar exponerla al fuego o a temperaturas por encima de los 130˚C/265˚F.
RESOLUCIÓN DE PROBLEMAS
Problema: Cargué la unidad cuando el % que aparecía en pantalla indicó que el
nivel de carga de la unidad era bajo, pero al cabo de varias horas el
estado de carga seguía sin mostrar ningún cambio.
Respuesta: Puede ser que el cargador esté averiado.
Problema: Durante la recarga, el % en pantalla muestra que se ha cargado
totalmente. Sin embargo, al retirar la unidad del cargador y pulsar el
botón de Estado, la unidad aparece como no cargada.
Respuesta: Puede ser un problema de la batería.
PREGUNTAS Y RESPUESTAS
Pregunta: ¿Cuántos arranques se pueden realizar con una unidad totalmente
cargada antes de que sea necesario recargarla?
Respuesta: De 1 a 20. La respuesta concreta dependerá de factores como la
temperatura, el estado general del vehículo que va a arrancar, el tipo de
motor, el tamaño de los vehículos a arrancar, y otros.
Pregunta: ¿Se puede cambiar la batería de la unidad?
Respuesta: No, las conexiones de la batería que hay en el interior de la unidad hacen
imposible su sustitución.
Pregunta: ¿Cuál es la temperatura ideal para usar el arrancador auxiliar en
interiores?
Respuesta: Temperatura ambiente. También funcionará a temperaturas altas y bajas,
pero su capacidad puede verse reducida. Por ejemplo, un calor fuerte
acelera la descarga de la batería de la unidad.
Pregunta: Tengo un cargador de batería común de 10 amperios, ¿puedo utilizarlo
para recargar la unidad?

20
Respuesta: No, solo debe utilizarse el adaptador de CA incluido.
Pregunta: Después del arranque, ¿puedo dejar la unidad enganchada a la
batería para recargar el arrancador auxiliar mientras el motor está en
funcionamiento?
Respuesta: No. No se puede recargar el arrancador auxiliar de esta forma. El circuito
interno de seguridad del arrancador y sus cables impedirán que entre
corriente de vuelta a la unidad.
Pregunta: ¿Este arrancador es a prueba de torpes?
Respuesta: No, hay que seguir las instrucciones de arranque. Lea y comprenda bien
todas las instrucciones de seguridad y funcionamiento de este manual,
así como las instrucciones del manual del vehículo que vaya a arrancar,
antes de utilizar el arrancador auxiliar.
Pregunta: ¿Durante cuánto tiempo tengo que cargar la unidad?
Respuesta: Hay que cargarla durante un mínimo de 6 horas antes del primer uso.
Para las recargas posteriores, hay que cargarla hasta que el indicador
señale que se ha recargado completamente.
Pregunta: ¿Con cuanta frecuencia tengo que recargar la unidad?
Respuesta: Hay que cargarla siempre que el estado de batería en pantalla indique
que el nivel es bajo. Para periodos largos sin uso hay que recargarla
cada 90 días.
INSTRUCCIONES PARA DESECHAR EL PRODUCTO
Contiene una batería a base de litio.
Debe desecharse/reciclarse de forma adecuada.
La batería que hay en el interior de este arrancador auxiliar es una
batería a base de litio y hay que reciclarla o desecharla de la forma
adecuada, como cualquier otro dispositivo electrónico que contenga una
batería de tecnología avanzada. Usted acepta la responsabilidad de
reciclar o desechar este arrancador auxiliar de acuerdo con los
requisitos de las leyes nacionales, regionales y locales.
Table of contents
Languages: