Just Kampers Retro J13642 User manual

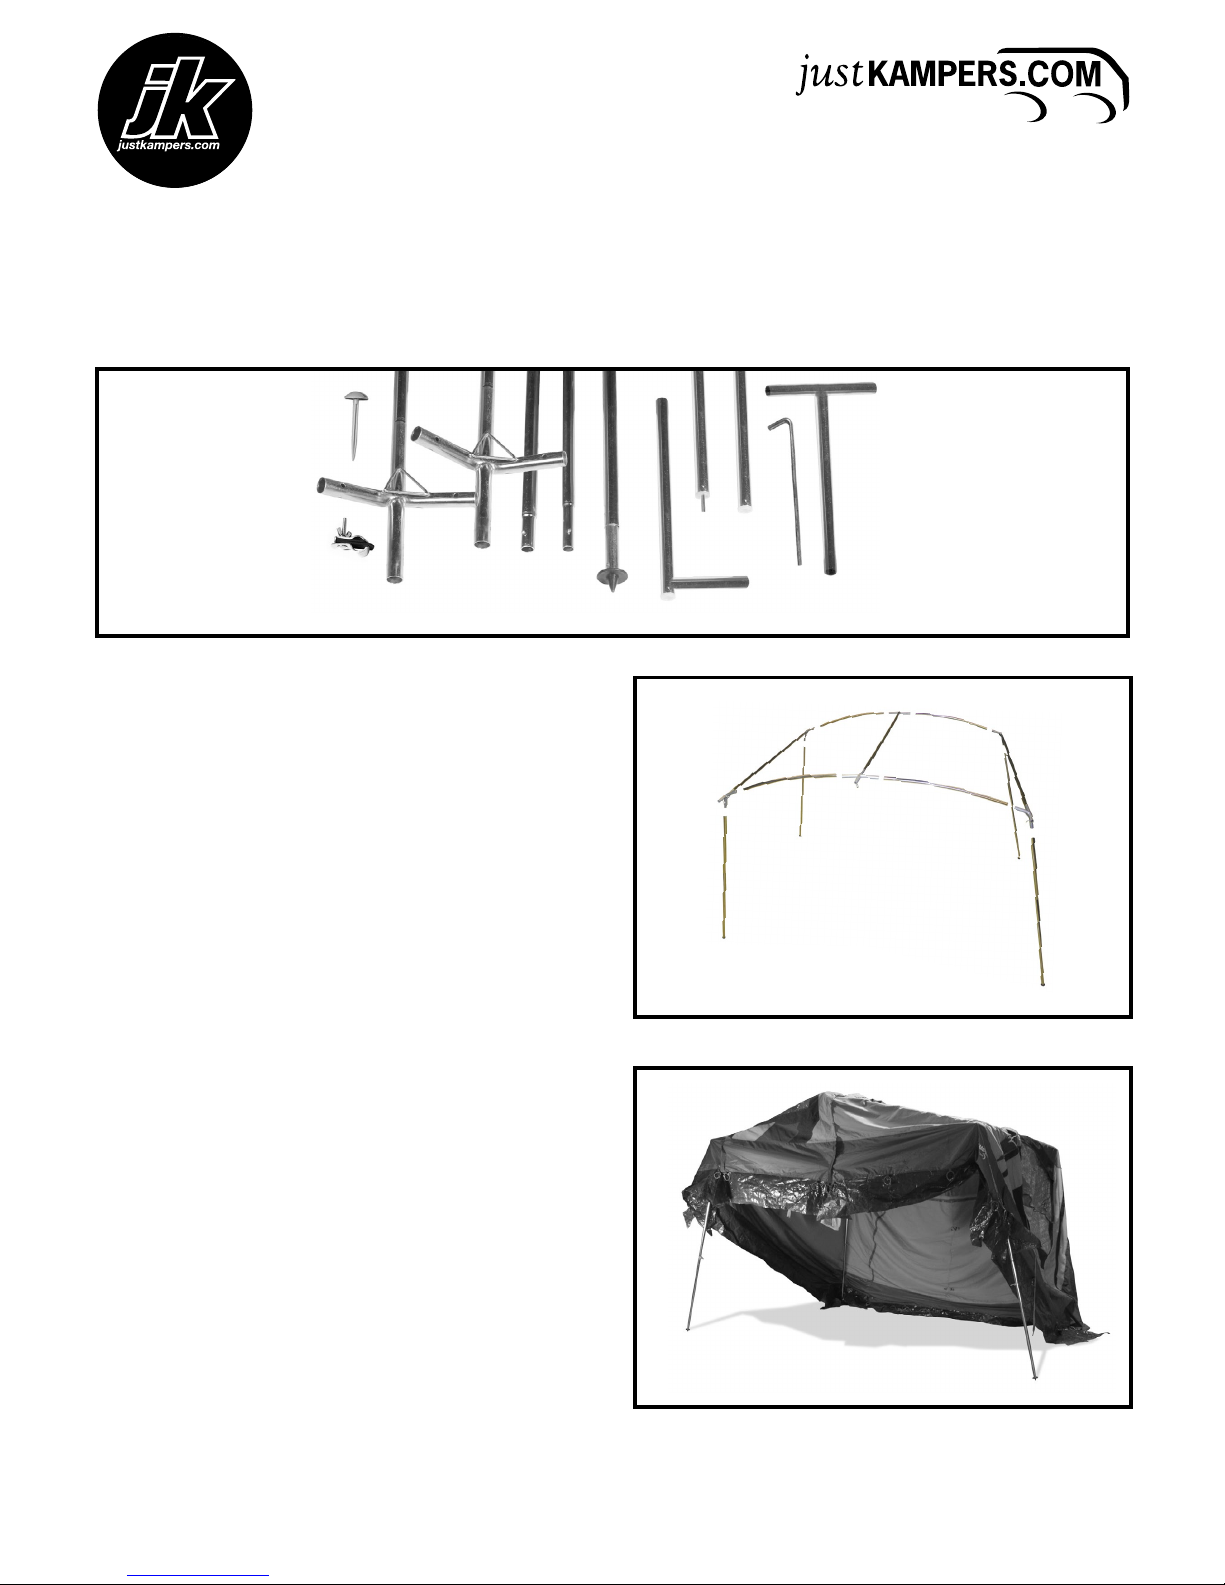
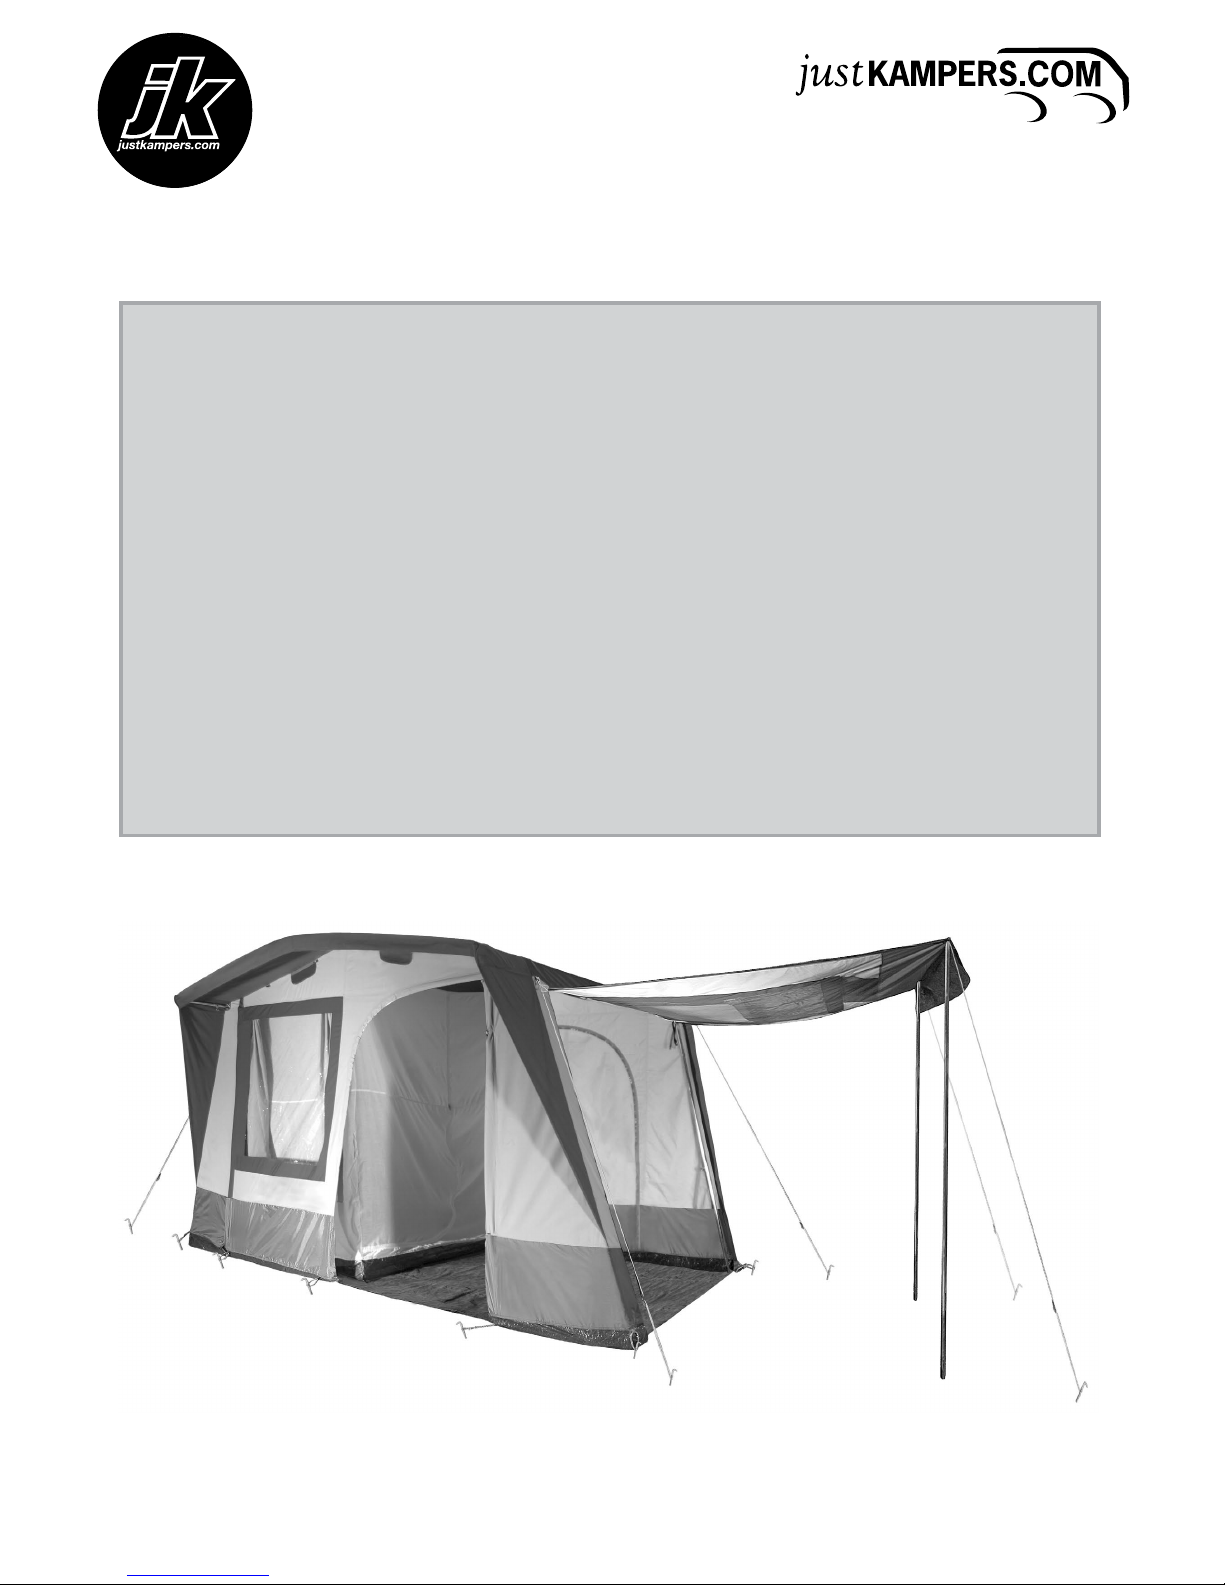
JK ‘retro’ driveaway frame awning
Before you start
Thank you for purchasing our JK Retro frame awning.
Please read these instructions to ensure a fault free time
with your new awning.
• A trial set-up is essential before your intended
journey, to check that all parts are included and
that you are aware of the set-up procedure.
• Your awning should be set up on an even, clean
surface, ideally with the front door facing downhill.
• Try to avoid opening onto hedges, large rocks or
settingupdirectlyundertreesduetolightningdanger,
continued dripping after rain and falling tree debris.
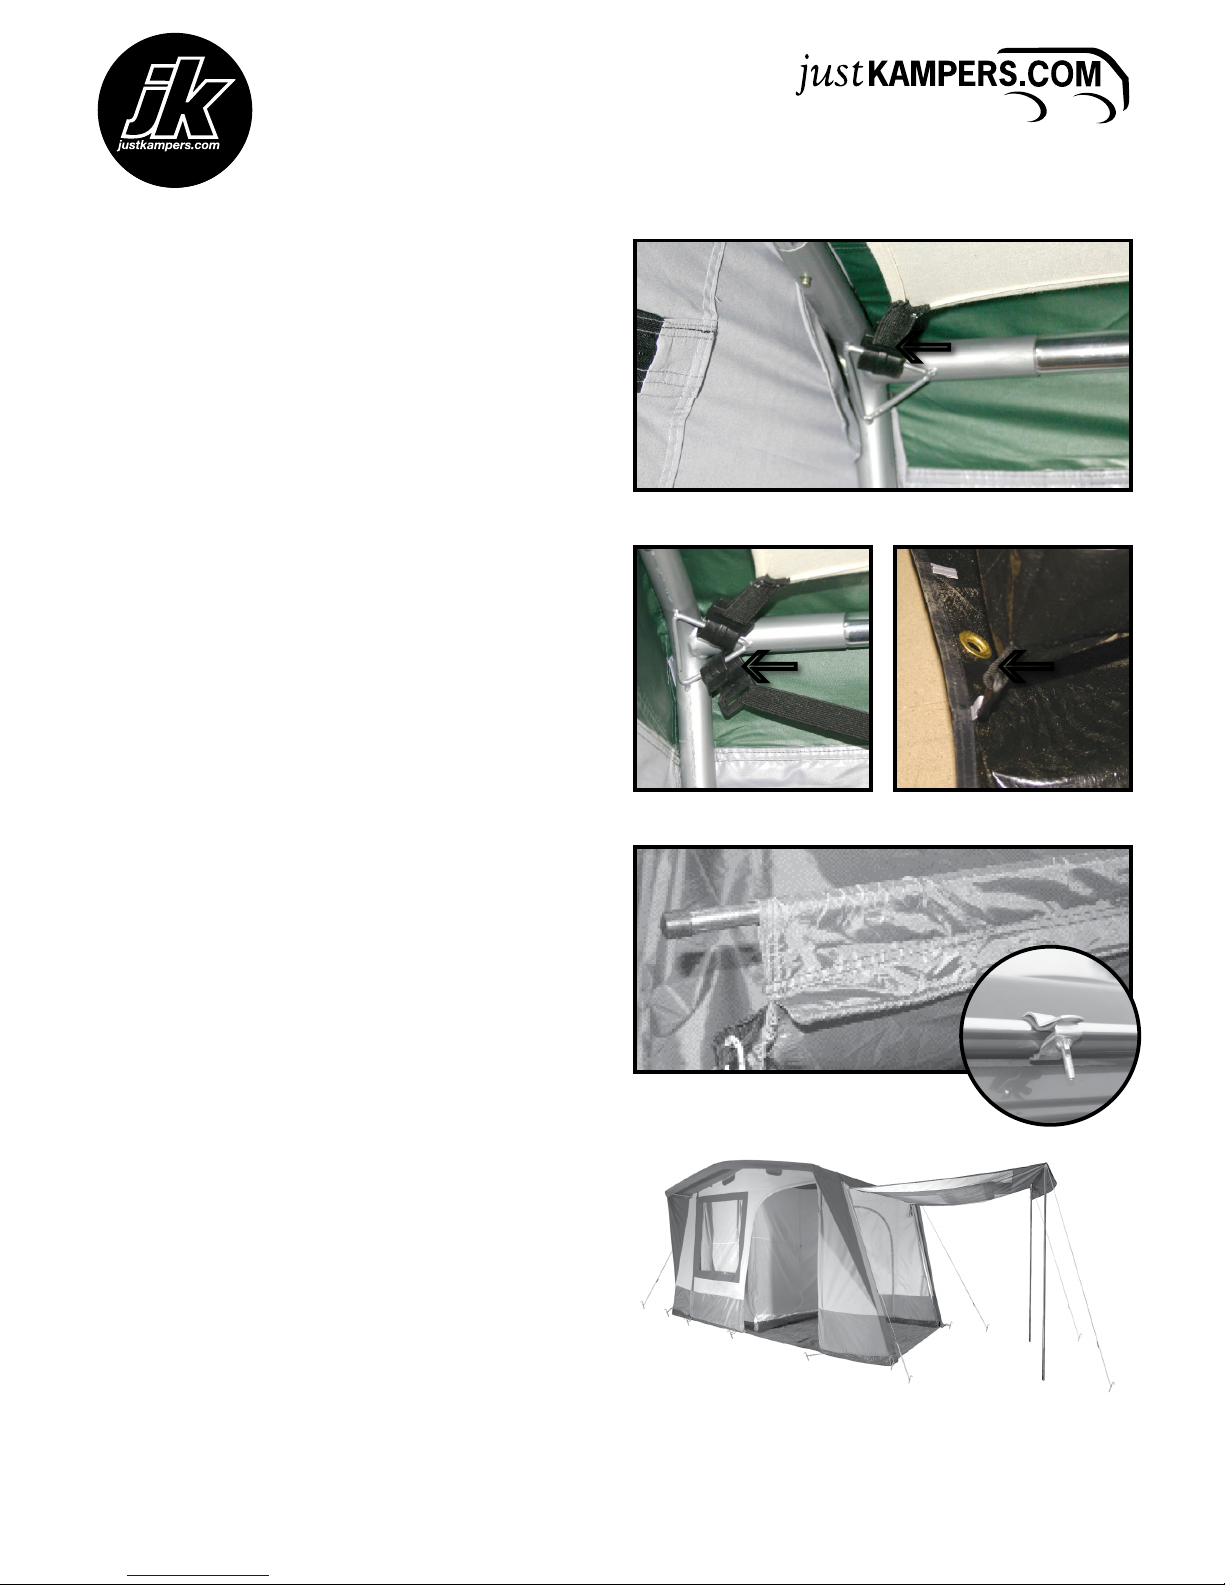
• Tent pegs should be inclined away from
the awning to achieve the best stability.
• Zippers should be closed during set up procedure.
Please handle these with care, as these are wear
and tear items that are not covered by the warranty.
• Do not touch the fabric when it is wet, as these
touch points will become permeable and water
will leak through.The thread contains some cotton
which expands when wet, it is advisable to treat
the seams with a seam sealer from time to time.
• Condensation may appear and should not
be confused with water leakage. The risk of
condensation can be reduced with proper
ventilation, a roof condensation sheet is included.
Putting away
To prevent mildew you should ideally dismantle the
awning when it is completely dry. If this is not possible
you should unpack your awning and dry as soon as
possible. If packed away damp, you may need to
re-waterproof the fabric before using it again.
Store your awning in a dry, cool and well ventilated place.
Maintenance
Use clean water for cleaning. For spots you can use an
awning cleaner. NB: Awnings should never be washed in
the washing machine or treated at a dry cleaning agent.
Poles must be stored clean and dry.
Zippers should be treated with Zip Ease from time to
time.
Please keep this information for future reference and pay
careful attention to the instructions. This will prolong
the working life of your awning.
Awning tie down kits
We recommend that you use an awning tie down kit to
prevent damage in adverse weather. Damage caused by
weather conditions is not covered under warranty.
Fire safety
Do not use cookers, stoves, heaters or lamps close to
the awning canvas.
Always read the fire drill instructions where you are
staying and know where extinguishers are on site. We
recommend for extra safety, carrying your own
extinguisher.
Available for left hand drive (J13642)
and right hand drive (J13641) vehicles
JK part numbers:
J13641 and J13642
OEM part number:
Not applicable
Tech Sheet
Spot Colour Pantone 653
Spot Colour P653/P151
Spot Colour White out
4 Colour Blue
4 Colour White out
4 Colour Blue/Orange
Black
White
Spot Colours
Process Colours
Page 1 of 5
0845 1204582
www.justkampers.com Just Kampers, Unit 1 Stapeley Manor, Long Lane, Odiham, Hants. RG29 1JE
NB. Please note that whilst every attempt is made to ensure that these instructions are as
accurate and clear as possible, we cannot be held responsible for misinterpretation of these
instructions or for any subsequent accident or damage caused through mis-fitted parts.

0845 1204582
www.justkampers.com
JK part numbers:
J13641 and J13642
OEM part number:
Not applicable
Just Kampers, Unit 1 Stapeley Manor, Long Lane, Odiham, Hants. RG29 1JE
NB. Please note that whilst every attempt is made to ensure that these instructions are as
accurate and clear as possible, we cannot be held responsible for misinterpretation of these
instructions or for any subsequent accident or damage caused through mis-fitted parts.
Tech Sheet
Spot Colour Pantone 653
Spot Colour P653/P151
Spot Colour White out
4 Colour Blue
4 Colour White out
4 Colour Blue/Orange
Black
White
Spot Colours
Process Colours
Page 2 of 5
The awning kit contains:
1x awning material, 1x groundsheet, 1x inner tent, 1x roof condensation sheet, 2x curtains, (a)=74x plastic groundsheet
pegs, (b)=3x gutter clamps, (c)=1x centre pole, (d)=2x side poles, (e)=4x 25mm diameter curved roof poles, (f)=2x
22mm diameter curved roof poles, (g)=4x adjustable leg poles, (h)=2x ‘L’ shaped poles, (i)=2x sun canopy poles, (j)=1x
vehicle gutter pole, (k)=40x metal tent pegs, (l)=1x ‘T’ shaped pole.
Step One
Firstly, on the left is an exploded view of all the main
awning poles in their correct positions. This part of the
awning requires the four ‘curved’ 25mm diameter roof
poles (e). After pushing all of these poles together you
should end up with the basic frame of the awning.
Note: Keeping the legs on their shortest setting at this
stage will make fitting the awning material much easier.
Step Two
The next step is to lay the awning material over the top
of the frame.
Starting at the front of the awning, there are three holes
in the material which correspond with three protruding
frame poles. Once the three short poles are pushed
through the matching holes in the material you can pull
the remaining fabric over the frame.
1. Assemble main awning poles
2. Lay awning material over the top of the frame
(a)
(b) (c)
(d)
(e) (f)
(g) (h)
(i) (j)
(k)
(l)
(g)
(e)
(g)
(d)
(front)
(e) (c) (e)
(d)
(e)
(g)
(g)
(back)

Step Five
Now the awning can be pegged to the ground.
The steel pegs (k) are used on the elasticated loops
around the base of the material which are hidden
underneath the black awning skirt.
There is an inner skirt and an outer skirt, both of which
are pegged down using the plastic pegs (a).
Six steel pegs are also used for pegging out the guys,
three each side.
Step Six
The ground sheet can now be placed inside the awning
and pegged down using the remaining plastic pegs (a).
5. Peg the awning to the ground and peg out the guys
6. Peg down the ground sheet inside the awning
0845 1204582
www.justkampers.com
JK part numbers:
J13641 and J13642
OEM part number:
Not applicable
Just Kampers, Unit 1 Stapeley Manor, Long Lane, Odiham, Hants. RG29 1JE
NB. Please note that whilst every attempt is made to ensure that these instructions are as
accurate and clear as possible, we cannot be held responsible for misinterpretation of these
instructions or for any subsequent accident or damage caused through mis-fitted parts.
Tech Sheet
Spot Colour Pantone 653
Spot Colour P653/P151
Spot Colour White out
4 Colour Blue
4 Colour White out
4 Colour Blue/Orange
Black
White
Spot Colours
Process Colours
Page 3 of 5
Step Three
After fitting the material, you can extend the legs which
have three height settings.
The ideal height is one where the awning material can
be pegged to the ground securely without placing too
much strain on the fabric or the poles.
Once you are happy that the material is fitted correctly
you can tie it to the frame legs. Inside the awning there
are eight ties, two in each corner.
Step Four
The overhang poles above, (l), (f) and (h) can now be
fitted together and then clamped onto the front of the
frame that you made earlier.
The roof material can now be pulled over this frame and
the two are held together with velcro strips.
3.Tie the material to the frame legs
4. Attach overhang and fix roof material with velcro strips
(h) (f) (l) (f)
(h)
(k)
(a)
(a)

0845 1204582
www.justkampers.com
JK part numbers:
J13641 and J13642
OEM part number:
Not applicable
Just Kampers, Unit 1 Stapeley Manor, Long Lane, Odiham, Hants. RG29 1JE
NB. Please note that whilst every attempt is made to ensure that these instructions are as
accurate and clear as possible, we cannot be held responsible for misinterpretation of these
instructions or for any subsequent accident or damage caused through mis-fitted parts.
Tech Sheet
Spot Colour Pantone 653
Spot Colour P653/P151
Spot Colour White out
4 Colour Blue
4 Colour White out
4 Colour Blue/Orange
Black
White
Spot Colours
Process Colours
Page 4 of 5
Step Seven
Next to fit is the roof condensation sheet, this clips to
the ceiling and helps to protect the occupants from any
overnight condensation that may form.
The plastic clips fasten in the centre of the frame and in
each corner.
7. Clip the roof condensation sheet onto the frame
Step Eight
Once the condensation sheet is in, the next is to fit the
inner tent.
The top of the inner tent clips to the ceiling in the same
way as the condensation sheet.
The bottom of the inner tent has four hooks which hook
onto four loops on the ground sheet.
8. Clip inner tent to frame and hook onto ground sheet
Step Nine
To attach the awning to the vehicle, slide the gutter rail
(j) through the sleeve in the awning material and then
place the 3 clamps (b) along the length of the rail.
This rail then sits in the vehicles gutter and the clamps
are fitted to the vehicle as shown.
9. Slide gutter rail through the sleeve
and fit 3 clamps to vehicle gutter
Step Ten
Finally, you can convert the side panel to a sun canopy
simply by adding the two sun canopy poles (i) and
spare guy ropes.
This will provide you with a sun shade.
NOTE:This should only be used in calm, dry conditions!
10. Convert the side panel to a sun canopy using poles
(j)
(b)
(i)
(i)

0845 1204582
www.justkampers.com
JK part numbers:
J13641 and J13642
OEM part number:
Not applicable
Just Kampers, Unit 1 Stapeley Manor, Long Lane, Odiham, Hants. RG29 1JE
NB. Please note that whilst every attempt is made to ensure that these instructions are as
accurate and clear as possible, we cannot be held responsible for misinterpretation of these
instructions or for any subsequent accident or damage caused through mis-fitted parts.
Tech Sheet
Spot Colour Pantone 653
Spot Colour P653/P151
Spot Colour White out
4 Colour Blue
4 Colour White out
4 Colour Blue/Orange
Black
White
Spot Colours
Process Colours
Page 5 of 5
Quick user guide
1. Keep all doors zipped shut when pegging out the awning and guy ropes.
2. Ensure all guy ropes and pegging points are used and that the awning is
correctly adjusted and the material taut.
3. Do NOT touch the inside of the awning material when wet. As the oil on your
skin will affect the waterproofing.
4. In windy conditions, check and adjust guy ropes and pegging regularly.
5. Do NOT pack awning material away wet, as this will cause mildew to form.
If you do have to pack a damp awning, hang it up and air as soon as possible.
This manual suits for next models
1
Table of contents
Other Just Kampers Accessories manuals