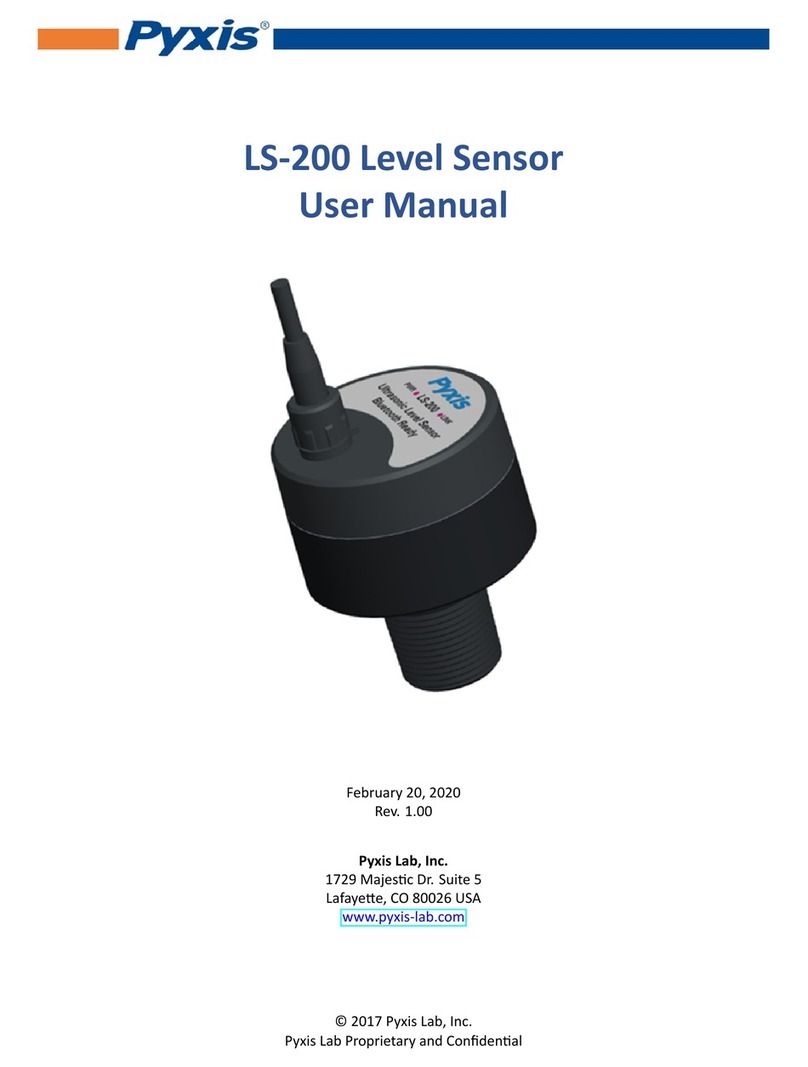
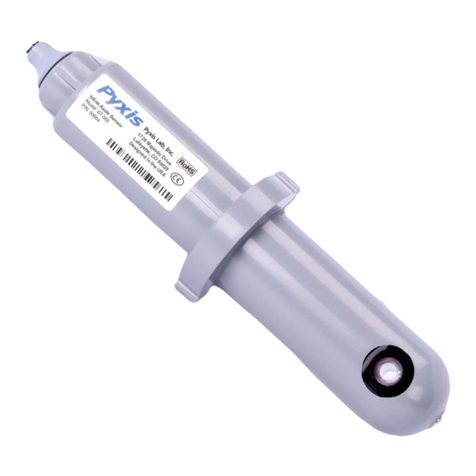
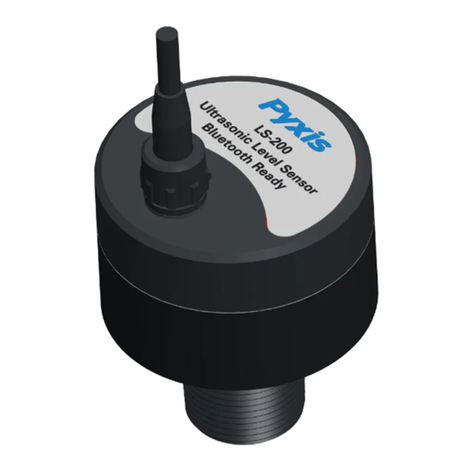
Pyxis LS-200 User manual

Table of Contents
1 Introducon 2
2 Specicaon 2
3 Unpacking Instrument 2
3.1 Standard Provided Accessories . . . . . . . . . . . . . . . . . . . . . . . . . . . . . . . . 2
4 Installaon 3
4.1 Wiring............................................. 3
4.2 Tank Top Installaon and Precauons . . . . . . . . . . . . . . . . . . . . . . . . . . . . 3
5 Instrument Indicator Overview 4
6 Setup with uPyxis® Mobile App 5
6.1 Download uPyxis® Mobile App . . . . . . . . . . . . . . . . . . . . . . . . . . . . . . . . 5
6.2 Connecng to uPyxis® Mobile App . . . . . . . . . . . . . . . . . . . . . . . . . . . . . . 5
6.3 Parameter Seng via uPyxis® Mobile App . . . . . . . . . . . . . . . . . . . . . . . . . . 6
6.4 Seng a Password via uPyxis® Mobile App . . . . . . . . . . . . . . . . . . . . . . . . . . 8
7 Setup with uPyxis® Desktop App 9
7.1 InstalluPyxis®DesktopApp.................................. 9
7.2 Connecng to uPyxis® Desktop App . . . . . . . . . . . . . . . . . . . . . . . . . . . . . 9
7.3 Parameter Seng via uPyxis® Desktop App . . . . . . . . . . . . . . . . . . . . . . . . . 10
8 4-20 mA Output Setup 13
9 Communicaon Using Modbus RTU 13
10 Sensor Maintenance and Precauon 13
11 Regulatory Approval 14
12 Contact Us 15

Warranty Informaon
Condenality
The informaon contained in this manual may be condenal and proprietary and is the property of Pyxis
Lab, Inc. Informaon disclosed herein shall not be used to manufacture, construct, or otherwise reproduce
the goods described. Informaon disclosed herein shall not be disclosed to others or made public in any
manner without the express wrien consent of Pyxis Lab, Inc.
Standard Limited Warranty
Pyxis Lab warrants its products for defects in materials and workmanship. Pyxis Lab will, at its opon, repair
or replace instrument components that prove to be defecve with new or remanufactured components
(i.e., equivalent to new). The warranty set forth is exclusive and no other warranty, whether wrien or oral,
is expressed or implied.
Warranty Term
The Pyxis warranty term is thirteen (13) months ex-works. In no event shall the standard limited warranty
coverage extend beyond thirteen (13) months from original shipment date.
Warranty Service
Damaged or dysfunconal instruments may be returned to Pyxis for repair or replacement. In some in-
stances, replacement instruments may be available for short duraon loan or lease.
Pyxis warrants that any labor services provided shall conform to the reasonable standards of technical com-
petency and performance eecve at the me of delivery. All service intervenons are to be reviewed and
authorized as correct and complete at the compleon of the service by a customer representave, or des-
ignate. Pyxis warrants these services for 30 days aer the authorizaon and will correct any qualifying
deciency in labor provided that the labor service deciency is exactly related to the originang event. No
other remedy, other than the provision of labor services, may be applicable.
Repair components (parts and materials), but not consumables, provided during a repair, or purchased
individually, are warranted for 90 days ex-works for materials and workmanship. In no event will the in-
corporaon of a warranted repair component into an instrument extend the whole instrument’s warranty
beyond its original term.
Warranty Shipping
A Repair Authorizaon (RA) Number must be obtained from Pyxis Technical Support before any product can
be returned to the factory. Pyxis will pay freight charges to ship replacement or repaired products to the
customer. The customer shall pay freight charges for returning products to Pyxis. Any product returned to
the factory without an RA number will be returned to the customer. To receive an RMA you can generate a
request on our website at hps://pyxis-lab.com/request-tech-support/.
Pyxis Technical Support
Contact Pyxis Technical Support at +1 (866) 203-8397, [email protected], or by lling out a request for
support at hps://pyxis-lab.com/request-tech-support/.
1 Introducon
The Pyxis LS-200 is a general-purpose ultrasonic sensor. It provides connuous level measurement up to 86
inches (7.2 . or 2.2 m) with a 4-20 mA output, RS485, and Bluetooth digital outputs. It can be congured
via the uPyxis® App on your mobile phones or computers. The sensor is powered by a 24 VDC external
power supply. This non-contact liquid level sensor is well suited for corrosive liquids and can be used for
industrial and municipal liquid storage and chemical feed applicaons.
2 Specicaon
Item Parameter
Power Supply*24 VDC, 2W
Output Bluetooth 4.1, 32 . (10 Meters) Line of Sight / RS-485 MODBUS and 4-20 mA
Cable Length 9.8 . (3 m), extension cable available
Range 4 – 86 inch (0.01 – 2.2 meter)
Resoluon 0.02 inch (0.5 mm)
Accuracy ±0.15% of the range
Dead Zone 4 inch (10 cm)
Measurement Interval Connuous, 10 or 30 seconds, 3 or 30 minutes, 1, or 4 or 6 hours, or stopped
Installaon 1-inch NPT
Weight 0.45 pound (210 g)
Dimension Height: 4.33 inch (110 mm); Diameter: 2.95 inch (75 mm)
Enclosure Material Polycarbonate (PC)
Transducer Material Polyvinylidene Fluoride (PVDF)
Ambient Temperature 5 - 122 °F (-15 - 50 °C)
Storage Temperature -4 - 140 °F (-20 - 60 °C)
Pressure 14 - 30 PSI (0.1 - 0.2 MPa)
Enclosure Rang IP67
Regulaon CE
*With Pyxis’ connuous improvement policy, this specicaon is subject to change without noce.
3 Unpacking Instrument
Remove the instrument and nd the standard accessories from the shipping container as listed below. In-
spect each item for any damage that may have occurred during shipping. Verify that all accessory items are
included. If any item is missing or damaged, please contact Pyxis Lab Customer Service at service@pyxis-
lab.com or by phone at +1 (866) 203-8397.
3.1 Standard Provided Accessories
• LS-200 Sensor P/N: 54011
• Waterproof Cable Adapter/Flying Leads (10) P/N: 50774
• Bluetooth/USB adapter P/N: MA-NEB

4 Installaon
4.1 Wiring
The LS-200 level sensor is powered by a 24V DC power supply from any standard controller, PLC or DCS. The
unit oers both 1x 4-20mA and 1x RS-485 Modbus outputs. If the power ground terminal and the negave
4-20 mA terminal in the controller are internally connected (non-isolated 4-20mA input), it is unnecessary to
connect the 4-20 mA negave wire (green) to the 4-20 mA negave terminal in the controller. If a separate
DC power supply other than from a controller is used, make sure that the output from the power supply is
rated for 22-26 VDC @ 80mA. Under standard installaons the clear wire is not landed and remains unused.
In unusual cases, a low-quality power supply may cause the sensor reading to be unstable. Connecng the
clear wire to the earth ground of the controller may resolve this problem.
*NOTE*Pyxis recommends powering o the controller, landing wires to controller terminal
board while the adapter to LS-200 is disconnected. Once the controller is powered on, re-
connect the adapter end to the LS-200. Follow the wiring table below to connect the sensor
to a controller or receiving device.
Wire Color Designaon
Red 24 V +
Black 24 V Power ground
White 4-20 mA +
Green 4-20 mA -, internally connected to the power ground
Blue RS-485 A
Yellow RS-485 B
Clear Shield, earth ground
4.2 Tank Top Installaon and Precauons
The sensor should be installed to a 1-inch bulkhead ng on the top of the tank. The major dimensions of
the sensor are shown in Figure 2. If a at horizontal surface is not available on the top of the tank, please use
a self-aligning bulkhead ng so that the sensor can be adjusted to be perpendicular to the liquid surface.
• Install and adjust the sensor to be perpendicular to liquid surface
• Installaon locaon shall not be too close to container wall to avoid interference.
• The sensor has a 3.94 inch (10 cm) dead zone (DZ). Raise the probe to avoid the DZ if desired
• Do not install in a locaon which will cause the ultrasonic wave to be obstructed
• Do not install the sensor in a vacuum environment

Figure 1. Installaon illustraon
Figure 2. Dimensions, inch (mm)
5 Instrument Indicator Overview
The indicators on the top of the sensor (Figure 3) are used to indicate power status and Bluetooth connec-
on status.
LED Status On O
Green LED Power Supply is on Power Supply is o
Blue LED Bluetooth is connected Bluetooth is disconnected
*NOTE*The Bluetooth connected LED will illuminate within 30 seconds of powerup of the
device. This feature is designed to minimize controller power draw during startup.

Figure 3. Sensor connecon and indicators
6 Setup with uPyxis® Mobile App
6.1 Download uPyxis® Mobile App
Download uPyxis® Mobile App from Apple App Store or Google Play.
Figure 4.
6.2 Connecng to uPyxis® Mobile App
Turn on Bluetooth on your mobile phone (Do not pair the phone Bluetooth to the LS-200). Open uPyxis®
Mobile App. Once the app is open the app will start to search for the sensor. When the uPyxis® Mobile
App connects to the sensor then press on the LS-200 Sensor Picture.

Figure 5.
6.3 Parameter Seng via uPyxis® Mobile App
The sensor measures the distance between the liquid surface in the tank and the boom sensor surface.
Converng this measured distance to other parameters such as the tank level, the remaining liquid volume,
or the consumed liquid, requires the tank dimensional and volume capacity informaon. Common vercal
tanks have a uniform horizontal cross secon. As such, the liquid volume is proporonal to the liquid level.
To convert the measured distance to volumetric informaon, it requires the user to enter three parameters.
Figure 6 illustrates these parameters for the tank. When connected, uPyxis® Mobile App will default to the
Overview screen. To enter the seng press on Seng tab.
*NOTE*For horizontal or other tanks that have a non-uniform cross secon, please contact
Pyxis Technical Support team (service@pyxis-lab.com) for assistance.

Figure 6.
In the Seng screen, you can set the Level Sensor Sengs by renaming the Device Name. The Sampling
Mode can be changed to your preference. To congure the tank, enter the sengs by pressing on Tank
Volume,Installaon Height,Max Level, and Display Units. To save the sengs, press Apply Sengs.
*NOTE*Max Level Height must be at least 4 inches less than Installaon Height
Figure 7.
To verify your readings aer seng your parameters click on Reading.

Figure 8.
6.4 Seng a Password via uPyxis® Mobile App
The LS-200 also has password protect capabilies. To password protect the seng on Password, press
Set. Aer pressing Set, the screen will change over to the Set Password screen. Before seng a new
password, contact Pyxis Service Department and give them the code at the boom of the screen. The
service representave will provide you with a password enabling you to reset a new password. Enter the
password that was given in the Original Password box. Then enter the New Password,Conrm Password,
and press Set Password.
Figure 9.

7 Setup with uPyxis® Desktop App
7.1 Install uPyxis® Desktop App
Download the latest version of uPyxis® Desktop soware package from: hp://www.pyxis-lab.com/sup-
port.html. This setup package will download and install the Microso.Net Framework 4.5 (if not installed
on the PC before), the USB driver for the USB-Bluetooth adapter, the USB-RS485 adapter, and the main
uPyxis® Desktop applicaon. Double click the uPyxis.Setup.exe le to install.
Figure 10. uPyxis® desktop app installaon
Click Install to start the installaon process. Follow the screen instrucons to complete the USB driver and
uPyxis® installaon.
7.2 Connecng to uPyxis® Desktop App
Connect the to a Windows computer using a Bluetooth/USB adapter (PN: MA-NEB, included in the package)
according to the following steps:
1. Connect the Bluetooth/USB adapter (PN: MA-NEB) to the computer USB.
2. Double click the uPyxis.exe icon to launch the program on your Desktop.
3. On uPyxis® Desktop App, click menu Device -> Connect via USB-Bluetooth as shown in Figure 11. If
the connecon is successful, the LS-200 image and its Serial Number will be displayed in the le pane
of the uPyxis® window as shown in Figure 12.
*NOTE*Aer the LS-200 and the Bluetooth/USB adapter are powered up, it may take up
to 10 seconds for the adapter to establish the wireless communicaon with the LS-200.

Figure 11. Connect uPyxis® desktop app to LS-200
Figure 12. Denions of terms
7.3 Parameter Seng via uPyxis® Desktop App
Click Seng to set the parameters as show in Figures 13-15. The sensor measures the distance between
the liquid surface in the tank and the boom sensor surface. Converng this measured distance to other
parameters such as the tank level, the remaining liquid volume, or the consumed liquid, requires the tank
dimensional and volume capacity informaon. Common vercal tanks have a uniform horizontal cross sec-
on. As such, the liquid volume is proporonal to the liquid level. To convert the measured distance to
volumetric informaon, it requires the user to enter three parameters as shown in Figure 13.
*NOTE*For horizontal or other tanks that have a non-uniform cross secon, please contact
Pyxis Technical Support team (service@pyxis-lab.com) for assistance.

The maximum height is the liquid level measured from the tank boom when the tank is lled to the rated
volume capacity. The installaon height is the distance between tank boom and the sensor boom sur-
face.
*NOTE*Max Level Height must be at least 4 inches less than Installaon Height
Figure 13. Illustraon of terms and tank capacity setup
Figure 14. Measurement mode drop-down selecon

Figure 15. Click Apply Sengs to save the sengs
Denions of terms in Figures 13–15.
• Volume: Volume of the tank
• Max Height: Liquid level measured from the tank boom as lled to rated capacity
• Installaon Height: The distance between the tank boom and the sensor boom surface.
• Sampling Interval: Connuous, 10 seconds, 30 seconds, 3 minutes, 30 minutes, 1, 4, 6
hours, or stopped
Click Reading menu to display real-me measurement data in a trend chart (Figure 16).
Figure 16. Level trend chart
To upgrade rmware, click System as shown in Figure 17. The latest rmware can be downloaded from
hp://www.pyxis-lab.com/support.html.

Figure 17. Firmware upgrade
8 4-20 mA Output Setup
The 4-20 mA output of the sensor is scaled as:
• 4 mA = (Tank is Empty) = (Level is 0) = (Distance is Installaon Height),
• 20 mA = (Tank is Full) = (Level is maximum height) = (Distance is Installaon Height – Maximum
Height).
The 4-20 mA analog signal can be converted to one of four values (Level, Distance, Volume Remaining, or
Volume Consumed) in the controller receiving the output according to the above scale. For example, a
nominal 100-gallon vercal tank, the maximum height is 36 inches and installaon height is 42 inches. The
tank volume is 100 gallons when it is lled up to the maximum height 36 inches. The controller should be
set up to convert 20 mA to 100 gallons, at which the tank is full and the tank level is 36 inches and the
distance measured is 6 inches.
*NOTE*The nominal capacity provided by the tank manufacturer may be greater than the
maximum safe (net or eecve) capacity that can be praccally lled. Please keep this in
mind as you congure your LS-200 for praccal purposes.
9 Communicaon Using Modbus RTU
The sensor can be congured as a Modbus slave device via RS-485. In addion to the level, volume, and
distance, many operaonal parameters, including warning and error messages, are available via a Modbus
10 Sensor Maintenance and Precauon
For best performance, keeps the sensor ultrasonic surface clean using a so cloth or towel. And Please.
noce that somemes the maximum sound pressure level inside the beam area is up to 165dB, which
exceeds the standard safe limit of 110dB. Never point the probe at the eye. The direcvity paern of the
probe is shown in Figure 18.

Figure 18. Direcvity paern of the LS-200
11 Regulatory Approval
United States
The LS-200 sensor has been tested and found to comply with the limits for a Class B digital device, pursuant
to part 15 of the FCC Rules. These limits are designed to provide reasonable protecon against harmful
interference in a residenal installaon. This equipment generates, uses and can radiate radio frequency
energy, and if not installed and used in accordance with the instrucons, may cause harmful interference to
radio communicaons. However, there is no guarantee that interference will not occur in an installaon. If
this equipment does cause harmful interference to radio or television recepon, which can be determined
by turning the equipment o and on, the user is encouraged to try to correct the interference by one or
more of the following measures:
• Reorient or relocate the receiving antenna.
• Increase the separaon between the equipment and receiver.
• Connect the equipment into an outlet on a circuit dierent from that to which the receiver is con-
nected.
• Consult the dealer or an experienced radio/TV technician for help
Canada
This device complies with Industry Canada license exempt RSS standard(s). Operaon is subject to the
following two condions: (1) this device may not cause interference, and (2) this device must accept any in-
terference, including interference that may cause undesired operaon of the device. Le présent appareil est
conforme aux CNR d’Industrie Canada applicables aux appareils radio exempts de licence. L’exploitaon est
autorisée aux deux condions suivantes: (1) l’appareil ne doit pas produire de brouillage, et (2) l’ulisateur
de l’appareil doit accepter tout brouillage radioélectrique subi, même si le brouillage est suscepble

12 Contact Us
Pyxis Lab, Inc
1729 Majesc Dr. Suite 5
Lafayee, CO 80026 USA
www.pyxis-lab.com
Phone: +1 (866) 203-8397
Email: [email protected]
Other manuals for LS-200
2
Table of contents
Other Pyxis Accessories manuals

Pyxis
Pyxis CR Series User manual

Pyxis
Pyxis ST-540 Series User manual

Pyxis
Pyxis ST-772 User manual

Pyxis
Pyxis ST-735 User manual

Pyxis
Pyxis ST-730 Series User manual

Pyxis
Pyxis ST-565 User manual

Pyxis
Pyxis ST-774 User manual

Pyxis
Pyxis LT-73 Series User manual

Pyxis
Pyxis ST-772 User manual

Pyxis
Pyxis LS-202 User manual

Pyxis
Pyxis ST-565 User manual

Pyxis
Pyxis LT-635 User manual

Pyxis
Pyxis ST-765SS-SO3 User manual

Pyxis
Pyxis LS-200 Troubleshooting guide

Pyxis
Pyxis ST-500 User manual

Pyxis
Pyxis ST-600 User manual

Pyxis
Pyxis ST-500 User manual

Pyxis
Pyxis ST-765SS Series User manual

Pyxis
Pyxis ST-500W User manual

Pyxis
Pyxis ST-750 User manual