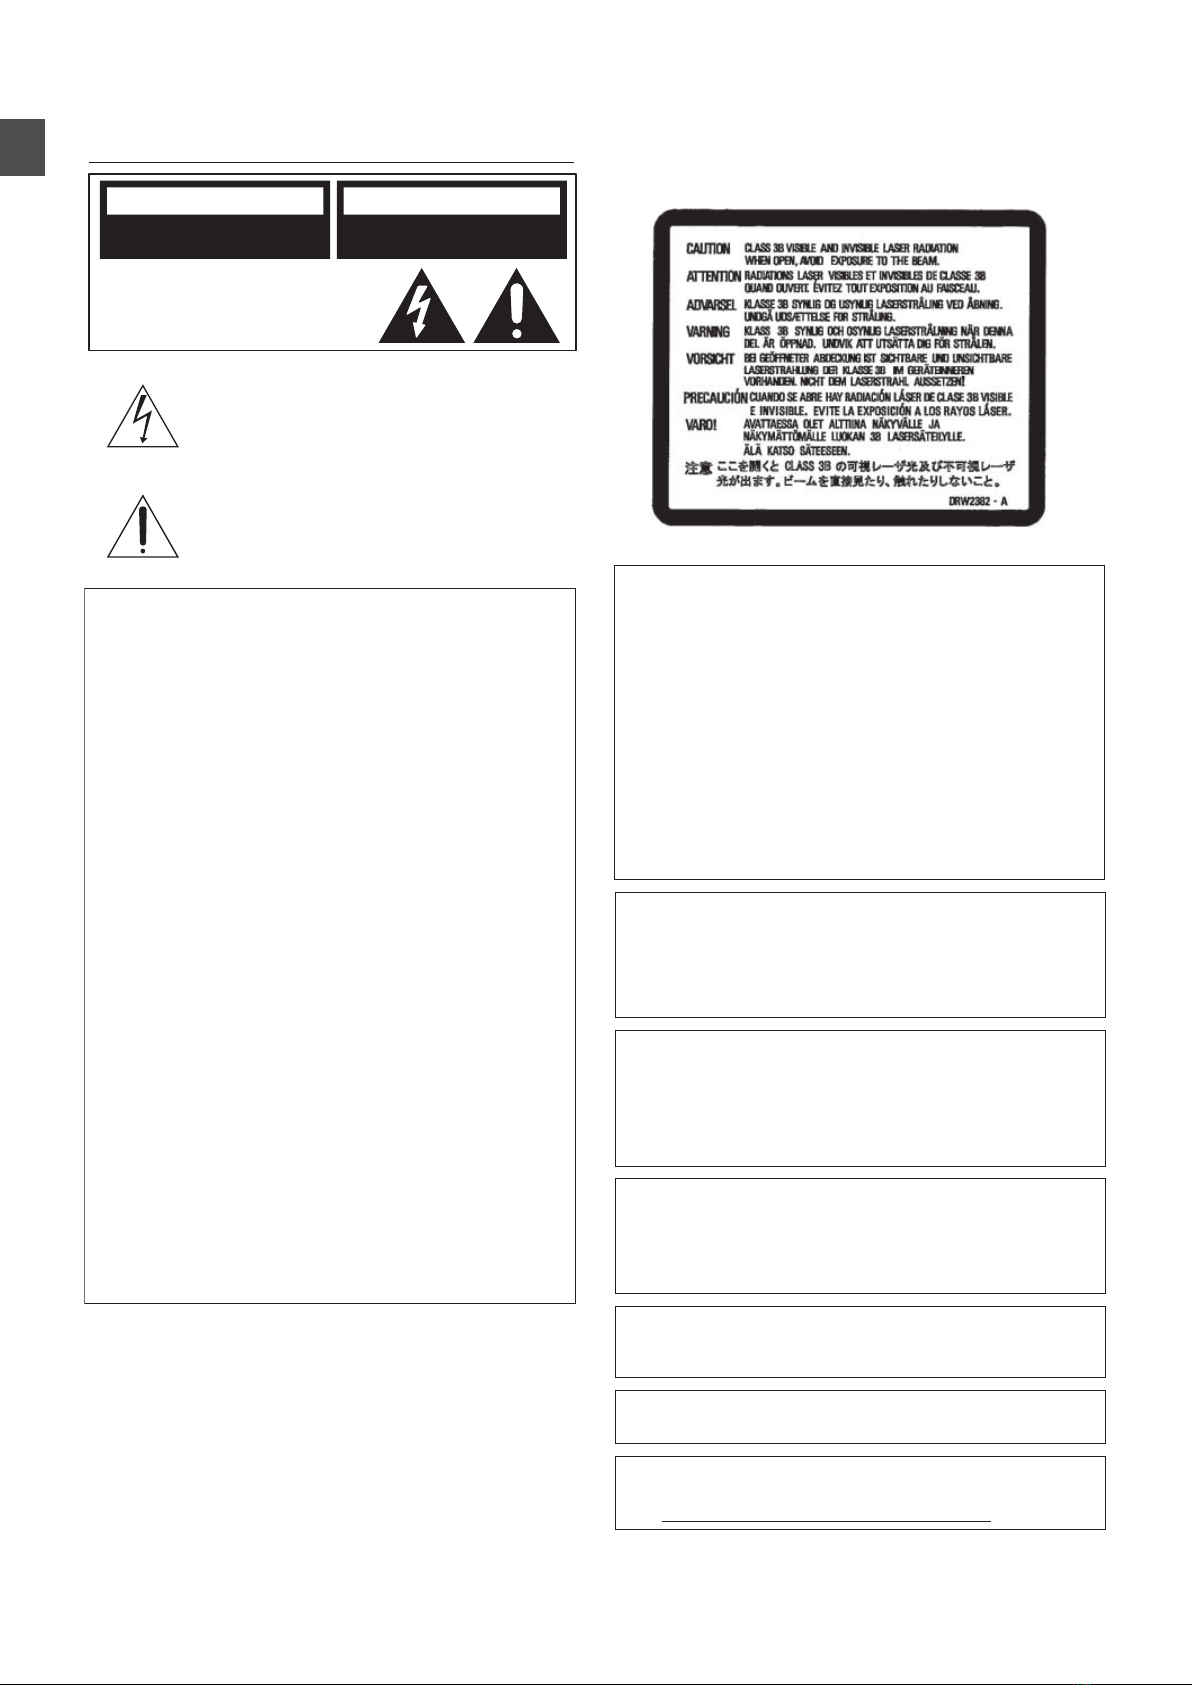
JVC SR-HD2700E User manual

.
BLU-RAY DISC & HDD RECORDER
SR-HD2700U
SR-HD2700E
.
STOP REV PLAY PAUSEFWD
OPEN/
CLOSE
STANDBY/ON
HDV/DV IN
REC
REC CERDDHBD
REC
MODE
RESET
INPUT
SELECT HDD
MEDIA SELECT
BD/SD
DIRECT/
MONITOR
.
Please read the following before getting started:
Serial No.
Model No.
Enter below the Model No. and Serial No. which is located
on the body. Retain this information for future reference.
For Customer Use:
In this manual, each model number is described without the
last letter (U/E) which means the shipping destination.
(U: for USA and Canada, E: for Europe)
Only “U” models (SR-HD2700U) have been evaluated by UL.
Thank you for purchasing this product.
Before operating this unit, please read the instructions carefully
to ensure the best possible performance.
INSTRUCTIONS
B5A-0715-00

Safety Precaution
.
OF ELECTRIC SHOCK
NOT OPEN
DE CHOC ELECTRIQUE
NE PAS OUVRIR.
Cautions CLASS 1 LASER PRODUCT
REPRODUCTION OF LABELS
WARNING LABEL INSIDE OF THE UNIT
This unit apply to the standard AIEC60825-1:2007Bfor laser products.
The lightning flash with arrowhead symbol, within
an equilateral triangle, is intended to alert the user
to the presence of uninsulated “dangerous voltage”
within the product’s enclosure that may be of
sufficient magnitude to constitute a risk of
electric shock to persons.
The exclamation point within an equilateral triangle
is intended to alert the user to the presence of
important operating and maintenance (servicing)
instructions in the literature accompanying the
appliance.
CAUTION:
A UNIT IS A CLASS 1 LASER PRODUCT. HOWEVER THIS
UNIT USES A VISIBLE LASER BEAM WHICH COULD CAUSE
HAZARDOUS RADIATION EXPOSURE IF DIRECTED. BE SURE
TO OPERATE THE UNIT CORRECTLY AS INSTRUCTED.
WHEN THIS UNIT IS PLUGGED INTO THE WALL OUTLET, DO
NOT PLACE YOUR EYES CLOSE TO THE OPENING OF THE
DISC TRAY AND OTHER OPENINGS TO LOOK INTO
THE INSIDE OF THIS UNIT.
USE OF CONTROLS OR ADJUSTMENTS OR
PERFORMANCE OF PROCEDURES OTHER THAN THOSE
SPECIFIED HEREIN MAY RESULT IN HAZARDOUS
RADIATION EXPOSURE.
DO NOT OPEN COVERS AND DO NOT REPAIR YOURSELF.
REFER SERVICING TO QUALIFIED PERSONNEL.
MISE EN GARDE:
CET APPAREIL EST UN PRODUIT LASER DE CLASSE 1.
CEPENDANT, CET APPAREIL UTILISE UN FAISCEAU LASER
VISIBLE QUI PEUT ENTRAÎNER UNE EXPOSITON
DANGEREUSE AUX RAYONNEMENTS. S’ASSURER DE
FAIRE FONCTIONNER L’APPAREIL CORRECTEMENT, EN
RESPECTANT LES INSTRUCTIONS.
LORSQUE CET APPAREIL EST BRANCHÉ À UNE PRISE
MURALE, NE PAS PLACER SES YEUX PRÈS DE
L’OUVERTURE DU TIROIR POUR DISQUE OU D’AUTRES
OUVERTURES DANS LE BUT D’OBSERVER L’INTÉRIEUR
DE L’APPAREIL.
L’UTILISATION DES COMMANDES, RÉGLAGES OU
PROCÉDURES DE PERFORMANCE AUTRE QUE CELLE
SPÉCIFIÉE DANS CE DOCUMENT RISQUE D’ENTRAÎNER
UNE EXPOSITION DANGEREUSE AUX RAYONNEMENTS.
L’UTILISATEUR NE DOIT PAS OUVRIR NI RÉPARER
L’APPAREIL DE LUI-MÊME. FAIRE APPEL À UN PERSONNEL
QUALIFIÉ POUR L’ENTRETIEN.
CAUTION
AVIS
RISK OF ELECTRIC SHOCK
DO NOT OPEN
CAN ICES-3 A / NMB-3 A
RISQUE DE CHOC ELECTRIQUE
- NE PAS OUVRIR.
WARNING:
TO PREVENT FIRE OR SHOCK HAZARD, DO NOT EXPOSE
THIS UNIT TO RAIN OR MOISTURE.
CAUTION:
This unit should be used withAC 120VH, 60Hz (SR-HD2700U only).
To prevent electric shocks and fire hazards, DO NOT use any
other power source.
CAUTION:
TO PREVENT ELECTRIC SHOCK, MATCH WIDE BLADE OF
PLUG TO WIDE SLOT, FULLY INSERT.
ATTENTION:
POUR ÉVITER LES CHOCS ÉLECTRIQUES, INTRODUIRE LA
LAME LA PLUS LARGE DE LA FICHE DANS LA BORNE
CORRESPONDANTE DE LA PRISE ET POUSSER JUSQU’AU
FOND.
Note to CATV system installer:
This reminder is provided to call the CATV system installer’s
attention to Article 820-40 of the NEC that provides guidelines
for proper grounding and, in particular, specifies that the cable
ground shall be connected to the grounding system of the
building, as close to the point of cable entry as practical.
“WARNING” and the following or equivalent. “To reduce the risk
of fire or electric shock, do not expose this apparatus to rain or
moisture.”
“ATTENTION” et suivant ou équivalent. “Pour limiter les risques
d’incendie ou d’électrocution, n’exposez pas cet appareil à la
pluie ou à l’humidité.”
A warning that an apparatus with CLASS I construction shall be
connected to a MAINS socket outlet with protective earthing
connection.
Avertissement: un appareil de CLASSE I doit être branché à une
prise SECTEUR comprenant une mise à la terre de protection.
WARNING
Batteries shall not be exposed to excessive heat such as
sunshine, fire or the like.
When the main plug or appliance coupler shall remain readily
operable.
This product contains a CR Coin Cell Lithium Battery which
contains Perchlorate Material – special handling may apply.
See www.dtsc.ca.gov/hazardouswaste/perchlorate
2Safety Precaution
Safety Precaution

.
IMPORTANT SAFETY INSTRUCTIONS
1) Read these instructions.
2) Keep these instructions.
3) Heed all warnings.
4) Follow all instructions.
5) Do not use this apparatus near water.
6) Clean only with dry cloth.
7) Do not block any ventilation openings. Install in accordance with
the manufacturer’s instructions.
8) Do not install near any heat sources such as radiators, heat
registers, stoves, or other apparatus (including amplifiers) that
produce heat.
9) Do not defeat the safety purpose of the polarized or grounding-
type plug. A polarized plug has two blades with one wider than
the other. A grounding type plug has two blades and a third
grounding prong. The wide blade or the third prong are
provided for your safety. If the provided plug does not fit into
your outlet, consult an electrician for replacement of the
obsolete outlet.
10)Protect the power cord from being walked on or pinched
particularly at plugs, convenience receptacles, and the point
where they exit from the apparatus.
11)Only use attachments/accessories specified by the
manufacturer.
12)Use only with the cart, stand, tripod,
bracket, or table specified by the
manufacturer, or sold with the
apparatus. When a cart is used, use
caution when moving the cart/apparatus
combination to avoid injury from tip-
over.
13)Unplug this apparatus during lightning
storms or when unused for long periods
of time.
14)Refer all servicing to qualified service personnel. Servicing is
required when the apparatus has been damaged in any way,
such as power-supply cord or plug is damaged, liquid has been
spilled or objects have fallen into the apparatus, the apparatus
has been exposed to rain or moisture, does not operate
normally, or has been dropped.
Failure to heed the following precautions may result in
damage to the unit, remote control or disc/cassette.
1. DO NOT
place the unit^
^in an environment prone to extreme temperatures or
humidity.
^in direct sunlight.
^in a dusty environment.
^in an environment where strong magnetic fields are
generated.
^on a surface that is unstable or subject to vibration.
2. DO NOT
block the unit’s ventilation openings or holes.
(If the ventilation openings or holes are blocked by a newspaper
or cloth, etc., the heat may not be able to get out.)
3. DO NOT place heavy objects on the unit or remote control.
4. DO NOT
place anything which might spill on top of the unit
or remote control.
(If water or liquid is allowed to enter this equipment, fire or
electric shock may be caused.)
5. DO NOT
expose the apparatus to dripping or splashing.
6. DO NOT
use this equipment in a bathroom or places with
water. Also DO NOT place any containers filled with water or
liquids (such as cosmetics or medicines, flower vases, potted
plants, cups, etc.) on top of this unit.
7. DO NOT
place any naked flame sources, such as lighted
candles, on the apparatus.
8. AVOID violent shocks to the unit during transport.
When the equipment is installed in a cabinet or a shelf, make sure
that it has sufficient space on all sides to allow for ventilation
(10cm or more on both sides, on top and at the rear).
When discarding batteries, environmental problems must be
considered and the local rules or laws governing the disposal of
these batteries must be followed strictly.
Use the supplied power cord.
(If not, fire or electric shock may be caused.)
DON'T continue to operate the equipment if you are in any doubt
about it working normally, or if it is damaged in any way^switch
off, withdraw the mains plug and contact the local dealers in your
area.
CAUTION:
Changes or modifications not approved by JVC could void user’s
authority to operate the equipment.
Declaration of Conformity
Model Number: SR-HD2700U
Trade Name: JVC
Responsible Party: JVCKENWOOD USA Corporation
Address: 1700 Valley Road Wayne, N.J. 07470
Telephone Number: 973-317-5000
This device complies with Part 15 of FCC Rules.
Operation is subject to the following two conditions:
(1) This device may not cause harmful interference, and (2) this
device must accept any interference received, including
interference that may cause undesired operation.
"This equipment has been tested and found to comply with the limits
for a Class A digital device, pursuant to Part 15 of the FCC Rules.
These limits are designed to provide reasonable protection against
harmful interference when the equipment is operated in a
commercial environment.
This equipment generates, uses, and can radiate radio frequency
energy and, if not installed and used in accordance with the
instruction manual, may cause harmful interference to radio
communications.
Operation of this equipment in a residential area is likely to cause
harmful interference in which case the user will be required to
correct the interference at his own expense."
DO be careful with glass panels or doors on equipment.
DO contact the local dealers in your area if you are ever in doubt
about the installation, operation or safety of your equipment.
NEVER let anyone especially children push anything into holes,
slots or any other opening in the case^this could result in a fatal
electrical shock.
MOISTURE CONDENSATION
Moisture in the air will condense on the unit when you move it from
a cold place to a warm place, or under extremely humid
conditions^just as water droplets form on the surface of a glass
filled with cold liquid. In conditions where condensation may occur,
disconnect the unit’s power plug from the wall and keep it
disconnected for a few hours to let the moisture dry, then turn on
the unit.
Safety Precaution 3
Safety Precaution

.
DISCLAIMER OF LIABILITY
JVC shall not be liable for any loss relating to the unit’s failure to
properly record, store or playback any content (video, audio or
otherwise) for any reason whatsoever. Any applicable warranties
shall only cover replacement or repair of the effected unit, and shall
not apply to recovery or replacement of lost content.
●
●
SR-HD2700U can play back and record only NTSC signals.
The hard disk is a consumable item. Replacement is
recommended after 10000 hours of use (if use in a 25°C
environment). For information on maintenance planning and
costs, contact the local dealers in your area.
The fan motor is a consumable item. Replacement is
recommended after 30000 hours of use (if use in a 25°C
environment). For information on maintenance planning and
costs, contact the local dealers in your area.
HOW TO USE THIS INSTRUCTION MANUAL
●All major sections and subsections are listed in the Table Of
Contents on page 5. Use this when searching for information on
a specific procedure or feature.
●The Amark signals a reference to another page for instructions
or related information.
●Operation buttons necessary for the various procedures are
clearly indicated through the use of illustrations at the beginning
of each major section.
BEFORE YOU INSTALL YOUR NEW UNIT . . .
. . . please read the sections/literature listed below.
●“ Cautions” on page 2
“ IMPORTANT SAFETY INSTRUCTIONS” on page 3 to 4
Batteries^Incorrect use of batteries may cause the batteries
to burst or ignite. A leaky battery may corrode the equipment,
dirty your hands or spoil your clothing. In order to avoid these
problems, make sure to observe the precautions below:
●Use the specified batteries only.
●Install the batteries with due attention to the plus (+) and
minus (-) sides of the batteries according to the instructions in
the compartment.
●Do not mix old and new batteries.
●Do not mix batteries of different types. Voltage specifications
of batteries of the same shape may vary.
●Replace an exhausted battery with a new one promptly.
●If you will not use the remote control for a long time, remove
the batteries.
●If leaked battery fluid gets on your skin or clothing, rinse
immediately and thoroughly. If it gets into you eye, bathe your
eye well rather than rubbing and seek medical treatment
immediately. Leaked battery fluid that gets into your eye or
your clothing may cause a skin
●Do not put the batteries in a place where young children can
reach.
irritation or damage your eye.
ATTENTION:
Using a mobile phone in the vicinity of the unit may cause
picture vibration on the TV screen or change the screen to a
black back display.
Some TVs or other appliances generate strong magnetic
fields. Do not place such appliances on top of the unit as it
may cause picture disturbance.
When moving the product, pressAto turn off the power,
and wait at least 30 seconds before unplugging the power
cord. Then, wait at least 2 minutes before moving the
product.
If there is a power outage when using the unit, the recorded
data may be erased.
It is recommended to back up discs which contain important
recordings periodically (every few years). As digital signals
do not deteriorate, failure to play back or record might arise
due to the effects of the disc aging through the years
depending on the storage environment.
Recorded programs and data cannot be restored once the
disc or tape is damaged.
If this symbol is shown, it is only valid in the European
Union.
SR-HD2700E can play back and record only PAL signals.
NTSC signals can also be played back on the BD/DVD deck.
4Safety Precaution
Safety Precaution

.
WARNING :
WARNING :
DO NOT EXPOSE THIS UNIT TO RAIN OR
MOISTURE.
The rating plate and the safety caution are on the rear of
the unit.
IMPORTANT:
Please read the various precautions on page 5 to 7 before
installing or operating the unit.
It should be noted that it may be unlawful to re-record pre-
recorded tapes,DVDs, or discs without the consent of the owner
of copyright in the sound or video recording, broadcast or cable
programme and in any literary, dramatic, musical, or artistic
work embodied therein.
CAUTION:
When you are not using the unit for a long period of time, it is
recommended that you disconnect the power cord from the
mains outlet.
Dangerous voltage inside. Refer internal servicing to qualified
service personnel. To prevent electric shock or fire hazard,
remove the power cord from the mains outlet prior to connecting
or disconnecting any signal lead or aerial.
The mains plug shall remain readily operable.
The STANDBY/ON Abutton does not completely shut off mains
power from the unit, but switches operating current on and off.
ABBshows electrical power standby and ACBshows ON.
A warning that an apparatus with CLASS I construction shall be
connected to a MAINS socket outlet with protective earthing
connection.
Main Plug
The Main Plug is used as the disconnect device, the disconnect
device shall remain readily operable
Even if the display window of the unit is unlit, the main power
supply is not cut off unless the power cord is unplugged.
The main power supply for this unit is controlled by inserting or
removing the power plug.
Dear Customer, [European Union]
This apparatus is in conformance with the valid European
directives and standards regarding electromagnetic compatibility
and electrical safety.
DANGEROUS VOLTAGE INSIDE
TO PREVENT FIRE OR SHOCK HAZARD,
European representative of JVC KENWOOD Corporation is:
JVC Technical Services Europe GmbH
Konrad-Adenauer-Allee 1-11
61118 Bad Vilbel
Germany
WARNING
This is a Class A product. In a domestic environment this product
may cause radio interference in which case the user may be
required to take adequate measures.
Sehr geehrter Kunde, [Europäische Union]
sehr geehrte Kundin,
dieses Gerät stimmt mit den gültigen europäischen Richtlinien
und Normen bezüglich elektromagnetischer Verträglichkeit und
elektrischer Sicherheit überein.
Die europäische Vertretung für die
JVC KENWOOD Corporation ist:
JVC Technical Services Europe GmbH
Konrad-Adenauer-Allee 1-11
61118 Bad Vilbel
Deutschland
Safety Precaution 5
Safety Precaution

.
Note for United Kingdom power cord only
The plug of United Kingdom power cord has a built-in fuse.
When replacing the fuse, be sure to use only a correctly rated
approved type, re-fit the fuse cover. (Contact the local dealers in
your area or qualified personnel.)
How to replace the fuse
Open the fuse compartment with the
blade screwdriver, and replace the
fuse.
POWER CONNECTION
The power supply voltage rating of this product is AC 220 – 240 V
(For European countries, Asian countries, and United Kingdom).
The power cord attached conforms to the following power supply
voltage and countries. Use only the power cord designated to
ensure safety and EMC regulations of each country.
This plug will fit only into a grounded power outlet. If you are unable
to insert the plug into the outlet, contact your electrician to install the
proper outlet. Do not defeat the safety purpose of the grounded plug.
●This product should be operated only with the type of power
source indicated on the label. If you are not sure of the type of
power supply of your home, contact the local dealers in your area
or local electric power company.
Warning:
●Do not use the same power cord for AC 120 V as for AC 220 –
240 V. Doing so may cause malfunction, electric shock or fire.
For European and Asian
countries: AC 220 – 240 V
For United Kingdom:
AC 220 – 240 V
Fuse
This equipment has been designed and manufactured to meet
international safety standards but, like any electrical
equipment, care must be taken if you are to obtain the best
results and safety is to be assured.
DO read the operating instructions before you attempt to use the
equipment.
DO ensure that all electrical connections (including the mains plug,
extension leads and interconnections between pieces of
equipment) are properly made and in accordance with the
manufacturer’s instructions. Switch off and withdraw the mains
plug when making or changing connections.
DO contact the local dealers in your area if you are ever in doubt
about the installation, operation or safety of your equipment.
DO be careful with glass panels or doors on equipment.
DON’T continue to operate the equipment if you are in any doubt
about it working normally, or if it is damaged in any way^
switch off, withdraw the mains plug and contact the local
dealers in your area.
DON’T remove any fixed cover as this may expose dangerous
voltages.
DON’T leave equipment switched on when it is unattended unless
it is specifically stated that it is designed for unattended
operation or has a standby mode. Switch off using the switch
on the equipment and make sure that your family knows how
to do this. Special arrangements may need to be made for
infirm or handicapped people.
DON’T use equipment such as personal stereos or radios so that
you are distracted from the requirements of road safety. It is
illegal to watch television whilst driving.
DON’T listen to headphones at high volume, as such use can
permanently damage your hearing.
DON’T obstruct the ventilation of the equipment, for example with
curtains or soft furnishings. Overheating will cause damage
and shorten the life of the equipment.
DON’T use make shift stands and NEVER fix legs with wood screws
^to ensure complete safety always fit the manufacturer’s
approved stand or legs with the fixings provided according to
the instructions.
DON’T allow electrical equipment to be exposed to rain or moisture.
ABOVE ALL...
^NEVER let anyone especially children push anything into holes,
slots or any other opening in the case^this could result in a fatal
electrical shock;
^NEVER guess or take chances with electrical equipment of any
kind^it is better to be safe than sorry!
6Safety Precaution
Safety Precaution

.
Safety Precaution
European Union only
EMC Supplement
This equipment is in conformity with the provisions and protection requirements of the corresponding European Directives.
This equipment is designed for professional video appliances and can be used in the following environments:
Controlled EMC environment (for example purpose built broadcasting or recording studio), and rural outdoors environment
(far away from railways, transmitters, overhead power lines, etc.)
In order to keep the best performance and ensure electromagnetic compatibility, we recommend to use cables not exceeding
the following length:
Cable Length
Power cord (attached cable (H05VV-F 3 x 0.75 mm2)) 2.0 m
Video signal cable (coaxial cable) 2.0 m
1.5 mAudio signal cable (shielded cable)
HDMI cable (shielded cable) 2.0 m
RS-232C cable (shielded cable) 2.0 m
(A straight cable with a D-sub 9-pin connector)
HDV/DV cable (shielded cable) 2.0 m
USB cable (shielded cable) 2.0 m
REMOTE cable (shielded cable) 2.0 m
SDI signal cable (coaxial cable) 2.0 m
The inrush current of this apparatus is 9.5 ampere.
In case where the strong electromagnetic waves or magnetism are near the audio cable or the signal cable, the sound or the
picture will contain noise. In such cases, please keep the cable away from the sources of the disturbance.
CAUTION
Safety Precaution 7
Safety Precaution

Contents
Safety Precaution
Safety Precaution
.................................................................... 2
Getting Started
Key Features
.......................................................................... 9
How to Read this Manual
......................................................... 9
Other Precautionary Notes
.................................................... 10
Hard Disk Drive (HDD)
.......................................................... 11
SD Cards
.............................................................................. 12
Discs
.................................................................................... 12
Precautions on the Use of Discs
............................................ 14
On-screen Displays
............................................................... 15
Name and Function of Parts
.................................................. 16
Front panel
........................................................................ 16
Display window
................................................................. 17
Rear panel
........................................................................ 17
Remote control
.................................................................. 18
Preparation
Connecting a Monitor
............................................................ 20
Connecting an Amplifier
........................................................ 21
Connecting a Video Camera or Other Equipment
.................... 21
Connecting External Devices
................................................. 22
Connecting the Power Supply
................................................ 22
Setting and Displaying Date/Time
.......................................... 23
Setting the Time Code
........................................................... 26
Dubbing/Importing
Dubbing/Importing
................................................................. 28
Dubbing chart
.................................................................... 29
Formatting
............................................................................ 30
Recording Modes
.................................................................. 33
Importing Data from a BD/DVD to the HDD
............................. 35
Importing Data from a USB-compatible Device to the HDD
..... 37
Importing Data from an SD Card to the HDD
........................... 40
Importing Data from an i.LINK-compatible Device to the HDD
. 42
Importing Data from a LAN-compatible Device to the HDD
...... 44
Dubbing a Title from the HDD to a BD/DVD
............................ 45
Dubbing Still Images from the HDD
........................................ 48
Enabling Playback on Other Devices (Finalizing)
.................... 50
Copying the Entire Disc
......................................................... 52
Recording
Switching External Input
........................................................ 54
Direct Recording to Discs
...................................................... 54
Simultaneous Recording to HDD and BD/DVD
....................... 54
Recording Using External Inputs
............................................ 55
Playing Back
About Playing Back
............................................................... 58
Using Playback Navigation
.................................................... 58
Option menu list
................................................................ 60
Video Playback Operation
..................................................... 61
Playing Videos on a BD/DVD
................................................. 63
Playing Videos on the HDD
.................................................... 64
Playing Videos on a SD Card
................................................. 64
Playing Still Images (JPEG)
................................................... 65
Changing Playback Settings
.................................................. 66
Playback Settings Menu
........................................................ 66
Audio/subtitle settings
........................................................ 66
Playback settings
.............................................................. 66
Video settings
................................................................... 67
Editing
Editing
.................................................................................. 68
Entering Characters
.............................................................. 69
Character List
.................................................................... 70
Grouping
.............................................................................. 71
Changing the Title/Group Name
............................................. 73
Deleting a Title/Group
............................................................ 73
Turning On Title/Group Protection
.......................................... 74
Turning Off Title/Group Protection
.......................................... 75
Creating a Playlist
................................................................. 76
Editing a Thumbnail
............................................................... 77
Editing a Chapter
.................................................................. 78
Dividing
................................................................................ 80
Deleting Scenes
.................................................................... 81
Changing the Disc Name
....................................................... 82
Changing the Shooting Date/Time
......................................... 82
Mode Conversion
.................................................................. 83
Settings Menu
Changing Settings of this Unit
................................................ 84
Setting Menu List
.................................................................. 84
SETUP
.............................................................................. 85
PLAYBACK SETTING
....................................................... 86
RECORD
.......................................................................... 87
AUDIO
.............................................................................. 88
DISPLAY
........................................................................... 89
CONNECTION
.................................................................. 90
SDI/HDMI CONNECTION
.................................................. 92
NETWORK SETTING
........................................................ 95
Others
Locking the Disc Tray
............................................................ 96
Turning on the Mode Lock
..................................................... 96
Last Function Memory
........................................................... 96
External Control
.................................................................... 97
RS-232C Specifications
..................................................... 97
LAN Connection
................................................................ 97
Command Table
................................................................ 97
Command
......................................................................... 98
Language Code List
............................................................ 108
Country Code List
............................................................... 110
Using the HDMI Consumer Electronics Control (HDMI CEC)
. 112
Creating a Seamless BD
..................................................... 112
Troubleshooting
.................................................................. 113
Frequently Asked Questions on Dubbing
.............................. 116
Remarks
............................................................................. 117
Specifications
..................................................................... 118
Important Notice Concerning the Software
........................... 119
Index
.................................................................................. 123
8Contents
Getting Started

Key Features
Professional Blu-ray Disc recorder of the
high-definition era
Copy videos to a Blu-ray Disc in high-definition from a high-
definition camcorder, or down convert the videos and record
them onto DVDs, all without the need for a PC.
The internal hard disk drive enables for easy editing and dubbing
multiple discs.
Supports direct recording to discs
You can record contents directly to an optical disc (BD-R/RE,
DVD-R/RW).
Interface with JVC ProHD MEMORY CARD
CAMERA RECORDER GY-HM series
Supports the import of “HQ mode” (*1) and “SP mode” (*2) files
in the MOV or MXF format recorded using the JVC ProHD
MEMORY CARD CAMERA RECORDER GY-HM series
(excluding GY-HM200 and GY-HM170). Import to the HDD and
dubbing to discs are supported.
MOV format
(*1) HQ
mode
: 1280x720/60p, 30p, 24p, 1440x1080/60i,
1920x1080/60i, 30p, 24p (SR-HD2700U)
1280x720/50p, 25p, 1440x1080/50i,
1920x1080/50i, 25p (SR-HD2700E)
(*2) SP
mode
: 1280x720/60p, 30p, 24p, 1440x1080/60i
(SR-HD2700U)
1280x720/50p, 25p, 1440x1080/50i (SR-HD2700E)
MXF format
(*1) HQ
mode
: 1440x1080/60i, 1920x1080/60i, 30p, 24p
(SR-HD2700U)
1440x1080/50i, 1920x1080/50i, 25p
(SR-HD2700E)
(*2) SP
mode
: 1440x1080/60i (SR-HD2700U)
1440x1080/50i (SR-HD2700E)
Compatibility with other consumer
camcorders
In addition to AVCHD, HDV and DV, JVC Everio file formats are
also compatible, and digital dubbing can be done.
Digital interface that allows for camcorder
compatibility
This unit is equipped with USB, SD slots and i.Link input
terminals for connecting the camcorder.
Create menu-supported Blu-ray discs
Blu-ray discs can be created using the BDMV (with menu)
format. (*1) BDAV discs can also be created and dubbed
according to the intended use.
This unit also enable users to use an original image as the
background.
(*1) : Menu cannot be created when recording directly to a
BDMV format disc.
Compatible with dual layer 50 GB Blu-ray
discs, and records up to 24 hours of full
high-definition images in a single disc
This unit is also compatible with high capacity dual layer 50 GB
Blu-ray discs, and up to 24 hours (AE mode) of full high-definition
images can be recorded in a single disc.
Authoring menu enables discs to be
created and used industrially such as for
demonstrations
Disc authoring can be used to create discs for industrial use,
such as discs that repeat playback automatically.
Equipped with external control RS-232C
terminal
This unit is equipped with an RS-232C terminal that allows for
external control using a PC.
Equipped with SDI output terminal
You can connect this unit directly to an SDI system without using
any converter or peripheral device.
Equipped with HDMI input terminal
You can input copyright-free HDMI content and record directly
using this unit.
How to Read this Manual
About this manual
This manual mainly describes operation procedures using the
remote control unit buttons.
0The buttons on the remote control unit are indicated as
[Button Name].
0The menu items are indicated as “Menu Item”.
Supplementary remarks in the main text
Memo : States restrictions on the functions or use of this unit.
Note : States precautions to be taken during operation.
A
: Indicates the page numbers or items to refer to.
Memo :
The displays of operable media are highlighted.
HDD : Hard disk drive
DVD : DVD
BD : Blu-ray disc
SD : SD card
SDHC : SDHC Card
CD : Music compact disc
JPEG : JPEG (still picture) file disc
Contents of this manual
0All rights reserved by JVC KENWOOD Corporation.
Unauthorized duplication or reprinting of this manual, in whole
or in part, is strictly prohibited.
0Other product names included in this manual are trademarks
and/or registered trademarks of their respective companies.
Marks such as ™, ® and © have been omitted in this manual.
0Illustrated designs, specifications and other contents of this
manual are subject to change for improvement without prior
notice.
Key Features 9
Getting Started

Other Precautionary Notes
Copyright protection
This unit supports copyright protection technologies.
Copyrights
0According to the copyright law, video or music data that you
store must not be used for purposes other than personal
enjoyment without the authorization of the copyright holder.
0This product incorporates copyright protection technology
that is protected by U.S. patents and other intellectual
property rights.
Use of this copyright protection technology must be
authorized by Rovi Corporation, and is intended for home and
other limited viewing uses only unless otherwise authorized
by Rovi Corporation. Reverse engineering or disassembly is
prohibited.
0The copyright protection function prevents copyrighted video
images from being saved to equipment such as a video
recorder. This function may also cause deterioration in the
playback picture quality when the data is output to a monitor
through a video recorder. This is not a hardware malfunction.
To play back copyrighted videos, connect this product
directly to the monitor.
0Read and understand fully the terms and conditions of all
copyright works before using this unit in the correct manner.
Under no circumstances shall JVC KENWOOD take any
responsibility for any infringements of copyright caused by
the customer when using this unit. The customer shall be
responsible for resolving all legal issues regarding to any
copyright infringements.
0This product is licensed under the AVC Patent Portfolio
License and VC-1 Patent Portfolio License. No license is
granted except for the personal and non-commercial use of
a consumer to the followings.
0Recording video in compliance with the AVC Standard
0Playing back AVC/VC-1 video that was recorded by a
consumer engaged in a personal and non-commercial
activity
0Playing back AVC/VC-1 video obtained from a licensed
video provider
Additional information may be obtained from MPEG LA, LLC.
See http://www.mpegla.com.
0This product is licensed under the AVC patent portfolio
license and VC-1 patent portfolio license for the personal and
noncommercial use of a consumer to (i) encode video in
compliance with the AVC Standard and VC-1 Standard
(“AVC/VC-1 Video”) and/or (ii) decode AVC/VC-1 Video that
was encoded by a consumer engaged in a personal and non-
commercial activity and/or was obtained from a video
provider licensed to provide AVC/VC-1 Video. No license is
granted or shall be implied for any other use. Additional
information may be obtained from MPEG LA, LLC. See http://
www.mpegla.com.
Trademarks
.
0Manufactured under licence from Dolby Laboratories. Dolby
and the double-D symbol are trademarks of Dolby
Laboratories.
0For DTS patents, see http://patents.dts.com. Manufactured
under license from DTS Licensing Limited. DTS, DTS-HD,
the Symbol, & DTS and the Symbol together are registered
trademarks of DTS, Inc.
© DTS, Inc. All Rights Reserved.
0DVD logo is a registered trademark of DVD Format/Logo
Licensing Corporation.
0HDMI, the HDMI Logo and High-Definition Multimedia
Interface are trademarks or registered trademarks of HDMI
Licensing LLC in the United States and other countries.
0Blu-ray Disc and the Blu-ray Disc logo are trademarks of Blu-
ray Disc Association.
0“x.v.Color” and the “x.v.Color” logo are trademarks of Sony
Corporation Co., Ltd.
0Java and all marks related to Java are the registered
trademarks of Oracle Corporation, its subsidiaries and
affiliates in the US and other countries.
0SD and the SDHC logo are trademarks of SD-3C, LLC.
0i.LINK and the i.LINK logo are trademarks.
0“AVCHD” and the “AVCHD” logo are trademarks of
Panasonic Corporation and Sony Corporation.
0Windows and Internet Explorer are either registered
trademarks or trademarks of Microsoft Corporation in the
United States and/or other countries.
0Mac OS is trademark of Apple Inc., registered in the U.S. and
other countries.
Stored video content and compensation
0For discs containing important video content, backup on a
periodic basis (once every few years) is recommended.
Although digital signals do not deteriorate, playback or
dubbing may fail due to aging of the disc resulting from the
storage conditions.
0Recorded data may be lost if power outage occurs while this
unit is being used. It is therefore recommended that videos
stored on the HDD be dubbed to a BD or DVD as soon as
possible in case the HDD breaks down.
0Videos or data stored on a BD/DVD, HDD, or SD card cannot
be recovered if the media is damaged.
Disclaimer of compensation for loss or
damage of stored video content
Please note that our company will not be liable for compensation
of the content or any incidental damages in the event that
dubbing or playback cannot be performed properly for some
reasons. The same applies during repair of this unit.
Compatibility with Analog Sunset
0Video contents that are copyright-protected under the AACS
will not be output from the analog output terminals of this unit.
0Video contents that are not copyright-protected under the
AACS will be output from the analog output terminals of this
unit.
0Analog output terminals refer to the [VIDEO OUT] terminal,
[S-VIDEO OUT] terminal, and [COMPONENT VIDEO OUT]
terminals.
0For details on the output resolution, refer to “List of Output
Resolutions” (A P 11).
10 Other Precautionary Notes
Getting Started

List of Output Resolutions
Media Output Terminal Content
Protection
Output
Resolution
DVD-Video Analog Output
(Component)
Free 480p (SR-
HD2700U)
576p (SR-
HD2700E)
CSS
BDMV Analog Output
(Component)
Free In HD (SR-
HD2700U)
576p (SR-
HD2700E)
AACS No Output
BDAV Analog Output
(Component)
Free In HD
AACS No Output
0The output resolution if “ SDI/COMPONENT OUTPUT ”
(A P 91) is set to “1080i” when there is no HDMI connection.
0BD contents are assumed to be recorded in the 1080i format.
0CSS is the abbreviation for content scramble system.
0AACS is the abbreviation for advanced access content
system.
Handling precautions
Do not use the plug or power point with dust or
metallic objects attached to it
0Failure to do so may cause short circuit or heating, and result
in fire or electric shock.
0Remove the plug once every half a year, and clean it with a
dry cloth.
Make use of a power point that allows the power
plug to be inserted or removed easily
0Make sure that the plug can be removed immediately in case
an abnormality is found in the unit.
Insert the plug firmly into the power point
0Failure to do so may cause short circuit or heating, and result
in fire or electric shock.
Do not make use of a power voltage other than
that specified
0Doing so may result in fire or electric shock.
Do not insert or remove the plug with wet hands
0Doing so may result in electric shock.
Do not touch the plug when there is thunder or
lightning
0Doing so may cause electric shock.
Do not insert any foreign object into this unit
0Doing so may result in fire or electric shock.
Do not dismantle or remodel this unit
0This unit consists of high-voltage components. Dismantling
or remodeling the unit may cause fire or electric shock.
Request the authorized dealer to inspect the
interior part of the unit once a year
0
Using this unit with dust accumulated inside may result in fire.
0It is particularly effective to perform servicing before the
humid rainy season.
Do not connect any video cameras that are not
made by JVC to the USB terminal
0Doing so may result in malfunction.
0Please read through “SD Cards” (A P 12) if you are using
a USB card reader.
Hard Disk Drive (HDD)
Hard disk drive (HDD)
The HDD rotates at a high speed whenever the power is turned
“On”.
Pay particular attention to the following precautions when using
this unit.
Warning
0Do not subject it to vibration or strong impact
Subjecting this unit to excessive impact may result in loss of
recorded data and even damage of the HDD.
0Do not remove the power plug when this unit is running
Shutting down the power when the HDD is running may result in
data loss and even damage of the HDD. Make sure that the power
plug is removed only after turning off the power.
(Wait for the “GOODBYE” message on the display window to
disappear first)
Formatting the HDD
To format the HDD, perform the following steps.
1Press the [MEDIA MANAGE] button on the remote
control unit
2Select “FORMAT” from “HDD”
0A confirmation screen for formatting the HDD appears.
3Select “YES”
0The confirmation screen for formatting the HDD
reappears.
4Select “FORMAT”
0HDD formatting starts.
Other Precautionary Notes 11
Getting Started

SD Cards
Handling of SD cards
Note :
0
The disc operation display icon appears blinking and
“READING” is displayed on the display window when the SD
card is being accessed (such as during dubbing, playback, or
formatting). When access to the SD card is in progress, do not
remove the card or the power plug. Doing so may cause the SD
card to become unusable.
If the SD card is not usable, reformat the card. If the problem
persists even after reformatting, use a new SD card.
0
Do not use or store the card at a place that is subject to static or
electrical noise.
0
Inserting the SD card incorrectly may cause this unit or the card
to malfunction.
0
Our company will not be liable for any damage or loss of the
stored data due to accidents. (Be sure to back up the data.)
0
Use the card according to the prescribed conditions. Do not use
it at the following locations.
0Places that are exposed to direct sunlight
0Places near heat-generating equipment
0Inside a car that is under the sun with the windows tightly
shut
0Places that are subject to high humidity and corrosion
0Do not bend or drop the card, or subject it to strong impact or
vibration.
0Do not expose the card to water.
0Do not place near devices that emit strong magnetic or radio
waves.
0Do not touch the metal part of the card.
0The SD SLOT does not support SDXC cards.
0To use an SDXC card, connect a SDXC-compatible USB card
reader (sold separately) via USB connection.
0Use a USB card reader with no more than two card slots. This
unit may not recognize the SD card if a USB card reader with
three or more card slots is used.
0When an SDXC card is formatted in the standard OS format
of the PC, title import may fail in some cases.
Memo :
0To dispose a card after erasing all data inside, it is
recommended that this be done using a commercially
available data deletion software, or by destroying the card
physically, such as with a hammer. Formatting or deletion of
data using this unit only changes the file administration
information, and does not erase the data completely.
BD video data
You can erase BD Video data from the SD card as follows.
1Insert the SD card which has BD video data stored
on it, into the [SD SLOT]
Memo :
0The BD video data cannot be erased if the SD card is write-
protected. In this case, turn off the write-protect lock before
inserting the SD card.
2Press the [MEDIA MANAGE] button on the remote
control unit
3Select “BD-VIDEO DATA ERASE” from “SD
CARD”
0The confirmation screen for erasing the BD video data is
displayed.
4Select “ERASE”, and press the [OK] button
0The BD video data will be erased.
Discs
BD recording formats
BDAV mode
0Videos can be edited (chapter edit etc) and new videos can
be added to the disc. This format is suitable for recording
videos.
0MPEG2 with HD quality will be recorded as it is onto the disc.
This format has low playback compatibility, but performs well
when used for backups.
BDMV mode
0Compatible and playable on other BD players. Menu
functions similar to those of DVD video mode are also
included. (*1)
This format performs well for distribution purposes.
(*1) : Menu cannot be created when recording directly to a
BDMV format disc.
DVD recording formats
VR mode
0Format the disc using “VR MODE” if you want to add new
videos to the disc.
0Deleting currently saved videos increases the remaining
space on the disc. (except for the case of DVD-R discs.)
Video mode
0Format the disc in this mode if you want to play the disc on a
different DVD player.
Formatting of discs
Formatting is required for some disc types. Perform formatting
if this is necessary.
When using BD-RE or BD-R discs
Formatting is required. Format the disc using this unit.
0Format it to the BDAV or BDMV mode.
When using DVD-R or DVD-RW discs
Formatting is required. Format the disc using this unit.
0Format using “VR MODE” or “VIDEO MODE”.
Note :
0BD-R and DVD-R discs cannot be reformatted. Check the
disc mode before formatting the disc.
12 SD Cards
Getting Started

Discs that enable both dubbing and
playback
Disc Type Recording Format Format Finalize Repeated Use
(Reformat)
BD-RE BDAV mode ü-ü
BDMV mode ü-ü
BD-R BDAV mode ü ü -
BDMV mode ü- -
DVD-RW Video mode üüü
VR mode üüü
DVD-R Video mode ü ü -
VR mode ü ü -
Memo :
0This unit does not support the BDXL format.
Discs that enable playback only
Disc Type Description
DVD-RAM (4.7 GB) Supports specific forms of playback, but no recording can be done.
BD-ROM Commercially available Blu-ray discs (movies, music, etc.)
The region code that can be played back on this unit is “*1”.
DVD video Commercially available DVD-Video discs (movies, music, etc.)
The region code that can be played back on this unit is “*2”. The video format used is PAL or NTSC.
Music CD CD-DA
DTS music CDs are also playable.
*1: SR-HD2700U: A, SR-HD2700E: B
*2: SR-HD2700U: 1, SR-HD2700E: 2
Memo :
0If 8 cm discs are used, only playback can be performed. The disc cannot be used for recording or editing.
08 cm discs can be used without adapters.
0DVD-RAM cartridges and BD-RE are not supported. Take the DVD-RAM out of the cartridge before using it.
Discs that are not supported
0DVD-RAM (2.6 GB/5.2 GB)
0DVD-R (for authoring)
0CD-ROM/R/RW (PhotoCD, CD-G, VCD etc.)
0DDCD (1.3 GB, Double Density CD)
0HDCD (High Density CD)
Memo :
0To playback a BD or DVD that was created using this unit on another player, finalize the disc.
0There is no need for finalizing if the BD-RE disc is recorded using BDAV mode.
0If a DVD that was recorded using VR mode has been finalized, the disc can only be played back on VR mode compatible devices.
0To perform high-speed dubbing, make use of a disc that supports high-speed recording.
0This unit can play back and record only PAL signals. NTSC signals can also be played back on the BD/DVD deck. (SR-HD2700E)
0This unit can play back and record only NTSC signals. (SR-HD2700U)
Note :
0Do not use disc if the sticker or label is peeled off from the disc surface, if the disc is not round in shape, or if it is significantly warped
or cracked.
Discs 13
Getting Started

Precautions on the Use of
Discs
Maintenance of discs
0Dirt attached to the disc, such as fingerprints and dust, may
cause distortion in the video image or sound.
Keep the disc clean at all times such as by using a soft cloth.
0Wipe the disc lightly from the center outward using the cloth.
0If dirt is stubborn, wipe it off using a slightly wet cloth, followed
by a dry cloth.
0Do not use thinner, benzine, alcohol, conventional record
cleaners, or antistatic sprays.
Doing so may damage the disc surface.
Handling discs
Removing a disc
.
Keeping a disc
.
Correct way to hold a disc
.
Do not touch the recording/playback side of the disc with
your fingers.
Fingerprints attached to the surface may affect the
recorded video/audio, and prevent this unit from
operating properly.
Disc storage
0Avoid storing the disc at the following locations.
0Places that are subject to high humidity, dust, or mold
growth
0Places that are exposed to direct sunlight or near a heater
0Inside a car during summer
0Do not drop the disc or subject it to strong impact.
0Place the disc in a case and store it vertically.
0Stacking the discs without using a case, placing the discs
against one another or dropping them may result in
deformation or cracking.
When the recording/playback lens is dirty
Dust or dirt may be attached to the recording/playback lens after
using this unit for a prolonged period of time, and recording or
playback may not be properly performed as a result.
In such case, contact the local dealers in your area.
Precautions when playing a dual disc
The side of the dual disc that is not used for DVD recording does
not comply with the standard specifications of music CDs.
It is recommended that playback on this unit be limited to the
DVD recording side of the dual disc.
Disc usage
The best performance may not be obtained for some discs.
Power Cable
Do not unplug the cable during recording or playback.
Doing so may cause the disc to become unusable.
If the disc becomes unusable, refer to the following.
BD-R or
DVD-R
:Use a new disc.
BD-RE or
DVD-RW
: Reformat the disc after erasing the data. If the disc
is still not usable, use a new disc.
Do not turn off the [A] button or unplug the power cable
immediately after closing the disc tray.
14 Precautions on the Use of Discs
Getting Started

On-screen Displays
Status display
Displays the current settings and operating status (such as
playback, pause) of this unit.
Pressing the [ON SCREEN] button on the remote control
displays the status. To cancel the display, press the [ON
SCREEN] button again.
You can select whether to display the statuses by changing the
settings in the settings menu.
For details, refer to “ ON SCREEN GUIDE ” (A P 89).
Memo :
0To display the statuses, set the “ON SCREEN GUIDE” item
on the “DISPLAY” menu screen to “AUTO”.
0Setting the “ON SCREEN GUIDE” item on the “DISPLAY”
menu screen to “OFF” hides display of all status information.
0You can display the status by pressing the [OPTION] button
on the remote control unit when playback, dubbing or editing
is not in progress.
APress the [OPTION] button on the remote control unit
BSelect “ON-SCREEN DISPLAY”, and press the [OK]
button on the remote control unit
Event display
An on-screen event display appears on the display window as
well as the monitor when there is a misoperation.
0The event display appears for an interval of about three
seconds.
Memo :
0The same event display may appear several times.
Alarm display
When an operation is not accepted by this unit, an on-screen
alarm display appears on the display of the main unit as well as
the monitor.
SDI time code display
The time code is displayed during recording of SDI input signals.
You can specify whether to display the time code, and also
where to display it.
For details, refer to “TIME CODE INPUT SETTING” and “TIME
CODE DISPLAY POSITION” under “SDI/HDMI
CONNECTION”.
Memo :
0When “TIME CODE INPUT SETTING” of “SDI/HDMI
CONNECTION” is set to “OFF”, the time code is not
displayed.
Menu operation
Pressing the remote control buttons below calls up the
respective menu screens.
0[SET UP], [NAVIGATION], [EDIT], [INFORMATION
CORRECT], [DUBBING], [MEDIA MANAGE]
0Press any of the [ J / K / H / I ] buttons to move to a specific
menu item (yellow item indicated by a small arrow).
0Press the [OK] button to confirm the selection.
0
Press the [RETURN] button to return to the previous screen.
0Simple instructions on the operation procedure may be
displayed at the bottom of the screen.
Memo :
0During playback using DIRECT OUT on this unit, pressing
each of the [SET UP], [NAVIGATION], [EDIT],
[INFORMATION CORRECT], [DUBBING], and [MEDIA
MANAGE] buttons automatically switches to MONITOR
OUT.
Switching cannot be performed when recording using
DIRECT OUT is in progress.
Pressing any of the above buttons during playback using
MONITOR OUT does not switch automatically to DIRECT
OUT. The display remains as MONITOR OUT.
On-screen Displays 15
Getting Started

Name and Function of Parts
Front panel
.
A B C D E H
RQPON
J LGF MI K
A[ A ] button
Switches operation on or off.
BDisc tray
C[ M ] button
Opens/closes the disc tray.
DDisplay window
ERemote control sensor
F[RESET] switch
Reset the unit.
G[REC MODE] button
Switches the recording mode.
H[HDD] lamp
Lights up when in HDD mode.
The [REC] lamp lights up while recording/importing.
I[INPUT SELECT] button
Switches the external input signals (SDI, HDMI, HDV/DV,
L-1).
J[BD] lamp
Lights up when in BD/DVD mode.
The [REC] lamp lights up while recording/dubbing.
K[MEDIA SELECT] button
Switches between HDD and BD/SD.
L[DIRECT/MONITOR] lamp
Lights up in the MONITOR OUT mode.
M[DIRECT/MONITOR] selection button
Switches the output of the rear SDI and HDMI output
terminals to “DIRECT OUT” or “MONITOR OUT”.
Memo :
0When each of the [SET UP], [NAVIGATION], [EDIT],
[INFORMATION CORRECT], [DUBBING], and [MEDIA
MANAGE] buttons is pressed, “ONSCREEN” appears in the
display window of the unit.
In this case, switching is possible only when the respective
top screens are displayed.
If a display other than the top screen appears, such as a pop-
up screen, switching may not be possible.
NPlayback control buttons
0[ I ] button
Plays back the data.
0[ o ] button
Stops playback/recording.
0[ O ] button
Fast reverses playback.
0[ N ] button
Fast forwards playback.
0[ W ] button
Pauses playback.
O[ R ] button
Starts recording.
P[SD SLOT]
Used for inserting SD cards.
Q[i.LINK(HDV/DV IN)] terminal
Connect a video camera using i.LINK (HDV/DV. IN).
R[USB] terminal
For connecting using a USB cable.
16 Name and Function of Parts
Getting Started

Display window
.
A B C D
AHDD/DISC remaining level display
BDubbing display
CDisc status display
DHDMI output display
Memo :
0The brightness of the display window can be adjusted.
For details, refer to “PANEL DISPLAY BRIGHTNESS”
(A P 85).
English messages appear for a number of operations.
(Examples)
HELLO : When the power plug is inserted
READING : When reading the disc
ONSCREEN : Upon moving to the playback navigation
screen
Rear panel
.
A B D F G
KJ
E
I
C
H
AAC inlet
For connecting the power supply.
BCooling fan
C[LAN] terminal
For connecting a LAN cable.
D[SDI IN/OUT THROUGH/OUT] terminal
For connecting using a BNC cable.
E[AUDIO OUT/IN] terminals
For connecting using an audio cable.
F[VIDEO OUT/IN] terminals
For connecting using a video cable.
G[SERIAL COM.(RS-232C)] terminal
For connecting to a PC using a serial cable.
H[HDMI IN / HDMI OUT] terminal
For connecting using an HDMI cable.
I[S-VIDEO OUT/IN] terminals
For connecting using an S-video cable.
J[COMPONENT VIDEO OUT] terminals
For connecting using a component video cable.
K[REMOTE IN] terminal
For connecting a wired remote control.
Name and Function of Parts 17
Getting Started

Remote control
.
Z
b
c
S
V
T
W
C
A
D
d
a
e
f
g
k
h
j
m
l
X
B
U
Y
H
I
J
K
G
O
R
L
E
F
M
N
P
Q
i
A[DELETE]
Deletes a title or characters.
B[ M ]
Opens/closes the disc tray.
C[HDD]
For operating the HDD.
D[0]-[9]
For entering characters.
E[Z]
For entering characters.
F[RED], [GREEN], [BLUE], [YELLOW]
Enabled when the color button is displayed.
Memo :
0The sequence of the button color is different depending on
the model.
G[DUBBING]
Displays the dubbing menu screen.
H[ J / K / H / I ]
The cursor can be moved to select an item.
I[OPTION]
Displays the option screen.
J[ S ]
Move to the chapter just before the current chapter.
K[ O ]
Fast reverses the video and starts slow playback.
L[ R ]
Press the [ R ] and [ I ] buttons together to start recording.
M[REC MODE]
For checking the recording mode settings and amount of time
remaining.
N[ON SCREEN]
Displays information on the screen.
O[PROGRESSIVE SCAN]
Switches the resolution of the image output.
P[AUDIO]
Switches the playback audio.
Q[EDIT]
Displays the editing menu screen.
R[MEDIA MANAGE]
Displays the media management menu screen.
S[ A ]
Switches operation on or off.
T[INPUT SELECT]
Switches the external input signals (SDI, HDMI, HDV/DV,
L-1).
U[BD/SD]
For operating BD/DVD or SD.
V[PAGE PRV] [PAGE NEXT]
Returns to the previous page. Or advances to the next page.
W[ w ]
Move the playback position slightly backwards.
X[ v ]
Advance the playback position slightly.
Y[#]
For character input and switching between DIRECT OUT/
MONITOR OUT.
Memo :
0During character input, it cannot be used for switching
between DIRECT OUT/MONITOR OUT.
0When each of the [SET UP], [NAVIGATION], [EDIT],
[INFORMATION CORRECT], [DUBBING], and [MEDIA
MANAGE] buttons is pressed, “ONSCREEN” appears in the
display window of the unit.
In this case, switching is possible only when the respective
top screens are displayed.
If a display other than the top screen appears, such as a pop-
up screen, switching may not be possible.
Z[NAVIGATION]
Displays the playback navigation screen.
a[OK]
Confirms a selection or entry.
b[RETURN]
Returns to the previous screen without applying the selection
or entry.
c[ T ]
Move to the next chapter.
d[ N ]
Fast forwards the video and starts slow playback.
e[ I ]
Plays the video.
f[ W ]
Pauses the video that is currently playing/recording.
g[ o ]
Stops playback/recording.
18 Name and Function of Parts
Getting Started

h[MARK]
Adds a chapter mark during playback or recording. Select
multiple titles from the playback navigation screen or other
screens.
i[PB MODE]
Display the playback settings screen.
j[ANGLE]
Switches the camera angle for playback.
k[SET UP]
Displays the settings menu screen.
l[SUB TITLE]
Switches the playback subtitle.
m[INFORMATION CORRECT]
Displays the information editing screen.
Change batteries for the remote control
0If the operable distance of the remote control unit becomes
shorter, this means that the batteries are running out.
When this occurs, replace the batteries with new ones.
.
Batteries
0Insert the batteries correctly according to the + and – signs.
Insert the – side of the battery first.
0If an error occurs while using the remote control unit, remove
the batteries, wait for about five minutes, and operate the
remote control unit again after re-inserting the batteries.
Battery life : Approximately 6 months
(depending on the frequency of use)
Remote control codes
By setting a remote control code for the unit and remote control,
you can prevent two recorders from operating simultaneously
using the remote control for this unit.
(the setting for the unit and remote control at time of purchase is
“REMOTE CONTROL 3”.)
Memo :
0Changing the remote control code for the remote control
before the unit’s remote control code is changed will cause
the unit to be inoperable.
Change the unit’s remote control code first when changing
remote control codes.
Changing the remote control code for the unit
1Press the [SET UP] button on the remote control
to display the “SETUP” menu
2Change the “REMOTE CONTROL CODE” option in
the “SETUP” menu
Memo :
0For details, refer to “REMOTE CONTROL CODE”
(A P 85).
Changing the remote control code for the
remote control
1Press and hold the [OPTION] button on the remote
control
2Press either of the [1], [2], [3] or [4] buttons
0Press the number button that is equivalent to the remote
control code you desire.
3Press the [OK] button
0Press the [OK] button to change the remote control code.
4Release the [OPTION] button on the remote
control
Memo :
0If the remote control code is different from the unit, the remote
control code for the unit will be displayed on the display
window.
Examples : REMOTE CONTROL 3
Name and Function of Parts 19
Getting Started

Connecting a Monitor
To display video images from this unit, connect it to a monitor.
0This unit supports connections using “HDMI cable”,
“component video cable”, “S-video cable”, or “video cable”.
Memo :
0Switch to the appropriate monitor input according to the type
of connection cable used.
For details, refer to the instruction manual of the monitor.
Connecting using an HDMI cable
Connecting using an HDMI cable (sold separately) enables
signals to be maintained in the digital format, and thus playback
of clear video images.
.
Memo :
0To connect to a monitor that does not support the copyright
protection system (HDCP), set “HDCP”.
For details, refer to “ HDCP ” (A P 91).
0Use a High Speed HDMI Cable.
0After connecting using an HDMI cable, change the unit setting
to “HDMI CONNECTION”.
For details, refer to “ VIDEO PRIORITY MODE ” (A P 90).
Connecting using a component video cable
Connecting using a component video cable (sold separately)
delivers playback images that are clearer than those by an S-
video cable.
.
Memo :
0After connecting a component video cable, change the unit
setting to “SDI/COMPONENT OUTPUT”.
0For output from the component video output terminals, the
setting will be limited to “480i” in the case of copyright-
protected videos.
For details, refer to “ SDI/COMPONENT OUTPUT ”
(A P 91).
0Videos that are AACS copyright-protected are not output from
the component video output terminals.
Connecting using an S-video cable
For connecting an S-video cable (sold separately).
.
Connecting using a video cable
Connect the output terminal of this unit to the input terminal of a
TV using a video/audio cable (sold separately).
(Use a BNC adapter that is sold separately)
.
Note :
0Connect the S-video/video output of this unit directly to the
TV (or monitor). Connecting this unit to the TV or monitor via
a video deck triggers the copy protection function, and may
cause distortion in the video images during playback.
0Videos that are AACS copyright-protected are not output from
the S-video/video output terminals.
Connecting using an SDI cable (BNC)
Connect using an SDI cable (sold separately). You can transmit
both digital video and audio signals with a single cable.
.
Memo :
0The SDI output terminal comes with two outputs, one is an
SDI terminal that enables switching between DIRECT OUT/
MONITOR OUT, while the other is an SDI through terminal
used exclusively for through output.
0Copyright-protected videos are not output from the SDI
output terminal.
For details, refer to “ SDI/HDMI CONNECTION ” (A P 92).
20 Connecting a Monitor
Preparation
This manual suits for next models
1
Table of contents
Other JVC Blu-ray Player manuals

JVC
JVC SR-HD1700EU User manual

JVC
JVC XV-BP1UB User manual

JVC
JVC SRC-1020-1ORT User manual

JVC
JVC SR-HD1250US - Blu-ray Disc & Hdd Recorder User manual

JVC
JVC SR-HD1700US Installation guide

JVC
JVC SR-HD1250US - Blu-ray Disc & Hdd Recorder User manual

JVC
JVC LVT2007-029C User manual

JVC
JVC XV-BP1C User manual

JVC
JVC LVT2007-003C User manual

JVC
JVC 0609SKMLGEEGL User manual