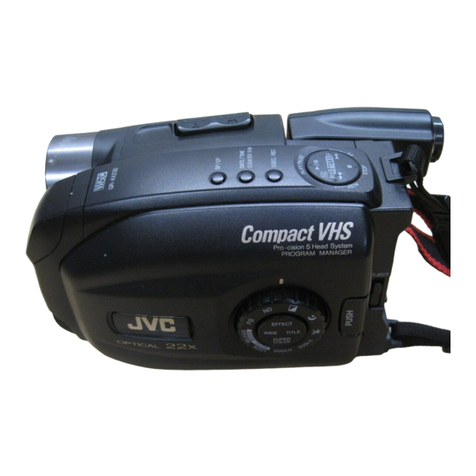
JVC GX-N7E User manual

No.
5550
:
VC
JUly
1984
Service
Manual
Manuel
de
Service
Service-Handbuch
COLOR
VIDEO
CAMERA
CAMERA
COULEUR
VIDEO
FARB-VIDEO
KAMERA
MODEL/MODELE/MODELL
GX-N’7E
*
This
Service
Manual
is
prepared
in
the
three
languages
(English,
French
and
German).
*
CONTENTS
@®
INSTRUCTION
BOOK
@
INTRODUCTION
AND
REPAIR
SERVICE
@
ADJUSTMENT
@
PARTS
LIST
®
STANDARD
CIRCUIT
DIAGRAM
*
TABLE
DES
MATIERES
@
MANUEL
D’INSTRUCTIONS
@
INTRODUCTION
ET
SERVICE
DE
REPARATION
@
AJUSTMENT
@
LISTE
DES
PIECES
DE
RECHANGE
@
SCHEMA
DE
CIRCUIT
STANDARD
*
INHALTSVERZEICHNIS
@
BEDIENUNGSANLEITUNG
@
EINFUHRUNG
UND
REPARATUREN
@
EINSTELLUNG
@
STANDARD-SCHALTUNGSDIAGRAMM

wd
VL
|
instruction
Book
COLOUR
VIDEO
CAMERA
GX-N7E
BEDIENUNGSANLEITUNG:
FARB-VIDEOKAMERA
GX-N7E
MANUEL
D‘INSTRUCTIONS:
CAMERA
VIDEO
COULEUR
GX-N7E
PRUIKSAANWLIZING:
KLEUREN
VIDEOCAMERA
GX-N7E
This
instruction
book
is
divided
into
four
sections,
English,
French,
German
and
Dutch:
©
English...
eee
Pages
1E
—
17E
@
German...
20.
oe
Pages
1G
—
17G
OP
ONCA
oo
ces
oa
cede
een
awe
Pages
1F
—
17F
©.
Duteh:,
2
ehh
eee
Pages
INL
—
17NL
Diese
Bedienungsanteitung
ist
in
vier
Fassungen,
eine
englische,
franzésische,
deutsche
und
hollandische,
gegliedert:
@
Englisch
....................,
Seite
1E
—
17E
@
Deutsch
..
2...
Seite
1G
—
17G
@
Franzésisch
......0...0...0.....
Seite
1F
—
17F
©
Hollandisch
.........2.......
Seite
INL
—17NL
Ce
manuel
d’instructions
est
divisé
en
quatre
sections:
Anglais,
Francais,
Allemand
et
Hollandais.
4
@
ARIAS
baie
esas
a
eh
ebb
Sek
s
Pages
1E
—
17E
@
Allemand
................0..
Pages
1G
—
17G
@
Frangais
2.2...
ee.
Pages
1F
—
17F
@
Hollandais......
0.
...0.....
Pages
INL
—
17NL
Deze
gebruiksaanwijzing
is
verdeeld
in
vier
deten,
te
weten
Engets,
Grans,
Duits
en
Nederlands:
OPE
NgOlS.
5.
tiels
aba
ewes
dee
de
eee
ec
Piz.
1E
~
17E
OP
OUIES
cea
ben
hah
Cinta
needa
wrat
ae
Piz.
1G
—17G
©
FANS
as
ee
thal
brine
uae
aunts
Sods
Plz.
1F
—17F
@
Nederlands
......00.0...00..
Piz.
INL
—
17NL
SES
WARNING:
TO
PREVENT
FIRE
OR
SHOCK
HAZARD,
DO
NOT
EXPOSE
THIS
APPLIANCE
TO
RAIN
OR
MOISTURE.
CAUTION:
To
prevent
electric
shocks
and
fire
hazards,
do
NOT
use
other
than
specified
power
source.
CAUTION
To
prevent
electric
shock,
do
not
disassemble
the
camera.
No
user-serviceable
parts
inside.
Refer
servic-
ing
to
qualified
service
personnel,
VIDEO
STANDARD
This
camera
GX-N7E
is
designed
to
produce
a
PAL
type
video
signal,
Equipment
using
standards
other
than
PAL
cannot
be
connected
with
this
camera,
Inquiries
on
any
difficulties
concerning
connection
and
use
of
related
VTR
units
should
be
forwarded
to
a
JVC
Authorized
Service
Station
or
JVC
Service
Dept.
When
using
the
camera
to
record
important
events
such
as
weddings,
be
sure
to
make
a
test
recording
first
to
check
that
the
picture
and
sound
are
recorded
normally.
in
this
way
you
will
not
be
let
down
by
your
camera,
recorder
or
video
tape
when
the
chance
to
record
the
event
will
never
be
repeated.

Thank
you
for
purchasing
this
JVC
Colour
Video
Camera.
To
obtain
the
best
results
from
your
GX-N7E,
read
this
instruction
book
carefully
before
use;
after
reading
it,
retain
it
for
future
reference.
FEATURES
NAMES
OF
PARTS
@
Minimum
illumination
of
10
tux
of
subject
being
shot.
@
Parallax-free
semi-TTL
Active
Infrared
Auto-Focus
sys-
tem.
@
Auto
Colour
Tracking
(ACT)
white
balance
adjustment.
@
Auto
Iris
Control,
6:1,
power
zoom
lens
with
Macro
CO
NTE
NTS
e
Sool
cuike
Jens
mount
‘See
ie
TS
{nterchangeable
with
lenses
for
SLR
(single
lens
reflex)
cameras
using
optional
mount
adaptors.
FEATURES
ace.
os8
557%
cova
lana,
evan
Wine
ed
movie
wee
oe
2E
PRECAUTIONS
.......
20.0.0...
000
c
eee
eee
2€
NAMES
OF
PARTS.........
0.000000
ee
eee
3E
HOW
TO
SET
UP
THE
CAMERA.............
4E
G)
HOW
TO
INSTALL
THE
MICROPHONE
....
4&
(2)
HOW
TO
INSTALL
THE
VIEWFINDER,
ADJUST
ITS
POSITION
AND
ENLARGE
THE
IMAGE
ON
ITS
SCREEN..........
4E
{3}
HOW
TO
ADJUST
THE
GRIP
BAND
......
5E
.
[@)
HOW
TO
INSTALL
THE
CAMERA
CABLE
..
5E
HOW
TO
CONNECT
TOA
VTR.............-
6E
(J)
WHEN
THE VTR
HAS
A
CAMERA
CONNECTION
TERMINAL
............
6E
[2]
WHEN
THE VTR
DOES
NOT
HAVE
A
CAMERA
CONNECTION
TERMINAL
.....
6E
HOW
TO
USE
THE
STEREO/MONO
SWITCH
7E
[4]
HOW
TO
USE
THE
POLARITY
SWITCH
...
7E
HOW
TO
OPERATE
THE
VIDEO
CAMERA
.....
8E
(0
HOW
TO
SUPPLY
POWER..............
8E
HOW
TO
USE
THE
IRIS
CONTROL
SWITCH
gE
(3)
HOW
TO
USE
THE
BLC
(BACKLIGHT
COMPENSATION)
SWITCH.
...........-
9E
{4}
HOW
TO
USE
THE
FOCUS
SWITCH.......
9E
HOW
TO
OPERATE
THE
WHITE
BALANCE
SWITCH:
ois
Steelers
couch Slave
Ss
Waser
Be
ae
10€
ZOOMING
OPERATION
...............
12E
(2
HOW
TO
RECORD
WITH
A
VTR
........
12E
VIEWFINDER
INDICATORS
................
13E
OTHER
OPERATIONS................--06-
14E
(1)
HOW
TO
OPERATE
THE
FADER
BUTTON:
oie
sea
a
es
ethca
fat
14E
HOW
TO
OPERATE
THE
MACRO
FACILITY
14
USING
AN
EXTERNAL
MICROPHONE
...
.15€
{@]
HOW
TO
MOUNT
AND
DEMOUNT
LENSES
.15E
SPECIFICATIONS
.........
0.0...
cece
ee
eae
17E
—2E
—
PRECAUTIONS
®
Do
not
aim
the
camera
lens
at
extremely
bright
objects
such
as
the
sun
or
other
strong
light
sources
even
when
not
in
use
or
switchéd
off
as
well
as
during
shooting
or
recording.
Incorrect
use
could
damage
the
pickup
tube.
Always
be
sure
to
keep
the
lens
capped
except
during
shooting.
®@
Do
not
shoot
luminous
bodies
such
as
metal
objects,
etc.
which
reflect
light,
as
this
can
result
in
not
only
bad
pictures
but
damage,
etc.
@
Select
a
light
which
generates
less
heat
and
prevent
its
beam
from
shining
directly
on
the
camera.
Otherwise
heat
from
the
light
may
deform
the
camera
body
or
components,
or
cause
malfunctioning.
Apply
power
and
operate
the
camera
1
or
2
hours
every
6
months.
The
pickup
tube
will
lose
efficiency
with
age
if
the
camera
is
not
used
for
too
long
time.
®
Do
not
disassemble
any
part
of
the
camera;
high
voltages
are
developed
in
some
parts
of
the
camera
and
it
is
dangerous
to
touch
them
because
of
the
possibility
of
electric
shock.
®
Do
not
allow
inflammable
objects,
metal
objects
or
water
to
get
inside
the
camera,
as
these
can
cause
damage
or
mat!functioning.
®
Do
not
try
to
tighten
or
loosen
the
screws
in
the
several
servicing
holes
of
the
camera
body
and
viewfinder.
These
are
only
for
experienced
service
personnel.
Avoid
using
the
camera
in
places
where
it
is
excessively
hot,
humid
or
cold
or
where
there
are
strong
electric
waves
and
magnetic
fields
which
can
create
electrical
noise,
or
where
it
is
liable
to
catch
fire.
Be
careful
not
to
subject
the
camera
to
excessive
shock
or
vibration,
as
these
could
cause
distorted
pictures,
damage
or
mal-
functioning.
@
Do
not
leave
the
camera
inside
a
parked
car
as
the
tem-
perature
can
become
extremely
high
when
exposed
directly
to
the
sun
with
the
doors
shut.
This
can
cause
plastic
parts
tobe
deformed
and
result
in
matfunctioning.
@
Lens
cap
@
Colour
temperature
sensor
window
@
Lens
hood
O
Focus
ring
©
Zoom
lever
@
Zoom
buttons
@
Viewfinder
connector
©
Accessory
shoe
©
Microphone
@
WHITE
BALANCE
switch
@®
Focus
switch
@®
BLC
(backlight
compensation)
switch
®
FADER
button
®
IRIS
CONTROL
knob
®
IRIS
CONTROL
switch
®
Infrared
receiver
®
STEREO/MONO
switch
®
Viewfinder
®
Grip
band
@
Camera
cable
socket
—
36
-
@
VTR
START/STOP
button
@
Tripod
mounting
hole
@®
VTR
POLARITY
switch
@
EXPOSURE
indicator
@®
VTR
START/TAPE-END
ALARM
indicator
(red)
@
WHITE
BALANCE
setting/
BATTERY
warning
indicators
(green
and
yellow)
@
Camera
cable
@®
POWER
button

esi
Shia
Se
acecne
_
and
insert
the
power
plug
into
the
POWER
jack
at
the
same
i
time.
"
Notes:
_™
How
to
Install
Viewfinder
©
.
First
align
the
key
(
24)
in
viewfinder
connector
@
‘with
the
groove
(
QZ)
)
in
the
viewfinder
socket,
and
then
~
For
easier
and
more
enjoyable
on-the-spot
shooting,
view:
—
HOW
TO
SET
UP
THE
CAMERA
MIC
jack
(3.5
mm
dia.
stereo
mini
jack)
[1]
HOW
TO
INSTALL
THE
MICROPHONE
Mike
plug
Insert
the
mike
plug
of
provided
mike
@
into
the
MIC
jack,
{3.5
mm
dia,
stereo
mini
plug}
®
Confirm
that
provided
mike
@
is
fully
inserted.
©
The
power
jack
is
exclusively
for
use
with
provided
mike
@;
do
not
insert
other
plugs
into
it.
Power
plug
POWER
jack
HOW
TO
INSTALL
THE
VIEWFINDER
THE
IMAGE
ON
ITS
SCREEN
Plug
connector
@
into
the
socket.
Note:
Confirm
that
viewfinder
connector
@
is
fully
plugged
into
the
socket.
Viewfinder
socket
"©
How
to
Adjust
the
Position
of
Viewfinder
®
Parallel!
(standard)
position
*
finder
®
is
designed
to
Operate
in
three
different
positions
,
by
moving
and
rotating
it:
paraliel
(standard),
inclined
and
_
at
right-angles,
'@
To
move
viewfinder
®
to
the
inclined
position
from
the
parallel
position.
©
Lift
the
viewfinder
@
neck
in
the
direction
of
arrow
®
until
the
viewfinder
is
firmly
locked.
Note:
Push
the
screen
end
in
the
opposite
direction
of
arrow
@
to
put
it
back
to
the
parallel
position
from
the
inclined
position.
.©
To
move
viewfinder
@
to
the
right-angle
position
from
the
inclined
position.
i
@
Stide
the
viewfinder
®
guide
joint
in
the
direction
of
H
attow
®
and
remove
it
from
the
viewfinder
guide.
(Rotate
viewfinder
@®
in
the
direction
of
arrow
©.
and
press
it
on
the
rear
of
the
camera
until
it
is
firmly
locked.
Note:
In
order
to
move
viewfinder
@
from
the
Right-angle
position
right-angle
position
to
the
inclined
position,
pull
the
screen
end
in
the
opposite
direction
of
arrow
©
to
release
the
lock,
and
rotate
the
viewfinder
to
the
top
of
the
camera.
Finally,
insert
the
viewfinder’s
joint
into
the
guide
untit
the
viewfinder
is
firmly
locked.
Qe
Aue
{©
Operate
the
camara
with
viewfinder
§
firmly
locked
in
one
of
the
three
positions.
Never
leave
the
viewfinder
between
these
positions.
Viewfinder
guide
1
~4E
,
ADJUST
ITS
POSITION
AND
ENLARGE
[3]HOW
TO
ADJUST
THE
GRIP
BAND
*
@
Detach
the
end
of
grip
band
@®
from
the
end
fixed
to
@With
your
right
hand
inside
grip
band
®,
pull
the
Loék
button
@
HOW
TO
MAGNIFY
THE
IMAGE
ON
THE
VIEW-
FINDER’S
SCREEN
Slide
the
viewfinder
@
outer
case
in
the
direction
of
the
arrow
until
it
clicks
into
its
locked
position
to
magnify
the
image
on
the
viewfinder’s
screen.
in
B
Note:
To
bring
the
outer
case
back
to
the
origina!
position,
Notch
press
the
lock
button
in
and
slide
the
case
in
the
opposite
direction
of
the
arrow
until
the
case
stops
5.
e
at
its
original
position.
Outer
Outer:
case
case
Lock
button
Lock
button
:
the
camera,
and
loosen
the
band.
end:
to
the
left
to
tighten
it,
and
then
press
the
Velcro
Pieces
together.
Notes:
®@
Confirm
that
the
Velcro
pieces
are
together
firmly.
@
Looping
the
lens
cap
@
string
around
the
grip
band
®
facilitates
uncapping
and
capping
the
lens.
[4]
HOW
TO
INSTALL
THE
CAMERA
CABLE
iO)
Align
the
key
(24)
on
the
camera
connector
of
provided
Proper
connection
camera
cable
@
with
the
groove
(01)
in
the
camera
cable
socket
@
@®
Insert
the
connector
into
the
socket
@.
Note:
Never
attempt
to
force
the
10-pin
rectangular
camera
connector
of
provided
camera
cable
@
into
the
camera
cable
socket
when
the
connector
is
posi-
tioned
upside
down.
Improper
connection
@
When
removing
the
camera
connector,
remove
by
gripping
the
camera
connector,
not
the
cable.
—
5E
—
Outer
case
@Set
the
outer
case
to
the
A
or
B
position
for
the
best
viewability,
A
position:
Pull
the
outer
case
in
the
direction
of
the
arrow
as
far
as
it
goes,
5
position:
Hold
the
lock
button
in,
and
Puli
the
outer
case
back
slightly,
into
the
notch
of
the
button,
Camera
connector
(10-pin
rectangular)

HOW
TO
CONNECT
TO
AVTR
®
Do
not
switch
the
camera
and
VTR
on
before
con-
@
Refer
to
the
instruction
manual
of
the
VTR
and
other
necting
to
the
VTR.
components
to
be
connected.
[1]
WHEN
THE
VTR
HAS
A
CAMERA
CONNECTION
TERMINAL
@®
Insert
matching
the
groove
(
0)
in
the
VTR
connector
(10-pin
circular)
in
the
direction
of
arrow
@
with
the
key
(cb)
in
the
camera
connection
terminal
of
the
VTR
body.
@
Secure
by
tightening
the
ring
in
the
direction
of
arrow
Note:
Power
is
supplied
to
the
camera
from
the
VTR.
os"
Camera
connection
terminal
Securing
ring
To
camera
VTR
connector
(10-pin
circular)
WHEN
THE
VTR
DOES
NOT
HAVE
A
CAMERA
CONNECTION
TERMINAL
@Connect
the
DC
plug
of
the
camera
conversion
cable
to
of
provided
camera
cable
@
in
the
direction
of
arrow
the
DC
output
terminal
of
the
optional
AC
adaptor
@
with
the
key
(4)
in
the
connector
of
camera
con-
(CV-AC222(S),
CV-AC224(S)
or
CV-AC324(S)).
(See
version
cable
VC-409-3
(optional).
arrow
@)
@Secure
by
tightening
the
ring
in
the
direction
of
arrow
Notes:
©
Power
to
the
camera
is
supplied
from
the
AC
adaptor.
@
Also
refer
to
the
AC
adaptor’s
instruction
manual.
@
Insert
matching
the
groove
(
C1)
in
the
VTR
connector
@®Connect
the
plugs
of
the
camera
conversion
cable
to
the
recorder's
remote,
video
input
and
audio
input
terminals.
(See
arrow
@))
VTR
To
video
—_
.
.
VIDEO
input
terminal
HOOD
output
plug
=
i
oe
2
To
audio
AUDIO
input
terminal
CHASTE
at
output
plug
2
To
remove
REMO
terminal
for
Securing
ring
Connector
1
TE
pause
(10-pin}
plug
To
camera
Ds
AC
adaptor
CV-AC222{S),
CV-AC224(S)
or
CV-AC324(S}
{Optionally
available)
f
®
VTR
connector
Camera
signal
conversion
cable
(10-pin
circular)
VC409-3
(Optionally
available)
{stereo
sound
recording
is
not
possible)
To
AC
outlet
OC
output
terminal
—6E
—
HOW
TO
USE
THE
STEREO/MONO
SWITCH
With
a
stereo
mike,
set
STEREO/MONO
switch
@
to
the
STEREO
position
when
the
VTR
is
capable
of
stereo
recording,
and
set
it
to
the
MONO
position
when
the
VTR
is
monaural.
Notes:
©
Provided
mike
@
is
stereo.
®@
With
a
mono
mike,
it
is
onty
possible
to
make
monaural
recordings.
Position
S:
Set
switch
@
to
this
position
when
the
VTR
is
capabie
of
stereo
recording.
Stereo
sound
can
be
recorded
by
keeping
the
VTR
in
the
STEREO
recording
mode.
(The
switch
should
be
set
to
this
position
when
using
the
provided
stereo
microphone.)
Position
M:
When
the
VTR
is
mono,
set
STEREO/MONO
switch
@
to
this
position.
(The
switch
should
be
set
to
this
position
when
using
a
monaural
microphone.)
[4]
HOW
TO
USE
THE
POLARITY
SWITCH
Set
POLARITY
switch
@
to
the
other
position
when
the
VTR
start
indicator
®
operates
with
the
opposite
polarity.
(See
page
13E
for
more
information
on
the
VTR
start
indi-
cator
@).
@®
Remove
the
polarity
switch
cover.
@
Set
POLARITY.
switch
@
to
the
other
position.
Upper
position
:
The
camera
is
delivered
with
the
switch
in
this
“preset”
position.
Lower
position
:
Opposite
polarity.
—7E
—
Cover

H
i
|
Position
@:
Set
IRIS
CONTROL
switch
®
to
this
posi-
HOW
TO
OPERATE
THE
VIDEO
CAMERA
[1]
HOW
TO
SUPPLY
POWER
=
When
connected
to
JVC
compact
VTR
HR-C3.
In
this
case,
it is
possible
to
switch
the
VTR
on
from
the
@
When
connected
to
a
VTR
with
a
camera
connection
terminal.
(See
11]
WHEN
THE
VTR
HAS
A
CAMERA
CONNECTION
TERMINAL
in
“HOW
TO
CONNECT
camera,
TO
A
VTR”
section
on
page
6E.)
Power
is
supplied
to
the
camera
when
the
VTR
is
@
Push
POWER
button
@
to
switch
the
VIR
switched
on. on.
@
When
connected
to
a
VTR
with
no
camera
connection
0)
®
Push
it
again
to
switch
the
VTR
off.
terminal.
(See
page
6E.)
Power
is
supplied
to
the
camera
when
the
VTR
is
switched
on.
Power
is
supplied
to
the
camera
when
the
AC
adaptor
is
switched
on.
Notes:
Note:
Switching
the
VTR
on
from
the
camera
is
possible
©
Power
supply
to
the
camera
may
be
different
according
only
when
connected
to
JVC
compact
VTR
HR-C3.
to
the
type
of
VTR
connected.
Refer
to
the
VTR’s
instruction
manua!
for
details.
©
Be
sure
to
remove
the
lens
cap
@
only
after
supplying
power
to
the
camera,
and
do
not
forget
to
switch
off the
power
supply
after
replacing
the
cap.
Do
not
aim
the
lens
directly
at
the
sun
or
other
strong
light
sources.
Incorrect
use
could
damage
the
pickup
tube.
HOW
TO
USE
THE
IRIS
CONTROL
SWITCH
For
standard
shooting,
set
IRIS
CONTROL
switch
®
to
position
@
Position
©:
Set
switch
@
to
this
position
to
select
the
AUTO
IRIS
control
mode.
The
iris
is
auto-
matically
adjusted
according
to
the
brightness
of
the
scene.
tion
to
select
the
manual
[RIS
CONTROL
mode.
Then
turn
IRIS
CONTROL
knob
@®
in
either
direction
(Refer
to
the
following
de-
scription
of
IRIS
CONTROL
knob
@®)
to
adjust
the
iris
manually.
Using
IRIS
CONTROL
knob
®
@
side
:
Turn
[RIS
CONTROL
knob
@
in
direction
@
to
make
the
picture
brighter
(by
opening
the
aperture).
Turn
ERIS
CONTROL
knob
@®
in
direction
@
to
make
the
picture
darker
{by
closing
the
aperture}.
@
side
:
Note:
IRIS
CONTROL
knob
@
operates
only
when
IRIS
sun
imok
switcn
@®
15
set
to
position
1)
R
a
BE=
HOW
TO
USE
THE
BLC
(
BACKLIGHT
COMPENSATION)
SWITCH
|
For
standard
shooting,
set
BLC
(backlight
compensation)
switch
@
10
position
“O’’,
|
Position
+
:
Set
BLC
switch
@
to
the
“+”
position
to
allow
the
iris
to
open
by
approxi-
mately
1/2
an
f-stop
above
the
standard
AUTO
IRIS
setting.
Use
this
func-
tion
when
the
subject
is
too
dark
and
the
background
is
too
bright.
+
t
0
PositionO
:
Set
BLC
switch
@
to
the
“Q’
position
to
release
the
BLC
function
or
restore
the
standard
AUTO
IRIS
CONTROL
function.
Note:
BLC
switch
@
can
operate,
only
when
IRIS
CONTROL
switch
@®
is
set
to
posi-
tion.
HOW
TO
USE
THE
FOCUS
SWITCH
For
standard
shooting,
set
FOCUS
switch
@
to
position
Q.
Lower
position
@
:
Set
FOCUS
switch
@
to
this
position
to
focus
automatically.
Manual
position@
:
Set
FOCUS
switch
@
to
this
position
to
focus
manually,
and
then
turn
focus
ring
@
to
bring
the
subject
into
focus.
+»...
._.
CA}
Upper
position
@:
@
Hold
FOCUS
switch
@
pushed
up
in
this
position
for
POWER
ry
A
ry
FOCUSING
[instant
auto
focusing).
()
*@
Release
switch
@
to
return
to
MANUAL
FOCUSING.
After
A}
releasing
switch
@
it
will
return
automatically
to
its
manual
position
@
.
The
GX-N7E
has
a
semi-TTL
(through-the-lens)
active
infrared
auto
focus
system
designed
to
focus
on
the
subject
automatically.
This
camera
transmits
infrared
rays
from
just
above
the
center
of
the
fens.
These
rays
hit
the
subject
and
are
reflected
to
the
infrared
receiver
on
the
front
of
the
camera
which
in
turn
calculates
the
optimum
focus
automatically.
Infrared
transmitter
Infrared
receiver
~9E
—

SSS
eseeeeeeensnennsEE
Important
Points
in
Shooting
@
The
camera
is
designed
to
focus
on
the
subject
in
the
center
of
the
field
of
view.
@
The
subject
must
be
more
than
10
centimeters
(4
inches)
across
when
3
meters
(10
feet)
away
from
the
camera
for
correct
operation
of
the
auto-focus
system.
©
The
camera
does
not
focus
correctly
when
the
MACRO
function
is
used.
Center
®
While
using
AUTO
FOCUS,
be
careful
not
to
touch
the
focus
ring
or
cover
the
infrared
transmitter/receiver
to
avoid
malfocusing.
®@
AUTO
FOCUS
works
correctly
with
almost
every
type
of
subject;
manual
focusing
is
recommended,
however,
when
optimum
focus
cannot
be
obtained
by
using
the
AUTO
FOCUS.
Examples
of
scenes
with
which
AUTO
FOCUS
may
not
be
correct
are
shown
in®
—
©
below.
@
When
both
close
and
distant
objects
are
required
to
be
in
focus.
@
When
close
and
distant
objects
form
a
continuous
perspective.
@®
When
the
subject
is
a
pattern
of
narrow
horizontal
stripes.
@
When
the
subject
does
not
reflect
light
(i.e.
a
black
curtain
or
water).
@®
When
the
subject
is
too
small.
©
When
the
subject
is
behind
a
glass
window
or
screen.
®
[5]
HOW
TO
OPERATE
THE
WHITE
BALANCE
SWITCH
For
standard
shooting,
set
WHITE
BALANCE
switch
®
to
position
@.
Position
:
Set
WHITE
BALANCE
switch
@
to
this
position
for
outdoor
shooting;
At
this
setting,
the
colour
temperature
is
about
5,500
K
(natural
tight).
ih
Position
:
Set
WHITE
BALANCE
switch
@
to
this
position
for
indoor
shooting;
At
this
setting,
the
colour
temperature
is
about
3,200
K
(artificial
light).
@
position
:
Set
WHITE
BALANCE
switch
@®
to
this
position
for
AUTO
COLOUR
TRACKING.
The
AUTO
COLOUR
TRACKING
system
is
designed
to
auto-
matically
adjust
the
white
balance
by
letting
the
built-in
colour
temperature
sensor
window
sense
and
track
changes
in
colour
temperature.
Colour
tem-
Perature
compensation
in
this
system
ranges
from
about
2,800
K
to
10,000
K.
Notes:
©
Do
not
touch
or
cover
the
colour
temperature
sensor
window
when
the
AUTO
COLOUR
TRACKING
system
is
operating.
Especially
at
twilight
or
in
dimly
lit
situations,
AUTO
COLOUR
TRACKING
may
be
influenced
and
alter
the
white
balance
to
an
undesirable
degree
by
strongly
reflecting
coloured
objects
or
by
strong
direct
light
passing
near
the
colour
temperature
sensor
and
affecting
it.
In
such
Cases,
reset
the
WHITE
BALANCE
switch
to
the
or
°&
)
position.
COLOUR
TEMPERATURE
@
When
only
the
subject
is
brightly
illuminated
and
where
you
are
situated
with
the
camera
for
shooting
the
scene
is
somewhat
darker,
or
when
shooting
under
special
lighting
such
as
mercury
lamps,
sodium
tamps
or
Stage-lighting,
white
balance
must
be
adjusted
more
accurately
since
there
exists
a
mixture
of
colour
temperatures.
In
such
Cases,
reset
the
white
balance
switch
to
the
:4:
{or
}
position;
better
white
balance
may
be
attained
than
with
the
switch
set
to
@
When.
an
object
emits
light
because
its
temperature
rises,
there
is
a
relationship
between
the
temperature
of
the
object
and
the
colour
of
the
light
it
is
emitting.
As
the
temperature
of
the
object
rises,
the
colour
of
the
light
varies
from
red
to
orange,
yellow,
white
and
blue,
The
colour
of
the
light
can
be
expressed
as
the
absolute
temperature
of
the
object
in
degrees
absolute
or
degrees
Kelvin
(abbreviated
as
K);
this
is
called
the
“colour
temperature”
of
the
light.
Hf
i
&
i
‘
i
i
1
!
White
batance
adjustment
is
necessary
so
that
white
objects
|
are
accurately
reproduced
as
their
original
white
colour.
If
!
the
colour
white
is
reproduced
accurately,
all
other
colours
i
will
be
reproduced
accurately
as
well.
White
balance
adjust-
i
ment
should
be
done
every
time
the
colour
temperature
of
i
the
light
falling
on
the
subject
changes.
With
the
human
‘THE
IMPORTANCE
OF
WHITE
BALANCE
ADJUSTMENT
eye,
this
adjustment
is
a
natural
spontaneous
reflex,
but
with
a
video
camera,
white
objects
are
reproduced
reddish
or
blueish
if
correct
white
balance
adjustment
is
not
performed.
With
this
model,
this
adjustment
is
performed
automatically
by
setting
the
WHITE
BALANCE
switch.
Colour
temperature
of
natural
light
{K)
|
Colour
temperature
unit:
K
[
sit
Colour
temperature
of
artificial
light
(K)
|
©
Fair,
blue
sky
light
@
Slightly
cloudy
7
8,000
sky
light
@
Cloudy,
rainy
sky
t—
7
000
light
f-~
6,000
©
Sunlight
in
fine-weather
midday
@
Average
suntight
in
fine
weather
©
Sunlight
1
hour
after
sunrise
and
before
sunset
-®
Sunlight
40
min.
after
sunrise
and
before
sunset
an
EOS
§
Sunrise
Sunset
+—
2,500
@
Sunlight
30
min,
after
sunrise
and
before
sunset
©
Suniight
20
min.
after
sunrise
and
before
sunset
}
:
t—
2,000
a
Lower
the
colour
temperature
using
an
amber
filter
+—10,000
—
q
ve
eves
40,000
i
When
WHITE
:
@
Sunlight
2
hours
after
sunrise
BALANCE
switch
a
®@
Fluorescent
lamp
(White)
and
before
sunset
@
isset
to
AUTO
COLOUR
TRACKING
(@
4,000
e
Normal
flash
bulb
Position).
“|
Raise
the
colour
temperature
using
a
blue
filter
©
Fiuorescent
lamp
6,000
(Daylight)
Camera
flash
bulb
5
poo
|
©
Blue
lamp
for
photography
\eo\
3.500
©
Fluorescent
lamp
(Off-white)
®
Tungsten
lamp
for
photography
®@
Halogen
lamp
©
lodine
lamp
®@
Tungsten
lamp
D
9
OND
2,500
~|
®
Acetylene
lamp
®
Kerosene
jamp
2,000—j
®
Candlelight
“It
is
recommended
to
use
the
table
above
for
colour
temperature
reference
under
various
shooting
conditions.
-11e-
|
!
|

[6]
ZOOMING
OPERATION
=
Manual
zooming
Turn
zoom
lever
@
clockwise
or
counter-clockwise
for
manual
zooming.
=
Power
zooming
Push
buttons
@
for
power
zooming.
Button
T:
to
zoom
to
telephoto
Button
W:
to
zoom
to
wide-angle
HOW
TO
RECORD
WITH
A
VTR
First,
set
the
VTR
to
the
record
pause
mode.
(For
details
refer
to
the
VTR’s
instruction
manual.)
@
To
start
recording
Push
VTR
start/stop
button
@
.
®@
To
stop
recording
Press
button
@
again
to
set
the
VTR
to
the
record
Pause
mode
to
stop
recording.
Notes:
1.
When
shooting
in
quiet
places,
sounds
originating
from
camera
operation
such
as
the
switching
of
controls,
auto
focusing
and
zooming
can
be
sometimes
much
louder
than
desirable.
In
such
a
case,
replace
the
detachable
microphone
with
an
external
one
and
place
it
as
far
from
the
camera
as
practical
to
prevent
these
sounds
from
being
recorded.
.
Do
not
install
heavy
accessories
(weighing
more
than
300
g)
in
the
accessory
shoe;
this
can
damage
the
shoe.
Be
extremely
carefull
in
handling
the
camera
when
a
long,
extended
accessory
is
installed
in
the
shoe.
i.
Exposure
indicator
®
Exposure
indicator
@
is
displayed
on
the
left
of
the
screen.
This
indicator
moves
up
and
down
according
to
the
.
exposure.
When
indicator
@.
moves:
UP
means
over-exposure
MIDDLE
means
proper
exposure
OOWN
means
—_
under-exposure
VTR
START/TAPE
END
ALARM
indicator
@
=
How
Indicator
@
Shows
the
VTR
Mode
When
the
VTR
is
started
by
pressing
the
VTR
start/stop
button
@
,
indicator
(red)
@
flashes
slowly
(or
lights
continuously
depending
on
the
VTR).
Pressing
VTR
START/STOP
button
@
again
sets
the
VTR
.
to
the
pause
mode
at
which
time,
indicator
@
goes
off.
“Note:
Set the
polarity
switch
@
to
the
other
position
oi
when
the
VTR
start
indicator
@
operates
with
the
opposite
polarity
(See
page
7E).
$
=
How
Indicator
@
Warns
of
the
Tape
Nearing
{ts
End
When
less
than
one
minute
of
tape
is
left,
indicator
(red)
@®
flashes
very
quickly
when
the
camera
is
operated
in
combi-
nation
with
JVC's
compact
VTR
HR-C3.
Playback
and
Monitoring
on
the
Viewfinder
Screen
@
When
the
camera
is
connected
with
a
VTR
that
has
a
camera
connection
terminal,
the
picture
which
has
just
been
recorded
can
be
played
back
and
monitored
on
the
viewfinder
screen.
(The
picture
may
not
be
WHITE
BALANCE
setting/BATTERY
WARNING
indicators
@
=
How
the
Indicators
@
Show
the
White
Balance
Setting
When
white
balance
switch
@
is
set
to
the
indoor
(artificial
light}
position
38
,
the
right
lamp
(yellow)
of
indicators
@
is
lit.
When
set
to
the
outdoor
(natural
light)
position
##
,
the
left
lamp
(green)
of
indicators
@
is
lit.
;
When
set
to
AUTO
COLOUR
TRACKING
position
@
,
both
lamps
(green
and
yellow)
are
lit.
=
How
Indicators
@
Warn
of
the
Battery
Being
Exhausted
When
the
battery
in
the
VTR
becomes
nearly
exhausted,
either
lamp
or
both
lamps
(green
or/and
yellow)
of
indi-
cators
@
flash.
When
the
white
balance
switch
is
set
to
the
indoor
(artificial
light)
position
:#:
,
the
right
lamp
(yellow)
flashes.
When
the
white
balance
switch
is
set
to
the
outdoor
(natural
light)
position
#:
,
the
left
lamp
(green)
flashes.
When
the
white
balance
switch
is
set
to
the
AUTO
COLOUR
TRACKING
position
@,
both
lamps
(green
and
yellow)
flash.
played
back
depending
on
the
connected
VTR.)
Do
not
fail
to
cap
the
fens
during
playback,
otherwise,
the
picture
can
be
distorted.
—12E
—
—
13€
-—

OTHER
OPERATIONS
[1]
HOW
TO
OPERATE
THE
FADER
BUTTON
@
Keep
FADER
button
@®
depressed;
the
picture
will
gradually
disappear
to
white,
and
the
sound
will
gradually
become
inaudible
within
approximately
5
to
6
seconds.
Note:
This
operation
is
used
for
fade-outs.
@
Release
FADER
button
®
which
has
been
kept
de-
Pressed;
the
picture
will
gradually
emerge
from
a
white
screen,
and
the
sound
will
gradually
increase
within
approximately
7
to
8
seconds.
Note:
This
operation
is
used
for
fade-ins.
ah,
Keep
button
@
depressed
>)
>
ie
Sound
[ee
Release
the
button
Keep
button
=|
depressed
Picture
oe
|
+
|
|
Ag
JL)
i
See
el
[2]
HOW
TO
OPERATE
THE
MACRO
FACILITY
@
Turn
ZOOM
lever
@
in
the
direction
of
arrow
@
to
the
maximum
wide-angle
position.
@
Pulling
ZOOM
lever
@
out,
turn
it
further
to
the
MACRO
position
(See
arrow
@)).
@
Adjust
the
distance
between
the
camera
and
subject
so
that
the
image
is
the
required
size
(see
arrow
@®).
The
minimum
MACRO
distance
is
approximately
1
centi-
.
meter,
@
Turn
the
ZOOM
lever
©
clockwise
or
counter-clockwise
(See
arrow
@)
within
the
MACRO
range
so
that
the
-
"subject
is
in
focus.
Notes:
©
Set
FOCUS
switch
@
to
the
manual
position
@.
@
When
FOCUS
ring
@
is
turned,
the
image
size
varies
slightly.
@
When
ZOOM
lever
®
is
turned
too
far
towards
tele-
photo
when
focusing,
a
click
will
be
heard
and
MACRO
will
be
released.
:
—44E
-
USING
AN
EXTERNAL
MICROPHONE
©
Pull
the
provided
mike
©
out
of
the
MIC
jack.
@
Insert
the
mike
plug
of
an
external
microphone
into
the
MIC
jack.
Notes:
@
The
MIC
jack
is
a
3.5
mm
dia.
stereo-mini
jack,
but
is
compatible
with
a
3.5
mm
dia.
monaural
mini
plug.
@
Some
external
microphones
can
be
mounted
in
the
accessory
shoe.
i
@
The
POWER
jack
is
exclusively
for
use
with
the
provided
mike
@
.
Do
not
insert
another
microphone’s
plug
into
it.
‘
[4]
HOW
TO
MOUNT
AND
DEMOUNT
With
this
camera,
replacing
the
lens
is
possible.
Use
optional
mount
adaptors
to
mount
interchangeable
lenses
for
certain
SLR
{single
lens
reflex)
cameras.
HOW
TO
DEMOUNT
THE
LENS
@
Loosen
the
slotted
head
screw
securing
the
grip
cover
to
move
it
outward
(arrow@).
‘Note:
The
stotted
head
screw
cannot
be
taken
out
of
the
grip
cover.
@
Remove
the
grip
cover
from
the
camera
body
(arrow
@).
Note:
When
removing
the
grip
cover,
be
careful
not
to
damage
the
connector
pins.
And
when
mounting
the
cover,
align
both
connectors
first,
then
push
the
cover
gently
to
mount
it
on
the
camera
body.
®
Loosen
the
slotted
head
screw
securing
the
lens
and
disengage
the
screw
(arrow
@)).
Note:
The
slotted
head
screw
that
secures
the
lens
can
not
be
taken
out
of
the
camera
body.
@
Rotate
the
lens
in
the
direction
of
arrow
@)
by
30
degrees.
©)
Demount
the
lens
from
the
camera
body
(arrow
®).
[
When
mounting
the
lens,
reverse
steps
(
through).
|
Notes:
@
Never
touch
the
surfaces
of
the
lens
or
optical
filter.
@
Be
extremely
careful
not
to
allow
the
surfaces
of
the
fens
and
optical
filter
to
get
dustry
or
dirty.
@
Prevent
strong
light
from
shining
directly
on
the
surface
of
the
optical
filter
while
replacing
the
tens.
©@
For
details
on
how
to
use
interchangeable
lenses
for
SLR
cameras,
refer
to
the
operational
manuals
of
the
optional
bayonet
SLR
lens
mount
adaptors.
@
When
using
substitute
SLR
camera
lenses,
protect
the
detached
lens
by
covering
the
front
lens
with
the
pro-
vided
fens
cap
and
the
rear
lens
with
the
rear
lens
cover
(provided
with
optional
mount
adaptors).
External
microphone
MIC
jack
(3.5
mm
dia.
stereo
mini
jack)”
Power
jack
LENSES
@
When
an
interchangeable
lens
for
an
SLR
camera
is
mounted
on
the
camera,
IRIS
CONTROL
Knob
©
should
be
adjusted
referring
to
exposure
indicator
@
in
the
viewfinder
screen,
and
FOCUS
must
be
manually
ad-
justed
with
the
lens.
Also,
the
WHITE
BALANCE
switch
@
can
work
at
both
position
#:
(outdoor
setting)
and
position
#:
{indoor
setting)
but
cannot
work
at
posi-
tion
@
(AUTO
COLOUR
TRACKING
setting).
Zoom
buttons
@
operate
automatic
zoom
function
only
with
the
provided
lens.
©
Optional
bayonent
SLR
Lens
mount
adaptors
are
—
15€
—
available
from
JVC
for
use
with
Canon
(LA-C7C(U)),
Pentax
(LA-C7P(U}},
Olympus
(LA-C7L(U)),
Nikon
(LA-C7N(U})
and
Minolta
(LA-C7M(U})
lenses.
Use
the
mount
adaptor
designed
for
the
chosen
lens,
Lens
securing
slotted
head
screw
Cover
securing
rip
cover
stotted
head
screw

|
SPECIFICATIONS
Type
:
Colour
Video
Camera
Microphone
jack
:
0.28
m
Vrms
(-68.79
dBs),
2
System
:
Step-energy
decoding
system
high
impedance,
2
channels
Notes:
;
(single
tube)
(3.5
mm
dia.
stereo
mini
jack)
1.
AG
interchangeable
lens,
having
more
than
a
63
mm
»
Signal
system
:
Based
on
PAL
standard
Viewfinder
:
Electronic
viewfinder
(CRT,
diameter
from
within
25
mm
of
the
surface
of
the
:
Pickup
tube
+
1/2"
Newvicon
1/2"
black-and-white)
oe
stp
not
fit
on
the
camera
because
of
the
grip
Scanning
:
625
lines,
2:1
interlaced
Lens
:
F1.2,f
=
8.5
~51
mm,
6:1
Power
Ae
payee
.
te
|
f
vari
.
Resolution
:
270
lines
or
more
(horizontal)
zoom,
Fitter
mounting
screw
dia.
y
A
sees
inds
o
iistacace
le
ene
oat
speci-
-
300
fines
or
more
(vertical)
46
mm,
Auto
iris
control,
Macro
ph
dps
are
available
from
se
pales
C
raid
Synchronizing
system:
Internal
sync
mechanism,
Auto-focus
Connector
>.
\
@
ee
ene
aor
ne
care
ad
determined’
t
Video
output
2
1
Vp-p,
75
Q
unbalanced
ZOOM
min.
distance
:
Approx.
1
meter
fone
corer
sik
li
Heationsan
bs
Srmancs
she
ay
ey
(sync
negative)
MACRO
min.
distance
:
Approx.
1
centimeter
LEY
.
The
warranty
does
not
cover
the
performance
a
Video
S/N
ratio
:
45
dB
or
more
Vensimount
:
Special
bayonet
mount
a
quality
of
the
camera
when
using
it
with
an
inter-
Audio
output
:
77.5
m
Vrms
(-20
dBs),
Power
scurce
-DC12V
>,
Grip
band
bracket
changeable
lens
mounted
(one
purchased
at
a
camera
F
impedance
1
k&2,
2
channels
Power
consumption
:6.0W
Corinectat
oA
the
oy;
shop).
Minimum
illumination
:
10
lux
(in
auto
irts
mode
Operating
temperature
Or
on
the
grip
cover
:
excluding telephoto
setting)
range
:0°C
—
40°C
Grip
band
bracket
i
HOW
TO
CLEAN
LENSES
q
When
the
surfaces
of
the
lens
and
optical
filter
become
{available
in
camera
shops),
then
wipe
the
dust
off
the
dusty,
blow
it
off
with
a
blower
or
sweep
it
off
with
a
surfaces
of
the
lens
and
optical
filter,
moving
in
a
gentle
soft,
clean
brush,
spiral
from
the
center
of
the
lens.
For
cleaning
the
lens,
fold
a
piece
of
lens
cleaning
paper
.
.
‘
Notes:
@
a
; ;
(available
in
camera
shops}
around
the
tip
of
some
e
ee
ee
Solution:
3
<
tweezers,
moisten
the
paper
with
a
lens
cleaning
solution
,
Seay:
ae
Move
in
a
gentle
spirat
2
Fold
the
paper
around
the
tip
Fold
a
piece
of
paper
of
the
tweezers
Wipe
the
dust
off
from
the
center
with
this
part
|
|
&
Tweezers
:
ai.
i
!
Le
f
i
evan
i
Lins
leaning
paper
i
i
—
16E
-
setting
;
Provided
microphone
DIMENSIONS
{
#:
:
About
5,500
K)
@
tndoor
(artificial
light)
setting
{
&
:
About
3,200
K)
@®
AUTO
COLOUR
TRACKING
setting
(@
:
About
2,800
K
—
10,000
K)
:
Stereo
microphone
Unit:
mm
(inches)
iltumination
range
:
10
—
100,000
lux
(in
auto
iris
Weight
21.1
kg
(2.5
Ibs)
(excluding
camera
Optical
filter
:
mode)
cable
and
fens
cap)
;
Minimum
optimum
Accessories
:
Stereo
microphone
,
illumination
of
subject
(included
with
camera)
Camera
cable
being
shot
:
500
lux
Lens
cap
Colour
temperature
:
@
Outdoor
(natural
light)
setting
tens
food
EVF
Rubber
Eye
cup
*
Design
and
specifications
subject
to
change
without
notice.
“This
colour
video
camera
is
designed
to
output
video
signals
conforming
with
the
PAL
standard.
Thus,
this
camera
is
not
usable
for
VTRs
or
colour
television
units
which
use
colour
signal
systems
other
than
the
PAL
standard,
—17E
—

Diese
Bedienungsanleitung
ist
in
vier
Fassungen,
eine
ACHTUNG:
.
GX-N7E
englische,
franzdsische,
deutsche
und
hollandische,
gegliedert:
©
Englisch
oie
vee
v
na
genes
cen
Sie
ue
SCHUTZEN
SIE
DIESES
GERAT
VOR
|
|
o
Pranséaoch
00002000
SIIITTI
Seine
a
TF
REGEN
UND
FEUCHTIGKEIT,
DAMIT|
|
ADJUSTMENT
©
Hollandisch
...............
Seite
INL
—
17NL
ES
NICHT
IN
BRAND
GERAT
ODER
EIN
KURZSCHLUSS
ENTSTEHT.
apni
R
EG
LAG
E
Zur
Vermeidung
von
Kurzschiiissen
und
Brandgefahr
KEINE
andere
Spannungsversorgung
verwenden.
VORSICHT
ae
eee
ree
{
idung
von
elektrischen
Jagen
die
Kamera
i
Feit
canaae
Das
Gerat
enthalt
keine
von
'
CONTENTS
Laien
reparierbaren
Teile.
Reparaturen
nur
von
qualifi-
i
zierten
Kundendienst-Fachleuten
ausfiihren
lassen.
MEASURING
INSTRUMENTS,
TOOLS
AND
FIXTURES
FOR
ADJUSTMENTS
..............-..
2E
INSTRUMENTS
CONNECTIONS
AND
SETUP
...........
0...
ccc
cece
ac
ccceceeeceeuces
3E
PRIOR
TO
STARTING
ADJUSTMENT
...........
00.
c
cece
ccc
cece
nectar
eeeeuncenaee
3E
MAIN
PARTS
ARRANGEMENT
.........
0.00.0
c
cece
ccc
ecceccectetetcsseveenerus
4E
Pees
ervideeancsietacncch
.
LOCATIONS
OF
BOARDS
AND
TEST
POINTS
..........0.-.0
000
0ccceeeeceeeee
cece,
SE
Gerate
anderer
Normen
kénnen
nicht
an
die
Kamera
:
ADJUSTMENTS
LOCATION
..........
0.00
cece
cece
cence
ceuceceencees
ieiehat
bets
-acole
6E
angeschlossen
werden.
Sollten
Schwierigkeiten
beim
*
ADJUSTING
PROCEDURES
.....
0...
cece
cece
ce
eee
e
ee
eeennnneeneeens
9E
Anschlu8
und
Gebrauch
mit
einem
Videorekorder
.
ADJUSTING
STEP.
0...
ccc
cece
nee
e
ene
nent
ee
eetanetnenneeeaees
10E
auftreten,
wenden
Sie
sich
bitte
an
eine
autorisierte
F
‘NC
Servicestelle
oder
JVC
Serviceabteilung,
1,
ADJUSTMENT
OF
THE
SSG
(SYNC
SIGNAL
GENERATOR)...........-.c0cccccecccccen
12E
2.
ADJUSTMENT
OF
THE
DEFLECTION
SYSTEM
.........0.
00.0
cc
ccc
eccececccececcce
1I3E
3.
ADJUSTMENT
OF
THE
SIGNAL
SYSTEM
............
00
ccc
ccc
eeecececeuucnees
1W9E
4.
ADJUSTMENT
OF
THE
ELECTRONIC
VIEWFINDER
..........
000.
cc
ccc
cccccceccceee
39E
Bei
Aufnahmen
wichtiger
Szenen
(z.B.
bei
einer
ay
i
{
beaufnahmen
durchgefiihrt
und
darau
iberpedtt
warden,
ob
Bild:
und
Tonaqualedt
normal
TABLE
DES
MATIERES
sind.
So
kénnen
Sie
sicher
sein,
eine
unwiederbringliche
:
ae
Aufnahmeszene
ohne
Beeintrachtigungen
bei
Kamera,
APPAREILS
DE
MESURE,
OUTILS
ET
DISPOSITIFS
DE
REGLAGE
..........-0.ccccccceeee
2F
Videorekorder
und
Kassettenband
in
Bild
und
Ton
BRANCHEMENTS
ET
MISE
EN
PLACE
DES
APPAREILS
............
0.000
cceececeuceecee
3F
festzuhalten.
AVANT
DE
COMMENCER
LES
REGLAGES
............0..
ccc
cece
eceececceeeseceeues
3F
DISPOSITION
DES
PIECES
ET
COMPOSANTS
PRINCIPAUX
............0cccecceceeeccuee
4F
EMPLACEMENTS
DES
PLAQUETTES
ET
POINTS
DE
TEST
.......
0.00.
cece
ecccucecuecuey
5F
POINTS
DE
REGLAGE
...
10...
cece
cence
cece
bens
eenseeteveteusueesens
6F
PROCEDURES
DE
REGLAGES
....
0.2.1...
ccc
cece
cece
ee ne ne
eevctnetersee.
9F
ETAPES
DE
REGLAGE
co
25.56
sseve
ada.
8
sects
saveie
boas
Sieve!
abd
Sastass
Geal
OE
WE
Aid
ba
Pv
hala
sets
10F
1,
REGLAGE
DU
GENERATEUR
DE
SIGNAL
DE
SYNCHRONISATION
..........
000
eueeae
12F
2.
REGLAGE
DU
BLOC
DE
DEVIATION
...........
0.0
ccc
cece
cece
e
cece
eeeceeeenes
13F
3.
REGLAGE
DU
BLOC
DESIGNAL
.........
0...
c
cece
cece
nee
eceeucvveeence
19F
4.
REGLAGE
DU
VISEUR
ELECTRONIQUE
........
0.0.00
0
cece
cece
ceeccccceueevees
39F
INHALT
SVERZEICHNIS
MESSINSTRUMENTE,
WERKZEUGE
UND
VORRICHTUNGEN
FOR
DIN
EINSTELLUNGEN
.......
2G
INSTRUMENTENANSCHLOSSE
UND
AUFSTELLUNG
............
00000
c
vce
ce
ceececeues
3G
VORBEREITUNGEN
FUR
DEN
BEGINN
DER
EINSTELLUNG
...............
000
ccc
eceeeee
3G
ANORDNUNG
DER
HAUPTBAUTEILE
...........
0000
c
cece
cece
ete
eeeearnseeeuns
4G
ANORDNUNG
DER
LEITERPLATTEN
UND
PRUFPUNKTE
..........
0...
c
ec
ee
cece
seeeues
5G
EINSTECUPUNKTE
cs
ood
is
aca
alead
o
S05
ie
afb
bleed
da
ieo
evan
tag
ine
Na
Patecne
aia
We
de
ahe
6G
EINSTELLVORGANGE
...
1.2...
ccc
cee
cece
cece
ete
nenetunenbeennnes
9G
EINSTELLUNGSSCHRITTE
22.20.
e
een
cece
eee
nneeeteenans
10G
1,
EINSTELLUNG
DES
TAKTGEBERS
(SSG)
..
00...
ccc
ce
cece
nee
eueunees
12G
2.
EINSTELLUNG
DES
ABLENKSYSTEMS
.........
0.0.0.0
cece
ccuececeeecceeuueuace
13G
3.
EINSTELLUNG
DES
SIGNALSYSTEMS
...........0000
0c
cece
ccc
e
cece
eeeeeaneveue
19G
.
4.
EINSTELLUNG
DES
ELEKTRONISCHEN
SUCHERS
..............00
0000
ccc
cceeeeeeee
39G
GX-N7E
(No.
5650)
PAG
July
1984

NUE
NUD
EH
ODIED
®
MEASURING
INSTRUMENTS
1.
Oscitloscope
2.
Color
monitor
TV
(PAL-type)
Color
temperature:
9,300K.
3.
Lights...
.
2.0...
2
Color
temperature:
3,200K.
.
Frequency
counter
OO
=
TOOLS
AND
FIXTURES
.
OC
voltmeter...
.....---
one
each
seen
ee
eeeees
1
6.
Power
supply...
6...
-
ee
eee
ee
eee
ated
Wr
esor
aca
ren
nies
1
1)
AC
adaptor
CV-AC222
or
CV-AC222
(S)
(in
Continental}
Sa
Tor2
CV-AC224
or
CV-AC224
(S)
{in
UK)
CV-AC324
or
CV-AC324
(S)
(in
Australia)
Ltcawapraaen
s
1
2)
Camera
cable
Sratereye.tnere
cee
om
1
VC-444-2E
and
VC-409-3
7.
Vectorscope
(PAL-type)
Used
only
if
necessary
[PATTERN
(Note)
Reflection-type
patterns
even-
tually
suffer
from
drops
in
signal
output
level
or
loss
of
output
uniformity.
Periodic
replacement
is
recommended.
(iecmee
{Gray
scale
pattern)
(White
pattern)
GS-2A
Reflection-type
(y
=
2.2)
WC-2A
Reflection-type
~T
3.
RED
FILTER
(Color
bar
pattern)
Reflection-type
Transmission-type
:CC-2A
2
CC-2T
Back
focus
adj.
driver
A-7541
2.
ORIVERS
4.
COLOR
TEMP.
CONVERSION
FILTER
————
OD
SSS)
1.
W4
Color
temperature
i
oes
|
conversion
filter
(469)
i.
ori
2.
KODAK
wratten
ee
LW
No.
80B
gelatin
filter
RE
REED
Equivalent
filter
using
KODAK
wratten
No.
25
gelatin
filter
5.
PIN
CLIP
its
use.
:2E
(No.
5550}
Slightly
bending
the
pin
tip
facilitates
Camera
Lighting
12V0C
Distance
required
for
adjusting
ittumination
in-
tensity
of
the
pattern
surface
at
approximately
2,500
tux
(230
fc):
about
1.3
m
(4
ft.)
——~-———
VIDEO
Oscilloscope
EXT.
TRIG
Terminated
with
752
Color
monitor
TV
Pattern
WRAAARARRRRARRERRRRARRRRRRS
VIDEO
©)
wave
check
terminal
AC
adaptor
(1)
AGING
A
NEW
PICKUP
TUBE
(2)
(3)
“(a)
New
pickup
tubes
must
be
aged
(run)
at
least
2—3
hours
to
stabilize
their
characteristics.
During
aging,
be
sure
to
adjust
V.
HEIGHT
VR
of
the
camera
so
that
scanning
is
as
wide
as
possible.
Scanning
must
slightly
overlap
the
black
mask
portion.
After
aging,
readjust
the
camera
as
explained
in
this
manual.
(Some
items
only
need
to
be
checked.)
Warming
up
the
camera
.
Turn
on
the
camera
at
least
10
minitues
before
making
any
adjustments.
Lighting
©
Adjust
the
distance
between
the
light
and
the
sub-
ject
so
that
the
illumination
on
the
subject
is
about
2,500
tux.
@
Make
the
illumination
over
the
entire
subject
sur-
face
as
uniform
as
possible.
Connection
to
external
trigger
terminals
of
oscilloscope
The
following
trigger
signals
must
be
monitored
separately:
®
Horizontal
trigger
signal
(blue
wire)
or
(red
wire}
connector
of
the
DEF
&
HV
BOARD.
@
Vertical
trigger
signal
(orange
wire)
or
[Q2
|
(yellow
wire)
con-
nector
of
the
DEF
&
HV
BOARD.
(5)
Caution
“High
Voltage”
(6)
Some
parts
of
this
camera,
carry
high
voltages,
such
as
the
high
voltage
transformer,
high
voltage
module
and
EVF,
exercise
extreme
care
during
adjustment.
Test
points
The
pins
of
respective
PC
BOARD
modules
of
this
camera
are
used
as
the
test
points,
making
it
very
difficult
to
connect
onto
these
pins.
it is
therefore
recommended
that
axtension-use
lead
pins
be
attached
to
those
pins
frequently
used.
‘
CD
CE)
1D
1
GS)
GB)
and
others
PC
BOARD
PC
BOARD
Extension-use
Solder
lead
pin
f&t~
EGENS
QE

+
GX-N7E
“@®
irs
SWITCH
COMPENSATION”
(BLC
SWITCH)
IRIS
SWITCH
ZOOM
LEVER
QE
(No.
SEO)
POWER
ZOOM
BUTTON
FocUS
SWITCH
TELE WIDE
FADER
SWITCH
IRIS
CONTROL
KNOB
WHITE
BALANCE
SWITCHING
REGULATOR
©
VTR
BOARD
®
ssG
BOARD
©
BOARDS
LOCATIONS
DEF
&
HV
BOARD
@®
ENCODER
aeanp
@
acc
©
cop
BOARD
BOARD
(©)
COLORy
BOARD
MOTHER
BOARD
PREAMP
BOARD
®
Audio
&
LENS
BOARD
©
DETECTOR
©
©
BLK
SET
BOARD
AIW
BOARD
1
PRE-PROCESS
CARRIER
MATRIX
BOARD
BOARD
PHASE
SH
COMP:
Vv
BLCOMP.-R
(E1?)-——_--—~
V
BL
COMP.-B
H
BL
COMP-R
OID
H
a
COMP.-B
|
°
TEST
POINTS
LOCATIONS
@
FRONT
8
®
3
V
BL
coMe-Y
@S———-F-_,
8
H
BL
COMR-Y
e133
080
OUT
|
2
:
o
gi
CARRIER
OUT
)
©
00000000000000000
00000000900000000
(O
0000000000000:
Bout
f’ouT
(TP-8)
(TP-R'
BOUT
ROUT
(TP-B)
(TP-R}
th
OBOCQGOV@OD
©O8
:
AUDIO
&
LENS
BOARD
:
PRE-PROCESS
BOARD
:
CARRIER
MATRIX
BOARD
:
DETECTOR
BOARD
:
BLACK
SET
BOARD
:
COLOR
Y
BOARD
:
CDP
BOARD
:
AGC
BOARD
:
ENCODER
BOARD
:
SSG
BOARD
:
VTR
TRIGGER,
RUN
&
BATTERY
ALARM
BOARD
(No.
5550)
5E

6E
(No.
5550)
V
HEIGHT
VCENTER
R349
H
CENTER
HLIN-2
H-CIN-3
H-LIN-t
POWER
ZOOM
SW
>
FRONT
FOCUS
TARGET
A/W
6
PRE
SET
A/WB
GAIN
A/W
R
PRE SET
A/W
R
GAIN
B
BLK
SET
Yu
BLK
SET
Re
eLK ser
Yer

H
SAW
H
SAW!
PHASE
SH
SH
COMP-8
v
saw
Vv
PB
ee
[Rt22
|
v
saw
ADJUSTMENT'OF
THE
LIGHT
BALANCE[R2I6
]
bY
Focus
DEFRECTION
SYSTEM
BIAS
H
PB
LIGHT
|
LIGHTLEVEL
[R215
|
ween
ADJUSTMENT
OF
THE
SHADING
COMP.,
BIAS
LIGHT
COMP.,
IRIS
SET
AND
WHITE
BALANCE
SET
:
ol
©
vel
y
[Ri4s
|v
e
»
COMP-B
“eo
[Ras
Jv
{R261
|
SV
ADy.
Vv
PB
SH
COMP.-R
AUTO
IRIS
7
[Rise]
vsaw
SET
L—____[R133]
4
PB
|
H
BL
COMR-R
H
BL
COMP-8
|
sea
[Rist]
[Riaz]
H
SAW
vPB
V
BL
COMP.-Y
FRONT
<Q
ADJUSTMENT
CARRIER
OF
THE
SIGNAL
BALANCE
SC
FREQ
fHOSC
!
SYSTEM
AND
FOCUS
ADJUSTMENT
OF
THE
SSG,
CARRIER
BALANCE
AND
BATTERY
ALARM
IL-4]
Il
ll
;
R-¥
BATT
ALARM
SET
CARRIER
BALANCE
(No.
5550)
7E
(No.
5550)
8E

yecme
UP
ERSTE
Lee
ake
1,
PRESETTING
2.
Very
thin
wires
are
used
for
wiring
connection
between
@
ADJUSTING
STEP
Before
starting
the
adjustment
procedure,
preset
the
multiple
circuit
boards.
Removing
and
replacing
the
tollowing
switches
as
indicated.
circuit
boards
several
times
during
adjustment
may
is
switch
ar
"
(Manual)
cause
the
connections
to
be
broken.
POWER
SUPPLY
and
SSG
SIGNAL
system
ELECTRONIC
VIEWFINDER
Mi
age
i
compensation”
@
3.
Connect
the
Ground
through
the
chassis
frame.
system
Adjustment
Adjustment
Adjustment
2)
switch
e
a
>
Mgr
4.
Repeat
adjusting
procedures
until
the
best
condition
is
3)
White
balance
button
+“
BJ"
(indoor)
attained.
;
4)
Focus
switch
~>
“MANUAL”
1,
POWER
SUPPLY
and
SSG
system
(Note)
1.
Chip
VR
rotating
‘position
is
designated
as
’
(Note)
The
AGC
turns
OFF
when
IRIS
SWITCH
is
set
to
ON
HA
‘1
‘AUtS
shown
in
the
figure
below
for
the
convenience
BURST
LEVEL
MANUAL,
and
when
the
switch
is
set
to
7 :
A
.
’
ee
since
the
chip
VR
can
be
rotated
5V
Adjustment
Rough
Adiustmierit
is
.
7
H.
WIDTH,
H.
LIN-1.2.3
SSG
Adjustment
Adjustment
SH
COMP.
V.
HEIGHT
Point
of
contact
Point
of
contact
Point
of
contact
‘
«
Seallstion
Sheree
Full-counter-
Mechanical
Full-
3
clockwise
center
clockwise
TARGET
VOLTAGE
V.
CENTER
Adjustment
Adjustment
Point
of
contact
BIAS
LIGHT
FOCUS
Alignment
Rough
Adjustment
ss
DY
FOCUS
Adjustment
FOCUS,
CARRIER
BALANCE
Rough
Adjustment
Are
carriers
Uniformly
output
from
?
Point
of
contact
Point
of
contact
Full
counter-
Mechanical
Full-
clockwise
center
clockwise
Y
GAIN
and
AUTO
IRIS
2.
Never
rotate
VR’s
other
than
those
specified
Hopgy
Adiusimens
Yes
by
this
Instruction
Manual.
‘
SIGNAL
SYSTEM
5.
Unless
otherwise
designated,
always
apply
“just
scan”
:
to
all
pattern
adjustments.
3.
ELECTRONIC
VIEW
FINDER
system
H
SYNC
Adjustment
FOCUS
Adjustment
TARGET
VOLTAGE
Adjustment
FINAL
CHECK
V
SYNC
Adjustment
PICTURE
LOCATION
Adjustment
BRIGHTNESS
Adjustment
(No.
5550)
9E
10£
(No.
5550)

2.
SIGNAL
SYSTEM
BIAS
LIGHT
Adjustment
BIAS
LIGHT
SH
COMP.-Y
Adjustment
Y
SET
UP
goes
ON
and
OFF
by
switching
AGC
NO
Y
SET
UP
Adjustment
Y
GAIN
Adjustment
Y
KNEE
Adjustment
AUTO
IRIS
Adjustment
OC
BLANCE
Adjustment
PHASE
SET
Adjustment
R'
GAIN,
B’
GAIN
Adjustment
Yu-R
Adjustment
BLK
SET
Adjustment
CARRIER
BALANCE
Adjustment
G,
R,
8
GAIN
Adjustment
COLOR
7,
WHITE
BALANCE
Adjustment
Is
dark
section
tracking
effected
?
YES
R,
B
BL
SH
COMP.
Adjustment
SC
PHASE
BURST
LEVEL
Adjustment
R
ADD,
B
ADD
Adjustment
CHROMA
GAIN
Adjustment
SHADING
COMP.
Adjustment
CHROMA
LIMITER
Adjustment
OUTDOOR
R,
B
GAIN
Adjustment
AUTO
WHITE
BALANCE
Adjustment
BACK
FOCUS
Adjustment
AUTO
FOCUS
Adjustment
BATTERY
ALARM
Adjustment
FINAL
CHECK
|
(No.
5550)
11E
Measurin
No.
item
:
i
instrument
Test
point
and
Adjustment
part
Description
i
1.
[5v
pe
Adjustment
|
Voltmeter
|
C82)
(6V
LINE)
R261(5V
ADJ.)
Tset
the
DC
voltage
to
5.0
V
£0.05
V
scale
of
[PRE-PRO
BOARD]
{MOTHER
BOARD]
|
the
meter
(Note)
The
voltmeter
should
be
precisely
adjusted.
Ensure
that
only
an
accurate
tester
is
used.
2.
|
SSG
.
|
Adjustment
2-1)
fsc
Frequency
Adjustment]
counter
2-2|
fh
Adjustment
DC
Voltmeter
oe
5
[SSG
BOARD]
«D
[SSG
BOARD}
C11(SC FREQ.)
[SSG
BOARD]
TO1
(fh
OSC)
[SSG
BOARD]
etl
SC
FREQ.
This
adjustment
is
only
done
when
repairing
the
SSG
IC
and
peripherals
that
require
adjustment.
In
most
cases,
you
can
go
directly
to
step
2.
“Adjusting
the
Deflection
System”.
:
Turn
the
C11.
(SC
FREQ.)
trimmer.
to
obtain
a
frequency
counter
reading
of
4.433619
MHz
+7
Hz.
(Note)
Take
care
not
to
short-circuit
any
of
the
IC
terminals.
Turn
the
core
of
the
T441
(fh
OSC)
to
obtain
a
DC
voltmeter
reading
of
25
V+0.5V..
12E
(No.
5550)

pe
|
item
|
z
Test
point
and
Adjustment
part
Description
Hq
instrument
Measuring
z
jo,
Item
instiurment
Test
point
and
Adjustment
part
Description
j
i i
It
aring
on
the
]
1.)
TARGET.
|
Oscilloscope
R313
(TARGET)
Ae
Sate
es
display
voltage
appearing
ICKU
.
vee,
(ana)
a
LEER
eC
HVBORRE!
(Confirmation
is
facilitated
by
demounting
SETTING
:
BOARD]
a
switching
regulator.)
PRESETTING
2.
Observe
Point
@)
shown
in
Fig.
2-1
(a)
and
A
|
To
obtain
if
a
picture
is
not
obtained,
preset
the
follow-
measure
cathode
voltage
ee
pK
ee
a
picture
ing
VRs
as
indicated.
(Waveforms
shown
in
Fig.
observable.)
e@
PRE
PROCESS
BOARD
ke—
1H
—+|
R12
(Y
GAIN)
>
Mechanical
center.
|
@
AGC
BOARD
if
R26
(Y
KNEE)
~
Turn
fully
counter-
i
clockwise.
R43
(CHROMA
LIMITER)
VK
:
>
Turn
fully
counterclockwise.
ae
CHROMA
Le
F
Vv
Fig.
2-1
(b)
LIMITER
A
a
yGain|
*
ENCODER
BOARD
:
{about
7V)
7
RO4
(Y
SET
UP)
+
Mechanical
center.
;
3,
Measure
(B14)
and
adjust
R313
(TARGET)
Y
SETUP
Y
KNEE
Wily
so
that
voltage
becomes
“pickup
tube
\f
a
picture
is
already
obtained
or
fine
adjust-
display
voltage
+
cathode
voltage
(Vk).”
ment
is
to
be
made
later,
presetting
is
not
7
zi
|
necessary.
-
|
2.]
Rough
Oscilloscope
R215
(LIGHT
©
Close
the
tris
[Eee
rare
eae
q
LEVEL
qooe
nnn
fe
-
293+
ef
eno
a+
--------
-
+--+}
+--+
-
-----------
--+-+-
Adjustment
H-rate
[PRE-PRO
in
Fig.
2-2,
adjust
R215
(LIGHT
B
Syeone
HBLCOMP-Y
VRs_
|
Before
performing
deflection
adjustments,
|
of
the
1:1
BOARD]
[MOTHER
BOARD}
|
*
(eve.
-
ie
oe
level
incellatio
i
indi
TA:
,
E
ou.
—
IPREPRE
VBLCOMP-Y
VAs.
|
Preset
the
following
VRs
as
indicated,
:
pate
matches
the
blanking-period
level.
Board]
LIGHT
&®
PHASE
SH
COMPVRs
1.
Measure
G12)
at
the
H-rate
and
adjust
the
H
BL
COMP-Y
VRs
to
obtain
flat
[CM
Board]
waveforms.
Signal
pariod'—-|
H
BL
COMP-R
VRs
2.
Measure
at
the
V-rate
and
adjust
Blanking
period
H
BL
COMP-B
VRs
the
V
BL
COMP-Y
VRs
to
obtain
flat
Fig.
2-2
SH
COMP-R
VRs
waveforms:
2
eee
[DET
Board]
SH
COMP-B
VRs
3.
Measure
at
the
H-rate
and
adjust
the
3.|
Rough
Oscilloscope
R305
(FOCUS)
©
Set the
IRIS
SWITCH
to
AUTO
1D
VBLCOMP-8
VR:
PHASE
SH
COMP
VAs
to
obtain
flat
Adjustment
|
/H-rate
prepre
(DEF
&
HV
BOARD]
waveforms.
i
M
and
adjust
R305
(FOCUS)
so
E
V
BL
COMP-R
VRs
-
Jofthe
10:1
RD]
1.
Measure
:
{B.
SET
Board]
4.
Measure
(017)
at
the
H-rate
and
adjust
FOCUS
and
BOA
that
the
waveforms
are
maximized
and
POINT
@
DY.
FOCUS
VRs
the
H
BL
COMP-R
VRs
to
obtain
flat
phase
Sines
become
clearly
observable,
as
[MOTHER
Boara]
[MOTHER
BOARD]|
waveforms.
once
VIDEO
OUT
ROB
(Y-B
CARR.
aly
Foe
ines
Mi
5,
Measure
at
the
H-rate
and
adjust
ROG
(R-Y
CARR.
BAL.
the
H
BL
COMP-B
VRs
to
obtain
fist
[AGE
BOARD)
waveforms.
‘4
sa
tea
ey,
ts
a
adjust
the
SH
COMP-R
VRs
to
obtain
i
flat
waveforms.
Fig.
2-3
(a)
7.
Measure
at
the
H-
and
V-rate,
and
,
FF)
adjust
the
SH
COMP-B
VRs
to
obtain
cea
loe
AES
flat
waveforms.
‘aun
atetaiemanblyaanist
8.
Measure
€16)
at
the
V-rate
and
adjust
1.
Measure
VI
pol
iaaiete
POINT
(A)
the
V
BL
COMP.B
URe
to
obtain
flat
ROB
(Y-B
CARR.
BAL.)
and
R06
ee
waveforms,
CARR.
BAL.)
so
that
the
carriers
aré
MOTHER
BOARD
9.
Measure
at
the
V-rate
and
adjust
minimized
as
shown
in
Fig.
2-3
(b).
the
V
BL
COMP-R
VRs
to
obtain
flat
*
As
to
th
KVR
mh
:
waveforms.
che
ch
OROIUSTHIENS
TOeK.
10.
Measure
POINT
@®
at
the
H-
and
V-rate,
:
and
adjust
the
DY.FOCUS
VRs
to
obtain
Fig.
2-3
(b)
TIONS”.
fl
tL
i
at
waveforms.
i
14E
(No.
5550)
(No.
§550)
13E

-
ory
Measuring
:
.
Measuring
|
Test
point
and
Adjustment
part
Description
No.
Item
‘ieeia
song
i
Test
point
and
Adjustment
part
Descripton
|
tal
Pisa
‘
instrument
Sait
=
mG
i!
~
|
VIDEO
OUT
L304
(WIDTH
Adjustin
edi
ith
illoscope.
le
Rough
eer
R12
(Y
GAIN)
©
Set
the
IR!S
SWITCH
to
AUTO
Rn
o
Hay
.
R332
(H
hue
[_Adiusting
procedure
with
oscilloscope.
|
pea
(Ha)
[PRE-PRO
-[PRE-PRO
BOARD}
Adjustment
(
10:1
)
R339
(H
LIN-2)
©
Set
the
IRIS
CONTROL
SWITCH
to
AUTO
t
10:
:
.
e
0:1
BOARD}
R213
(IRIS
SET}
1.
Measure
VIDEO
OUT,
and
as
shown
in
R331
(H
LIN-3)
1.
As
shown
in
Fig.2-6
(a),
adjust
R305
GAIN
[MOTHER
BOARD]
Fig.
2-4
(a),
adjust
R213
(IRIS
SET)
so
H
R305
(FOCUS)
:
Pepe
ee
ee
and
disk:
the
Geedladns,
Bakes
G
9
Veo
awe
(FOCUS)
so
that
the
carrier
is
minimized.
AUTO
IRIS
(pedestal-white
peak)
y
[DEF
&
HV
BOARD]
a
ae
White
Gray
scale
pattern
F
pattern
0.7
VPD-wP
apn
Serer
WK
Fig.
2-6
(a)
ro:
2.
As
shown
in
Fig.
2-6
(b),
adjust
L304
(WIDTH),
R332
(H
LIN-1),
R339
(H
LIN-2),
and
R331
(H
LIN-3)
so
that
the
carrier
is
Fig,
2-4
(a)
minimized
and
becomes
flat.
ae
te
2.
Measure
Gs»,
and
as
shown
in
Fig,
2-4
(b).
‘
:
f
|
adjust
R12
(Y
GAIN)
so
that
the
wave-
>
+
forms
become
0.4VoB-wP
(optical
black-
‘
ea
!
white
peak)
Fig.
2-6
tb}
;
3.
Repeat
above
steps
1
and
2
until
optimum
we
conditions
are
obtained.
(Note)
1.
This
adjustment
is
effective
only
0.4V0B-wP
when
adjustment
of
4.1
MHz
trap
is
correct.
:
oB
2.
When
colors
other
than
green
are
;
observed,
adjust
R15
(R
GAIN)
Fig.
2-4
(b)
and
R18
(B
GAIN),
and
reduce
L
4
the
carriers.
5.
|
Rough
Oscilloscope
|
VIDEQOUT
R11
(R-Y
BURST
1.
Observe
VIDEO
OUT
by
removing
the}
|
|
|...
Jo
mee
_——
a
a
|
Adjustment
(‘
sate)
LEVEL)
lans:cap:
Vectorscope
|
VIDEO
OUT
Adjusting
procedure
with
vectorscope
of
the
10:1
R12
(Y-8
BURST
2.
Expand
the
burst
portion
-as
shown
in
BURST
LEVEL)
Fig.
25
©
Set the
FRIS
CONTROL
SWITCH
to
AUTO.
peckee
iy?
‘
LEVEL
(AGC
BOARD}
3.
Alternately
adjust
R11
(R-Y
BURST
i
pe
.
in
Fi
j
LEVEL)
and
R12
(Y-B
BURST
LEVEL)
so
fe]
White
1.
As
shown
in
Fig.
2-6
(c),
alternately
adjust
that
the
waveforms
display
an
optimum
i
pattern
R305
(FOCUS),
L304
(WIDTH),
R332
{H
“interleave”
status
by
possessing
180°
LIN-1),
Risse
(H
LIN-2),
and
R331
as
LIN-
phase
difference
as
shown
in
Fig.
2-5
(b)
3)
to
achieve
convergence
at
one
point
in
and
also
that
their
level
becomes
0.3
Vp-p.
the
MG
direction.
ft
TEN
TTT
AER
ONS
Mg
|
Fig.
2-6
(c)
ee
oe
i
ts
16E
(No.
5550)
(No.
5550)
15E

No.
Item
Measuring
instrument
Test
point
and
Adjustment
part
Description
7.|
V.
HEIGHT
Adjustment
pattern
Monitor
TV
{underscan
type)
Gray
scale
(GS-2A)
s
VIDEO
OUT
R349
(V
HEIGHT)
[DEF
&
HV
BOARD)
©
If
an
overscanning-type
monitor
TV
is
used,
mark
the
screen
in
the
ratio
3:4.
1.
Slide
the
camera
back
and
forth
or
perform
zooming
until
the
horizontal
frame
marks
concide
with
the
side
limits
of
the
monitor
screen,
as
shown
in
Fig.
2-7
(a).
2.
Adjust
R349
(V.
HEIGHT)
until
the
vertical
frame
marks
concide
with
the
upper
and
lower
limits
of
the
monitor
screen,
as
shown
in
Fig.
2-7
(b).
V.C.
i
ENTER
Deniers
R355
(V
CENTER)
©
Set
the
[RIS
CONTROL
SWITCH
to
AUTO
Adjustment
Ga).
~~]
[PRE-PRO
[DEF
&
HV
BOARD)
eS
:
BOARD]
1,
Shoot
the
white
pattern
on
the
full
screen
surface
and
adjust
so
that
the
pattern
ae
[SSG
BOARD]
edges
do
not
appear
on
the
screen.
me
2.
Simultaneously
measure(K1D
(COMP.
BLK)
andCB7),
and
adjust
R355
(V
CENTER)
so
that
the
video
start
coincides
with
COMP.
BLK
completing
point
as
shown
in
Fig.
2-8.
i
t
‘3
|
i)
COMP
.BLK
Fig.
28
j
L
a
J
J
(No.
5550)
17E
ALT
7
ring
Test
point
and
Adjustment
part
|
instrument
;
Description
9.
|
SHADING
|
Oscilloscope
CT)
&
Ce)
[PRE-PRO
HCENTER|
\
10:1
BOARD]
Adjustment
pattern
HCENTER
ep
ft)
Alignment
magnet
°
R305
(FOCUS)
R327
(H
CENTER)
[DEF
&
HV
BOARD)
Shoot
the
white
pattern
and
set
the
iris
|
to
obtain
0.4
VoBwP
at
1.
As
shown
in
Fig.
2-9
{a),
demount
the
switching
regulator
by
removing
the
screw
®
(Note)
Leave
the
connector
attached.
DY.
FOCUS
VRs
R120
(H
SAW)
2
R121
(H
PB)
R122
(Vv
SAW)
R123
(V
PB)
[MOTHER
BOARD)
FY
switching
Regulator
Fig.
2-9
(a)
Alignment
magnet
ij
Measure(B7)).
and
as
shown
in
Fig.
2-9
(b),
adjust
the
alignment
magnet
and
R305
(FOCUS)
so
that
the
carrier
is
maximum
and
the
phase
tines
are
clearly
observable.
Fig.
2-9
(b)
3.
As
shown
in
Fig.2-9
(c),
adjust
R120
(H
SAW),
R121
(H
PB),
R122
(V
SAW),
and
R123
(V
PB)
so
that
the
waveforms
become
uniform
or
disappear.
UN
it
it
Fig.
2-9
(c)
4,
Adjust
R327
(H
CENTER)
so
that
right-
side/left-side
balance
of
the
carrier
shown
in
Fig.
2-9(c)
is
equalized.
.
Repeat
above
steps
2
and
3
until
shading
is
minimized.
Also,
if
necessary,
repeat
“2-6.
H
WIDTH/H
LIN
Adjustment.”
oa
{
18E
(No.
5550)
Table of contents
Other JVC Camcorder manuals

JVC
JVC GR-D21 User manual

JVC
JVC GR-SXM755UC User manual

JVC
JVC GR-SXM947UM User manual

JVC
JVC Everio LYT2197-001A-M Instructions for use

JVC
JVC GY-HM700 User manual

JVC
JVC GZ-RY980HEU Operating and maintenance manual

JVC
JVC GZ HD5 - Everio Camcorder - 1080i Owner's manual

JVC
JVC Everio GZ-RX515BE Operating and maintenance manual

JVC
JVC GR-DA30AA User manual

JVC
JVC KY-F550 User manual

JVC
JVC GR-AX760 User manual

JVC
JVC GR-SX867UM User manual

JVC
JVC GZ-MG36E/EK User manual

JVC
JVC Everio R GZ-R435 Operating and maintenance manual

JVC
JVC GY-HD250 User manual

JVC
JVC GR-DVL500 User manual

JVC
JVC GR D 240 User manual

JVC
JVC EVERIO GZ-HM690BUS User manual

JVC
JVC GR-AXM25 User manual

JVC
JVC GZ-MG130E/EK User manual