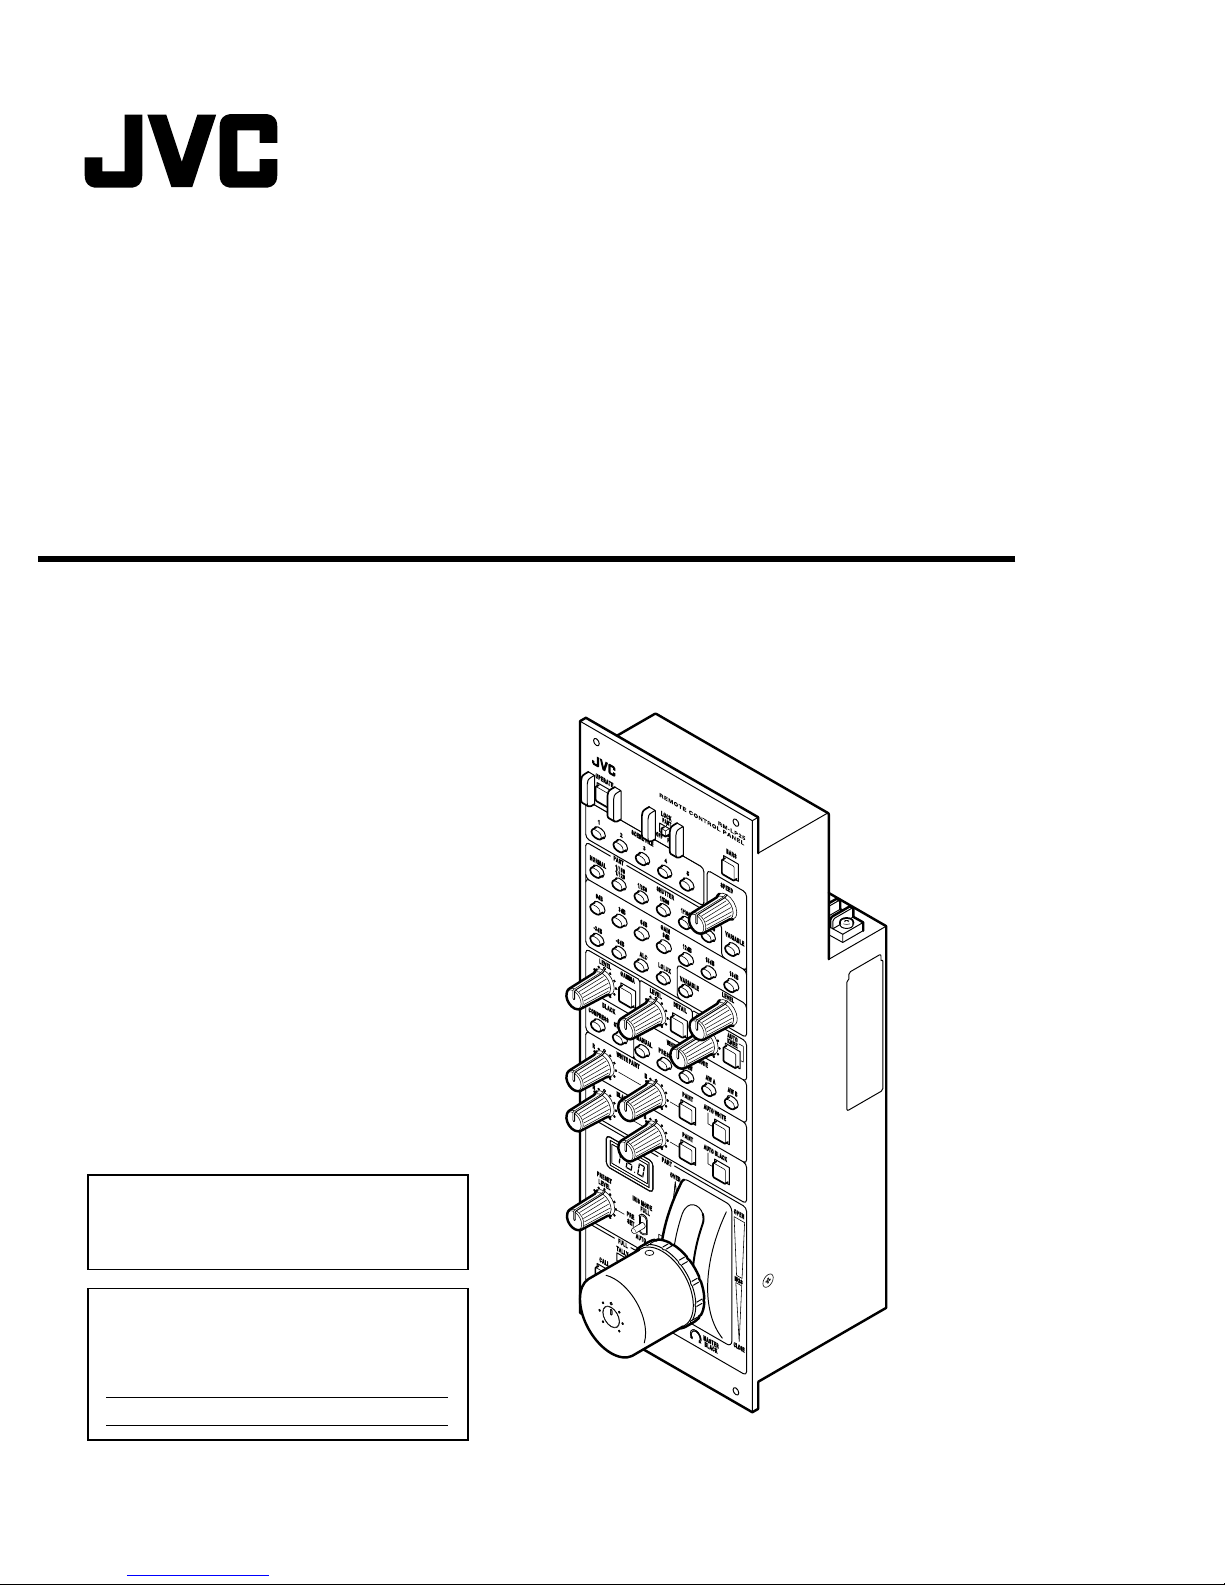
9
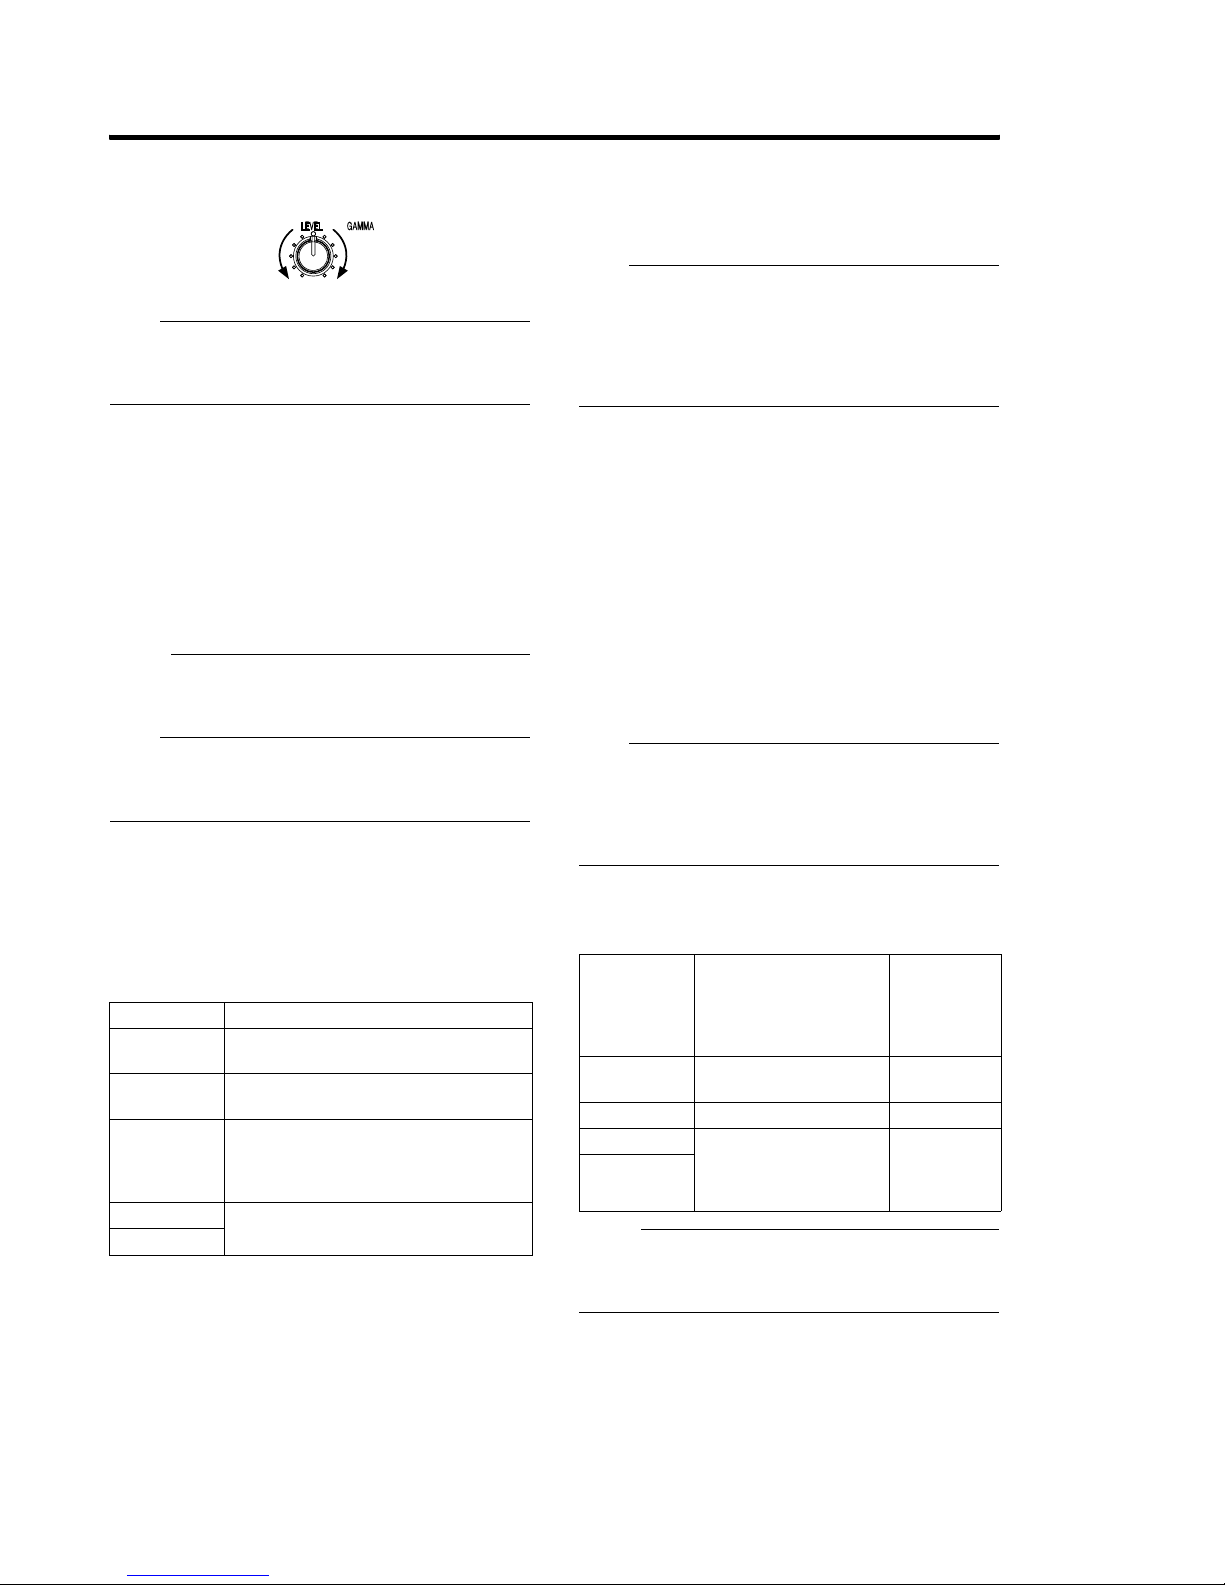
[LEVEL]leveladjustmentknob:
Foradjustingthegammalevel.
Note:
Thefeatureisnotavailableonthecameraifthelightof
thecorrespondingbuttonisnotlit.Controlusingthisunit
isdisabledinthiscase.
H
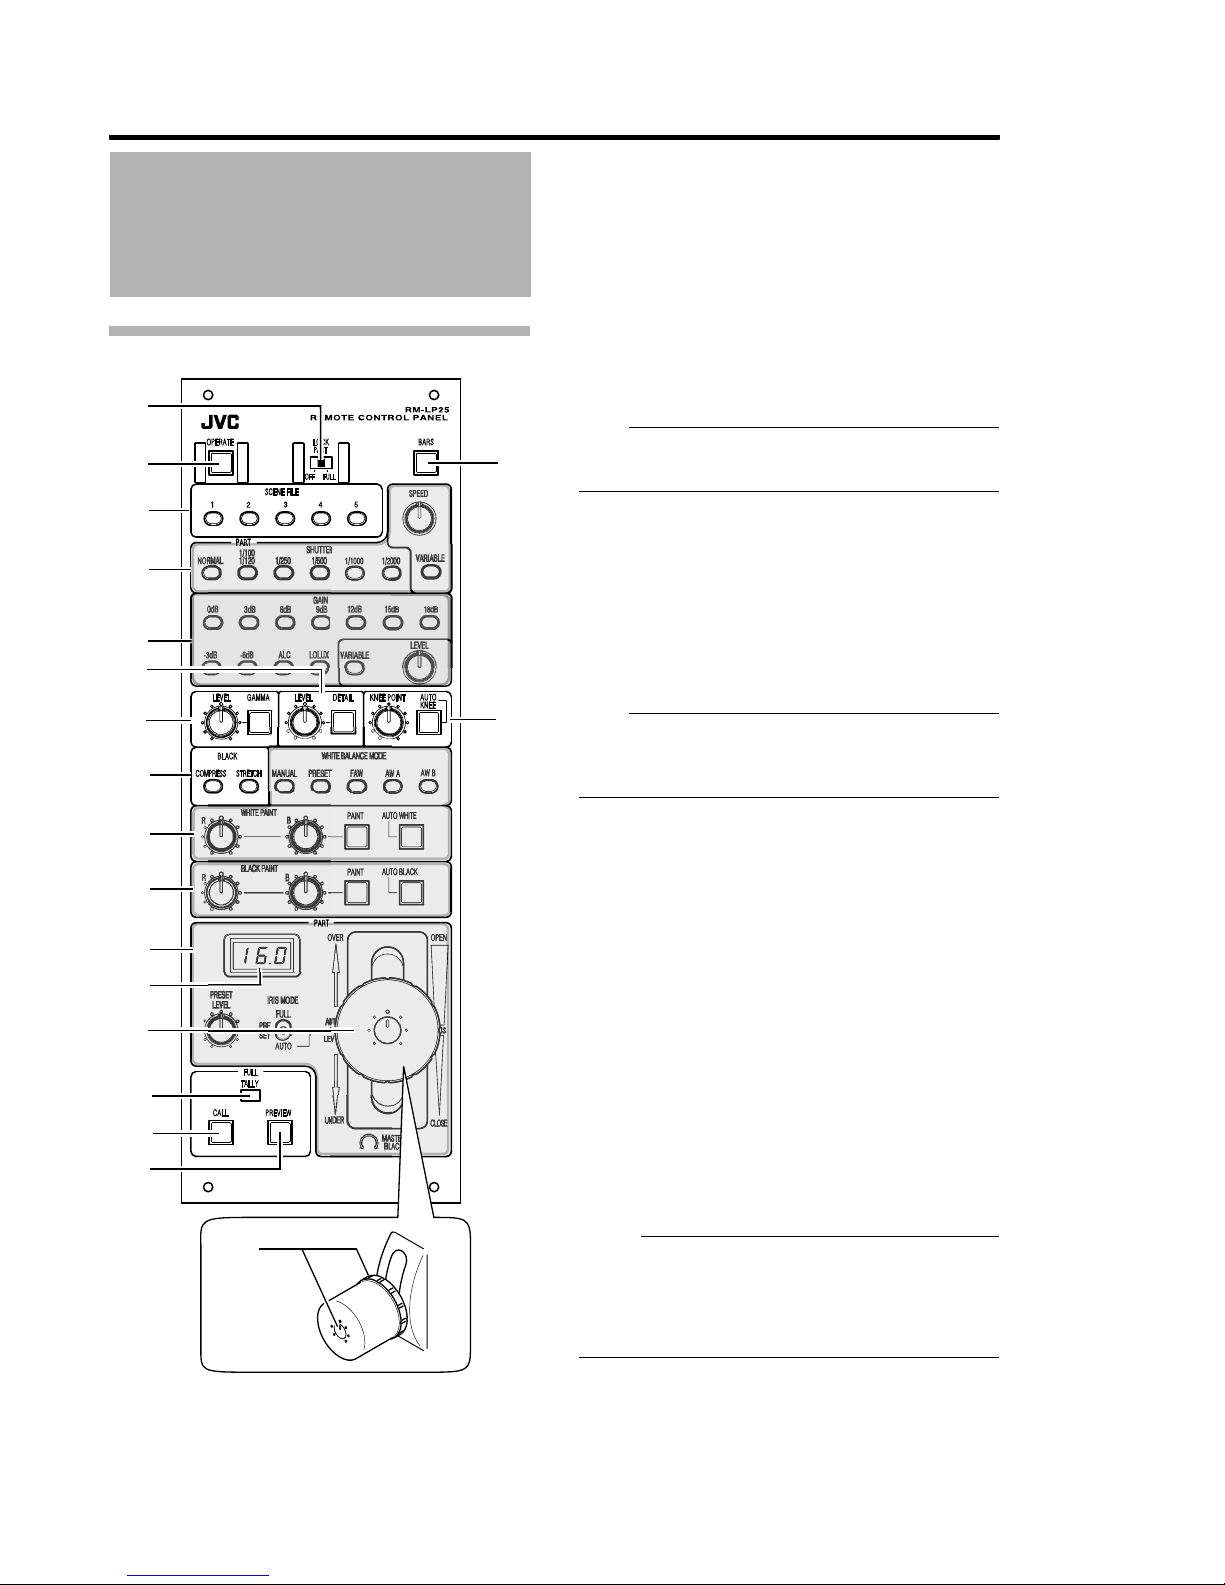
[BLACK]BlackControlUnit
Forswitchingthegainvalueofdarkareas.Switchusingthe
videosignalstobeshot.
[STRETCH]Stretchbutton:
Enhancesthecontrastofdarkareasinanimageby
stretchingonlythesignalsofthedarkareas.
[COMPRESS]Compressbutton:
Compressesthegainvalueofdarkareastoenhancethe
contrastwhentheimageshotisbrightandhaslittlecontrast.
Memo:
Whenbothbuttonslightupingreen,orwhenonebutton
lightsupingreenandtheotherisnotlit,thesetting
becomes�NORMALB nocorrection).
Note:
Thefeatureisnotavailableonthecameraifthelightof
thecorrespondingbuttonisnotlit.Controlusingthisunit
isdisabledinthiscase.
I
WhiteBalanceControlUnit(
A
17page)
Forspecifyingthewhitebalancesettings.
[WHITEBALANCEMODE]WhiteBalanceMode
selectionbutton
Forsettingthewhitebalancemode.
Theindicatoroftheselectedmodelightsupinorange.
[AUTOWHITE]AutoWhitebutton
Pressingthisbuttonwhen[WHITEBALANCEMODE]isset
to�AWABor�AWBBlightsupthebuttoninorangeand
startsuptheautowhitefeature.
Aftertheadjustmentiscomplete,theresultisindicatedby
theindicator.
Note:
When[WHITEBALANCEMODE]issetto�MANUALB,
�PRESETB,or�FAWB,thisbuttonisnotlit,andautowhite
doesnotstartup.
Settingthe[BARS]buttonSto�ONBoutputsacolorbar
image.Inthiscase,thisbuttonisnotlit,andautowhite
doesnotstartup.
[PAINT]Paintbuttonandindicatorlight:
When[WHITEBALANCEMODE]issetto�AWABor�AW
BB,youcanspecifywhetherfine-tuningonthevaluestored
atthecameraistobeperformed.
Inaddition,when[WHITEBALANCEMODE]issetto
�MANUALB,theorangelightturnson,andadjustmentofthe
R/Bchannel'sgainvalueusingthe[WHITEPAINTR/B]knob
isenabled.
Note:
Aftertheautowhiteoperationiscomplete,thisbuttonis
indicatedas�OFFB greenlighton).
When[WHITEBALANCEMODE]issetto�PRESETBor
�FAWB,thisbuttonisnotlit,andthe[WHITEPAINTR/B]
knobcontrolisdisabled.
[WHITEPAINTR/B]WhitePaintR/Badjustmentknob:
Thefunctionsavailablediffersaccordingtothewhitebalance
modebuttonselected.
Memo:
Youcanselectthecorrespondingwhitebalancemode
buttontostoresettingsfor�MANUALB,�AWAB,and�AW
BBrespectively.
SettingValue Function
MANUAL Whitebalancevaluethatissetusingthe
WhitePaintR/Badjustmentknobisused.
PRESET Thepresetwhitebalancevalue 3200K)is
used.
FAW SwitchestotheFAW Full-timeAutoWhite
Balance)mode,andwhitebalanceis
automaticallyadjustedtoanappropriate
value.
AWA Thevaluestoredinthecamera'sauto
whitebalancememoryAorBisused.
AWB
LEVEL G�MM�
Decreasesthe
reproducibilityofdark
areas.
Enhancesthe
reproducibilityofdark
areas.
Lightsupingreen Autowhiteissuccessfully
completed.
Blinksinorange
BLightsupingreen
Autowhiteisabnormally
terminated.
ON
Orangelighton)
Fine-tuningenabled.
Adjustbyturningthe[WHITE
PAINTR/B]knob.
OFF
Greenlighton)
Fine-tuningdisabled.
The[WHITEPAINTR/B]knobis
disabled.
Settingof
WhiteBalance
Mode
Selection
Button
FeatureofWhitePaint
Knob
Statusof
Paint
Indicator
Light
MANUAL KnobforadjustingtheR/B
channel'sgainvalue.
Lit
PRESET/FAW Disabled. Notlit
AWA Knobforfine-tuningthe
whitebalancevalue
obtainedduringauto
whitebalanceadjustment.
Lit
AWB