ENGLISH
Important cautions
CAUTION
To reduce the risk of electrical shocks, fire, etc.:
1. Do not remove screws, cover or cabinet.
2. Do not expose this appliance to rain or
moisture.
Precautions
Installation
• Select a place which is level, dry and neither
too hot nor too cold (between 0°C and 35°C
(32°F and 95°F)).
• Keep away from direct sunlight.
• Do not put it too close to a heater.
• Indoor use only.
Power cord
• Do not handle the power cord with wet
hands!
• Do not bend the power cord sharply.
• Do not connect the supplied AC adaptor to
any other equipment. It is exclusively for use
with this unit.
Malfunctions, etc.
• There are no serviceable parts inside. If
anything goes wrong, unplug the power cord
and consult your dealer.
• Do not insert any metallic object.
• Do not allow water to get inside.
• Do not move or bend the ear cups or any
other part of the headphones with excessive
force. It may damage the headphones.
• Stop using the headphones if they are
causing discomfort on your skin. Otherwise
inflammation or irritation may be caused on
your skin.
• The ear pad will wear out earlier than the
other parts even in normal use or in normal
keeping due to the material characteristics.
For replacement of the ear pads, please
consult with the dealer where you purchased
the headphones.
• If the headphone is not used for a prolonged
time, unplug the AC adaptor from an AC
outlet.
Battery precautions
• Be sure to use the supplied exclusive battery.
Do not use any other rechargeable or dry cell
battery.
• Use only the type of battery the manufacturer
recommends when replacing the battery.
• Do not throw the battery in a fire or heat it.
• Do not immerse or wet the battery in water.
• Do not remove or damage the covering tube.
• Do not subject the battery to strong shocks or
throw it.
• If any liquid from the battery gets into your
eyes, it may cause blindness.
If battery liquid does get into your eyes, do
not rub them, but instead immediately wash
them thoroughly with clean water, then
consult a doctor at once.
Also, should any liquid from the rechargeable
battery get onto your skin or clothes, it may
burn your skin. In this case, wash with clean
water immediately.
• When discarding batteries, environmental
problems must be considered and the local
rules or laws governing the disposal of these
batteries must be followed strictly.
Charging precautions
• Charge only with supplied Ni-MH type
battery. Other types of battery may burst
causing personal injury and damage.
• Use only the supplied base station to charge
the battery.
• Be sure to use the supplied AC adaptor.
Supplied accessories
Check to be sure you have all of the supplied
accessories.
The number in parentheses is the quantity of the
pieces supplied. If anything is missing, contact
your dealer immediately.
• Exclusive rechargeable batteries (2)
• Exclusive AC adaptor (1)
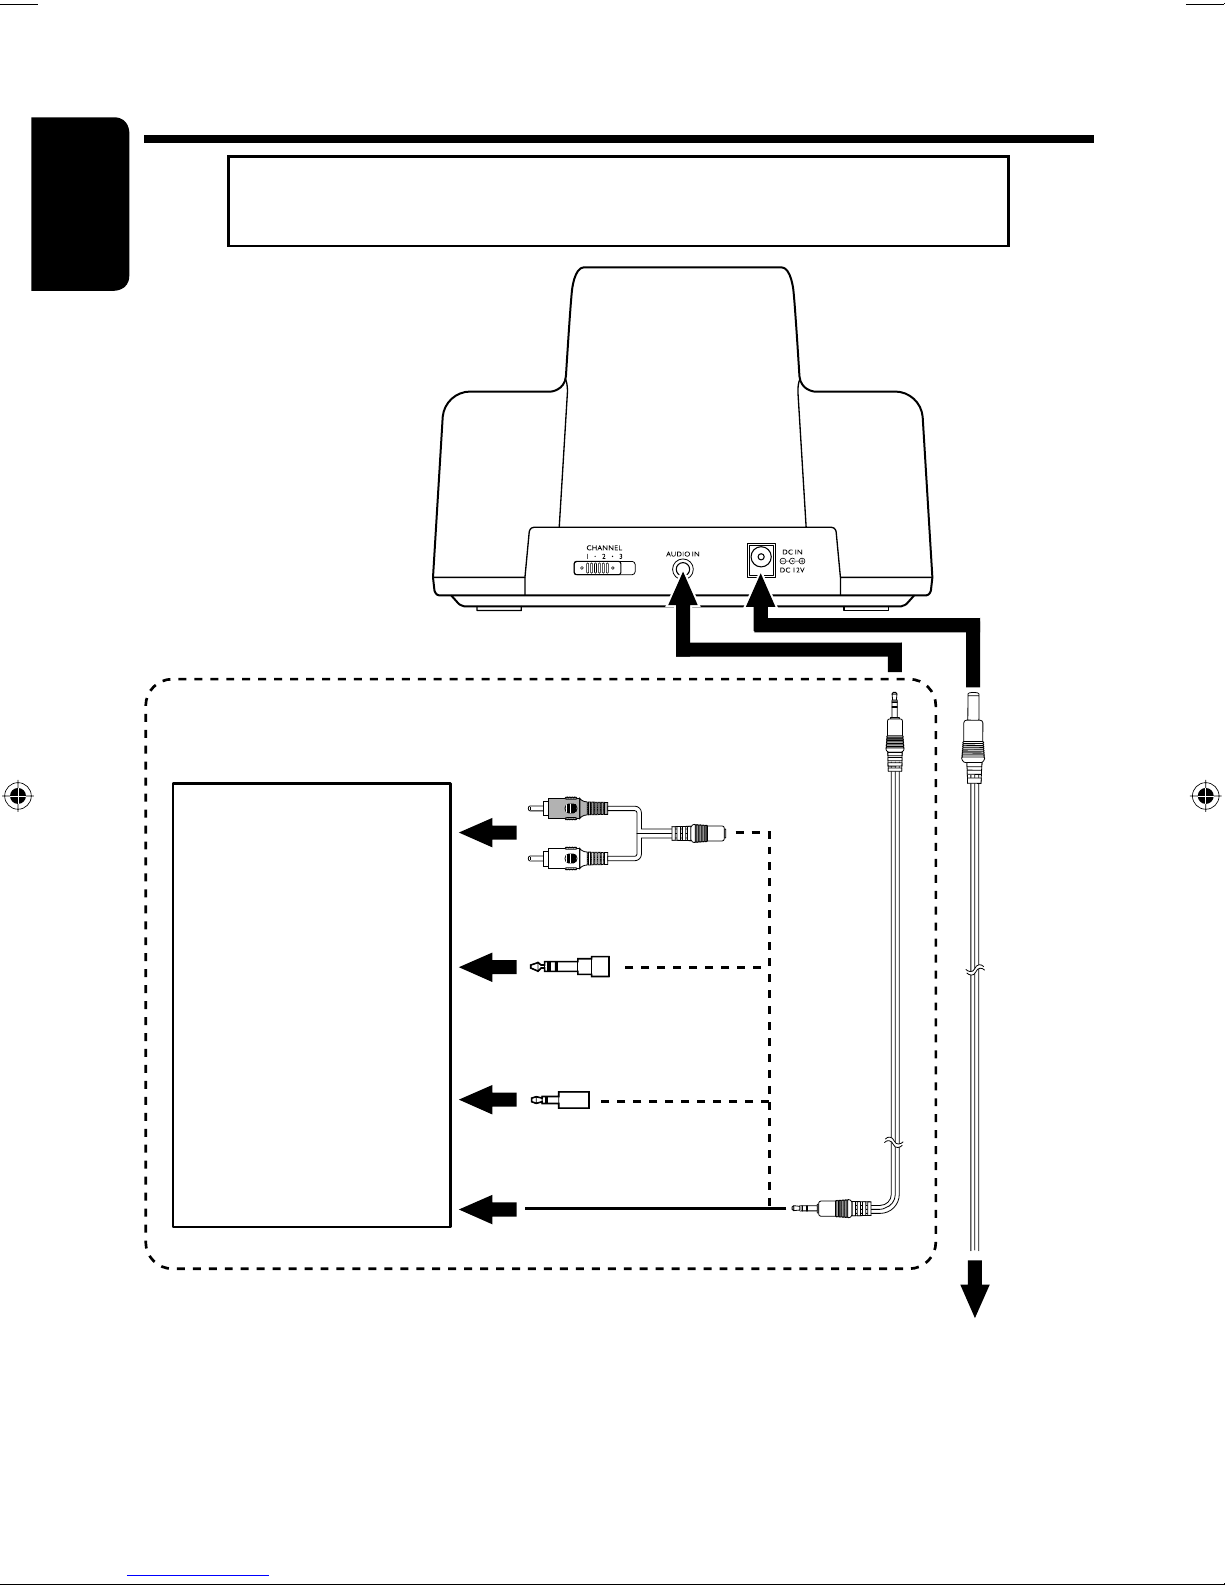
• Connection cord (1)
• Conversion cord (1)
• Plug adaptor (1)
Precautions
HAW600RF_J.indb 2HAW600RF_J.indb 2 06.6.16 11:11:41 AM06.6.16 11:11:41 AM


 User manual")