4
:DUQLQJ,QFRUUHFWLQVWDOODWLRQRIEDWWHULHVPD\FDXVH
battery leakage and corrosion, resulting in damage to the
remote control.
Do not mix old and new batteries, or batteries of
different types.
Do notGLVSRVHRIEDWWHULHVLQD¿UH
Do not dispose of batteries with normal household
waste, take to a local recycling centre.
:KHQUHSODFHPHQWSDUWVDUHUHTXLUHGPDNHVXUH
that the service technician has used replacement
SDUWVZKLFKDUHVSHFL¿HGE\WKHPDQXIDFWXUHRUKDYH
WKHVDPHVSHFL¿FDWLRQVDVWKHRULJLQDORQH8QDWKRULVHG
VXEVWLWXWLRQVPD\UHVXOWLQ¿UHHOHFWULFDOVKRFNRURWKHU
hazards.
Warning: Risk of exposure to radiation from class 1/
class 3b visible and invisible laser beams. Do not open
the TV and stare directly into beam.
Warning: Risk of electric shock, do not attempt to
repair, service or modify this TV yourself. Contact the
manufacturer, their approved service agent.
:DUQLQJ7RSUHYHQWWKH
VSUHDGRI¿UHNHHSFDQGOHVRU
RWKHURSHQÀDPHVDZD\IURP
this product at all times.
7KLVHTXLSPHQWLVD&ODVV,,RUGRXEOHLQVXODWHG
electrical appliance. It has been designed in such a
ZD\WKDWLWGRHVQRWUHTXLUHDVDIHW\FRQQHFWLRQWR
electrical earth.
Safety Information
Important-Please read these instructions fully before installing or operating
7KH79VKRXOGQRWEHSODFHGQHDUWRRSHQÀDPHVDQG
sources of intense heat such as an electric heater.
(QVXUHWKDWQRRSHQÀDPHVRXUFHVVXFKDVOLJKWHG
candles, are placed on top of the TV.
([FHVVLYHVRXQGSUHVVXUHIURPHDUSKRQHVDQG
headphones can cause hearing loss, please take care.
To prevent injury, this TV must be securely attached to
the wall in accordance with the installation instructions (if
the option is available).
7KH/&'VFUHHQLVDYHU\KLJKWHFKQRORJ\SURGXFWZLWK
DERXWDPLOOLRQWKLQ¿OPWUDQVLVWRUVJLYLQJ\RX¿QHSLFWXUH
details. Occasionally, a few non-active pixels may appear
RQWKHVFUHHQDVD¿[HGEOXHJUHHQRUUHGSRLQW3OHDVH
note that this does not affect the performance of your
product.
7DNHFDUHQRWWRVFUDWFKWKHVFUHHQZLWK¿QJHUQDLOVRU
other hard objects.
%HIRUHFOHDQLQJXQSOXJWKH79IURPWKHZDOOVRFNHW
Do notXVHOLTXLGRUDHURVROFOHDQHUV2QO\XVHDVRIW
dry cloth.
Headphone volume
Wall mounting (optional)
LCD Screen
Cleaning
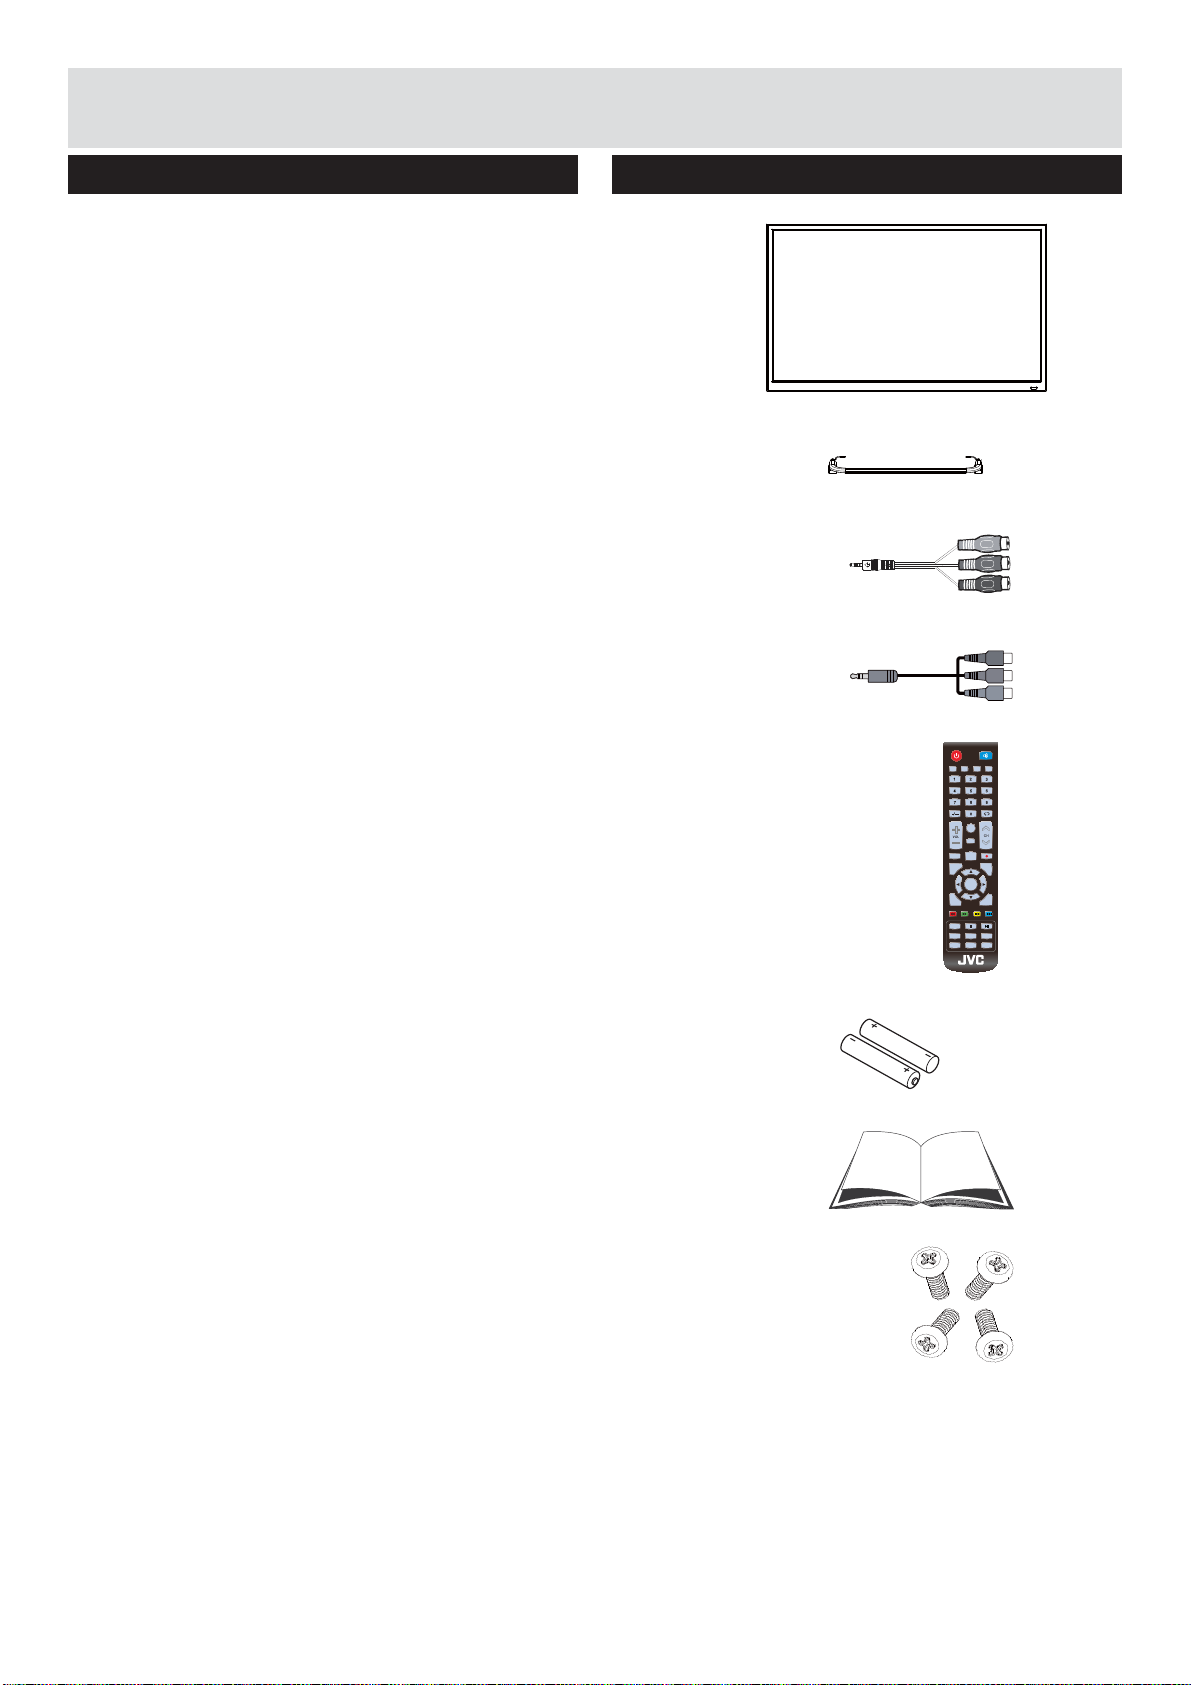
Batteries
Replacement parts
Servicing
Dear Customer,
This apparatus is in conformance with the valid European
directives and standards regarding electromagnetic compatibility
and electrical safety.
Darty Holdings SAS © 14 route d’Aulnay 93140 Bondy, France
* DVB and the DVB logos are trademarks of the DVB
project.
* Manufactured under license from Dolby Laboratories.
Dolby, Dolby Audio and the double-D symbol are
trademarks of Dolby Laboratories.
7KHWHUPV+'0,DQG+'0,+LJK'H¿QLWLRQ0XOWLPHGLD
Interface, and the HDMI Logo are trademarks or
registered trademarks of HDMI Licensing LLC in the
United States and other countries.
License information
Downloaded from www.vandenborre.be